DMX lighting control: a practical guide for beginners
Date added: 3/08/2026
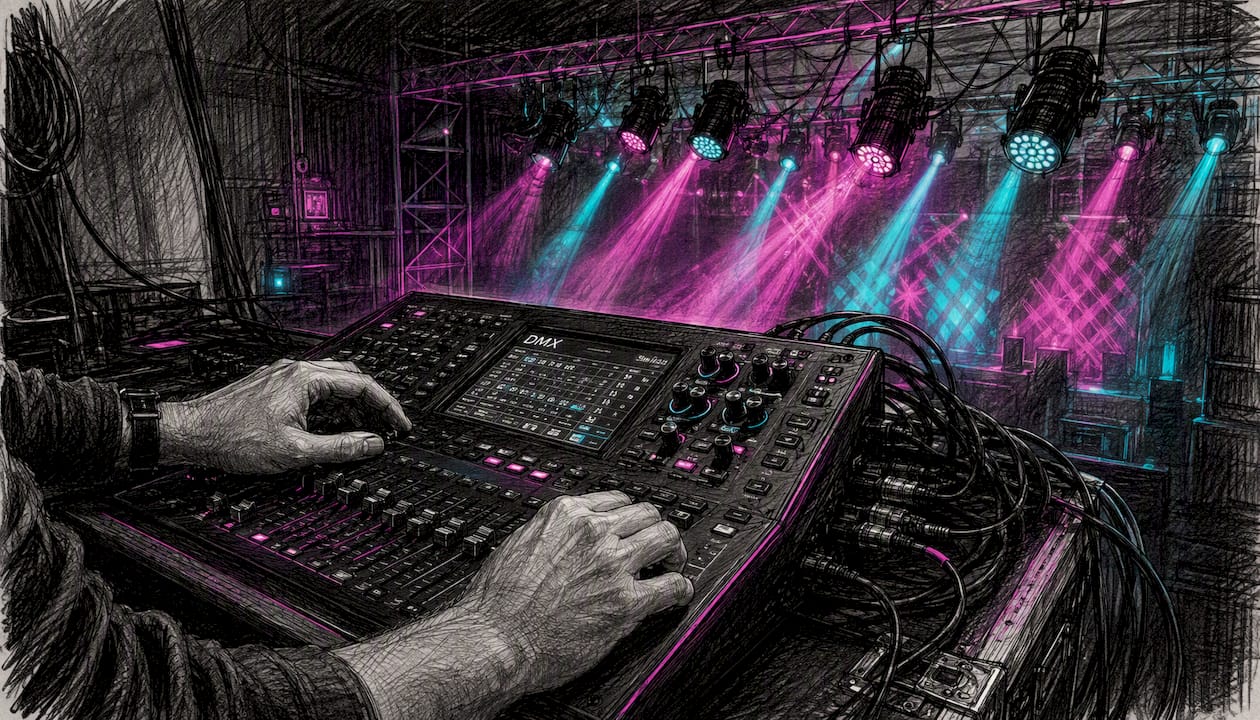
DMX lighting control is a standardised digital protocol that sends channelised data from a controller to lighting fixtures, letting you set intensity, colour, and motion across an entire rig from a single desk. The formal name is DMX512, governed by ANSI E1.— (also called DMX512-A), which defines the electrical characteristics, data format, and connector requirements. Two extensions matter immediately: RDM (Remote Device Management) adds two-way communication so you can query and configure fixtures without touching them, and W-DMX (from Wireless Solution) replaces the copper cable with a radio link while keeping everything else identical.
Firefly AV is an AV hire and event production company based in Leeds and Preston, working UK-wide. This guide draws on practical hire and installation experience across conferences, awards nights, theatre productions, and corporate events.
After reading, you should be able to name these five core items:
- Controller — the desk or software that generates DMX data
- Universe — one DMX stream of up to 512 channels
- Channel — a single data slot with a value of 0–255
- Cable/connector — typically XLR 5-pin with 120 Ω impedance cable
- Terminator — a 120 Ω resistor plug fitted at the end of the chain
Pro Tip: If someone hands you a fixture manual and asks you to “patch it,” they mean: find out how many channels that fixture uses, pick a free start address in your universe, and tell both the fixture and the console what that address is. Everything else follows from that.
Key takeaways
DMX lighting control sends 512 channels of 8-bit data per universe from a controller to fixtures, and correct termination, addressing, and cable choice determine whether it works reliably.
| Point | Details |
|---|---|
| Definition | DMX512 (ANSI E1.—) sends up to 512 channels per universe, each with a value of 0–255. |
| Termination is non-negotiable | A 120 Ω terminator at the chain’s end prevents reflections and is the most common missing element on faulty rigs. |
| Addressing and personalities | Set each fixture’s start address so channel blocks do not overlap; channel count depends on the fixture’s personality mode. |
| Wired vs wireless trade-off | Wired DMX with correct cable is more predictable; wireless (W-DMX) suits inaccessible runs but needs pre-show testing and redundancy. |
| When to hire Firefly AV | For multi-universe rigs, pixel mapping, or unfamiliar venues, a technicianed package from Firefly AV reduces setup risk and on-site fault time. |
Table of Contents
- How does DMX transmit data down the cable?
- What are the main components in a DMX system?
- How do channels, addresses, and fixture personalities work?
- What cable and connectors does DMX use, and how far can you run it?
- What do wireless DMX and RDM add to a system?
- How do you wire a simple DMX rig safely?
- How do you read a fixture manual and understand channel maps?
- How do you troubleshoot a DMX system when something goes wrong?
- Where is DMX used, and is it right for your project?
- What kit does Firefly AV stock, and what does a hire package cost?
- Firefly AV’s hire and technical support for DMX lighting
- Sources
- FAQ
How does DMX transmit data down the cable?
Every DMX frame starts with a BREAK — a prolonged low signal that tells every fixture on the line to reset and listen. The BREAK is followed by a Mark After Break (MAB), then a start code byte (0x00 for standard DMX), and then up to 512 data slots, each carrying a value between 0 and 255. Slot 1 corresponds to DMX address 1, slot 512 to address 512. That range of 512 slots is one universe.
ENTTEC’s DMX512 explainer describes the packet and timing in detail: the controller repeats this packet continuously, refreshing all 512 channels at roughly 44 Hz when the full universe is populated. Fewer channels mean a faster refresh, but 44 Hz is the practical floor for a full universe and is fast enough for smooth fades and strobe effects.
The physical transport is RS-485 differential signalling at 250 kbit/s. Two wires carry the same signal at opposite polarities; receivers subtract one from the other, which cancels out electrical noise picked up along the run. That is why DMX holds up in electrically hostile environments like stages with large dimmer racks nearby. The trade-off is that DMX is strictly unidirectional and carries no error-correction: a corrupted packet simply disappears, and the fixture holds its last value until the next good packet arrives.
Data note: DMX is an 8-bit channel stream. Each slot value of 0–255 maps to a control range (0% to 100% for a dimmer, or a specific colour mix for an LED fixture). RDM uses an alternate start code of 0xCC to initiate half-duplex replies from fixtures, enabling remote discovery and address management without a separate cable run. As SparkFun’s DMX tutorial explains, RDM packets are interleaved between standard DMX frames.
For large rigs that exceed 512 channels, the answer is multiple universes. Ethernet-based protocols — Art-Net and sACN — carry thousands of universes over a single Cat6 cable, which is why pixel-mapped LED walls and large touring shows move to Ethernet backbones rather than running dozens of separate XLR lines.
| Parameter | Value |
|---|---|
| Data rate | 250 kbit/s |
| Channels per universe | Up to 512 |
| Value range per channel | 0–255 (8-bit) |
| Typical refresh rate (full universe) | ~44 Hz |
| RDM start code | 0xCC |
| Physical layer | RS-485 differential |
What are the main components in a DMX system?
Controller — this is where the show lives. It can be a dedicated lighting console (a Chamsys MagicQ PC Wing is a compact example Firefly AV stocks), a laptop running control software with a USB-to-DMX interface such as the Avolites T1 Titan One dongle, or an Ethernet node that converts Art-Net or sACN back to DMX at the rig end.
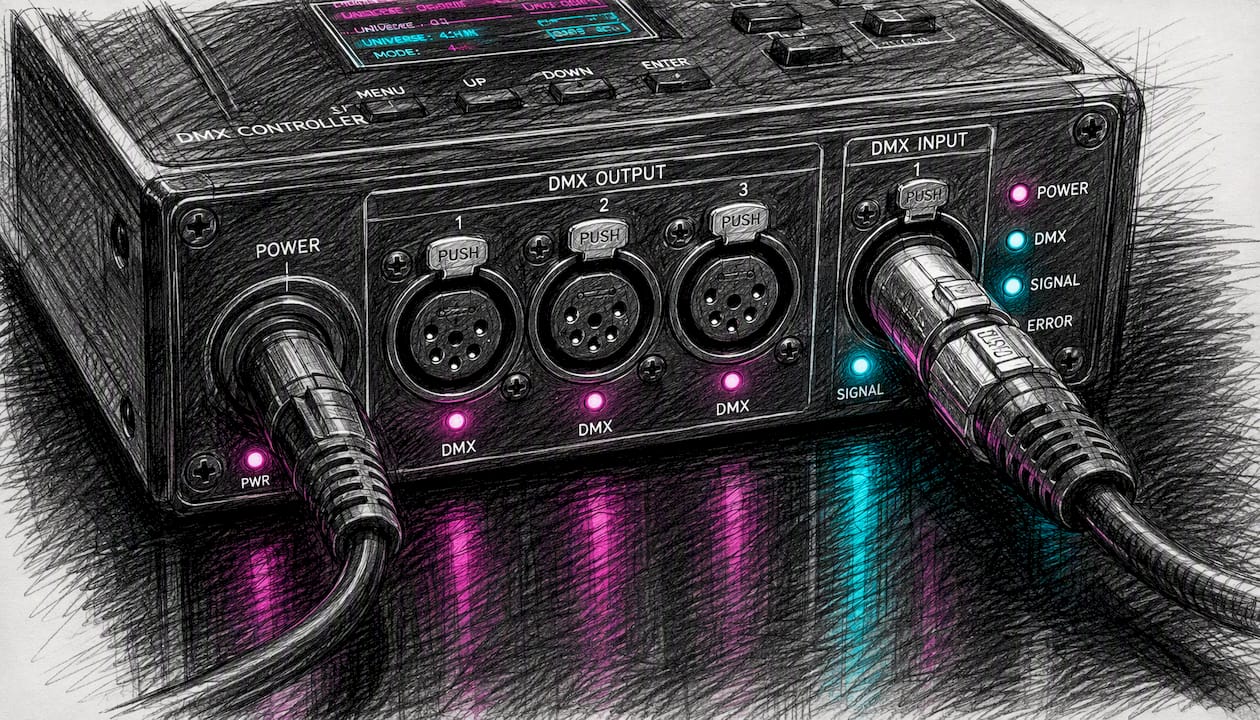
Fixtures — anything that receives DMX: dimmers, LED wash lights, moving heads, pixel battens, hazer machines, and DMX star cloth. Each fixture has a start address and a personality (the number of consecutive channels it uses).
Splitters and opto-isolated boosters — a single DMX output can drive up to 32 unit loads before signal quality degrades. An RS-485 segment is limited to 32 unit loads; beyond that, you need an opto-isolated splitter to create fresh legs. Splitters also protect the controller from electrical faults downstream.
Terminator — a passive plug containing a 120 Ω resistor, fitted at the very last fixture in the chain. Without it, the signal reflects back down the cable and interferes with incoming packets, causing flicker. Acuity Brands’ wiring guide is direct on this: missing termination is the most common cause of unexplained flickering, especially once runs get longer.
Ethernet nodes — devices like the Chauvet NET-X II Art-Net node sit at the rig end of a Cat6 run and output one or more DMX universes locally. This lets you run a single network cable from the console position to a truss, then distribute multiple universes from there.
- Controller → generates the DMX packet stream
- Fixtures → receive and act on addressed channel values
- Splitter/booster → regenerates signal for additional legs
- Terminator → absorbs the signal at the chain’s end
- Ethernet node → converts Art-Net/sACN to DMX at the fixture end
Pro Tip: For a small rig of ten to twenty fixtures on a single universe, a USB-to-DMX dongle and free or low-cost software is perfectly adequate. Once you cross into multiple universes or need pixel mapping, move to a proper console or an Art-Net node setup — the dongle approach does not scale cleanly.
How do channels, addresses, and fixture personalities work?
A channel is one data slot in the DMX stream, carrying a value of 0–255. A universe is the full set of 512 channels. Every fixture is assigned a start address: the channel number where its first control parameter lives. All subsequent parameters occupy the next consecutive channels.
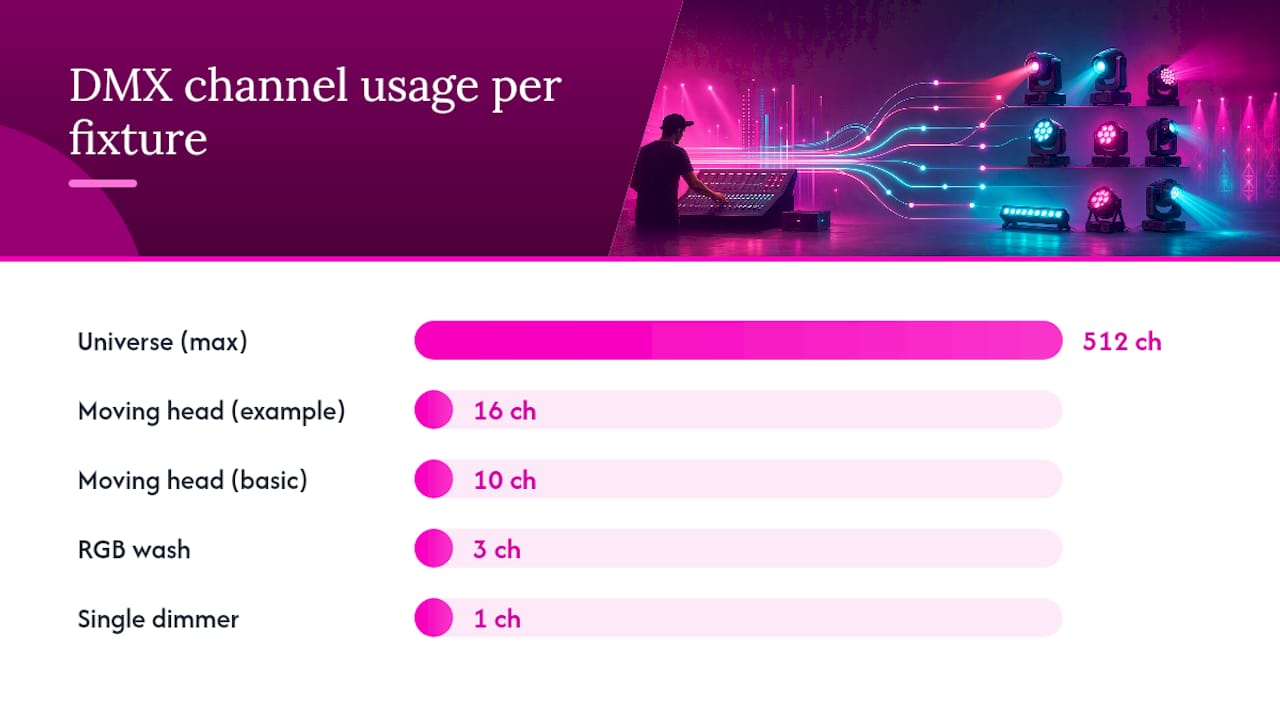
How many channels a fixture needs depends on its personality — the mode it is set to. A single dimmer channel uses one slot. An RGB LED wash needs three (red, green, blue). A moving head in a basic mode might use ten or more: pan, tilt, colour wheel, gobo, shutter, dimmer, and so on.
A quick bit of arithmetic: if you have 20 RGB wash lights, each using 3 channels, they consume 60 channels total. You could fit 170 of them in a single universe before running out of addresses. Twenty moving heads at 16 channels each consume 320 channels, leaving room for only 12 more channels of other fixtures in that universe.
To set an address on a fixture, look for either a bank of DIP switches (older fixtures) or a digital display with up/down buttons (most modern LED fixtures). The manual will show the DIP switch pattern for each address. Always double-check: two fixtures sharing the same start address will respond identically, which is occasionally useful for mirroring but usually a mistake.
- Confirm the fixture’s personality/mode before setting the address
- Calculate: start address of fixture N = start address of fixture (N-1) + channel count of fixture (N-1)
- Leave no gaps and no overlaps
- Document your patch before the show, not during it
What cable and connectors does DMX use, and how far can you run it?
The standard connector is XLR 5-pin, with pin 2 as data minus, pin 3 as data plus, and pin 1 as shield/ground. Pins 4 and 5 are reserved for a second data pair in the standard but are rarely used in practice.
The 3-pin XLR caveat is important: many fixtures and some controllers use 3-pin XLR for DMX because it is cheaper and the connectors are physically interchangeable with microphone cable. Do not use microphone cable for DMX. Mic cable is typically unbalanced or low-impedance and does not meet the 120 Ω characteristic impedance the RS-485 standard requires. Use cable specified for DMX: 120 Ω, 2-pair, 24 AWG twisted pair. The engineering approach to AV installation consistently emphasises correct cable specification as a baseline for reliable signal integrity.
Practical run limits and device counts:
- Maximum recommended run length per segment: 300 metres (though shorter is safer in noisy environments)
- Maximum unit loads per segment: 32 (use a splitter beyond this)
- Daisy-chain topology only: no T-taps or star wiring
- Terminate the last device with a 120 Ω terminator plug
- Keep DMX cable away from mains power runs to avoid interference
For longer distances or multi-universe distribution, Cat5e/Cat6 cable carrying Art-Net or sACN is the practical answer. A single Cat6 run can carry thousands of universes to an Ethernet node at the rig end, which then outputs local DMX legs. This is standard practice on large stages and in architectural installations.
Things not to do:
- Do not use T-tap splitters or Y-leads in the signal path
- Do not run DMX parallel to mains or dimmer cables
- Do not omit the terminator because “it seems fine” on a short run
Pro Tip: Label both ends of every DMX run with the universe number and leg letter before the show. When something goes wrong at 7 PM, you will not be tracing cables in the dark. Colour-coded cable sleeves or coloured gaffer tape at the connectors costs almost nothing and saves real time.
What do wireless DMX and RDM add to a system?
Wireless DMX replaces only the transport layer. The channels, universe structure, values, and packet timing remain identical; the radio link simply substitutes for the copper cable between transmitter and receiver. Firefly AV stocks Wireless Solution W-DMX F-1 Lite G5 transceivers and SHoW Baby 6 transceivers for exactly this purpose.
Wireless DMX pros:
- Fast deployment where running copper is impractical (across a room, over a stage void, up a truss)
- No cable clutter for temporary or touring rigs
- Useful for moving set pieces that cannot be tethered
Wireless DMX cons:
- RF interference from Wi-Fi, other wireless systems, and crowded venues
- Latency is slightly higher than wired (typically a few milliseconds, but measurable)
- Range varies with environment; walls, metalwork, and other RF sources all reduce it
- Requires pre-show testing and ideally a spectrum scan
Deployment reality: SoundStoreXL’s wireless DMX guide and UKING’s field comparison both reach the same conclusion: if you can run proper copper with correct termination, wired DMX is more predictable. Wireless earns its place where copper runs are genuinely infeasible, but it requires professional planning, antenna placement, and redundant links for critical cues. Treat it as a transport bridge, not a default.
RDM (Remote Device Management) uses start code 0xCC to send management packets between the controller and fixtures. Because RS-485 is normally unidirectional, RDM switches the line to half-duplex: the controller sends a request, pauses, and the fixture replies. This enables remote discovery (the console finds all RDM-capable fixtures automatically), remote address setting, and fault reporting such as lamp failure or temperature warnings.
Two important caveats: RDM requires RDM-aware splitters, because a standard passive splitter blocks the reply path. And RDM cannot operate reliably over most wireless DMX bridges unless the bridge explicitly supports RDM pass-through — check the vendor’s firmware notes before assuming it will work.
How do you wire a simple DMX rig safely?
One sentence: confirm addresses, connect controller out to fixture in, daisy-chain fixtures in address order, fit the terminator, then power up and test.
Step-by-step wiring checklist:
- Set fixture addresses — before connecting anything, set each fixture’s start address using DIP switches or the onboard display. Write down the patch.
- Connect controller OUT to fixture 1 IN — use a properly rated 120 Ω DMX cable with XLR 5-pin connectors.
- Daisy-chain fixture OUT to fixture 2 IN — continue in address order where practical; address order is not mandatory but makes troubleshooting faster.
- Continue the chain — add remaining fixtures, keeping the run under 300 metres and the device count under 32 per segment.
- Fit the terminator — plug a 120 Ω XLR terminator into the DMX OUT of the last fixture in the chain.
- Power up fixtures — power the fixtures before the controller so they boot into a known state.
- Patch the console — tell the console which fixture type is at which address. Most consoles have a fixture library; select the correct personality.
- Run a sanity check — bring each fixture to full on the console and confirm it responds. Use a short known-good jumper cable to swap out a suspect fixture if one does not respond.
Safety checklist:
- Isolate power before making or breaking cable connections
- Do not run DMX cable parallel to mains or dimmer feeds; cross at 90° if paths must intersect
- Secure all cables against trip hazards with cable ramps or gaffer tape
- Check that all fixtures are rated for the power supply voltage at the venue
Statistic callout: According to Acuity Brands’ field guidance, missing termination is the single most common cause of DMX flicker and unexplained behaviour, particularly once runs extend beyond a few metres or device counts increase.
Pro Tip: Firefly AV typically stages a small corporate rig in Leeds or Preston with a lighting technician on-site for the day. Indicative day rates for a lighting technician run from around £250 to £450 depending on rig complexity and duration — these are illustrative figures subject to scope and are not fixed prices. For a dry-hire DMX package without a technician, budget separately for kit and allow time for your own pre-show testing.
How do you read a fixture manual and understand channel maps?
Most fixtures ship with two or more personality modes. A simple mode uses fewer channels and is easier to patch; an extended mode adds fine control over pan/tilt speed, colour temperature, or effects. The trade-off is straightforward: fewer channels mean less resolution and fewer independent parameters, but a simpler patch and more fixtures per universe.
Example: 3-channel RGB batten
Set this fixture to address 1 and you control red on channel 1, green on channel 2, blue on channel 3. Set it to address 4 and the same parameters sit on channels 4, 5, and 6.
Example: 12-channel moving head (basic mode)
| Channel | Parameter |
|---|---|
| 1 | Pan |
| 2 | Pan fine |
| 3 | Tilt |
| 4 | Tilt fine |
| 5 | Colour wheel |
| 6 | Gobo wheel |
| 7 | Shutter/strobe |
| 8 | Dimmer |
| — | Focus |
| — | Prism |
| — | Prism rotation |
| 12 | Lamp control/reset |
The personality table is always in the fixture manual, usually near the back. If the manual is missing, the manufacturer’s website almost always has a PDF. Choose the mode that gives you the parameters you actually need — running a moving head in 24-channel mode when you only need pan, tilt, and colour wastes 12 channels per fixture and adds nothing to the show.
- Match the mode in the fixture to the mode in the console’s fixture library
- If the console library does not have your fixture, most consoles allow manual patching or import of a custom personality file (GDTF format is now widely supported)
- Always verify: bring the fixture to a known state (e.g. full white, centre position) and confirm the console matches
How do you troubleshoot a DMX system when something goes wrong?
Most DMX faults are cabling, termination, or addressing errors. That covers the vast majority of on-site problems, and knowing that narrows the diagnostic path considerably.
Troubleshooting flow:
- Check power and addresses — confirm every fixture is powered and that no two fixtures share the same start address.
- Swap to a known-good short cable — replace the first cable in the chain with a short, tested jumper. If the problem clears, the original cable is faulty.
- Check termination — confirm a 120 Ω terminator is fitted at the last fixture. Remove and refit it to rule out a loose connection.
- Test fixtures individually — disconnect all but the first fixture and test. Add fixtures one at a time to find the point where the fault appears.
- Check splitters — if a splitter is in the chain, bypass it temporarily to confirm it is not the source of the fault.
- Check universes — if using multiple universes, confirm the console is outputting on the correct universe number and that the Ethernet node or interface is configured to match.
Best practices for reliability:
- Use 120 Ω rated DMX cable throughout, not microphone cable
- Terminate every leg, including legs from splitters
- Keep runs under 300 metres per segment
- Separate DMX cable from mains and dimmer feeds
- Label both ends of every run before the show
For redundancy on critical shows, use an opto-isolated splitter to create independent legs for different rig sections. If one leg develops a fault, the others continue unaffected. A hybrid approach — wired sACN/Art-Net backbone for critical universes, wireless for last-metre flexibility — is increasingly common on larger productions.
Pro Tip: Firefly AV carries spare 120 Ω terminators, short test jumpers, and a basic DMX tester on every rig. A £15 DMX tester that shows signal presence and address values pays for itself the first time it locates a fault in under two minutes rather than two hours.
Where is DMX used, and is it right for your project?
DMX is the default control protocol for professional stage and event lighting, and it has spread well beyond the theatre into architectural, hospitality, and even domestic settings.
Common applications:
- Touring and theatre — moving heads, followspots, dimmers, and haze machines all on one or more DMX universes
- Corporate events and conferences — wash lighting, gobo projectors, and set lighting at venues like Leeds Town Hall, Manchester Central, or Edinburgh International Conference Centre
- Exhibitions and product launches — precise, repeatable lighting states that can be recalled instantly
- Weddings and private events — uplighters, pin spots, and DMX star cloth for atmosphere
- Architectural façades and permanent installations — DMX over Ethernet (sACN) driving pixel-mapped LED arrays
- Bars, clubs, and small venues — simple chase programmes on a basic controller
When wired DMX is clearly preferable: critical cues where timing matters (theatre, broadcast), pixel mapping with high channel counts, and any installation where RF interference is a risk.
When wireless or Ethernet makes more sense: crossing a stage void or a large open floor where cable runs are genuinely impractical, or scaling to many universes on a large show.
Home use: entirely feasible for hobbyists and smart home enthusiasts, but for a small domestic project with a handful of colour-changing lights, a simpler wireless RGB controller is usually less effort. DMX earns its place at home when you want precise, repeatable control over a larger number of fixtures or want to integrate with a broader AV system.
For conference centres, town halls, and theatres, Firefly AV recommends on-site technician support for any rig beyond a handful of fixtures. The time saved in setup and troubleshooting consistently outweighs the day rate.
| Use case | Wired DMX | Wireless DMX | Ethernet (Art-Net/sACN) |
|---|---|---|---|
| Small venue / wedding | Good | Practical | Overkill |
| Corporate conference | Good | Useful for tricky runs | Good for multi-universe |
| Theatre / touring | Preferred | Supplementary | Standard for large rigs |
| Architectural / permanent | Good | Not recommended | Preferred |
| Home hobbyist | Feasible | Simpler alternatives exist | Not needed |
What kit does Firefly AV stock, and what does a hire package cost?
Firefly AV is based in Leeds and Preston and works UK-wide on everything from small corporate breakfasts to large-scale broadcast and eSports productions. Clients include the BBC, Leeds City Council, JCT600, Leeds Art Gallery, and the University of Bradford.
DMX-relevant kit we stock:
- Chamsys MagicQ PC Wing (lighting console/interface)
- Wireless Solution W-DMX F-1 Lite G5 transceivers
- SHoW Baby 6 wireless DMX transceivers
- Avolites T1 Titan One USB DMX dongle
- Chauvet NET-X II Art-Net nodes
- eLumen8 pixel battens (DMX-addressable)
- LEDJ Spectra QX40 pixel IP65 fixtures
- DMX star cloth (8m x 4.5m, cool white)
- Absen LED wall panels, Panasonic projectors, Sennheiser microphones, Allen & Heath consoles, DB Technologies speakers, Birddog cameras, and Lite Deck staging
Typical hire and day-rate signals (illustrative, subject to scope):
- Lighting technician day rate: approximately £250–£450 per day depending on rig complexity, travel, and duration
- Simple dry-hire DMX package (controller, cables, terminators, basic fixtures): pricing varies significantly with fixture count and type; contact Firefly AV for a scoped quote
- Technicianed package for a small corporate show (setup, operation, and de-rig): typically quoted as a project rate rather than a day rate; most small conference lighting packages fall in the range of a few hundred to low thousands of pounds depending on fixture count and venue
Why clients choose technician support:
- Pre-show address checking and termination verification catches faults before the audience arrives
- Console programming and cueing is faster with an experienced operator
- On-site fault diagnosis and spare parts mean a problem does not become a show-stopper
- Compliance with venue technical requirements and safe working practices
Statistic callout: For a typical small corporate conference rig in Leeds or Preston, Firefly AV’s experience is that technician-supported packages reduce on-site setup time by a significant margin compared with unsupported dry hire, particularly for clients without dedicated in-house AV staff.
A note from the team at Firefly AV
The single lesson that comes up on almost every rig, regardless of size, is this: check your terminators and addresses before you power anything up. Not after. Not when something looks wrong. Before. A missing terminator on a 30-metre run might behave perfectly in a cold venue at 2 PM and start flickering the moment the room fills with people and the dimmers come on. Address conflicts are even more insidious — two fixtures responding identically looks like a programming error until you check the DIP switches.
If you are planning a complex rig or working in a venue you have not used before, get in touch with Firefly AV. We are happy to talk through the setup and advise on whether a site survey makes sense.
Firefly AV’s hire and technical support for DMX lighting
Firefly AV offers both dry hire and fully technicianed DMX lighting packages, with bases in Leeds and Preston and UK-wide delivery. For straightforward rigs, dry hire gives you the controller, cables, terminators, and fixtures with a kit list and setup notes. For anything more complex — multi-universe shows, pixel mapping, or venues with awkward cable routes — a technicianed package means an experienced operator on-site from load-in to de-rig.
Site surveys in Leeds and Preston are available for larger or permanent installations, and Firefly AV can advise on whether wired DMX, wireless, or an Art-Net/sACN Ethernet backbone is the right approach for your venue and show type. Lead times vary by availability; for events with specific technical requirements, earlier is always better.
To discuss a package, request a quote, or browse the full equipment catalogue, visit the AV equipment hire page or the audio visual equipment guide for event planners. For larger productions, the event production setup examples page shows how DMX lighting fits into a complete AV production.
Sources
The sources below informed this guide and are worth bookmarking for deeper study:
- What is DMX512? Channels, Universes and Timing Explained - ENTTEC Support
- How to wire a DMX system - Acuity Brands insights
- Long distance DMX: Wireless vs cable reliability – UKING
FAQ
What does a DMX light controller do?
A DMX controller generates a continuous stream of up to 512 channel values per universe and sends them to connected fixtures via an RS-485 data link. Each channel value (0–255) controls one parameter on a fixture, such as dimmer level, colour, or pan position.
Can you use DMX lights without a controller?
Most DMX fixtures will hold their last received values if the signal is lost, and some have a standalone or sound-active mode built in. However, without a controller sending a live DMX signal, you have no real-time control over intensity, colour, or movement, so a controller is needed for any programmed or cued lighting.
Is DMX lighting still relevant?
DMX512 remains the standard control protocol for professional stage and event lighting worldwide, governed by ANSI E1.— and supported by every major fixture manufacturer. Ethernet protocols like Art-Net and sACN extend it for large-scale rigs, but they still output DMX at the fixture end.
Can I use DMX lights at home?
Yes, DMX fixtures work perfectly well in a home or studio setting, and a basic USB-to-DMX interface with free software keeps the cost low. For a small number of colour-changing lights, a simpler wireless RGB controller is often less effort; DMX makes more sense when you want precise, repeatable control over a larger fixture count.
When should I hire a professional instead of setting up DMX myself?
Once a rig involves multiple universes, pixel mapping, moving heads, or an unfamiliar venue, the time and risk of a DIY setup usually outweigh the cost of professional support. Firefly AV provides technicianed DMX packages across the UK, with on-site setup, programming, and fault cover from load-in to de-rig.