Portfolio

What we do


Filter

  • Type

Clear Filter

Sort By

Clear Filter
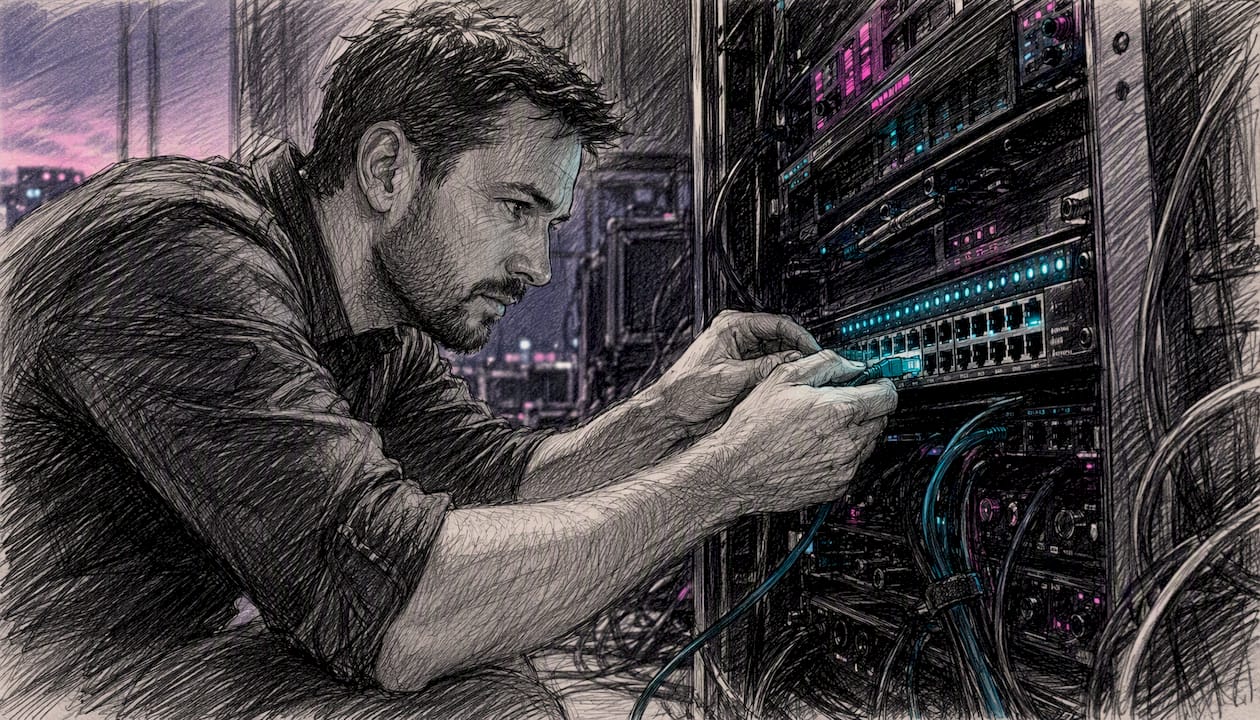
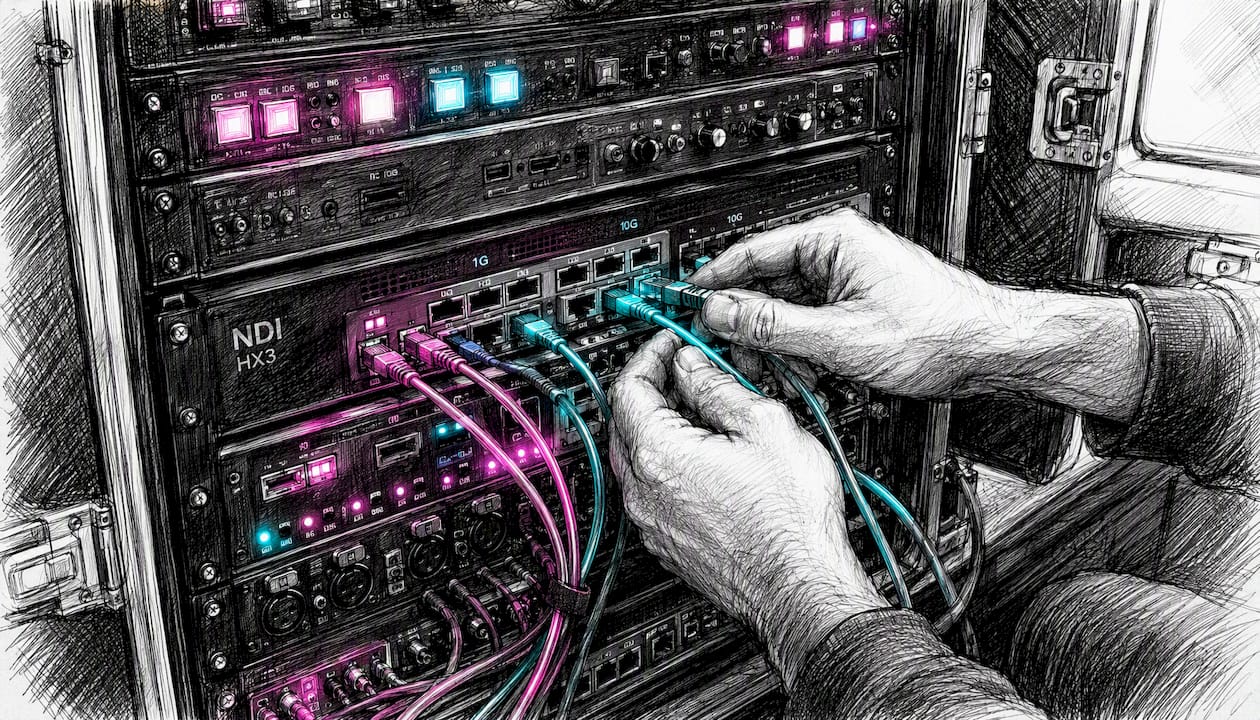
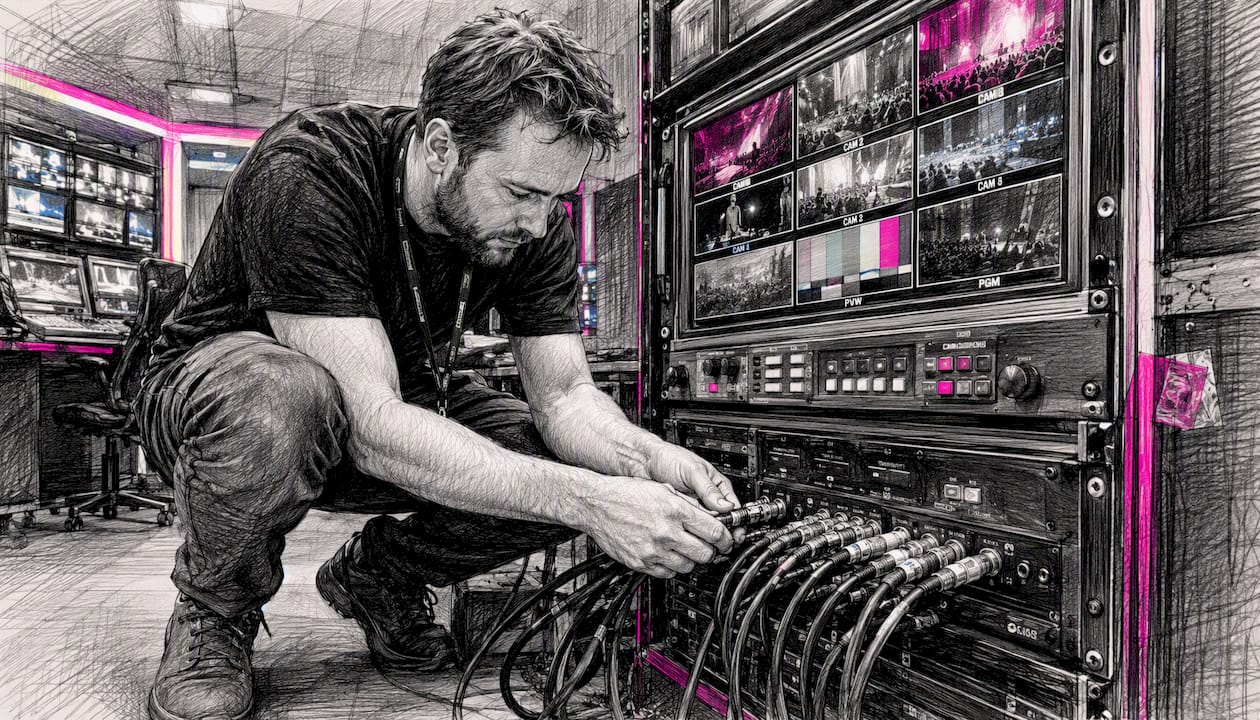
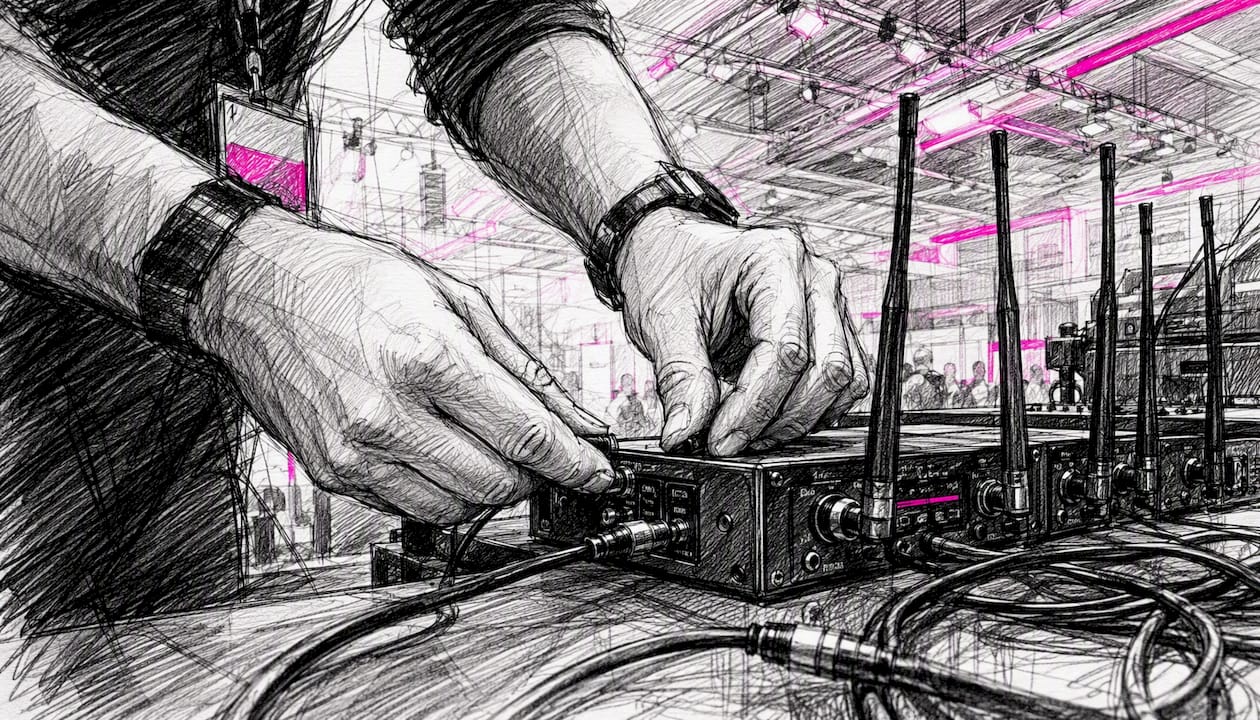
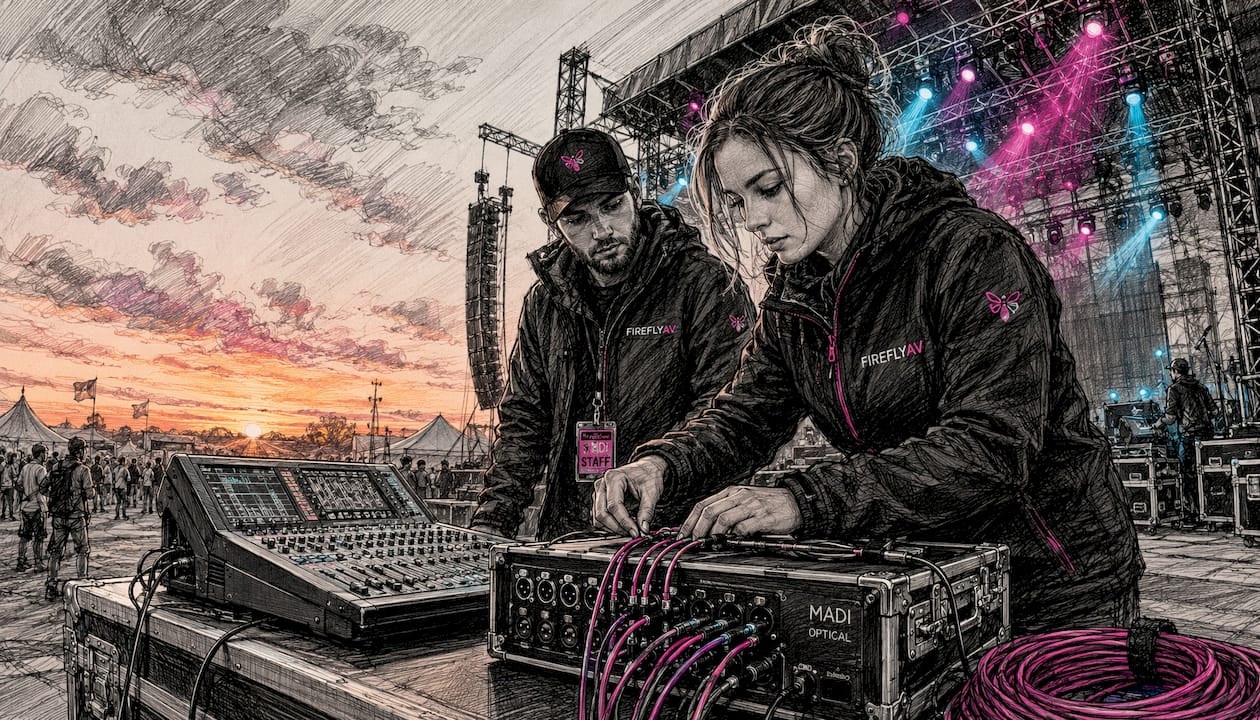
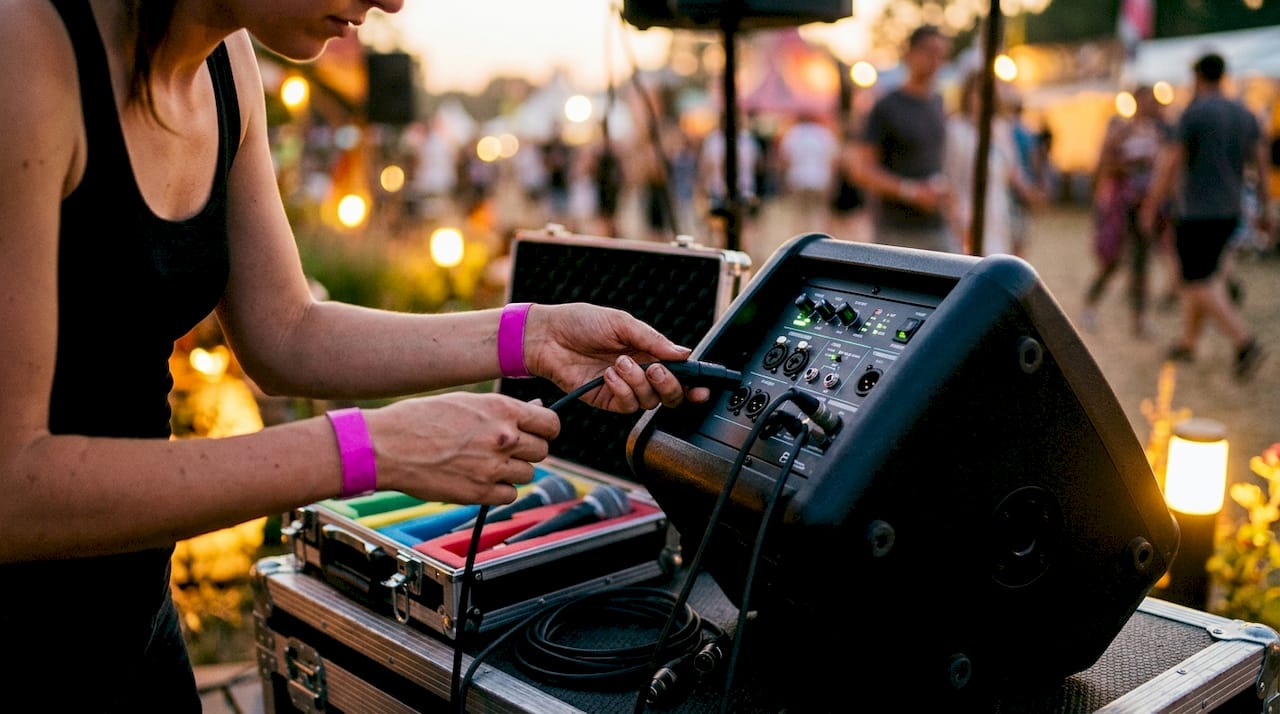
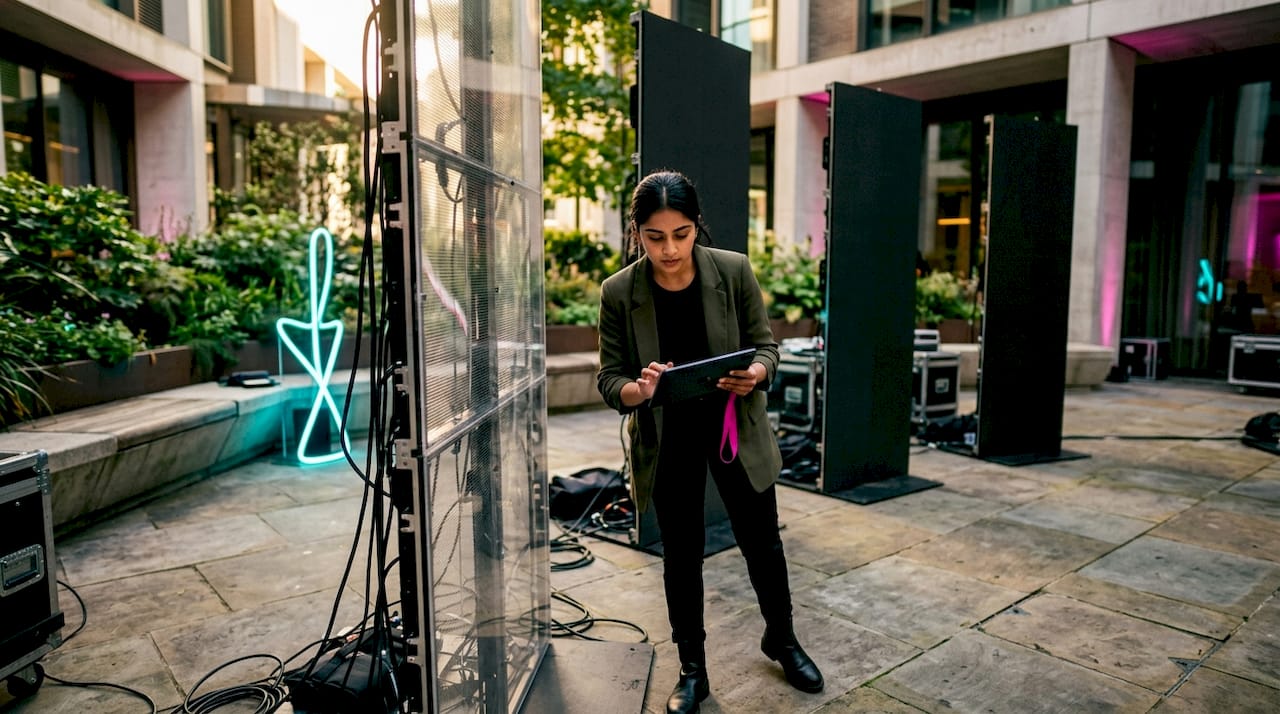
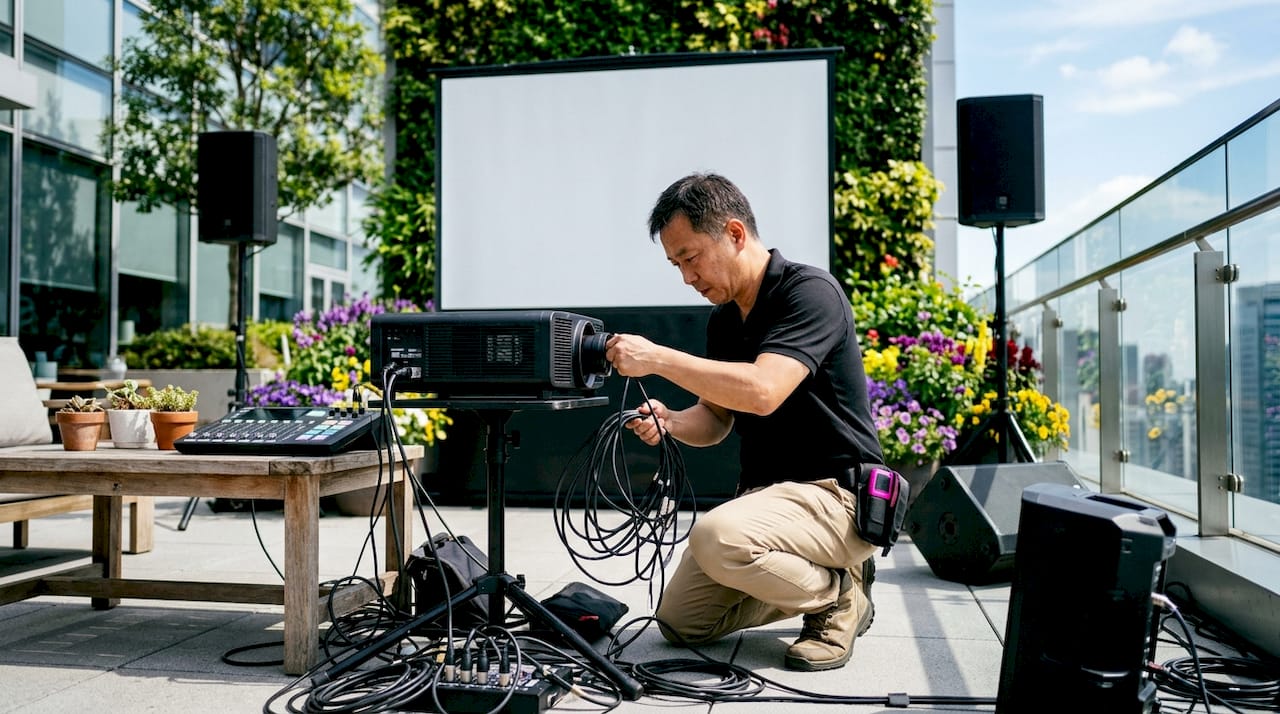
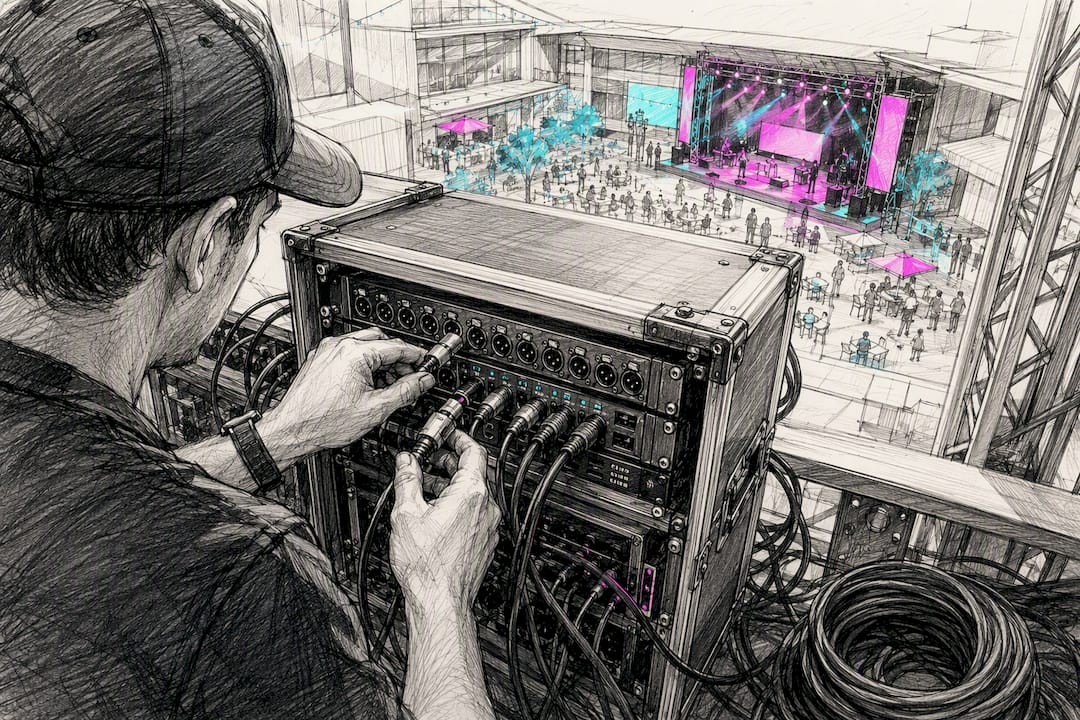
Hands wiring AV cables at event stage

"

Hiring a professional AV technical crew ensures your event delivers clear sight and sound, runs to time and reduces brand risk. A crew brings redundancy for hybrid livestreams (spare encoders, backup playback), and handles the safety and compliance work, including rigging checks and risk assessments, that venues and insurers expect. Firefly AV is an AV hire and event production company based in Leeds and Preston, working UK-wide across conferences, launches, awards nights and exhibitions.

The benefits of an AV technical crew show up most clearly when something goes wrong. A frozen laptop, a dropped stream, a rigging fault, and the difference between a crew catching it in seconds and a presenter fighting a laptop on stage is the whole reputation of the event.

  • Consistent picture and sound quality across the room, not just at the lectern
  • Faster load-in and strike, which avoids venue overtime charges
  • Trained staff handling PAT testing, rigging checks and risk assessments
  • Built-in redundancy for streams, recordings and playback
  • One point of contact managing the technical side, freeing organisers to manage the room

Key Takeaways

Hiring an AV technical crew improves audio and visual reliability, reduces safety and compliance risk, and saves organiser time compared with running AV in-house or unstaffed.

Point Details
Crew roles scale with event size A breakout room needs one technician; a hybrid general session needs a TD, audio engineer and video technician together.
Redundancy prevents visible failure Backup playback, spare mics and a second encoder catch faults before an audience notices.
Day rates vary by role Technicians typically run £200 to £450 per day; senior TDs £450 to £900 per day.
Independent providers can offer better value Venue AV commissions can reduce the budget actually spent on kit and crew for larger shows.
Firefly AV supplies crew and kit UK-wide Based in Leeds and Preston, stocking Absen LED, Sennheiser, Allen & Heath, DB Technologies and BirdDog equipment.

Table of Contents

What does an AV technical crew actually do?

An AV technical crew covers a set of distinct roles, and which ones you need depends on the event’s scale. A breakout room with a screen and a lapel mic might need one competent technician. A general session with in-room magnification (IMAG), a livestream and multiple presenters needs several specialists working from the same show plan.

  1. AV producer — owns the overall technical plan, budget and supplier coordination before the event.
  2. Technical director (TD) — runs the show live, calling cues and coordinating vision, audio and lighting in real time.
  3. Audio engineer — mixes microphones, monitors and playback, and manages gain before feedback becomes a problem.
  4. Lighting designer — builds the visual mood and ensures presenters and stage are lit correctly for cameras.
  5. Video technician — operates cameras, switches sources and manages the LED wall or projection feed.
  6. Stage riggers — install trussing, LED and speaker arrays safely, and sign off load calculations.

Safety and compliance work sits alongside all of this. The National Careers Service lists pre-event safety checks and equipment testing as core technician duties, while the wider occupational framework for AV professionals covers system design, technical event management and formal risk assessments as standard parts of the job, not extras.

The practical benefits: 8 ways a technical crew protects your event

Most of the value of a crew shows up in what doesn’t happen: the dropout that never reaches the screen, the feedback loop that never hits the PA. Here’s where that value actually comes from.

Consistent quality, with kit that’s built for the job. A crew running Sennheiser microphones, an Allen & Heath console for the mix and DB Technologies speakers for coverage delivers audio that stays clean whether the room holds 50 people or 500. Pair that with an Absen LED wall for vision and you get colour and brightness consistency that a hired-in projector from a generic supplier often can’t match.

Fewer of the failures that damage a brand on the day. Frozen playback, microphone feedback during a CEO’s keynote, LED tiles dropping out mid-presentation — these are the failures a crew is trained to prevent or catch within seconds, not the ones an unstaffed AV rig catches at all.

Real troubleshooting, with a fallback already built in. Technical production leadership reduces the risk of catastrophic failure through redundancy planning, conditioned power and pre-event testing, not luck. A senior TD builds this in as standard: a second encoder standing by, a backup playback device cued, spare handheld mics charged and ready.
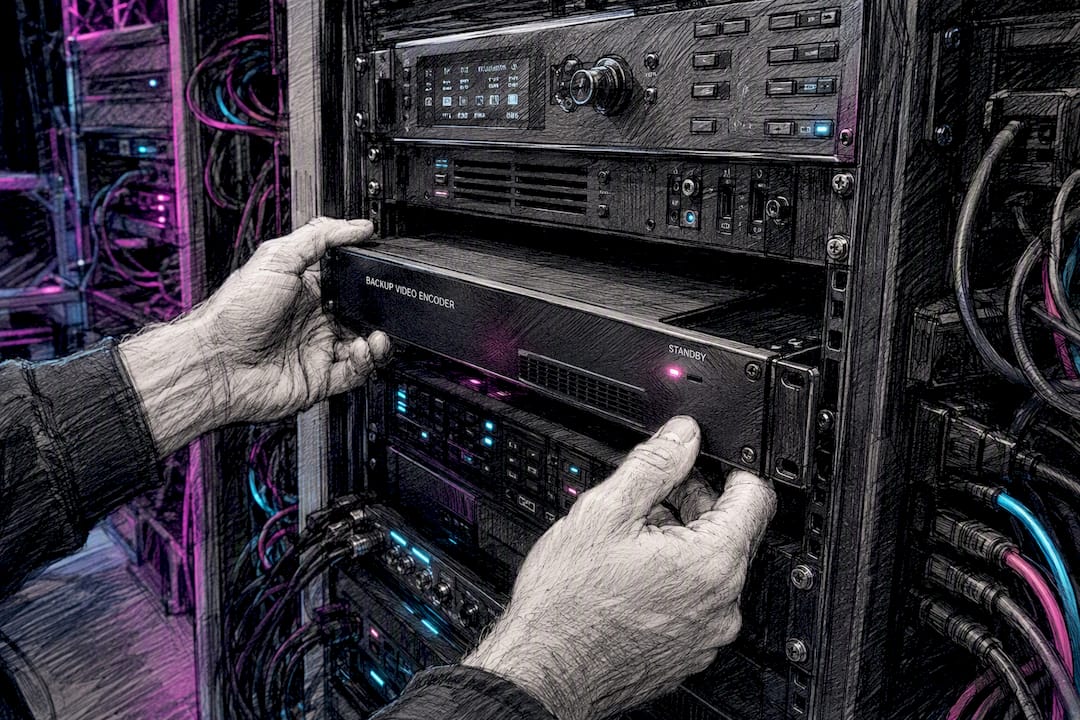
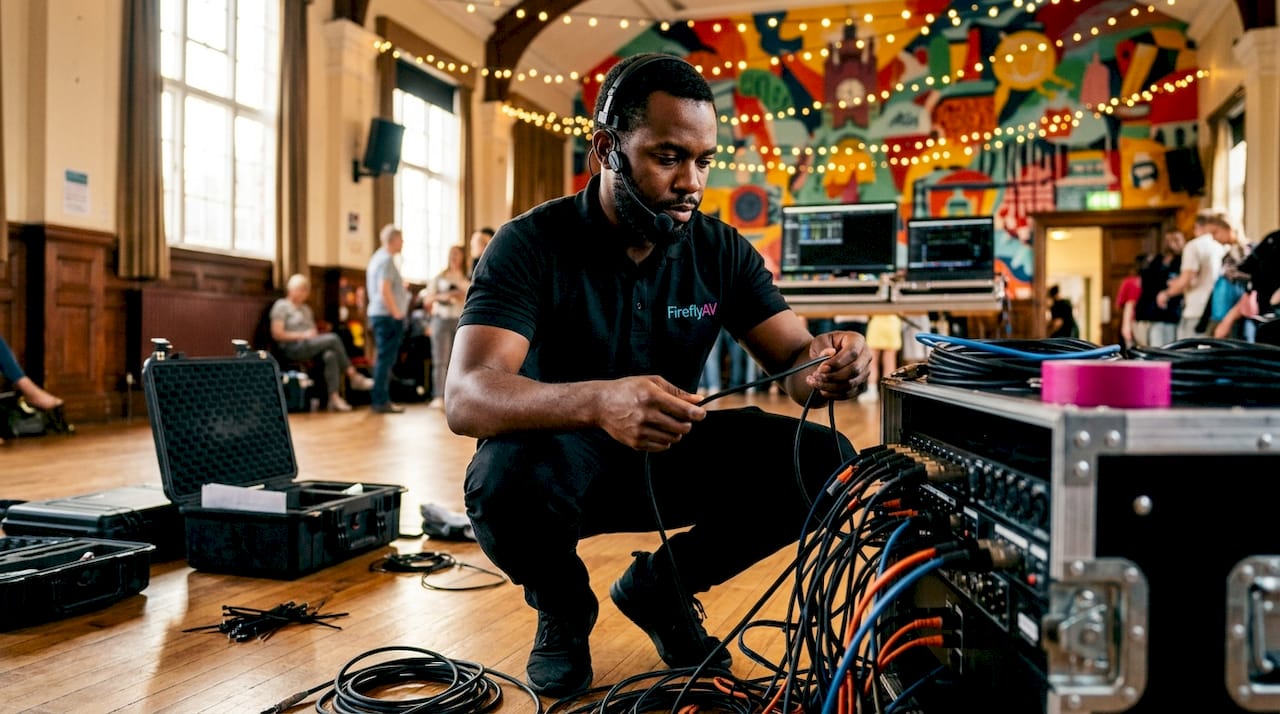
Technician hands swapping backup AV encoder

Faster load-in, cleaner strike. A crew that has run the room before knows the loading dock, the power runs and the rigging points, which cuts hours off setup and avoids venue overtime fees that can run into hundreds of pounds per hour at some UK venues.

Safety and compliance handled as part of the job, not an afterthought. Rigging checks, PAT testing, method statements and public liability insurance are standard crew deliverables — hiring trained technicians reduces liability because risk assessments and rigging sign-offs happen before doors open, not after something falls.

Hybrid and livestream competence that a generalist AV hire rarely has. Running BirdDog cameras, managing return audio and switching feeds without introducing lag or EDID handshake issues takes practice most in-house teams don’t get.

Organiser time returned to the parts of the job only you can do. With a TD running cues, you’re managing sponsors and speakers rather than checking HDMI leads.

A visibly sharper event for attendees. Clean IMAG, a properly mixed room and a broadcast-quality recording afterwards are the outputs stakeholders actually judge the event by.

Pro Tip: Ask any crew supplier to describe their redundancy plan in concrete terms, not buzzwords. “We run backup playback and a second encoder” is a real answer; “we’ve got contingencies” is not.

What do AV crew day rates typically cost?

Day rates vary by role, region and how far ahead you book, but the following ranges give a useful starting point for UK events.

  • AV technician: roughly £200 to £450 per day
  • Senior technical director: roughly £450 to £900 per day
  • Full production packages (crew, core kit and a TD for a corporate conference): often starting around £10,000 for a basic larger meeting, scaling with complexity

These figures are typical ranges, not fixed quotes; actual pricing depends on the venue, the kit list and how many crew days the show needs. Total cost usually combines equipment hire, crew day rates, travel, a technical rehearsal day and any standby time built in for live contingencies. Booking with short notice tends to push day rates up, particularly for specialist roles like vision mixing or rigging.

Venue in-house AV often carries a built-in commission, which can leave less of the budget actually spent on equipment and crew. For larger shows, independent AV providers frequently deliver better value because more of the fee goes directly into kit and specialist staff rather than a venue markup.

How do you brief and book an AV technical crew?

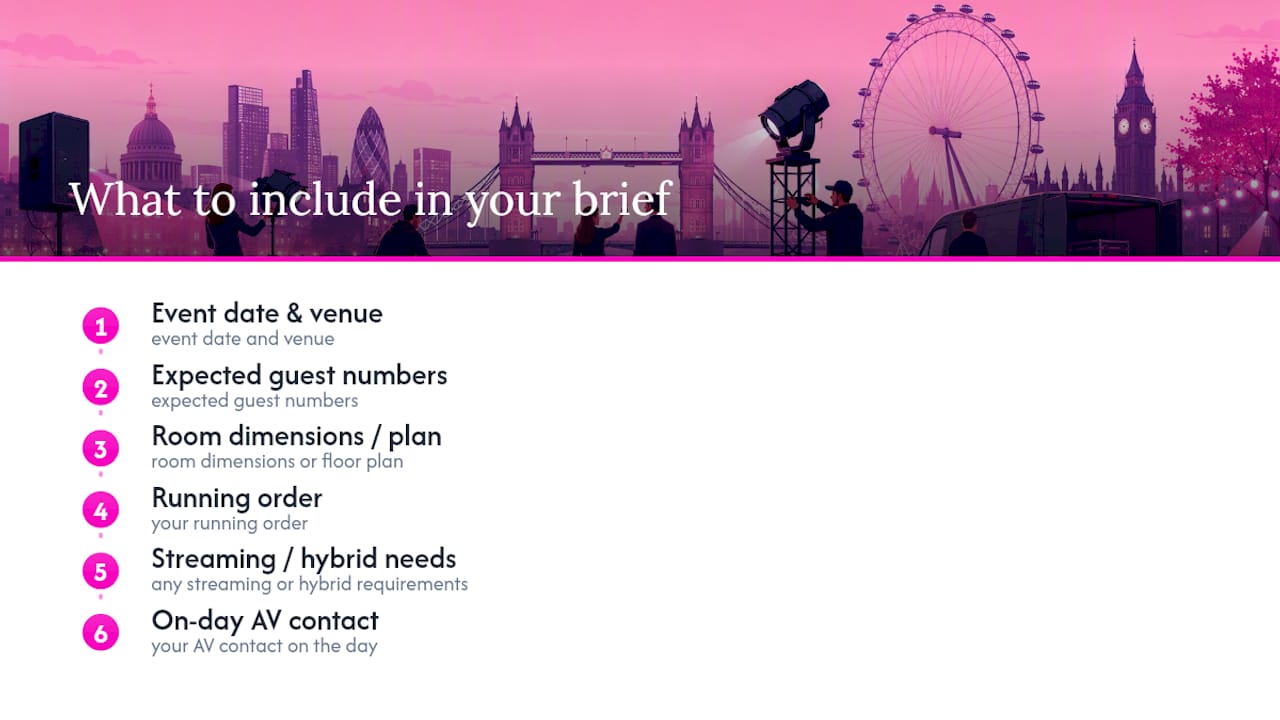
A clear brief is the single biggest factor in whether a crew delivers what you actually needed. Suppliers can only plan redundancy, staffing and kit around the information you give them.

  1. Send the run of show first. Timings, session order and any presenter tech riders let the crew plan crew calls and equipment needs properly.
  2. Share the floor plan and required outputs. State whether you need IMAG, a livestream, a recording, or all three, and note stage dimensions and power access.
  3. Ask about redundancy in specific terms. A supplier should describe backup playback, spare radio mics and a second encoder, not vague reassurance.
  4. Confirm safety paperwork upfront. Ask for current PAT testing records, rigging certifications and public liability insurance before signing.
  5. Book a technical rehearsal slot. For any event with multiple presenters or a livestream, a rehearsal with the TD, key speakers and the AV producer in the room catches problems while they’re still cheap to fix.
  6. Agree the crew call time and equipment list in writing. Setup and strike times, the full kit manifest and who’s on site when should all sit in the written brief, not a verbal understanding.

Pro Tip: Splitting the show caller role from the technical director on larger events reduces mistakes, because one person focuses purely on cueing while the other manages the technical picture.

Why choose Firefly AV for your next event?

Firefly AV runs from bases in Leeds and Preston and works UK-wide, supplying the kit lines named throughout this guide: Absen LED walls, Panasonic projectors, Sennheiser microphones, Allen & Heath consoles, DB Technologies speakers, BirdDog cameras and Lite Deck staging.

Clients include the BBC, Leeds City Council and the University of Bradford, spanning broadcast, civic and academic events with very different technical demands.

A typical example: a corporate conference with an Absen LED wall as the main screen, a three-camera BirdDog livestream setup, a technical director calling cues and a dedicated audio engineer on the desk. The outcome is a clean in-room experience for delegates and a broadcast-quality stream for remote attendees, run from a single crew rather than stitched together from separate suppliers.

For equipment specifics before you brief a supplier, the audio visual equipment guide for event planners and the Firefly AV project portfolio are useful starting points.

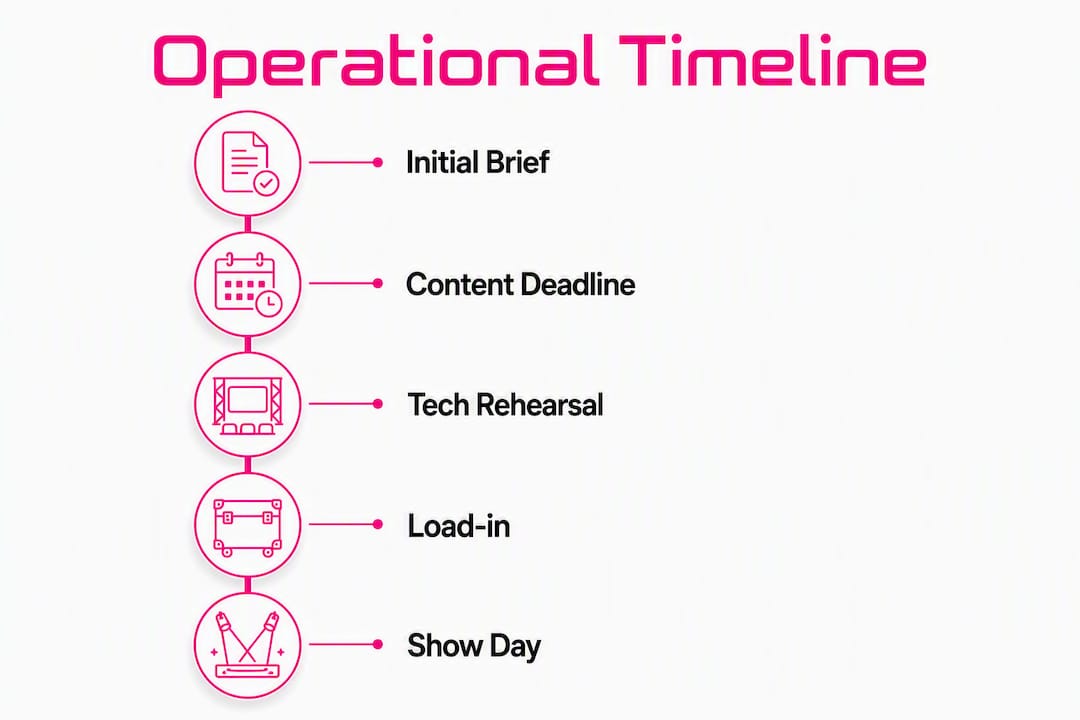
What does the crew timeline look like from booking to strike?

Crew involvement rarely starts on event day. For anything beyond a single-room meeting, the timeline stretches back weeks.

Four to six weeks out, the AV producer and organiser confirm scope: venue site visit, power availability, floor plans and required outputs (stream, recording, IMAG). This is when signal-flow and CAD diagrams get drawn up, which saves organiser time later by catching layout problems before load-in day.

One to two weeks out, kit is confirmed and crew calls are scheduled. Presenter tech riders and run-of-show timings should land with the crew here, not on the morning of the event.

The day before or morning of, load-in happens, followed by a technical rehearsal covering microphone checks, lighting cues, stream tests and any video playback. This is the point where a TD tests redundancy: swapping to backup playback, checking the second encoder, confirming return audio for remote speakers.

During the event, the TD runs the show live while the audio engineer and video technician handle their desks, watching for the faults a crew is trained to catch before an audience notices.

After doors close, strike happens efficiently because the crew that built the rig also knows how to take it down fast, avoiding venue overtime. Recordings and stream archives are usually delivered within a few days.
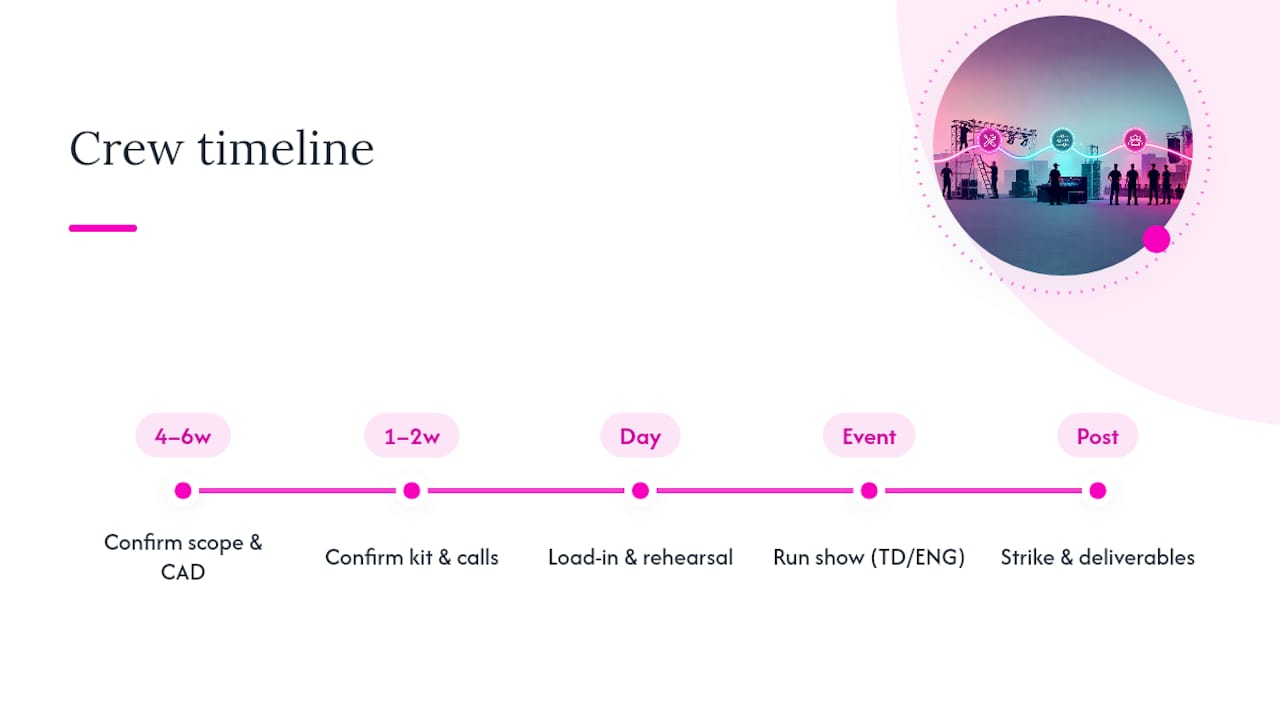
What does the crew timeline look like from booking to strike? — overview diagram

How does AV crew support differ across event types?

The benefits of hiring a crew look different depending on what you’re running, even though the underlying value, quality, safety and time saved, stays constant.

A conference with hybrid delegates needs technical direction that coordinates in-room IMAG, a livestream and a recording simultaneously. Getting the return audio and frame-rate matching wrong between feeds is a common failure point that dedicated technical direction is built to catch before it reaches remote viewers.

A product launch typically leans harder on lighting and LED vision quality, since the room is judged on visual polish rather than technical complexity. Here, an Absen LED wall run by an experienced video technician does more for brand perception than almost any other single element.

An awards night usually runs a tight, unforgiving schedule: video packages, live audio for acceptance speeches, and a stage that has to look right on camera and in the room at once. A show caller working alongside the technical director keeps the schedule from slipping, since the two roles split cueing from technical oversight.

An exhibition often needs distributed AV across multiple stands or breakout areas rather than one central rig, which puts more weight on the AV producer’s planning and less on a single live technical director.

What goes wrong at events without a technical crew?

Events run without a technical crew tend to fail in predictable, avoidable ways.

The most common issue is audio feedback and inconsistent levels, because nobody is actively managing gain on the console during the show; a volunteer or venue staff member checking levels once at the start won’t catch a lapel mic drifting out of range an hour later.

Load-in and strike take longer, because nobody has run this exact combination of venue and kit before, and problems get solved by trial and error rather than experience. That often tips into venue overtime charges that a crew with a tested setup routine would have avoided.

Safety and compliance gaps are the least visible risk until they matter. Rigging without a proper risk assessment, or running kit with no current PAT testing record, creates liability that most venues and insurers won’t accept once questioned.

Hybrid streams are the most fragile point. Without someone dedicated to monitoring the feed, a dropped stream or lagging return audio can go unnoticed for minutes, which is exactly the kind of failure remote attendees remember. And without a single point of technical ownership, small issues, a cable fault, a level creeping too hot, a slide clicker losing connection, get discovered by the audience instead of caught beforehand.

What actually matters when you brief a crew

Most guides to hiring AV support focus on kit specs. That’s the wrong starting point. The kit list matters far less than whether the crew has run this exact combination of event type and venue before, and whether they can describe their redundancy plan in specifics rather than reassurance.

The conventional advice, “get quotes from three suppliers and compare price”, misses the real variable: day rates cluster fairly tightly for a given role and region, so price differences usually reflect experience and redundancy planning rather than corner cutting. A quote £100 cheaper per day that skips a backup encoder is not a saving.

What should come first in any brief is the run of show and the required outputs, stream, recording, IMAG, because everything else, staffing, kit list, rehearsal time, follows from that. Organisers who send a vague brief and expect the crew to fill in the gaps are the ones who end up surprised on the day. Get specific early, and the rest of the planning gets considerably easier.

— Michael

How Firefly AV can help with your next event

If you’ve read this far weighing up whether to staff your event properly, the practical next step is straightforward. Firefly AV delivers crewed production, hybrid stream support and dry-hire equipment from bases in Leeds and Preston, working UK-wide, so you’re not stitching together separate suppliers for kit, crew and stream management.
Firefly AV

Lead times vary by scale: smaller conferences and launches can often be confirmed within two to three weeks, while larger multi-day productions benefit from more advanced notice to lock in kit and specialist crew. If you want to see what’s available before committing, browse AV equipment hire in Leeds for stock including Absen LED walls, Sennheiser microphones and BirdDog camera systems, or get in touch to request a site visit and a quote tailored to your run of show.

Sources

FAQ

What does an AV technical crew include?

A crew typically includes some combination of an AV producer, technical director, audio engineer, lighting designer, video technician and stage riggers, depending on the event’s scale and outputs required.

How much does it cost to hire an AV technical crew?

Individual technicians typically run £200 to £450 per day, senior technical directors £450 to £900 per day, and full production packages for larger conferences often start around £10,000, with final cost depending on kit, venue and lead time.

Why is a technical rehearsal important?

A technical rehearsal lets the crew test redundancy, microphone levels, lighting cues and stream connections before an audience is in the room, catching problems while they’re still cheap and quiet to fix.

Does Firefly AV provide crew for hybrid and livestream events?

Yes, Firefly AV supplies technical directors, audio engineers and BirdDog camera crews for hybrid events from its Leeds and Preston bases, working across the UK.

What should I ask an AV supplier before booking?

Ask for specifics on redundancy planning, current safety paperwork including PAT testing and rigging certification, comms plans for the live show, and whether a technical rehearsal slot is included in the quote.

"


Why hiring an AV technical crew protects your event

2/08/2026
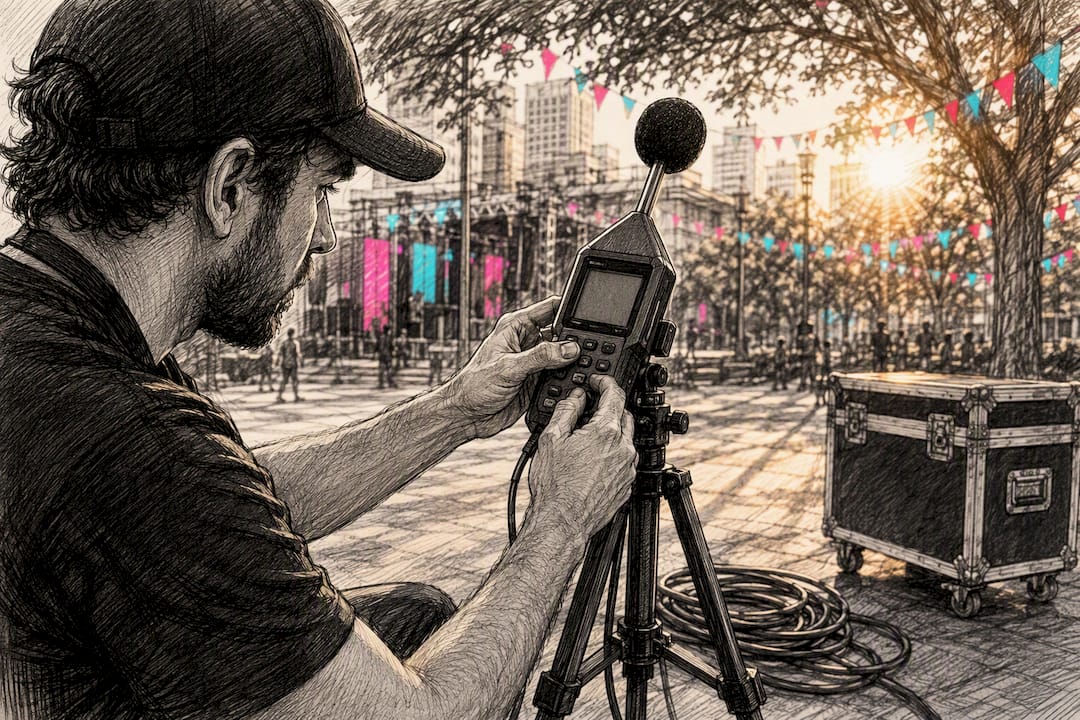
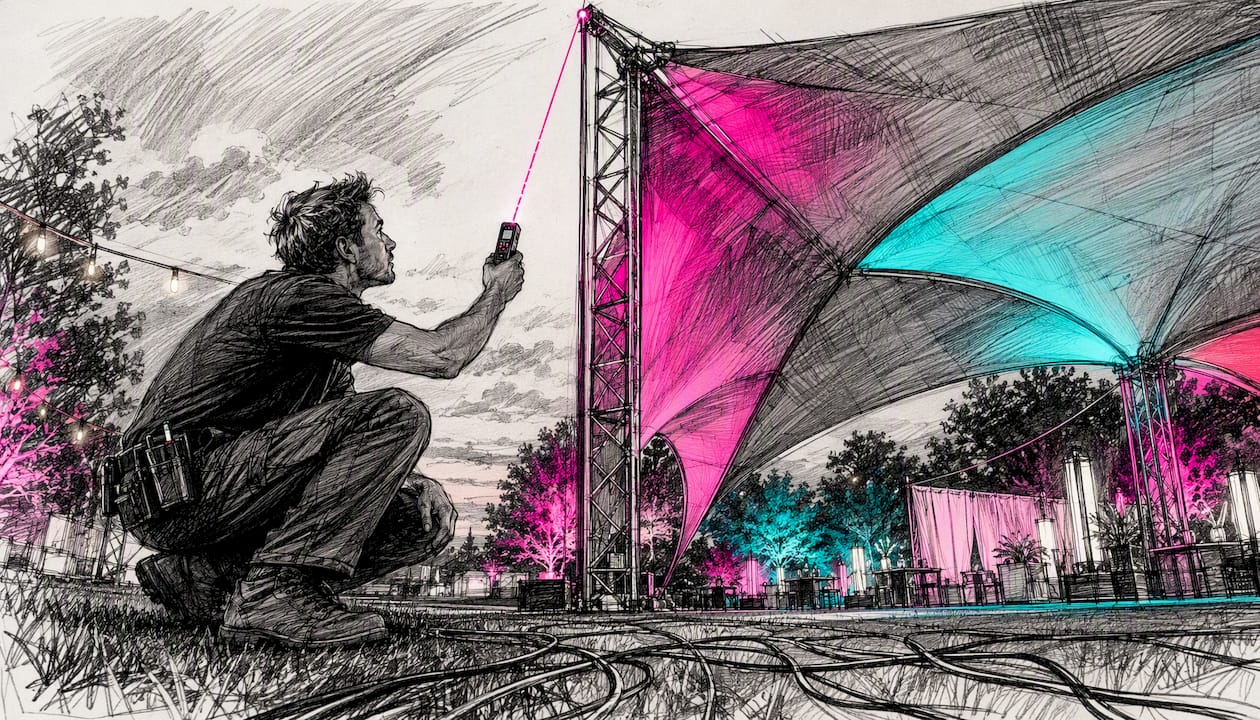
Technician calibrating sound monitoring meter outdoors

"

There is no such thing as a “noise pollution licence” in the UK. Noise is controlled instead through a mix of instruments: premises licences and Temporary Event Notices under the Licensing Act 2003, statutory nuisance abatement notices under the Environmental Protection Act 1990, and, for a smaller category of fixed-site operations, environmental permits. Whichever applies to your event, the mechanism is the same: conditions are attached, and breaching them has consequences.

Firefly AV is an audio visual hire and event production company based in Leeds and Preston, working across the UK and Europe, and we deal with these instruments on a practical level every time we rig sound for a conference, festival stage, or product launch near residential neighbours.

Get the wrong licence, or ignore a condition buried in the small print, and you’re looking at:

  • A licence review that can add restrictive conditions or suspend your licence
  • An abatement notice requiring you to stop or limit noise immediately
  • Fines that have run as high as £20,000 in some prosecutions
  • Reputational damage with a venue or local authority that affects future bookings

Key Takeaways

Noise compliance for UK events depends less on which licence you hold and more on whether you can evidence what happened on the night.

Point Details
No standalone licence exists Noise is controlled via premises licences, TENs, abatement notices, and environmental permits, not a dedicated “noise licence.”
TENs run up to 96 hours Temporary Event Notices cover short-run events but still carry enforceable noise conditions under the Licensing Act 2003.
Abatement notices carry criminal penalties Non-compliance under the Environmental Protection Act 1990 can lead to prosecution, not just a warning.
NIAs and NMPs apply to fixed-site operations Large permanent infrastructure or industrial sites may need a Noise Impact Assessment referencing BS 4142 methodology.
Calibrated logs resolve disputes SPL monitoring records and a named responsible person on site are what typically prevent escalation to licence review.

Table of Contents

What is a noise pollution licence, and why doesn’t it exist?

Searching for “noise pollution licence” usually means one of four things is actually needed, depending on what you’re running and where.

A premises licence is the standing authorisation a venue holds under the Licensing Act 2003 to sell alcohol, provide late-night refreshment, or put on regulated entertainment. It’s permanent, tied to the building, and typically carries a full set of conditions covering noise, hours, and capacity.

A Temporary Event Notice (TEN) is the lighter-touch route for one-off or short-run events at a venue without a premises licence, or at a licensed venue doing something outside its usual permission. A TEN covers licensable activities for up to 96 hours, and there’s a cap on how many any one premises can run per year.

  1. Check what your event actually is. A wedding reception with amplified music in a marquee needs different cover to a corporate product launch inside an already-licensed conference centre.
  2. Identify the licensing authority. That’s your local council, and they administer both premises licences and TENs.
  3. Read the S182 guidance. The revised guidance issued under section 182 (Feb 2026) tells licensing authorities to focus on preventing public nuisance rather than imposing blanket rules, which is why conditions vary so much between venues.
  4. Submit early. TENs need advance notice, and premises licence variations can take some time if there are representations.

Pro Tip: A TEN doesn’t automatically mean lighter noise conditions. Councils frequently attach the same restrictions they’d put on a premises licence, particularly for events near housing, so don’t assume a short notice period equals a quiet form-filling exercise.

How does statutory nuisance law affect events?

If your event isn’t covered by a licence breach but neighbours still complain, the council can act under the Environmental Protection Act 1990 instead. Statutory nuisance doesn’t require a specific decibel figure. It’s assessed on whether noise “materially interferes” with someone’s use of their property, judged against timing, duration, and character as much as loudness.

Environmental health officers typically follow a set pattern once a complaint lands:

  • Log the complaint and ask for diary sheets recording times and impact
  • Visit or monitor remotely, sometimes overnight, to witness the noise directly
  • Assess against statutory nuisance tests, not just subjective annoyance
  • Decide whether to serve an abatement notice

An abatement notice requires the person responsible to stop the noise or reduce it within a stated timescale, and it can specify how. You can appeal to the magistrates’ court in England and Wales, or the sheriff court in Scotland, but the notice usually stands while an appeal is pending unless the court says otherwise.

Non-compliance is a criminal offence. Fines follow, and repeat breaches escalate quickly toward prosecution. There’s a recognised defence of “best practicable means,” meaning you took every reasonable step available given the cost and technology involved, but it only works if you can prove it with contemporaneous records, not a verbal assurance after the fact.

When do you need an environmental permit instead?

Most events never touch this regime. It applies mainly to fixed-site industrial processes, and occasionally to very large festivals with permanent or semi-permanent infrastructure that falls under regulated activities.

Where it does apply, the Environment Agency’s guidance on environmental permits sets expectations that go well beyond a standard licensing application:

  • A Noise Impact Assessment (NIA) modelling likely noise levels against nearby receptors, usually referencing BS 4142 methodology for rating industrial and commercial sound
  • A Noise Management Plan (NMP) setting out how noise will be controlled operationally, not just predicted on paper
  • Evidence that mitigation has actually been considered, not just described

The Noise Advisory Tool (NAT) helps applicants work out whether an NIA and NMP are likely to be required, but it’s a screening aid, not a decision-maker.

The Environment Agency will not grant a permit if significant noise pollution is expected. That single line is why an NIA needs to be genuinely rigorous rather than a box-ticking summary, because a weak assessment can sink an application outright.

If your event sits anywhere near this threshold, get specialist input before you submit, not after a refusal.

What technical measures actually reduce noise risk on site?

This is where most of the real compliance work happens, and it’s also where an AV supplier earns its keep.

  1. Get the system design right first. Speaker orientation and directional arrays keep sound aimed at the audience rather than spilling toward a neighbouring street or residential block. Line-of-sight planning between the stage and the nearest sensitive receptor matters more than most organisers expect.
  2. Control low frequency separately. Bass carries further and through more structures than mid and high frequencies, so subwoofer placement and cardioid arrays need their own plan, not an afterthought bolted onto the main hang.
  3. Monitor in real time. Calibrated SPL meters at front of house and at the noise-sensitive boundary let your technician adjust before a complaint arrives, not after.
  4. Log everything. Timestamped SPL readings, limiter settings, and any adjustments made during the show are the evidence that turns “we think it was fine” into a defensible record.
  5. Build in operational controls. Restricted hours for outdoor stages, managed egress to avoid crowd noise late at night, acoustic shielding where practical, and clear door and window policies for indoor venues all reduce risk cheaply.

Noise limiters split opinion for good reason. They’re effective, but the S182 guidance explicitly warns against imposing them as a blanket condition on small venues, where they can strangle a mix unnecessarily. For a 200-capacity venue night, a well-briefed technician with a calibrated meter often achieves the same result more flexibly than a fixed limiter. For a multi-stage outdoor festival, limiters paired with continuous monitoring become close to essential.

Budget-wise, expect a monitoring technician on a day rate somewhere in the £250 to £450 range depending on event scale and location, with calibrated SPL kit hire adding a modest daily cost on top. Larger festival rigs with multiple monitoring points and a dedicated noise management lead push toward the higher end of that range across a multi-day build.

Pro Tip: Keep your Noise Management Plan under two pages. Licensing and environmental health officers see plenty of NMPs, and a document that clearly states your monitoring points, response thresholds, and named responsible person carries more weight than one padded with generic risk-assessment language.

A concise NMP should cover:

  • Named responsible person on site with contact details
  • Monitoring points and SPL thresholds for each
  • Response procedure if a threshold is breached
  • Hours of operation and any curfew arrangements agreed with the licensing authority

Firefly AV builds this into system design as standard, running conference mic systems and PA rigs from DB Technologies speakers through Allen & Heath consoles, with Sennheiser mics for spoken-word elements where gain structure and feedback control also affect perceived loudness. Absen LED walls and staging come from the same crew, so noise control sits inside the wider production plan rather than as a separate bolt-on.

What happens after a noise complaint is made?

The pathway is fairly consistent across councils, even if the pace varies.

  • Initial contact: An officer may call the venue directly during the event, particularly for a first-time or minor complaint.
  • Investigation: Diary sheets, monitoring visits, or objective SPL data get requested, sometimes within days.
  • Outcome: Ranges from informal advice, through an abatement notice, to a licence review, and in serious or repeat cases, prosecution or a closure order.
  • Coordination: Councils and the Environment Agency coordinate so an operator isn’t prosecuted twice under different regimes for the same incident.

If a complaint arrives mid-event, the immediate priority is evidence, not panic. Pull your SPL log, note the exact time and reading, reduce levels if the reading is trending toward your agreed threshold, and get the named responsible contact on the phone to the council’s out-of-hours line if one exists. A prompt, documented response is consistently what separates a written warning from a formal notice.

When should you bring in a specialist AV supplier?

Certain situations tip past what an in-house events team can safely manage alone: a large outdoor event with multiple stages, a licence application that’s attracted representations from residents, or a venue with a documented history of noise complaints. In each case, the technical evidence you can produce afterwards matters as much as the mitigation you put in place beforehand.

Calibrated logs and a named technician’s testimony routinely turn a subjective complaint into an objective record, which is often what actually resolves a licence review in the operator’s favour.

Firefly AV supports organisers across this whole chain: system design that accounts for directional control from the outset, calibrated SPL monitoring throughout the event, on-site technicians who can adjust in real time, and support drafting a Noise Management Plan that a licensing officer will recognise as substantive. Day rates for a dedicated monitoring technician typically sit in the £250 to £450 bracket, scaling with event size and the number of monitoring points required. For anyone weighing up what audio visual equipment actually contributes to a compliant event, the answer is usually less about the kit list and more about who’s operating it and what they’re logging while they do.

If you’re planning an event where noise risk is a genuine factor, whether that’s a city-centre conference venue or an outdoor festival site, book AV support that builds monitoring and documentation into the production plan from day one rather than treating it as an afterthought once a complaint has already landed.

Hands attaching microphone at festival site

Editorial take: what organisers get wrong about noise compliance

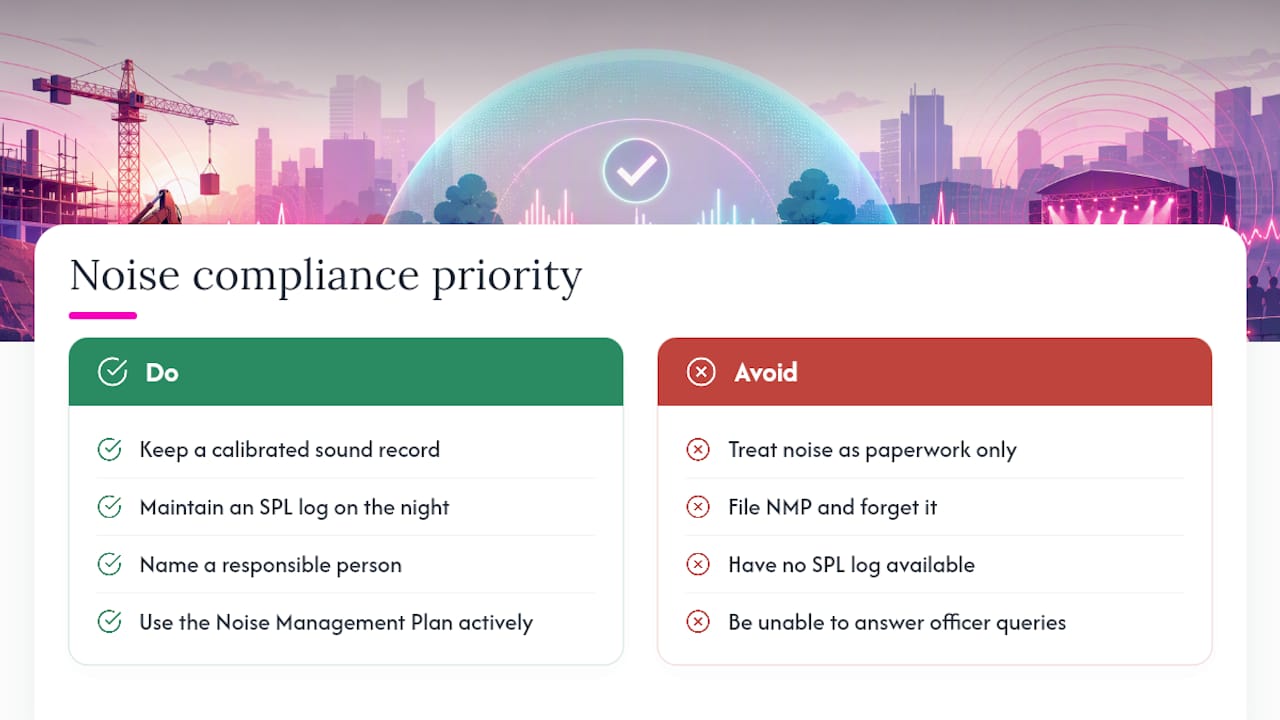
Most guidance on this topic treats noise control as a paperwork exercise: get the right licence, tick the right box, move on. That’s backwards. The licence is the least interesting part. What actually determines whether an event survives a complaint is whether anyone can produce a calibrated record of what happened on the night.

Councils and licensing authorities aren’t looking for perfection. The S182 guidance is explicit that conditions should be proportionate, which tells you enforcement bodies expect reasonable effort, not silence. The organisers who get burned aren’t usually the loudest ones. They’re the ones who had no SPL log, no named responsible person, and no answer when an officer asked what happened at 11:40pm.

Editorial take: what organisers get wrong about noise compliance — overview diagram

If there’s one priority to take from this, it’s treat your Noise Management Plan as a working document your technician actually uses on the night, not a compliance form filed and forgotten. That single habit resolves more disputes than any amount of licence paperwork ever will.

Sources

FAQ

What time do you legally have to be quiet?

There’s no single national cutoff time. Licensing conditions and TEN terms set specific hours per venue or event, and statutory nuisance assessments give extra weight to noise during night-time hours regardless of any stated curfew.

What are acceptable noise levels from neighbours?

There’s no fixed decibel threshold in statutory nuisance law. Officers assess whether noise materially interferes with normal use of a property, weighing timing, duration, and character rather than a single number.

How do you prove noise is a statutory nuisance?

Councils typically ask complainants to keep diary sheets logging times, duration, and impact, then may carry out their own monitoring visits before deciding whether the statutory nuisance test is met.

My neighbour plays music all day long. What should I do?

Report it to your local council’s environmental health team, who will investigate and can serve an abatement notice if they’re satisfied it meets the statutory nuisance threshold under the Environmental Protection Act 1990.

Do I need a permit for an outdoor festival?

Most festivals operate under a premises licence or TEN rather than an environmental permit. Permits typically only apply to fixed-site operations with permanent infrastructure that falls under regulated environmental activities.

What’s the difference between a premises licence and a TEN?

A premises licence is a permanent authorisation tied to a venue, while a Temporary Event Notice covers a specific event for up to 96 hours at a venue without a standing licence or outside its usual terms.

"


What is a noise pollution licence? The real legal picture

2/08/2026

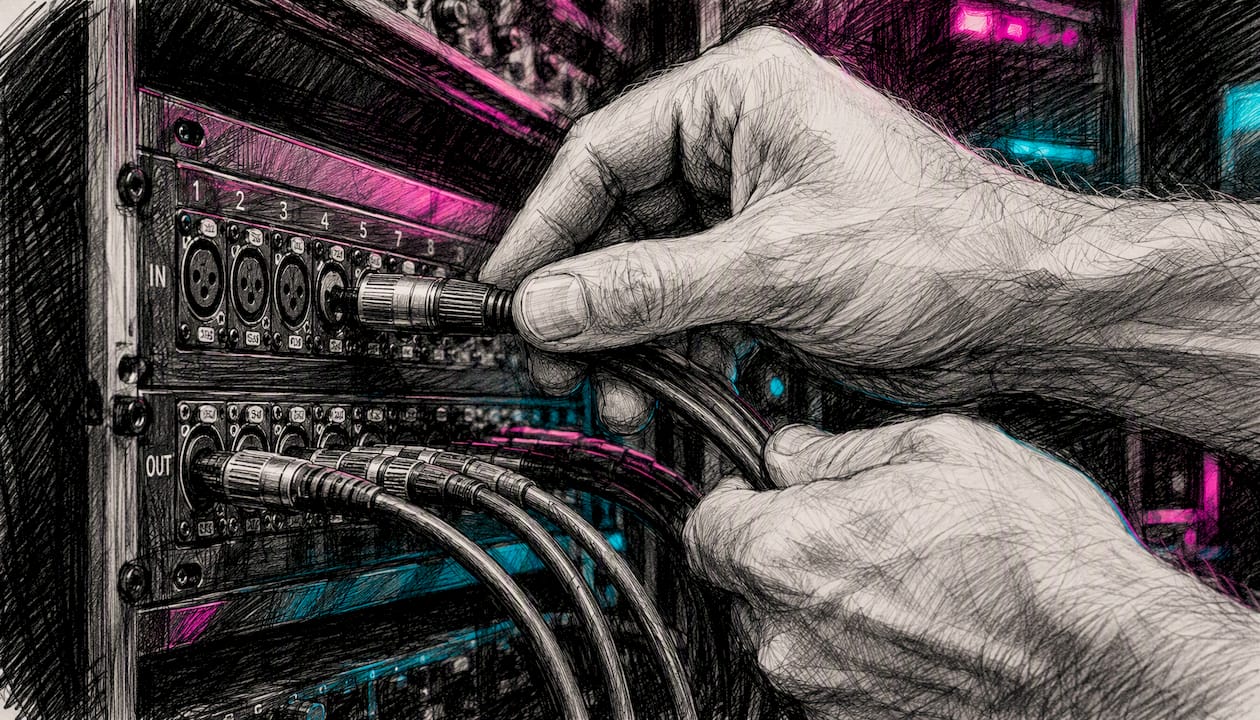
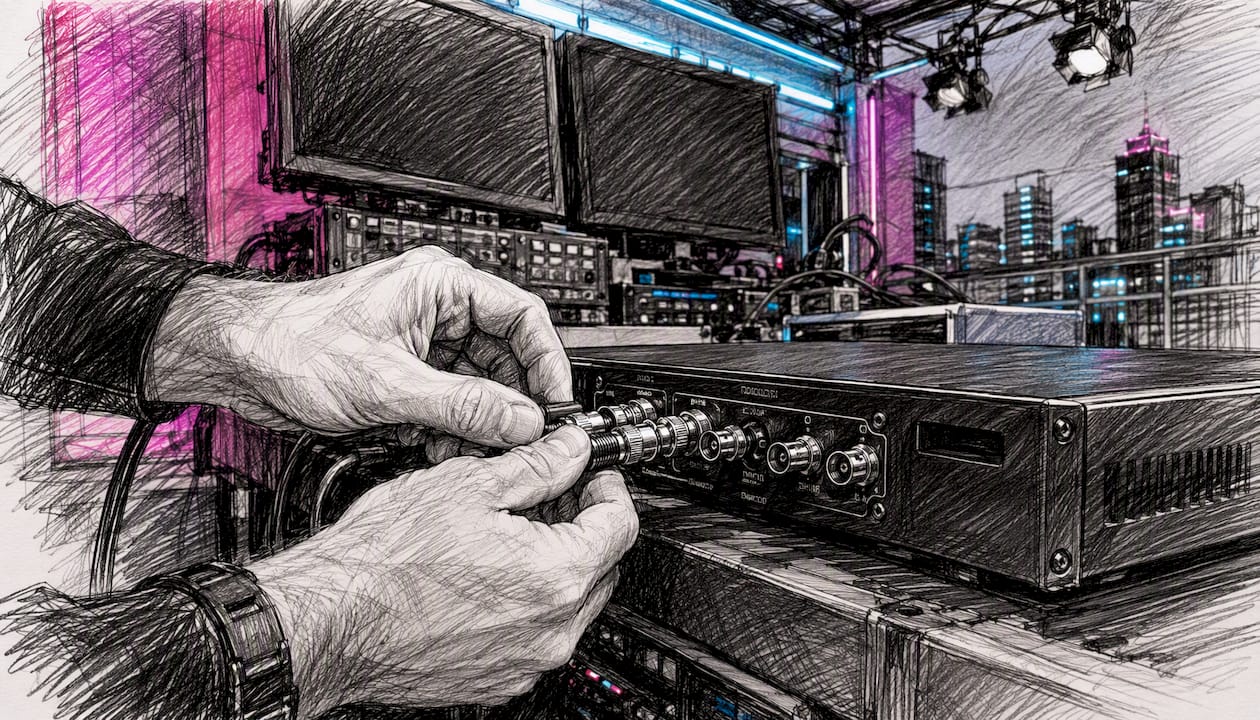
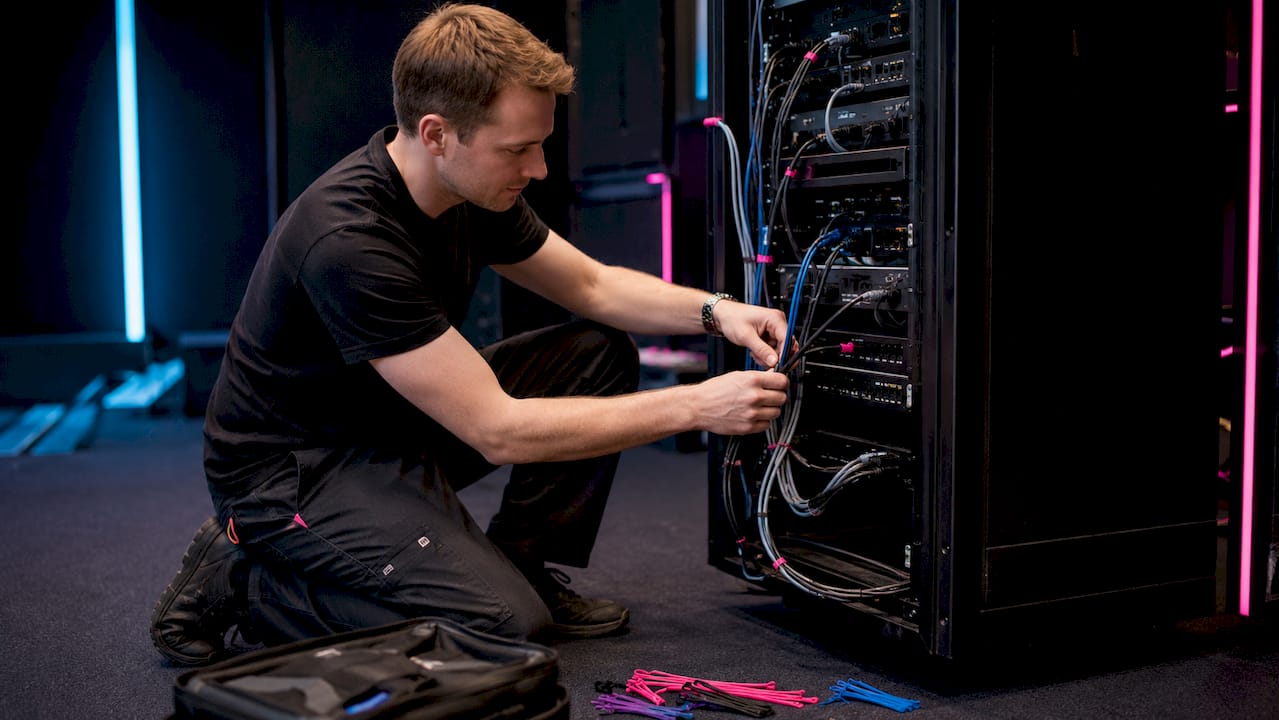
Hands connecting cables to rack unit

"

For large touring LED rigs, specify the Brompton Tessera XD; for compact or space-constrained installs, the Brompton Tessera XD-S is the better fit. Firefly AV, an AV hire and event production company with bases in Leeds and Preston, supplies and hires both units UK-wide, as dry hire or with technicians.

Both units share the same core job: taking a single 10G trunk and multiplexing it down to multiple 1G outputs, cutting the home-run cabling a large LED wall would otherwise need. Each connects automatically to a Tessera SX40 processor with no manual switch configuration.

Two facts settle most buying decisions on the spot:

  • The full-size XD gives you multiple 1G outputs and accepts either copper or single-mode fibre 10G trunk inputs.
  • Daisy-chaining lets you link a run of units off one trunk, though the shared bandwidth needs checking against your pixel budget before showtime.

Key Takeaways

Choosing between the Brompton Tessera XD and XD-S comes down to port count against footprint, and Firefly AV supplies or hires either from its Leeds and Preston depots.

Point Details
Model choice Pick the full XD for large multi-screen rigs; pick the XD-S for compact, space-constrained installs.
Fibre requirement Trunk inputs must use single-mode fibre at 1310nm, not multimode, to avoid signal mismatch.
Bandwidth budgeting Daisy-chained units share one 10G trunk, so total pixel demand must be checked before rig day.
SFP compatibility An XD-S behind an SX40 supports only ten of its twelve ports and may need 10GBase-LR SFP+ modules.
Firefly AV supply Firefly AV hires both units as dry hire or technicianed hire from its Leeds and Preston depots UK-wide.

Table of Contents

Brompton Tessera XD vs XD-S: what actually differs?

The headline difference is port count against footprint. The XD is a full 2U rack unit with multiple 1G Tessera Protocol outputs. The XD-S squeezes a higher number of 1G outputs into a half-rack, 1U chassis, trading some processor compatibility for a smaller road case footprint.

That trade-off matters more than the spec sheet suggests. When an XD-S runs behind an SX40, only the first ten of its twelve ports are supported, and you may need 10GBase-LR SFP+ modules to make the link work. That is not a footnote. It is the sort of detail that catches out a rigger who has only ever worked with the standard XD.

Feature Brompton Tessera XD Brompton Tessera XD-S
Form factor / weight Full 2U rack chassis Half-rack, 1U high
10G inputs Copper and single-mode fibre Copper and single-mode fibre (SFP+ dependent)
1G outputs 10 ports, approx. 525K pixels per port at 8bpc, 60Hz 12 ports (10 supported with SX40)
Mounting 19" rack, M12 truss holes Half-rack shelf, compact rigging
Best for Large-scale touring, multi-screen arrays with a central SX40 Compact installs, space-constrained trucks and trusses
Warranty / certifications CE marked, manufacturer standard warranty CE marked, manufacturer standard warranty

For a festival mainstage running several screens off one processor, the full XD is the obvious pick, since its port count matches large pixel budgets without forcing a second chain. For a corporate stage set with one or two screens and limited road space, the XD-S earns its keep purely on size. Both units auto-configure with the SX40 and both support daisy-chaining further units off the same trunk, so neither forces you into a rigid single-unit topology.

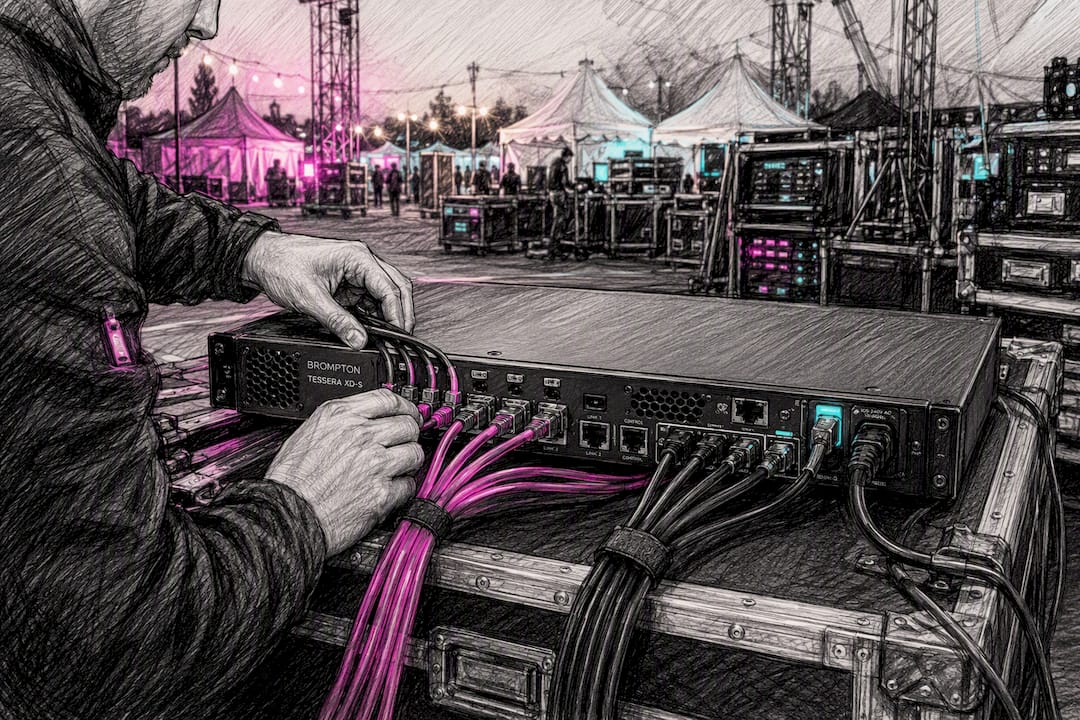
Technician cabled compact AV unit in truck

What are the key technical specs you need to confirm?

Get these numbers wrong on a tech rider and you find out on site, not in the office.

  • Copper trunk limits: standard Cat6A or Cat5e cabling carries the 10G input, but run lengths shrink fast beyond structured cabling distances, so fibre is the safer call for anything longer than a truss run.
  • Fibre spec: single-mode only, 1310nm at 9/125µm, rated to 2 km. Multimode fibre will not work, and it is one of the most common rental returns.
  • Pixel capacity per port: roughly 525K pixels per 1G output at 8bpc and 60Hz. Push the bit depth or frame rate higher and that capacity drops, so budget conservatively if a show calls for 10bpc content.
  • Power: an autoranging 100 to 240V PSU with locking PowerCON TRUE1 connectors, including a through-connection for daisy-chaining power between units.
  • Cooling and connectors: forced-air cooling with replaceable filters, plus Neutrik etherCON and opticalCON DUO connectors built for road use rather than office server rooms.

Pro Tip: A capacitive touch status screen on the front panel shows link status and faults at a glance. Check it during rig, not during doors, because it is the fastest way to catch a mismatched SFP before the audience sees it.

The distinction that matters most here is what the XD is not. It is not a managed network switch with Brompton’s badge on it. It is a purpose-built distribution unit that maintains timing precision across the whole signal chain, which is why generic IT switches make a poor substitute even when the port count matches.

How do you avoid on-site problems with XD units?

Most XD problems trace back to three things: the wrong fibre type, an under-budgeted daisy-chain, or a mounting plan drawn up without the M12 holes in mind.

  1. Check truss mounting early. The M12 holes accept half-couplers, letting you skip a bulky rack shelf on a truss rig entirely. Confirm load ratings with your rigger before the get-in, not during it.
  2. Budget the shared trunk bandwidth. When daisy-chaining several XDs off one 10G link, treat that trunk as a single finite resource. Add headroom if any screen in the chain runs higher bit depth or frame rate than the rest.
  3. Match fibre and SFP types precisely. Single-mode only on the trunk input, and if an XD-S sits behind an SX40, confirm whether 10GBase-LR SFP+ modules are needed before the truck leaves the depot.
  4. Pack spares that matter. Dust filters clog on outdoor and marquee gigs faster than most crews expect; carry replacements plus a spare etherCON and opticalCON lead in the flight case.

Rack-mounted runs benefit from active cooling in the case itself, particularly on long touring schedules. A 1U rack fan tray alongside the XD keeps internal case temperatures down on multi-day festival runs where the unit’s own filters are working overtime.

Should you buy or hire a Brompton Tessera XD?

Capital purchase suits companies running the same rig repeatedly across a season. For a one-off conference, product launch or single tour date, hire almost always wins on cost and flexibility.

Work through this before requesting a quote:

  • How many event days, and does the schedule justify owning the hardware outright?
  • What is the total pixel budget across all screens, and how many home runs does that translate to?
  • Who handles transport, storage and insurance between shows?
  • Does the crew need a technician on-site, or is dry hire sufficient for an experienced in-house team?

When you do ask suppliers for quotes, push on specifics: which SFP modules are supplied, whether fibre cleaning kits and spares are included, the firmware version policy, and lead time on replacement units if something fails mid-tour. UK technician day rates and dry-hire pricing vary with transport distance and whether emergency spares are held on standby, so ask for those cost drivers to be itemised rather than bundled.

How do you hire a Brompton XD in the UK?

UK supply generally comes from two directions: manufacturer-authorised distributors selling new units, and specialist rental houses stocking XD and XD-S for short-term production work.

Firefly AV falls into the second category, supplying and hiring Brompton XD and XD-S as dry hire on a standard two-day hire week, or with a technician for full project production, from depots in Leeds and Preston covering clients across the UK.

A proper quote should itemise:

  • Unit count and model (XD versus XD-S) against your pixel budget
  • Transport to and from site
  • Technician day rate if crewed hire is required
  • Insurance and spares cover for the hire period

Pro Tip: Ask any supplier whether spare SFP modules travel with the kit as standard. A blown SFP with no spare on the truck can stall an entire LED wall’s data feed until a replacement arrives.

Point Details
Hire model Dry hire runs on a two-day hire week; technicianed hire adds crew for setup and show support.
Depot coverage Leeds and Preston depots serve clients UK-wide for LED distribution hire.
Quote contents Unit count, transport, technician rate, insurance and spares should all be itemised separately.

Why does supplier experience matter for LED distribution kit?

Firefly AV works from Leeds and Preston depots across the UK, covering conferences, product launches, exhibitions and broadcast work for clients including the BBC, Leeds City Council and JCT600. That range of work means the equipment list runs wider than just distribution units.

  • Absen LED M2.9 Pro panels for screens paired with Brompton processing and XD distribution.
  • Birddog cameras and Allen & Heath consoles for shows combining vision and live sound.
  • Dry hire or technicianed options depending on whether a crew needs support on-site or just the kit.

A UK supplier’s honest view on Brompton XD hire

Most articles on distribution hardware stop at the spec sheet, as if a pixel-per-port figure tells you everything you need to know about running the kit on a real site. It doesn’t. The number that actually causes problems on tour is the shared trunk bandwidth, and it gets far less attention than the headline port count.

Crews plan pixel budgets per screen and forget the trunk is a single finite pipe once units are daisy-chained. That is where shows lose signal margin, not in the spec they quoted on the rider.

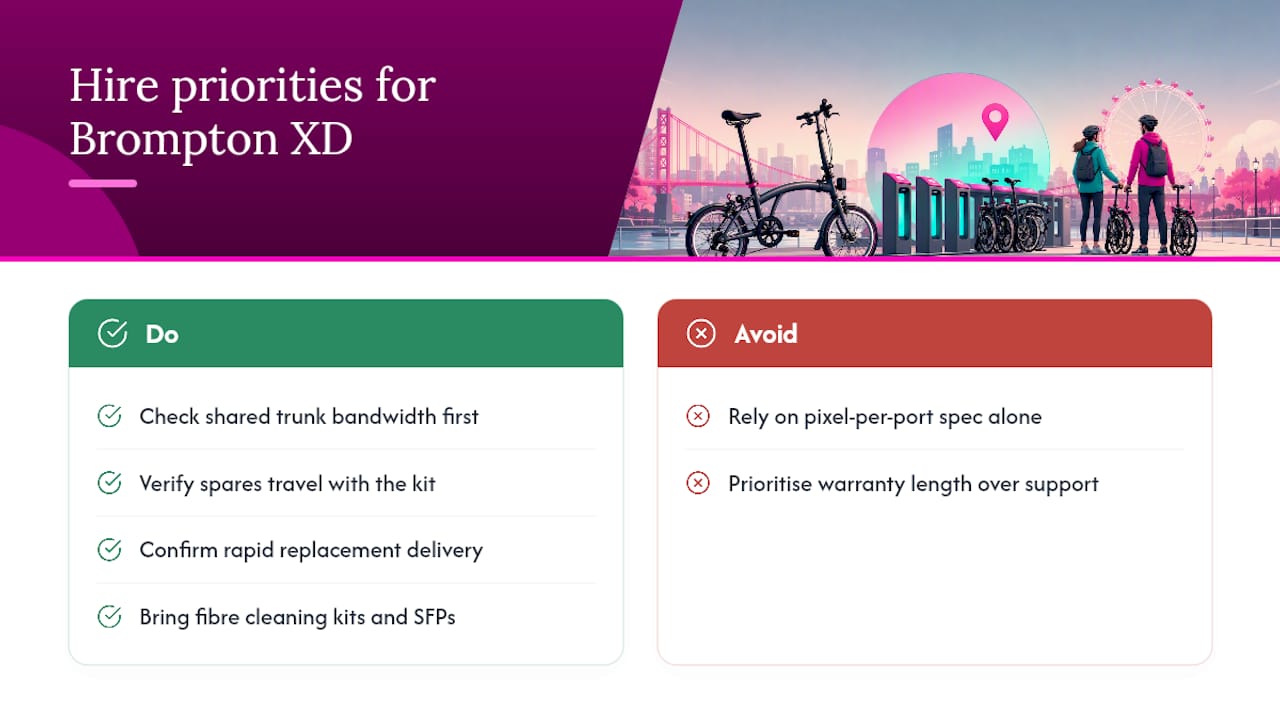
The other overrated detail is warranty length. Every unit on the market carries a broadly similar manufacturer warranty, so it tells you almost nothing about how a supplier will actually support you mid-tour. What matters is whether spare SFP modules and fibre cleaning kits travel with the kit, and whether a replacement unit can reach a venue within hours rather than days. That is the difference between a stalled screen and a show that carries on.

If you take one thing from this, prioritise the bandwidth check and the spares policy over the datasheet comparison. The hardware is well engineered either way.

A UK supplier's honest view on Brompton XD hire — overview diagram

Need Brompton XD or XD-S for an upcoming event?

Firefly AV supplies and hires Brompton Tessera XD and XD-S from Leeds and Preston, with the option to add a technician rather than leave a dry-hire crew to troubleshoot fibre mismatches alone on site. That local depot coverage means faster turnaround on replacement units and spares than sourcing from a distributor with no UK service presence.

Firefly AV

Whether you need a single XD for a compact conference stage or a chained run for a multi-screen touring rig, get a straightforward quote covering unit count, transport and technician time. Explore AV equipment hire and get a costed quote for your event dates.

Sources

  • Tessera XD – Data Distribution Unit

FAQ

What is the Brompton Tessera XD used for?

It distributes a 10G data trunk down to multiple 1G outputs feeding LED processing, cutting the number of long cable runs needed on a large screen build.

What is the difference between XD and XD-S?

The XD is a full 2U rack unit with ten 1G outputs built for large multi-screen rigs; the XD-S is a compact half-rack unit with twelve ports, of which only ten are supported when paired with an SX40.

Can you daisy-chain Brompton XD units?

Yes, multiple XDs can be linked off one 10G trunk, but the bandwidth is shared across the chain, so pixel budgets need checking before the rig goes up.

Does Firefly AV hire Brompton XD units?

Firefly AV hires both the Tessera XD and XD-S as dry hire or with a technician from its Leeds and Preston depots, covering clients across the UK.

Does the XD work with copper cabling or only fibre?

Both: the trunk input accepts copper 10G or single-mode fibre at 1310nm, 9/125µm, rated to 2 km, though fibre is the safer choice for longer runs.

"


Brompton XD: which Tessera unit and where to hire it

2/08/2026
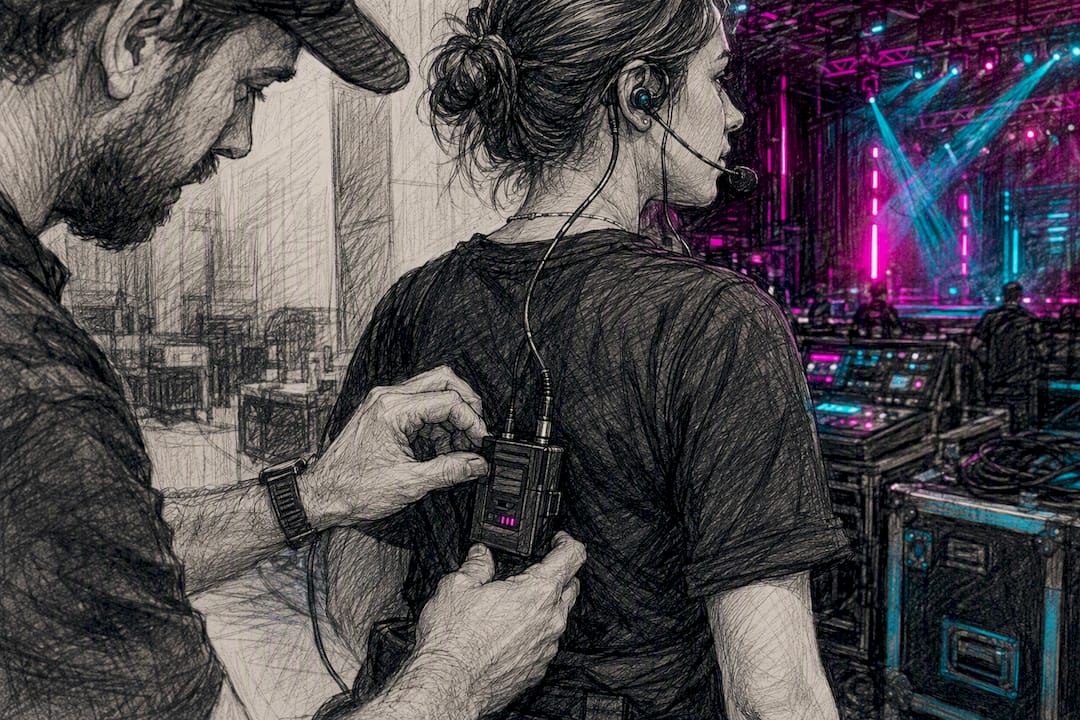
Technician attaching intercom beltpack to crew member

"

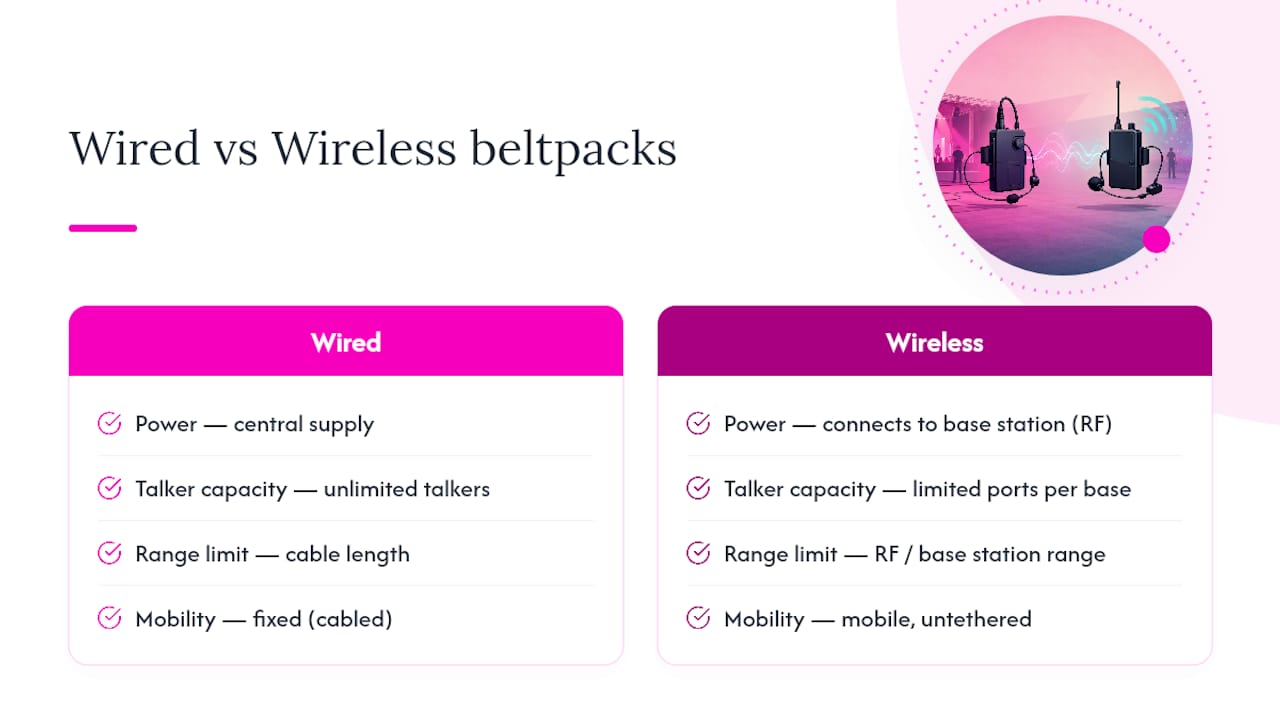
An intercom beltpack is a compact user station, worn on a belt and connected to a headset, that lets stage, production and technical crew talk instantly on a dedicated communication channel, either through a cable back to a central base station or over a paired wireless link. This note comes from Firefly AV, an AV hire and event production company based in Leeds and Preston, working across the UK on conferences, live shows and broadcast events. Wired beltpacks run off a central power supply and offer rock solid range limited only by cable length. Wireless beltpacks free crew to move but need proper RF planning to stay reliable.

Key Takeaways

Choosing between a wired and wireless intercom beltpack comes down to matching talker count, mobility needs and venue RF conditions to the right system architecture.

Point Details
Match system to talker count Count simultaneous users first; that number decides wired partyline versus wireless port capacity.
Battery life needs planning Wireless beltpacks typically run 8 to 12 hours per charge, so build in swap points for long shows.
RF planning prevents dropouts Position base stations centrally, avoid metal enclosures, and test coverage before doors open.
Budget for day rates realistically Expect roughly £15 to £30 for wired beltpacks, £25 to £45 for wireless, and £60 to £150 for base stations.

Table of Contents

What is an intercom beltpack made of, and how does it work?

Every beltpack does the same job: it takes your voice, puts it on a channel, and lets you hear everyone else on that channel through a headset. Wired or wireless, the controls are broadly the same:

  • Headset connector — usually a 4-pin XLR male, though some units use 3.5mm or proprietary jacks.
  • Talk switch or switches — a push-to-talk or latching key, sometimes duplicated for multichannel packs.
  • Volume control — a dial or rocker for individual channel levels.
  • Channel keyset — buttons or a rotary selector for multichannel units, letting a user hop between production and stage channels.
  • Belt clip — the physical mounting point, usually with a sprung clip for a waistband.
  • Power connector — a DC input from a central supply on wired units, or an internal socket for charging on wireless packs.

Wired beltpacks draw power from a central supply feeding the whole partyline loop, so there’s no battery to manage. Wireless packs run on internal lithium-ion cells, and production units typically deliver 8 to 12 hours of talk time per charge, which is why crews on long shoot days carry spares. Before any show, check headset wiring and impedance match the beltpack, because a mismatched or modified headset cable is a common cause of dead or distorted audio.

Wired or wireless beltpack: which suits your event?

Wired partyline systems run off a central power supply with parallel cabling to every station, giving unlimited talkers on a channel and range that’s only limited by how far you can run cable. It’s the standard for fixed stages, theatre productions and any site where cable runs are practical, and it’s the most dependable option when uptime matters more than mobility.

Wireless systems pair a base station with a limited number of beltpacks, and each wireless beltpack occupies a port on that base station. Most wireless intercom is full-duplex, meaning everyone talks and listens simultaneously, though some systems can switch to half-duplex to squeeze more users onto fewer ports.

Choosing between the two comes down to a short list of trade-offs:

  1. Mobility — wireless wins for roaming stage managers, camera operators and runners.
  2. Trip hazards — fewer cables underfoot matters hugely in front-of-house areas and on outdoor sites.
  3. RF coordination — wireless needs frequency planning; wired doesn’t care what else is transmitting nearby.
  4. Battery management — wired removes this problem entirely; wireless adds a logistics task to every show day.
  5. Interference risk — wireless systems using 1.9 GHz, 2.4 GHz and similar bands can suffer dropouts near heavy Wi-Fi or other RF-heavy kit.
  6. Range and coverage — wired is limited by cable length only; wireless is limited by antenna placement and building materials.

Before locking in a system, work out how many simultaneous talkers your production actually needs. That single number, more than any other factor, decides whether you need a simple wired loop or a scaled wireless deployment.

Where do beltpacks get used on a live event?

Stage management leans on beltpacks constantly. An ASM calling cues needs a lightweight single-muff headset so they can still hear the room, while a camera operator on a multi-camera shoot typically plugs into a four-wire CCU circuit where the camera supports it — and where it doesn’t, running a mic cable to a beltpack at the camera end is a standard workaround.

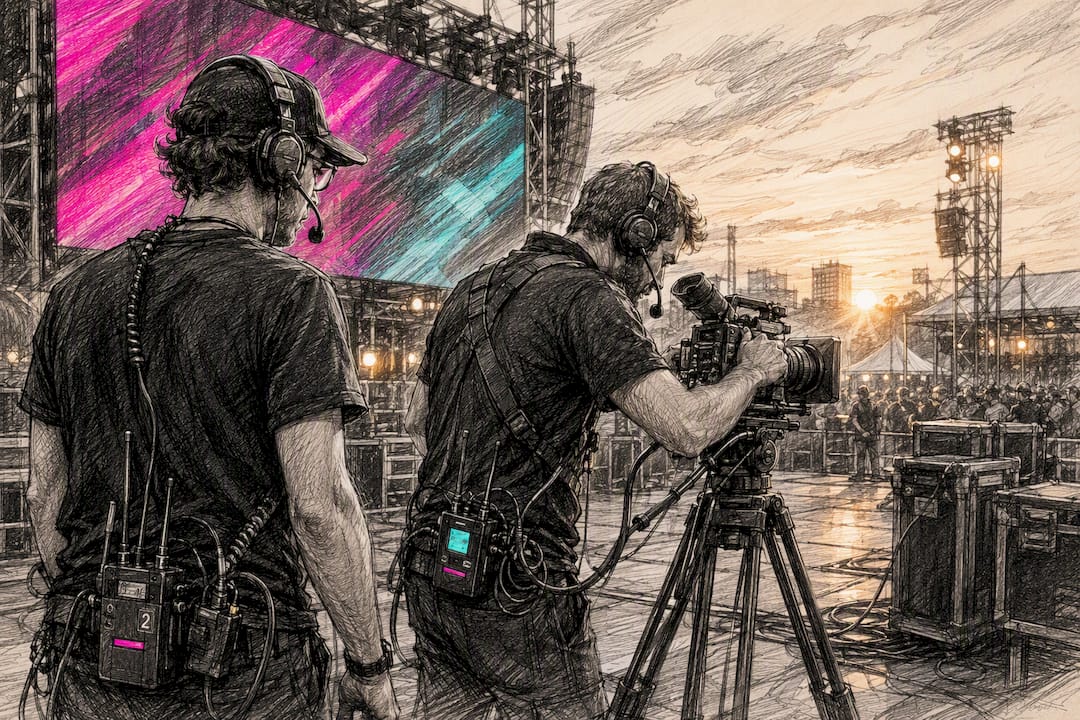
Stage crew using wired intercom beltpacks at live shoot

Front-of-house and back-of-house teams use beltpacks to coordinate paging, and many production beltpacks have programmable buttons that trigger back-of-house functions directly, such as paging a dressing room or patching into a two-way radio channel crew are already using; see the UCaaS Hardware Catalog — Yealink Phones, Snom & Algo Paging | California Telecom for compatible hardware options. That radio bridge matters more than people expect: most venue crews run analogue radios for building operations, and a beltpack that can talk to that channel saves duplicated headsets.

Headset choice should match the role, not just the budget:

  • Single-muff, lightweight — stage managers and ASMs who need situational awareness.
  • Dual-muff, sealed — noisy stages, front-of-house near PA stacks, pyro or SFX positions.
  • Low-profile, discreet — camera operators, presenters and anyone on camera themselves.

How do you choose the right beltpack for your event?

Before you ring a supplier, work through this checklist:

  1. How many simultaneous users do you need on comms, and does that number spike during load-in versus the live show?
  2. How many channels are required — one production channel, or separate stage, camera and FOH loops?
  3. Wired or wireless, based on the mobility versus reliability trade-off covered above.
  4. Headset compatibility — confirm connector type and whether crew are bringing their own headsets.
  5. Battery runtime for wireless packs, and whether spares or a charging station are needed on site.
  6. Expansion headroom — will you need more users added on the day, and does the base station have spare ports?
  7. Venue RF environment — ask about existing wireless mic systems, Wi-Fi density and any radio interference history.

On UK day rates, expect roughly £15 to £30 per wired beltpack per day, £25 to £45 for a wireless beltpack, and £60 to £150 for a base station depending on channel count and whether it’s a simple partyline hub or an IP-enabled rack unit. Always confirm current quotes with your supplier, since technician time, cabling and RF licensing (where relevant) sit on top of unit hire.

Dry hire makes sense for a one-off conference or a single-day awards night. If you’re running recurring events, or you’re a venue with a fixed comms need, buying starts to make financial sense once hire costs would exceed a purchase within a handful of events. Either way, ask the venue about their RF policy and available power before you finalise kit, and request a site walk-through so antenna placement gets planned properly rather than guessed on the day.

How do you set up a beltpack system without dropouts?

Getting the RF environment right before doors open saves more headaches than any other single step. A few habits from years of load-ins:

  • Position the base station centrally and in line of sight of beltpack users where the building allows it.
  • Avoid mounting base stations inside metal flight cases or steel-clad plant rooms, which kill signal fast.
  • On larger sites, distribute multiple antennas rather than relying on one central point.
  • Walk the full coverage area with a beltpack live before the audience arrives, not after.

On the power and audio side, keep the central PSU on wired partyline systems secured and away from foot traffic, and resist the urge to modify headset cables to fix a bad connector. If you need to feed dressing-room audio or paging, route it from the base station to a dedicated back-of-house amplifier rather than improvising a splitter off a beltpack output.

Pro Tip: Check Ofcom guidance and the venue’s own RF policy before you book, especially if other wireless mic or in-ear systems are running on site. Coordinating frequencies in advance is far cheaper than troubleshooting interference mid-show.

Which beltpack models does Firefly AV recommend for each role?

Firefly AV stocks a range of beltpacks matched to different jobs on site:

  • Green-Go Wireless Beltpack X — best for roaming crew who need mobility across a stage or venue floor, ideal for stage managers and floor coordinators.
  • Green-Go Wired Beltpack X Sports — built for long cable runs, the natural choice for sports broadcast and fixed camera positions.
  • Sennheiser Speechline SL Bodypack DW — a solid bodypack option where a wireless mic and comms need to sit on the same belt.
  • Clear-Com FreeSpeak paired with a Clear-Com Central Station — for productions needing multi-channel wireless scale across a large venue.

Beltpacks rarely travel alone on a job sheet. We commonly pair them with Absen LED wall, Panasonic projectors, Allen & Heath consoles, DB Technologies speakers, Birddog cameras and Lite Deck staging for full conference and broadcast builds.

What safety issues should you plan for around beltpack intercoms?

Crowded venues and high-noise stages bring specific risks that a comms plan needs to account for, not just an audio one. Cabling from wired beltpacks becomes a trip hazard the moment it crosses a walkway, so route cable along walls, under matting or overhead wherever load-in traffic passes. On outdoor sites and festival fields, that risk multiplies with uneven ground and rain.

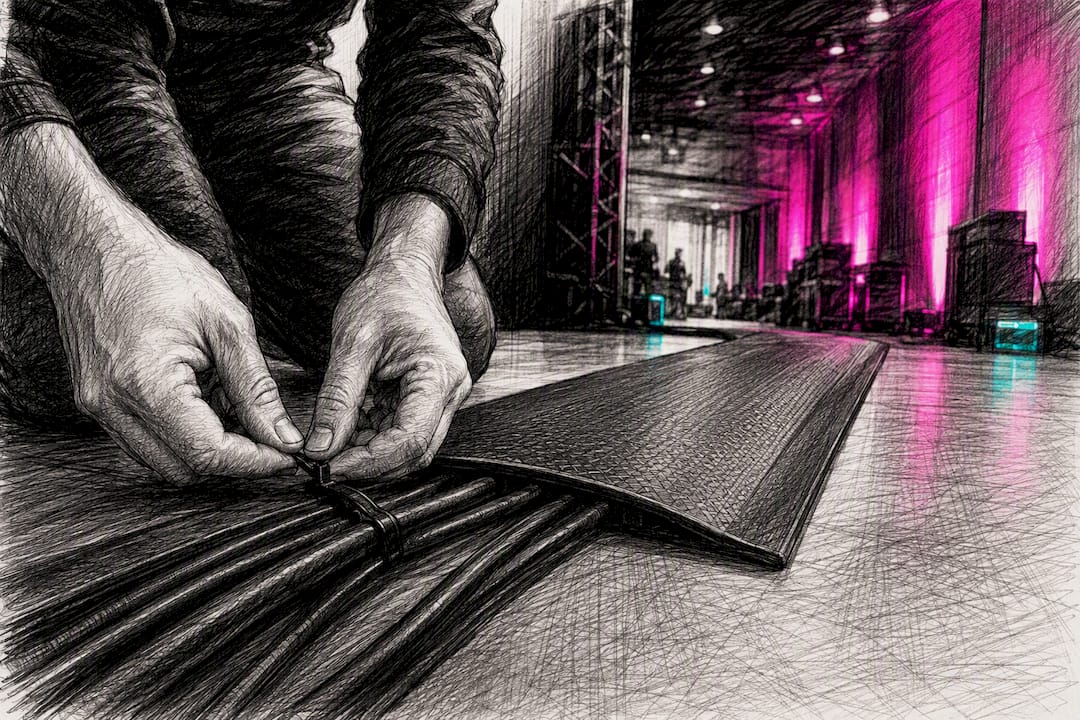
Cable routing under matting to prevent trip hazard

Hearing protection matters more than most crews admit. A dual-muff headset near a PA stack or pyro position isn’t just about hearing cues clearly, it also cuts the ambient noise reaching the wearer’s ears over a long show day. Volume levels on beltpacks should be checked individually rather than left at a factory default, since a channel set too loud can mask an emergency announcement rather than help someone hear it.

Battery-powered wireless beltpacks need a charging routine that doesn’t leave a stage manager without comms mid-show. Build in a swap point during a known quiet moment in the running order rather than waiting for a pack to die. And if your comms system doubles as an emergency communication channel, make sure that use is agreed with venue safety staff in advance, with a backup method (a runner, a radio, a second beltpack) if the primary channel drops during an evacuation scenario. RF interference near medical or emergency radio bands is rare but worth flagging to the venue’s own RF coordinator if your event runs alongside other broadcast or public safety wireless use.

Ready to hire beltpacks for your next event?

Firefly AV supplies wired and wireless beltpack systems as dry hire or with a technician, alongside the wider comms, lighting, sound and staging kit needed for conferences, awards nights, live sport and broadcast events across the UK. If you’re speccing a system from scratch, our team can talk through channel counts, RF planning and headset compatibility before your event date is locked in. Browse our AV equipment hire range or read more on audio visual equipment for event planners to see how comms fits into a full production build.

Where can you read more about intercom system design?

What actually matters when you’re choosing a beltpack system

Most guides to intercom beltpacks spend too long on spec sheets and not enough on the question that actually determines whether a show runs smoothly: what happens when the wireless drops mid-cue. Every wireless system will lose a beltpack at some point, whether from RF congestion, a dead battery, or someone walking behind a steel truss. The systems that hold up on the night aren’t the ones with the most channels, they’re the ones where the crew tested coverage properly beforehand and built in a fallback, whether that’s a second channel, a runner, or simply knowing which corner of the venue drops signal.

The conventional advice to “just hire wireless for mobility” undersells wired partyline more than it should. For fixed stage positions and long cable runs, wired remains the more dependable choice, and it removes battery management from your job list entirely. Wireless earns its keep for roaming roles, not as a default upgrade. Prioritise honest RF testing over kit specification, every time.

Sources

FAQ

What is an intercom beltpack used for?

An intercom beltpack gives production crew hands-free voice communication over a dedicated channel, most commonly for stage management, camera coordination and front-of-house paging during live events.

How long does a wireless beltpack battery last?

Production wireless beltpacks typically run 8 to 12 hours of talk time on a full charge, which is why long shoot days call for spare batteries or a swap routine.

Do I need a base station for a beltpack system?

Yes, both wired and wireless beltpacks connect to a base station, which supplies power and routes audio in wired setups and handles channel assignment and pairing in wireless systems.

What’s the difference between wired and wireless beltpacks?

Wired beltpacks draw power from a central supply and offer unlimited talkers with range limited only by cable length, while wireless beltpacks connect to a base station over RF and each pack occupies a limited port, trading some capacity for mobility.

Diagram comparing wired and wireless intercom beltpacks

How much does it cost to hire a beltpack in the UK?

Day rates typically run £15 to £30 for a wired beltpack, £25 to £45 for a wireless beltpack, and £60 to £150 for a base station, though it’s worth confirming current quotes and technician charges with your supplier.

Can beltpacks connect to two-way radios used by venue crew?

Many production beltpacks have programmable buttons that can bridge into a two-way radio channel, letting comms crew talk directly to building or security staff without a second headset.

"


What is an intercom beltpack, and how do event crews use it?

2/08/2026
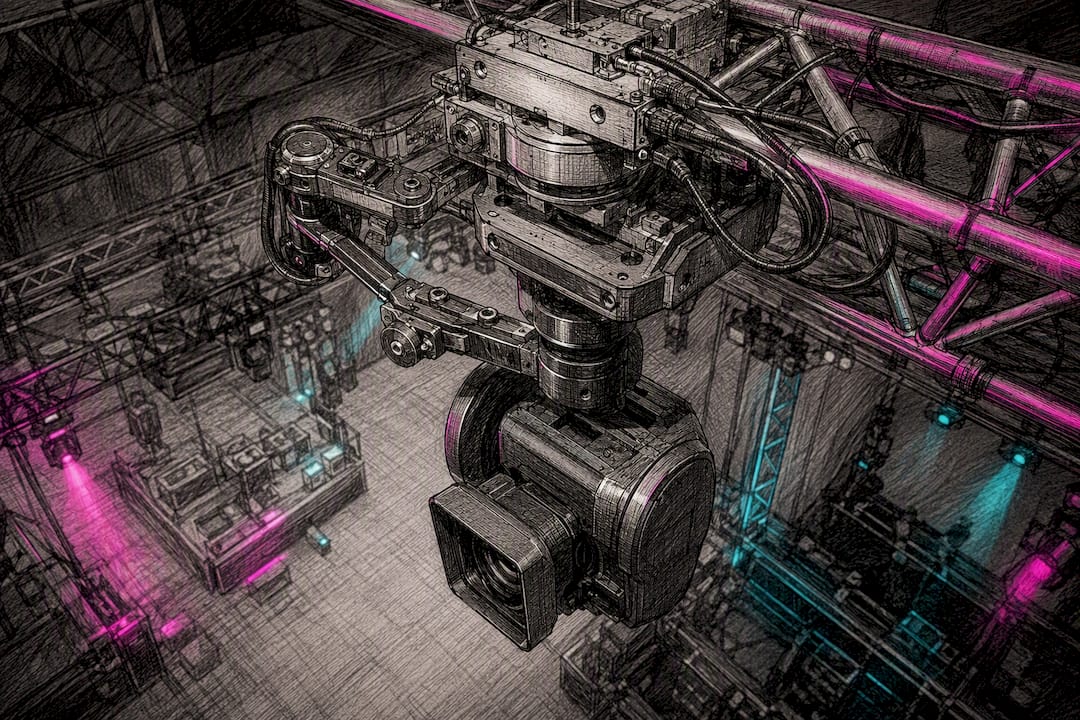
Robotic camera head mounted on event truss

"

A robotic camera system is a motorised, computer controlled camera rig that moves, pans, tilts, and zooms on programmed or remotely operated paths, letting one operator run several cameras at once instead of a full crew running one each. It covers everything from studio-mounted pan and tilt heads to rail-based cinebots that repeat an identical move frame for frame, and it’s now standard kit in television galleries, outside broadcast trucks, and virtual production stages.

  • Automation and repeatability: moves can be programmed once and replayed exactly, which matters for compositing and multi-take product shoots.
  • Remote multi-camera control: robotic systems allow a single operator to run several devices from one control panel, cutting crew numbers on studio floors.
  • Graphics and AR integration: positional data feeds virtual sets and on-screen graphics so overlays track the camera in real time.

Firefly AV is an AV hire and event production company based in Leeds and Preston, working across the UK, and this guide reflects how we brief, hire, and integrate robotic camera kit for broadcast and live production clients.

Key Takeaways

Robotic camera systems succeed when payload, control software, and positional data are matched to the production, and when rigging and calibration time are budgeted realistically.

Point Details
Match payload to camera weight Confirm rig payload rating leaves a safety margin above your heaviest lens and body combination.
Budget calibration time separately Allow a half day to a full day for rigging and encoder calibration before any live rehearsal.
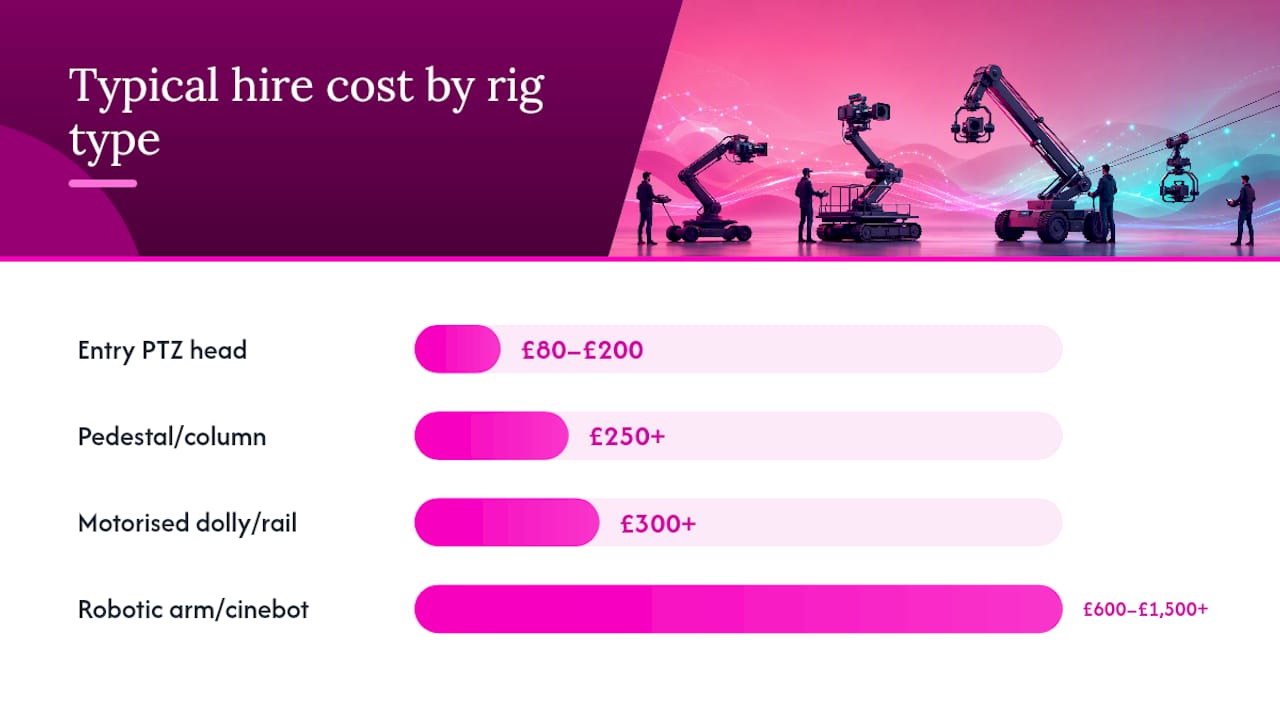
Hire usually beats buying PTZ hire runs roughly £80 to £200 per day; robotic arms run £600 to £1,500+ per day with an operator.
Positional data drives AR and graphics Confirm the control software outputs live position feeds before relying on it for virtual sets.
Firefly AV supplies hire and integration Firefly AV, based in Leeds and Preston, offers PTZ and robotic camera hire with technician and switcher integration UK-wide.

Table of Contents

What are the main types of robotic camera systems?

Four families cover most broadcast and event needs, and picking the wrong one is the most common (and expensive) mistake production teams make at the briefing stage.

  • Robotic arms and cinebots: multi-axis arms capable of sweeping, high-speed moves; typically rated for box cameras and large-sensor cinema bodies, with payloads suitable for typical studio-grade rigs.
  • PTZ heads: motorised pan, tilt, and zoom units carrying a fixed lens camera, popular for lecture capture, panel discussions, and multi-camera studio work where a compact footprint matters.
  • Motorised dollies and rail systems: linear or curved track that moves a camera smoothly along a fixed path, common on product shoots, awards stages, and set-piece studio sequences.
  • Pedestal and column systems: vertical lift units combined with pan and tilt heads, used where a camera needs to rise and fall as well as pivot, such as news studios and panel shows.

Panasonic’s product range spans robotic arms, motorised dollies, columns, elevation units, and pan and tilt mechanisms built to work with PTZ, 4K box, and large-sensor cameras. As a rough matrix: studio news and panel shows lean on pedestals and PTZs; outside broadcast and sport favour compact PTZ heads on fixed rigging points; concerts and awards use arms and rails for sweeping hero shots; product shoots and virtual production rely on cinebots for exact repeatability. Footprint and cable runs matter as much as payload. A rail system needs clear floor space and a straight or gently curved run, while a column unit needs headroom and a stable fixing point, so venue surveys should always precede the spec sheet.

How do control software and integration actually work?

Robotic camera systems work by combining a motorised head or rail with encoders that report exact position, fed into a controller that talks to production software over a network. Every axis, pan, tilt, zoom, focus, dolly travel, carries its own encoder, so the system always knows precisely where the camera is and can return to that exact point on command.

  • Motion head or rail: the physical hardware moving the camera along programmed axes.
  • Controller and control panel: hardware or software interface where an operator drives the rig or triggers saved shots.
  • Vision switcher integration: the robotic system feeds a clean signal into the same switcher handling manual cameras, so cuts between robotic and human-operated shots are seamless.
  • Automation and orchestration software: sequences multiple cameras, ties moves to a rundown, and can trigger shots on a timecode.

Industry guidance is consistent on one point: hardware without a proper integration layer is not much use on its own, since production teams need control software that talks to lighting consoles and vision switchers for the whole rig to behave as one system rather than isolated gadgets. Positional data also feeds graphics engines and AR overlays, which is why encoded axes and modular rails matter so much in virtual production. Glossary in brief: DOF means degrees of freedom (how many axes a rig moves on), API is the software interface other systems use to talk to the rig, and positional data is the live coordinate feed the camera sends out.

Where do robotic cameras earn their keep in broadcast and live events?

Robotic systems earn their place wherever repeatability, reduced headcount, or precise positional data matter more than a human operator’s improvisation.

  • Live studio shows: fixed PTZ and pedestal rigs cut the floor crew while keeping shot quality consistent across a series run.
  • Outside broadcast for sport: compact PTZ heads on gantries or barriers capture angles a full crew can’t reach safely.
  • Concerts and awards nights: robotic arms deliver sweeping hero shots that would be nearly impossible to repeat by hand, night after night.
  • Product shoots and virtual production: cinebots handle high-speed, identical passes for VFX compositing and green screen work.

A UK broadcast gallery running robotics typically has one operator managing four or five cameras from a single desk, freeing the rest of the crew for graphics, sound, and direction.

How do you choose the right robotic camera system?

Match the rig to camera payload and axes first, because underspecifying either forces a costly mid-project swap. Everything else, control software, footprint, cost, follows from getting that match right.

Type / best for Payload / camera compatibility Axes / motion range Control & integration Footprint / install complexity Typical cost / hire day rate Operator skill required
Entry PTZ head (studio, panels) fixed-lens cameras Pan, tilt, zoom Basic panel or software, switcher integration Small, quick to rig £80 to £200 per day Low, minimal training
Pedestal/column (news, panel shows) box cameras Pan, tilt, elevation Panel control, timecode triggers Medium, needs fixed floor point £250+ per day Moderate, short briefing
Motorised dolly/rail (product, stage) mirrorless to cinema bodies Linear/curved travel, some pan/tilt Software programmed moves Medium to large, needs clear run £300+ per day Moderate to high
Robotic arm/cinebot (VFX, hero shots) cinema cameras Full multi-axis, high speed API driven, AR/graphics feed Large, significant rigging £600 to £1,500+ per day High, specialist operator

Comparison diagram of robotic camera system types

Before signing off, ask suppliers: what payload margin does the rig have above your heaviest lens and camera combination? What control protocol does it use, and does it output live positional data for graphics? What’s the minimum rigging lead time? Red flags include a vendor who can’t confirm a control API, a rig with no positional data output for AR or graphics work, or a payload rating with no safety margin above your actual camera weight.

How much does a robotic camera system cost to hire or buy?

Hiring beats buying for most one-off events and short series, while owning a rig only pays off for broadcasters running daily or weekly studio output over several years. A single PTZ head can be bought outright for a few thousand pounds, but a broadcast-grade robotic arm or cinebot runs into five or six figures, so most UK production companies hire rather than tie up capital.

  • PTZ head day hire: at a cost depending on lens and control panel.
  • Robotic arm or cinebot hire: at a cost including a trained operator.
  • Motorised dolly or rail package: at a cost for hardware and rigging.

Pro Tip: Budget for at least a half-day rigging and calibration slot on top of the show day itself, robotic heads need encoder calibration on site before they’ll return to a saved position reliably.

Firefly AV runs stock across PTZ cameras for dry hire or technician-operated packages, on a two-day hire week structure for short and long-term bookings across the UK.

What safety and operator standards should you expect?

Robotic camera rigs carry real risk around moving mass, overhead rigging, and live cabling, so competent operators and proper documentation are not optional extras.

  • Defined exclusion zones around moving arms and rails during rehearsal and live operation.
  • Load limits confirmed against certified rigging points, never estimated on site.
  • Emergency stop procedures every operator and floor manager understands before doors open.
  • Current insurance, method statements, and risk assessments requested from any hire supplier in advance.

Ask for the operator’s training record and the rig’s last inspection certificate before it arrives on site.

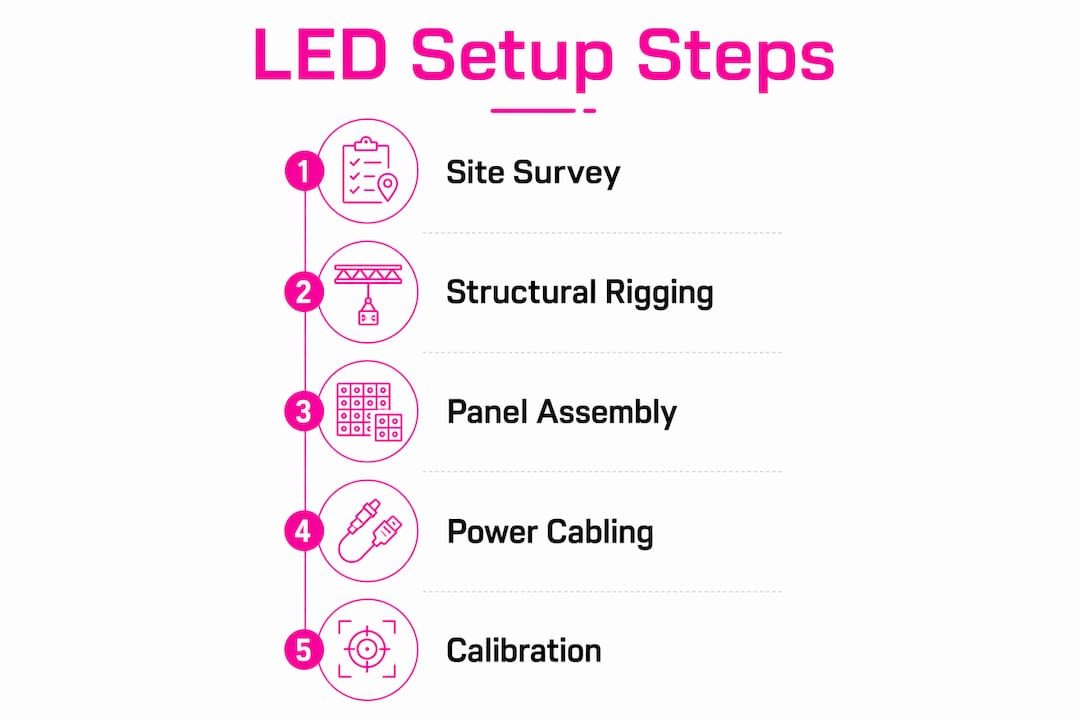
A site survey comes first: cable runs, network capacity, power drops, and rigging points all need confirming before a robotic head goes anywhere near a truss. From there, the sequence is network and IP addressing plan, power distribution check, physical rigging, then interoperability testing with the vision switcher and graphics system before the crew ever touches a live rehearsal.

  • Site survey covering rigging points, power, and network capacity.
  • IP addressing plan agreed with the venue or OB truck engineer ahead of build day.
  • Switcher and graphics interoperability tested during rig, not left until rehearsal.

Pro Tip: Allow a full rigging and test day before any multi-camera robotic shoot, same-day rig and shoot is the most common cause of on-air glitches we see.

Firefly AV, based in Leeds and Preston, also stocks the wider kit that surrounds a robotic camera setup: Absen LED walls, Panasonic projectors, Sennheiser mics, Allen & Heath consoles, DB Technologies speakers, and Lite Deck staging.

How long does installation and setup usually take?

A single PTZ head on a fixed bracket can be rigged, cabled, and calibrated inside two to three hours by an experienced technician, provided power and network points already exist at the mounting position. Add a rail or dolly system and that timeframe stretches to a half day, since track alignment and encoder calibration both need checking before the rig will hit a saved position reliably.

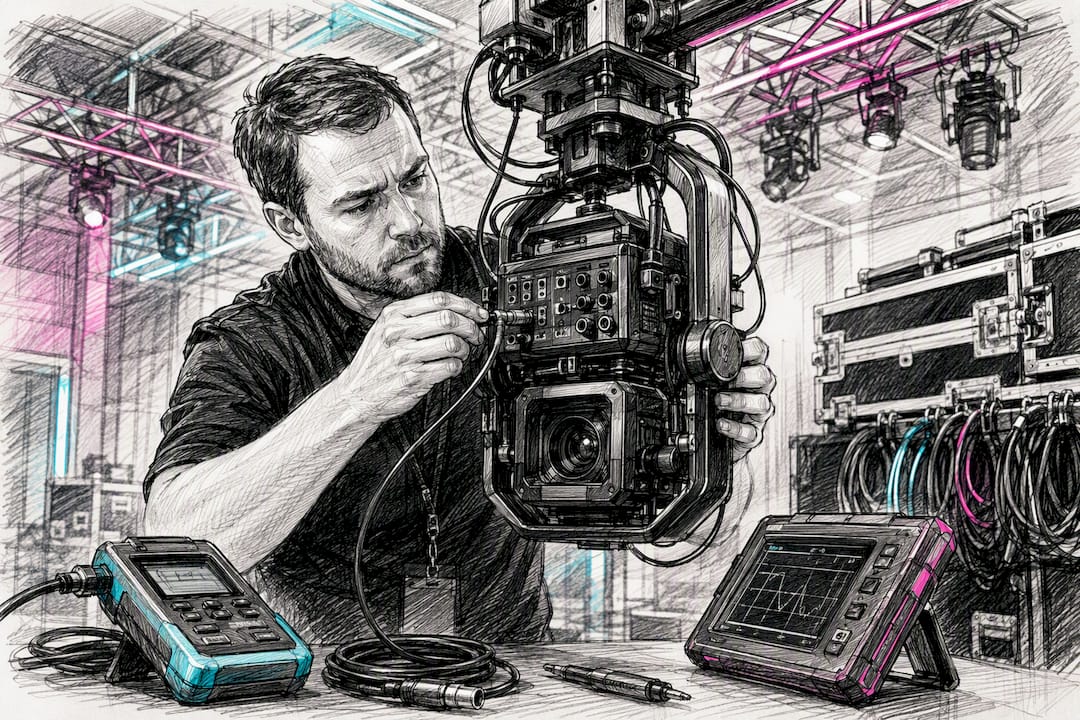
Technician calibrating robotic camera rig cables

Full robotic arm or cinebot installs, especially where AR or virtual production integration is involved, typically need a full rigging day followed by a separate calibration and interoperability test day. That second day matters more than production schedules usually allow for: positional data feeding a graphics engine has to be checked against every planned camera position, not just a couple of test points, or the AR overlay will drift once the shoot starts moving through a real rundown.

Multi-camera studio installs with several robotic heads plus pedestals commonly run three to five days from first cable pull to signed-off rehearsal, including switcher and lighting console integration. OB trucks compress this timeline because much of the control infrastructure is pre-built into the vehicle, but venue rigging, especially in older UK theatres or town halls with limited truss access, can add a day or more versus a purpose-built studio. Booking a realistic install window, rather than assuming a robotic rig behaves like a tripod you can drop in an hour before doors, is one of the most common planning gaps production managers hit on their first robotics-equipped shoot.

What maintenance does a robotic camera system need?

Encoders drift over time, and a rig that hasn’t been recalibrated in months will start missing its saved positions by a noticeable margin, usually before anyone notices until a shot lands wrong on air. Regular calibration checks, ideally before every major shoot rather than on a fixed monthly schedule, catch this before it becomes a live problem.

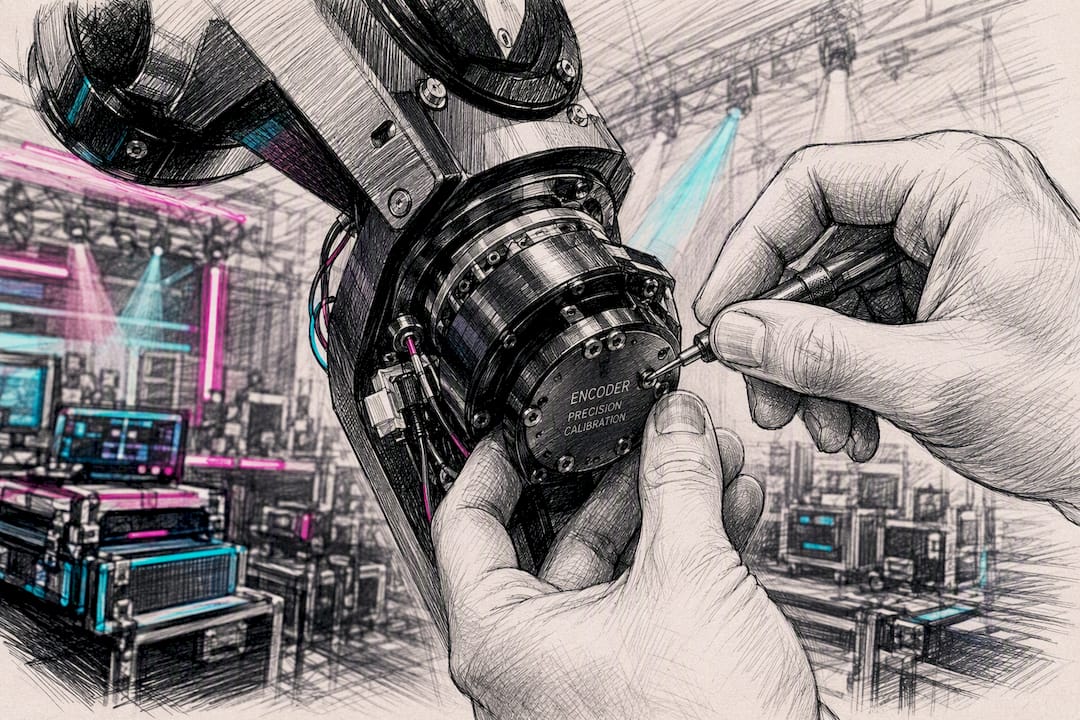
Hands adjusting robotic camera encoder parts

Cabling and connectors take more physical wear on a moving rig than on a static camera, since every move flexes the same cable run repeatedly. Hire suppliers and in-house engineering teams should inspect cable strain relief and connector wear on a rolling basis, particularly on rail and dolly systems where the cable travels the full length of the track on every pass.

Software updates matter just as much as physical maintenance. Control software and firmware on robotic heads get periodic updates from manufacturers addressing everything from encoder accuracy to new integration protocols, and a rig running outdated firmware can lose compatibility with a newer switcher or graphics package mid-project. Reliability, in practice, comes down to three habits: calibrate before every serious shoot, inspect cabling on a fixed schedule rather than waiting for a fault, and keep firmware current rather than treating an update prompt as something to defer.

How do robotic cameras fit existing broadcast workflows?

Robotic camera systems only add value once they’re speaking the same language as the rest of the gallery, which means the vision switcher, lighting console, and graphics engine all need to see the robotic rig as just another input, not a separate system running in parallel. Most modern robotic controllers support standard broadcast integration protocols specifically so they can sit alongside manually operated cameras on the same switcher bank without special workarounds.

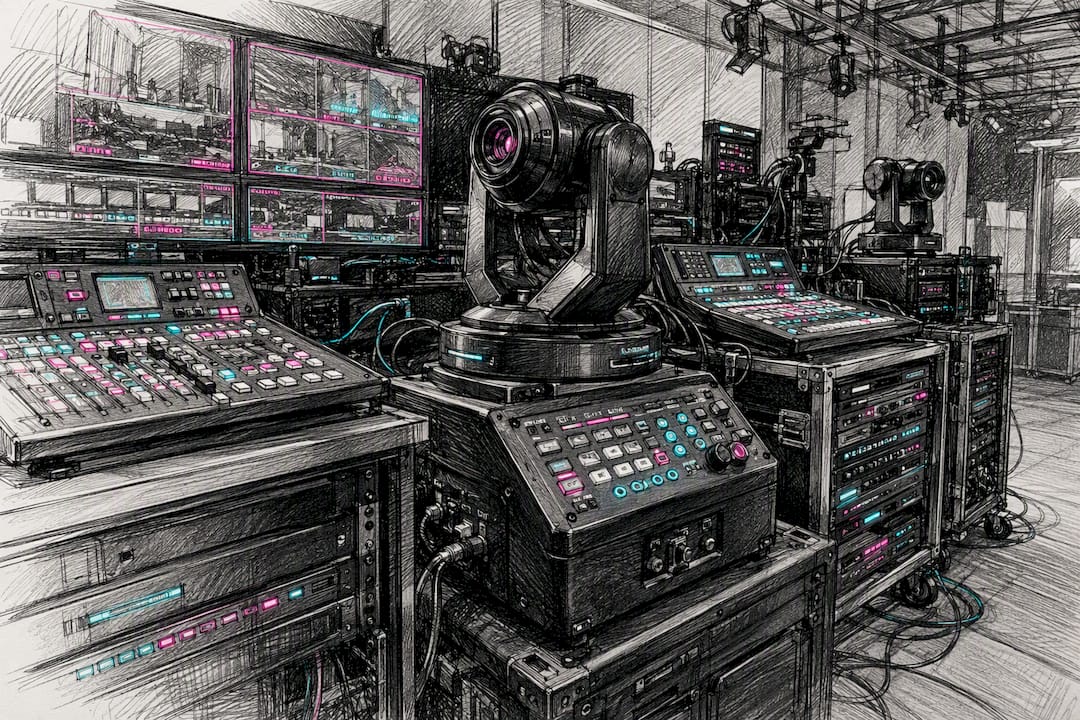
Robotic camera controller in broadcast gallery

The practical test is whether an operator can cut between a robotic shot and a human-operated camera without the audience noticing a difference in framing quality or timing. That depends on the robotic system’s control software talking cleanly to the switcher’s tally and preview system, something worth confirming during a technical rehearsal rather than assuming from a spec sheet. A multiview and SDI setup that already handles several manual camera feeds should be able to add a robotic feed with minimal reconfiguration, provided the robotic controller outputs a standard SDI or IP signal.

Positional data integration is where workflows most often break down. Graphics and AR systems need a continuous, accurate feed of the camera’s exact position, and if that data path isn’t tested against the actual graphics engine in use, on-screen elements will drift out of alignment the moment the camera moves off its calibrated start point. This is precisely why modular robotics and encoded positional data are treated as the enabling technology behind virtual production, not the robotic arm itself.

When should you choose robotics over a conventional camera crew?

Choose robotics when a shot needs to repeat exactly, compositing, product passes, multi-camera studio work with a lean crew, and keep a human operator when the shot depends on reading a live, unscripted moment.

  • Robotics wins: repeatable moves, reduced headcount, positional data for graphics or AR.
  • Human crew wins: fast-breaking live events, improvised framing, unpredictable subjects.
  • Most well-run productions blend both: robotics on fixed, repeatable angles, operators on anything that needs a human eye reading the room in real time.

Get robotic camera systems hired and integrated with Firefly AV

Firefly AV supplies robotic and PTZ camera hire, technician support, and full integration into your gallery or OB setup, from our Leeds and Preston bases, UK-wide.

Firefly AV

A typical package pairs a robotic head or PTZ camera with an operator, control panel, and cabling on a standard two-day hire week, so you’re not paying for kit sitting idle either side of the shoot. We also supply the switchers, multiview screens, and staging that sit around the camera system, meaning one point of contact rather than three separate suppliers to coordinate on show day.

Browse our current AV equipment hire range or read our primer on audio visual equipment for event planners if you’re briefing a supplier for the first time. To get a quote or arrange a site survey for your venue, get in touch and tell us your camera count, venue type, and show dates.

Sources

FAQ

What are robotic cameras?

A robotic camera is a motorised camera or camera head controlled remotely or by programmed moves, letting one operator run several cameras at once rather than needing a dedicated crew member per camera.

How much does a robotic camera system cost?

Day hire for a PTZ head typically runs £80 to £200, while a robotic arm or cinebot with an operator runs roughly £600 to £1,500 or more per day; buying a broadcast-grade system usually costs five to six figures outright.

What are some examples of robotic camera systems?

Examples include Panasonic robotic arms, dollies, and pedestal systems, Ross Video camera motion systems, XD-Motion and ARCAM rail systems, and PTZ units like BirdDog cameras, all commonly stocked or specified by AV suppliers such as Firefly AV for broadcast and event work.

Is robotic surgery good or bad? Does that relate to camera robotics?

Robotic surgery is a separate medical field and isn’t connected to broadcast robotic camera systems; the “robotic” term simply describes automated, precision controlled hardware in both fields, but the applications, risks, and standards are entirely different.

Do I need a specialist operator for a robotic camera rig?

Basic PTZ heads need only short operator briefing, but robotic arms and cinebots feeding AR or graphics systems need a specialist trained on that specific control software and rigging setup.

Can Firefly AV supply an operator alongside the camera hire?

Yes, Firefly AV offers both dry hire and technician-operated robotic and PTZ camera packages from its Leeds and Preston bases, alongside switcher, staging, and lighting kit for the same event.

"


Robotic camera system: what it is and how it works

3/08/2026

Technician adjusting streaming equipment cables

"

Streaming latency is the time between a moment happening in front of a camera and that same moment appearing on a viewer’s screen, measured glass-to-glass. Firefly AV is an AV hire and event production company based in Leeds and Preston, working across the UK on live streams for conferences, awards nights and eSports events, and latency is one of the first numbers we agree with a client before any kit goes on a truck.

Four things add most of the delay:

  • Capture and encoding at the camera or switcher
  • Chunking and packaging into segments for delivery
  • Transit across the CDN to the viewer’s region
  • Buffering inside the viewer’s player

Typical figures range from under a second for interactive formats to multiple seconds for standard broadcast-style delivery. The rest of this piece works through the categories, where each second gets added, which protocols change the outcome, and what to actually do about it on site.

Key Takeaways

Streaming latency is determined by the weakest stage in the capture-to-player chain, and fixing a numeric budget before an event beats chasing the lowest possible figure afterwards.

Point Details
Define your category first Match your target to ultra-low (under 1s), low live (2 to 8s) or non-low live before choosing kit.
Protocol sets the floor WebRTC enables sub-second delivery; LL-HLS and LL-DASH typically reach 2 to 5 seconds at scale.
Wired ingest reduces risk Venue Wi-Fi is the most common source of unexpected lag, even with correctly configured upstream kit.
Buffer size is a trade-off Smaller player buffers cut latency but raise rebuffer risk on congested networks.
Firefly AV builds to your budget Firefly AV configures ingest, encoding and CDN delivery around an agreed latency target for UK events.

Table of Contents

What is streaming latency in technical terms?

Engineers call the full measurement “glass-to-glass” latency: the delay from the camera lens (the glass) to the viewer’s screen (also glass). It’s distinct from network latency, which only measures how long a data packet takes to travel between two points, and from protocol latency, which is the delay a specific transport method like RTMP or SRT adds on its own. Glass-to-glass is the number that actually matters to a viewer watching a goal go in three seconds after the crowd noise on Twitter.

The full chain runs: camera → encoder → ingest → packager → CDN → player. Each stage adds its own delay, and they stack.

  • Capture and encode: converting raw video into a compressed stream
  • Ingest: getting that stream to your provider’s servers
  • Packaging: chopping it into segments or chunks for delivery
  • CDN distribution: pushing those segments to edge servers near viewers
  • Player buffer: the viewer’s device holding a few seconds in reserve to smooth out network hiccups

Measuring it properly means either syncing timestamps across the chain or, more practically, pointing a camera at a stopwatch, streaming that image, and comparing the time on screen with the time in the player. Clock synchronisation across separate devices is notoriously fiddly, which is why the visual timer method remains the field standard even with NTP or PTP available.

What counts as low latency versus ultra-low latency?

The industry splits latency into bands rather than treating it as one sliding number, and RFC 9317 sets out the categories most vendors now use: ultra-low latency at under one second, low-latency live under ten seconds, non-low live from ten seconds to a few minutes, and on-demand content measured in hours.

Statistic snapshot: WebRTC-based delivery typically holds under one second. LL-HLS and LL-DASH commonly reach 2 to 5 seconds at scale, while conventional HLS or DASH without low-latency extensions often result in significantly higher latency. Traditional broadcast delay, the reason terrestrial TV often lags a phone stream by 30 seconds or more, comes from a combination of large buffers and multi-hop satellite or fibre distribution chosen for reliability over speed.

None of these numbers is free. Shorter segments and smaller buffers cut latency but raise the risk of stuttering the moment a Wi-Fi connection wobbles, and they usually cost more in CDN and engineering complexity to run reliably. A CDN Alliance Low-Latency Working Group whitepaper notes the term “low latency” gets used loosely across the industry, which is exactly why picking a numeric target matters more than picking a label.

Where does latency actually get added in the pipeline?

Every stage in the chain contributes something, and knowing the rough split tells you where to spend your engineering budget.

  • Camera and production switcher: minimal on its own, but adds up with multi-camera mixing
  • Encoder: shaped heavily by GOP length, B-frames and preset choice
  • Contribution transport: the link carrying your feed to the ingest point
  • Packager: how segments and manifests get built
  • Origin and CDN: distribution to viewers, often the largest variable
  • Player buffer: the viewer-side safety margin against jitter

Encoder settings matter more than most organisers expect. A long GOP (group of pictures) and heavy use of B-frames improve compression efficiency but force the encoder to hold frames back before output, adding real delay. Shorter segments and chunked CMAF delivery cut that segment-duration lag, though at the cost of more frequent manifest updates and higher overhead on the CDN side.

Network variability is often the bigger villain. Jitter, packet loss and bufferbloat on congested Wi-Fi can undo a perfectly tuned encoder chain in seconds, and venue network conditions are a common root cause that upstream configuration can’t fix.

Network rack with wires and Wi-Fi router

Pro Tip: Prioritise wired primary ingest wherever the venue allows it, and keep your contribution link geographically close to your ingest point. A hotel’s guest Wi-Fi thirty metres from the access point is not a contribution network.

Which protocols and formats affect streaming delay?

Your choice of transport protocol sets a hard floor on how low you can push latency, regardless of how well everything else is tuned.

WebRTC delivers sub-second latency and suits small, highly interactive audiences, but it doesn’t scale to large crowds without significant infrastructure. SRT is built for reliable contribution over unpredictable networks, commonly used to get a feed from venue to ingest point rather than to viewers directly. LL-HLS and LL-DASH extend the standard HTTP-based formats with shorter chunks and partial segment delivery, landing most implementations in the 2 to 5 second range at scale. Standard HLS and DASH, still the workhorses for on-demand and non-interactive live content, sit at 15 to 30 seconds unless specifically tuned. CMAF (Common Media Application Format) underpins most low-latency HLS and DASH deployments by allowing chunked transfer encoding rather than waiting for a full segment to complete.

CDN behaviour matters as much as the protocol itself; understanding a global CDN for performance and security is key when selecting infrastructure for low-latency events. A CDN with poor origin push support will bottleneck even a well-configured LL-HLS stream, so ask any provider specifically how they handle low-latency chunk delivery before committing.

Approach Target latency Suitable use cases Cost and complexity Quality trade-offs
WebRTC Under 1 second Interactive chat, auctions, remote control High complexity, limited scale Lower ABR flexibility, resolution capped for stability
LL-HLS / LL-DASH 2 to 5 seconds Live sport, awards shows, corporate broadcast Moderate, needs tuned CDN Good ABR flexibility, minor rebuffer risk
Standard HLS / DASH 15 to 30 seconds Conferences, webinars, VOD Low complexity, widely supported Best ABR range, highest reliability

Diagram comparing streaming protocols and latency

Which events actually need low latency?

Not every stream needs to chase the lowest possible number, and treating latency as always-minimise wastes budget on events where nobody notices an extra five seconds.

  • Ultra-low or WebRTC territory: remote auctions, betting platforms, interactive gaming, remote equipment control
  • Low live, roughly 2 to 8 seconds: live sport broadcasts, awards ceremonies, live Q&A sessions where social media runs alongside the stream
  • Non-low live or VOD: conference keynotes, lectures, panel discussions, most on-demand content

Miss the target and the consequences are specific to the format. A betting platform running ten seconds behind live odds creates a real financial exposure. A sports broadcast running behind social media spoils the result before it airs. A conference keynote running eight seconds behind, by contrast, is invisible to almost everyone watching.

How do you reduce streaming latency in practice?

Start by setting a latency budget before you touch any settings, then allocate that budget across camera, encoder, transport, packager, CDN and player. Chasing a number without a plan for where it comes from is how teams end up over-engineering the wrong stage.

  • Choose your protocol deliberately: SRT or WHIP for contribution, WebRTC only for small interactive audiences, LL-HLS or LL-DASH for wider distribution
  • Shorten segments and chunks, targeting partial segments around 500 milliseconds where your packager supports it
  • Tune the encoder: disable B-frames, use a short GOP of around one second
  • Use wired ingest wherever the venue allows it
  • Choose a CDN edge close to your audience, or run multi-CDN for large or geographically spread audiences
  • Tune player buffer and ABR (adaptive bitrate) ladder settings rather than leaving platform defaults in place
  • Test at realistic scale before the event, not just on a desk in the office

Instrumented testing catches problems a checklist alone won’t. Run a local loopback test timing encoder output alone, then a full remote glass-to-glass test with timestamp overlay, then check CDN edge response separately from the player. Industry guidance consistently points to fixing a latency budget up front; teams that skip this step tend to drift toward much higher latency than they intended without noticing where it crept in.

Configuration lever Typical setting Latency headroom gained
GOP length 1 second, no B-frames Reduces encoder buffering delay
Segment/chunk size 500ms partial segments Cuts packaging delay significantly
Player buffer Tuned to venue network, not default Balances latency against rebuffer risk
Ingest connection Wired, not Wi-Fi Removes most jitter-related spikes

Pro Tip: For most UK corporate venues, don’t chase sub-second delivery if the format doesn’t demand it. A well-tuned 3 to 8 second target using LL-HLS is far more reliable on typical exhibition hall Wi-Fi than pushing for WebRTC and finding out on the day that the venue network can’t sustain it.

How do you measure and diagnose latency problems?

The visual timer method remains the most practical: point a camera at an on-screen stopwatch, stream it through your full production chain, and compare the time shown in the shot with the time shown in the player. It sidesteps the clock synchronisation headaches that NTP or PTP-based timestamp methods introduce across separate devices.

Work through the chain in stages rather than testing end to end and guessing:

  • Measure encoder output time alone, isolating capture and compression
  • Measure transit time from contribution device to ingest point
  • Measure packager-to-edge time across your CDN
  • Measure player decode and buffer time on the viewer’s device

Tools like ffmpeg timestamp logging, packet captures at each network hop, and simple on-screen timers each isolate a different stage, so run them in sequence rather than all at once.

Pro Tip: Always test from the actual venue network, not the office. Exhibition halls and corporate Wi-Fi behave nothing like a wired studio connection, and player buffering is frequently the largest single contributor to total latency once you’re on a congested network.

What kit and rates does Firefly AV use for low-latency streams?

Firefly AV runs live streaming and hybrid production from bases in Leeds and Preston, working UK-wide on conferences, awards nights, exhibitions and eSports events where latency targets get written into the brief before the first camera is rigged.

For contribution and switching, we use the Vmix 4K media server alongside Blackmagic Web Presenter units for encode and format conversion. Vision runs on Absen LED wall panels and Panasonic projectors, audio on Sennheiser microphones through Allen & Heath consoles and out via DB Technologies speakers, with Birddog cameras handling NDI-based multi-camera capture. Staging uses Lite Deck systems for quick rigging in venues with tight load-in windows.

LED wall and broadcast camera setup at event venue

Indicative day rates, as a planning guide rather than a quote: technician day rates typically run £250 to £450, OB encoder packages from £350 to £1,200 depending on redundancy and channel count, and LED wall hire from £700 to £2,500 a day depending on panel size and resolution.

Pro Tip: Build in a cellular SRT backup alongside wired primary ingest for any UK venue where the building’s fixed connection is unproven. It’s cheap insurance against a single point of failure taking your stream down mid-event.

What should organisers prioritise when latency matters?

Chasing the lowest possible number is the wrong first question. Set a realistic latency budget, then build failover around it, because a stream that stays up at 6 seconds beats one that drops entirely trying to hold 1 second.

Insist on wired ingest, on-site control over encoder settings, and a CDN edge close to your audience. Put latency targets and reliability expectations into supplier contracts as SLAs, not verbal assumptions. For most UK corporate events, a 3 to 8 second target strikes the right balance between viewer experience and a stream that survives an unpredictable exhibition hall network.

How Firefly AV helps you hit your latency target

Firefly AV is the practical route to a low-latency stream when you’d rather not assemble contribution engineering, encoder tuning and CDN coordination yourself from scratch. We handle ingest engineering, encoder packages, LL-HLS and LL-DASH packaging, multi-CDN coordination where an audience is spread across regions, and on-site technicians who can adjust settings live rather than leaving you locked into whatever was configured the day before.

Firefly AV

If you’re planning a stream where the delay matters, whether that’s a live auction, an awards ceremony or a hybrid conference with a remote audience watching alongside the room, start with our audio visual equipment explained for event planners guide to see what a properly specified setup looks like, then get in touch through our equipment hire page to request a quote against your latency budget and venue.

Sources

For deeper technical detail, consult RFC 9317 for formal latency category definitions, the CDN Alliance Low-Latency Working Group whitepaper for terminology and standardisation efforts, Mux’s low-latency guide for implementation benchmarks, and YouTube’s live latency help page for consumer-facing streamer settings. Always check your specific packager and CDN documentation before implementing LL-HLS or LL-DASH, since defaults vary considerably between providers.

FAQ

What is a good latency for streaming?

For interactive formats, under 1 second via WebRTC is the benchmark; for most live broadcast and corporate events, 2 to 8 seconds using LL-HLS or LL-DASH balances viewer experience against reliability.

How do I fix latency when streaming?

Start by fixing a latency budget, then work through wired ingest, shorter encoder GOP settings, smaller chunk sizes, a nearby CDN edge and tuned player buffer settings, testing each stage separately rather than guessing at the whole chain.

Is 40 milliseconds of latency bad?

No. Forty milliseconds is well within network latency territory, not glass-to-glass streaming latency, and is imperceptible for almost any live video application.

Why is there a 30 second delay on live TV?

Traditional broadcast delay comes from large buffers and multi-hop distribution chains, often satellite or fibre relays, chosen to prioritise reliability and smooth playback over speed, unlike low-latency internet streaming protocols.

Can Firefly AV help reduce latency for my event?

Yes. Firefly AV configures ingest, encoding and CDN delivery for UK conferences, awards nights and hybrid events, setting a latency target with the client before choosing kit and protocol.

"


Streaming latency: what it is and why it matters

3/08/2026

Followspot operator adjusting live stage light

"

A followspot operator is the technician who manually steers a powerful stage light to track a performer, keeping their face lit as they move across a stage, arena or set. It’s a hands-on, judgement-heavy job that sits apart from the automated lighting rig around it. Firefly AV is an AV hire and event production company based in Leeds and Preston, working across the UK, and we supply both the equipment and the crew who run it, including followspot operators for theatre, corporate and broadcast work.

The role is well documented in the industry. Wikipedia’s entry on the job describes a technician who pans, resizes and recolours the beam in real time, and the UK national occupational standard for operating a follow spot sets out exactly what competence looks like, from plotting cues to logging faults. Recruitment packs from working theatres, including one from the Regent’s Park Open Air Theatre, spell out the daily reality of the job in plain terms.

Key Takeaways

A followspot operator manually tracks and lights performers using pan, iris, focus and colour controls, guided by a rehearsed cue sheet and headset communication with the lighting desk.

Point Details
Core definition A followspot operator manually pans, resizes and recolours a beam to keep performers lit throughout a live show.
Cue sheets are essential Comprehensive cue sheets let another technician cover the show if the regular operator is unavailable.
Face-first tracking Experienced operators prioritise keeping the performer’s face lit over tracking limbs during fast movement.
Training route The UK national occupational standard for operating a follow spot is the recognised competence benchmark.
Firefly AV staffing Firefly AV supplies crewed followspot operators and full lighting crews for events across the UK, from Leeds and Preston outward.

Table of Contents

What does a followspot operator do during rehearsals and live shows?

The job splits neatly into two phases. During rehearsals, the operator watches blocking, notes where performers move, and works with the lighting designer to plot cues against the script or score. During the run itself, that plotting has to become second nature, executed under time pressure with no room for guesswork.

Typical duties include:

  • Tracking performers smoothly across the stage without jerky corrections
  • Executing cues called by the lighting designer or stage manager, often over headset
  • Writing and maintaining a cue sheet that records every colour, size and fade change
  • Running pre-show checks on lamp, focus and headset function
  • Making live adjustments when blocking shifts slightly night to night

A cue sheet entry might read something like “Cue 12: open to half-head, gel frame 2, 0.2s fade” — short, precise, and useless to anyone who hasn’t rehearsed it. That’s why comprehensive cue sheets are treated as mandatory professional practice: if the regular operator is off sick, someone else needs to run the show from paper alone.

Most cues are called live by the desk or stage management, but some productions hand the operator autonomy to interpret movement rather than wait for a call. Nederlander’s job description for the role makes clear that maintenance and record keeping sit alongside the on-stage work, not as an afterthought. Expect evening and weekend shifts as standard. Recruitment packs for touring and repertory theatre routinely list unsociable hours because that’s when the audience is in the seats.

How does a followspot work? Controls, kit and setup

A followspot isn’t just a bright bulb pointed at a person. The operator controls several things at once: pan and tilt to follow movement, an iris or shutter to change beam size, focus to keep the edge crisp at varying distances, intensity to dim smoothly between cues, and a colour magazine or gel frame to shift the mood instantly. Doing all of this without looking jerky or hesitant is the actual skill.

Kit is usually rigged in a followspot gallery, catwalk or a rear-of-house position with a clear sightline to the stage. Common setups include:

  • Xenon or LED-source followspots, chosen for output and colour consistency
  • Gel frames or internal colour magazines for quick colour changes
  • Iris and shutter mechanisms built into the housing
  • A stable platform or tripod mount, often at height

Pro Tip: Check the drag setting before the show, not during it. Over-tightening horizontal or vertical drag makes your movement jerky and obvious to the audience — you want just enough resistance for smooth, controlled tracking, not a stiff fight with the fixture. Some experienced operators also use a reflector sight, such as a Telrad, to map beam-ring sizes to fixed stage reference points, which keeps sizing consistent even at long throw distances. If you’re hiring gear alongside crew, our Stage Light 1 page gives a sense of the kind of stage lighting fixtures we supply as part of a wider rig.

What skills and training do followspot operators need?

Nobody walks into a followspot gallery and nails it on the first cue. It takes coordination, patience and a decent memory for a full running order.

The core skills worth building are:

  • Hand and eye coordination for smooth, continuous tracking
  • Sustained concentration across a two or three hour show
  • Comfort working at height, often on a narrow gallery or catwalk
  • Clear headset communication under time pressure
  • Cue notation and basic fault logging
  • Basic maintenance: lamp changes, lens cleaning

Most operators start through amateur dramatics, school or college technical theatre courses, or casual crew shifts at local venues before moving into paid work. The UK occupational standard for operating a follow spot is the benchmark worth referencing on a CV or job advert, since it defines competence in terms employers actually recognise. Bringing a sample cue sheet to an interview is one of the more effective ways to prove you understand the job rather than just describing it.

Rates vary by venue and experience. Day rates for freelance followspot operators in the UK typically sit in a broad band depending on production scale, union agreement and location, with West End and major touring shows at the top end and fringe or amateur venues considerably lower. Bodies like BECTU publish guidance rates for technical crew, and it’s worth checking current figures directly rather than relying on anecdote when quoting a job.

Health, safety and maintenance: what operators check

Most of a followspot operator’s safety responsibility comes down to routine, boring checks done consistently, not dramatic intervention. A pre-show walk-through should cover:

  • Lamp condition and expected working life for the run
  • Lens and optics free of dust or smudging
  • Power isolation confirmed before any bulb change
  • Rig security, mounting bolts and gallery railings
  • Headset function tested with the desk
  • Spare bulbs and fuses on hand

Working at height is part of the job description, whether that’s a catwalk, a rear gallery or a temporary tower rig, and the UK national occupational standard explicitly requires operators to follow safe backup procedures if something fails mid-show. Always isolate power before touching a lamp or fitting, and follow the venue’s own health and safety protocol rather than assuming your usual routine applies. If a lamp fails during a run, the priority is a fallback cue (often a static wash from house lighting) and an immediate flag to the lighting desk, not an attempt to fix it live.

How do you start operating a followspot well?

Getting good at this job is mostly about repetition under low stakes before you’re trusted with high ones.

  1. Watch a few rehearsals from the gallery before touching the controls
  2. Practise pan, tilt and iris movements with no performer present
  3. Learn standard cue notation so you can read someone else’s sheet
  4. Shadow an experienced operator through a full run
  5. Build your own cue sheet from scratch and get it checked

The most common beginner mistakes are over-tightening drag controls, chasing a moving limb instead of anchoring on the performer’s face, and scrappy note-taking that nobody else could follow. Practitioner accounts of the job consistently flag physical endurance as underestimated too; a three-hour show is a long time to hold a steady stance.

Pro Tip: Use a reflector sight during practice sessions and mark fixed reference points from your gallery position, wing lines, centre stage, key furniture marks, so your sizing stays consistent even when you can’t see the whole picture clearly. Keep your cue sheet legible enough that a colleague could pick it up cold and run the show.

Firefly AV perspective: how we staff and brief followspot operators

We hire and brief followspot operators for events across Leeds, Preston and further afield, and the checks stay consistent whatever the venue. Before doors, our crew run a kit checklist, hold a pre-show brief with the lighting designer, and confirm spare bulbs and headset comms are live. Followspot work rarely happens in isolation; it sits alongside the wider rig we supply, including Absen LED wall, Panasonic projectors, Sennheiser mics, Allen & Heath consoles, DB Technologies speakers and Lite Deck staging, all managed as one coordinated production rather than separate boxes ticked off a list.

Technician prepping followspot light backstage

Need a followspot operator or lighting crew for your event?

If you’re planning an awards night, conference or festival stage and need someone to run a followspot properly, that’s a crewing decision, not just an equipment order. Firefly AV supplies crewed followspot operation, full lighting crews, equipment hire and technical management for corporate and cultural events across the UK, working in conference centres, theatres, festival sites and awards venues.

Firefly AV

Pricing runs on day rates or full production quotes depending on scope, so a single-night awards ceremony and a multi-day festival get priced differently rather than forced into one template. If you already know roughly what kit and crew you need, our equipment hire pages show what’s available to book alongside technicians. If you’re still working out the brief, our guide to AV equipment for event planners is a useful starting point before you get in touch to talk through dates and staffing.

Sources

FAQ

What is a follow spot used for?

A follow spot is used to isolate and highlight a specific performer or object on stage, keeping the audience’s eye on them as they move, independent of the general stage wash.

What is the difference between a spotlight and a followspot?

A spotlight is often a fixed or static fixture, while a followspot is specifically designed and operated to track a moving subject continuously throughout a scene, with an operator adjusting pan, size and colour live.

How do you operate a followspot?

You track the performer with smooth pan and tilt movements, adjust iris and focus to control beam size and sharpness, and execute colour and intensity changes on cue, all while keeping the face illuminated as the priority.

Hands adjusting followspot lighting controls

How does a spotlight work?

A followspot works by projecting a controlled beam of light through an iris and lens system, with the operator manually adjusting direction, size, colour and intensity in real time to match the action on stage.

What qualifications do you need to become a followspot operator?

There’s no single mandatory qualification, but many operators build competence through amateur dramatics, college technical theatre courses or casual crew shifts, with the UK occupational standard serving as the recognised benchmark for employers.

Does Firefly AV supply followspot operators for events?

Yes. Firefly AV supplies crewed followspot operators alongside full lighting crews and equipment hire for corporate, cultural and awards events across the UK, working from bases in Leeds and Preston.

"


What is a followspot operator on a live show?

2/08/2026
Rear projection screen illuminated from behind at event

"

A rear projection screen is a semi-translucent surface that shows an image projected from behind it, so the audience views transmitted light rather than reflected light. Planners choose it when they want a clean stage with no shadows cast by presenters walking in front of the image and no projector visible in the room. Firefly AV is an AV hire and event production company based in Leeds and Preston, working across the UK. We install and hire the kit behind these setups: Panasonic projectors, Absen LED wall, Sennheiser mics, Allen & Heath consoles, DB Technologies speakers, Birddog cameras and Lite Deck staging.

A rear projection screen transmits light through a diffusion material instead of bouncing it off a reflective surface, which is why the projector sits behind the screen rather than in front of it.

  • Ideal for stages where you need a shadow-free image and concealed hardware
  • Common in awards ceremonies, museum exhibits and broadcast studios
  • Requires more depth behind the screen than most venues assume

The sections below cover how the technology works, the space and lumen checks you need to run, typical UK hire costs, and how to decide between rear projection, front projection and LED.

Key Takeaways

Rear projection works by transmitting light through a diffusion screen rather than reflecting it, trading extra rear space and higher lumen requirements for a shadow-free, gear-concealed stage.

Point Details
Core definition A rear projection screen transmits light from a projector behind it, unlike front projection, which reflects light off the surface.
Space is the deciding factor You need enough depth behind the screen for your lens’s throw distance, or a mirror relay system to compress it.
Brightness needs rise Rear-projection setups typically need higher-lumen projectors than equivalent front-projection rigs to offset light lost in transmittance.
Viewing angle limits seating Higher-gain materials brighten the image but narrow the viewing cone, so check your seating plan against it.
Firefly AV supports the full build Firefly AV, based in Leeds and Preston, runs site surveys, supplies Panasonic projectors and screen packages, and provides technicians for test installs across the UK.

Table of Contents

How rear projection works

Rear projection transmits light through a diffusion material rather than reflecting it off a coated surface, which is the entire reason the audience sees a clean image with no shadows. The technique is often called back projection, and it depends on a handful of components working together correctly:

  • A projector positioned behind the screen, usually on a short or long-throw lens
  • A rear-projection screen material with a known gain and transmittance rating
  • A mounting frame or cabinet that holds the material taut and flat
  • Power, cabling and ventilation for the enclosed space behind the screen

In simple terms: the projector fires light through the material, the material diffuses it, and the audience on the front side reads the transmitted image within a defined viewing cone. Picture it as audience, then screen, then projector, all on a single axis, with the projector’s throw distance determining how much depth you need behind the screen.

  1. Confirm throw distance and throw ratio for the lens you plan to use
  2. Match projector lumens to the screen’s transmittance rating
  3. Check the viewing cone covers your seating plan without hotspotting

You will hear terms like ALR (ambient light rejecting), hotspotting and diffusion used interchangeably by suppliers, so it is worth asking exactly which spec they mean before booking.

What types of rear-projection screen material are there?

Screen material choice depends on your content, your projector’s brightness and how much control you have over ambient light. Grey rear-projection vinyl is common where you need higher contrast under some ambient light, while white diffusion screens suit darker rooms and give a brighter, more neutral image. Dual-surface exchangeable screens let you switch between front and rear projection panels on the same frame, and switchable or translucent film can turn a glass panel transparent or opaque on demand, which retail and exhibition designers use for reveal effects.

Close-up of various rear-projection screen materials

UK suppliers worth knowing as examples include the Stage Depot grey rear projection screen and Pro Display’s rear-projection materials, both cited regularly in UK AV specification documents. Neither is an endorsement, simply a marker of what is commonly available in this market. Standard front-projection surfaces will not work for rear use; the material has to be built specifically for transmission.

Builds range from framed permanent screens to fast-fold portable frames and fully cabinetled rear-projection enclosures for touring shows.

Pro Tip: Match screen gain to your content type. Video and motion graphics tolerate lower-gain, wider-viewing-angle material, but dense text or fine graphics benefit from a higher-gain surface and a brighter projector to keep edges crisp.

Is rear projection better than front projection?

Neither wins outright. It depends on your venue, your budget and how much you value a shadow-free stage against how much depth you actually have behind the screen.

Factor Rear projection Front projection
Space/throw distance Needs depth behind the screen Needs clear sightline in front
Brightness (lumens) Higher lumens usually needed, light lost through diffusion Lower lumens often sufficient
Viewing angle Narrower viewing cone Wider audience spread possible
Cost (hire vs buy) Higher, especially with mirror relays Generally lower for standard setups
Aesthetics No shadows, gear concealed Presenter shadows possible, rig visible

Rear projection removes on-stage shadows, keeps rigging and cabling out of sight, and gives technicians a working back-of-house zone, reflecting conference room technology trends that prioritise clean stage appearances. The trade-offs are real: brightness loss through the diffusion material, the need for rear space you might not have, and a narrower viewing cone than front projection allows.

If your venue has the depth and you want a polished, gear-free look, rear projection tends to win. If space is tight or your audience spreads wide, front projection or an LED wall usually makes more sense.

What should you check before specifying rear projection?

Run these checks before you commit a venue to a rear-projection build, because the wrong answer on any one of them can force a redesign on-site.

  1. Measure the depth behind the screen. You need enough throw distance for your lens, plus access space for technicians.
  2. Check access routes. Can you get a projector, cabling and a technician behind the screen without disrupting the room during the event?
  3. Assess ventilation and noise. Enclosed rear-projection cabinets trap heat and projector fan noise; plan cooling accordingly.
  4. Confirm sightlines and seating rake. Every seat needs to sit inside the screen’s viewing cone, or the image will look dim or discoloured from the sides.
  5. Estimate lumens for ambient light. As a rule of thumb, budget for more lumens than an equivalent front-projection setup to compensate for light lost through the material, and scale up further for a brightly lit conference hall versus a blacked-out theatre.

A worked example: a 3.7m by 2.7m screen in a mid-sized conference hall, similar in scale to a 12 foot by 9 foot FastFold projector screen, typically needs a short-throw lens if your rear space is limited, paired with a projector in the higher-lumen band to punch through ambient room lighting and screen transmittance loss together.

Pro Tip: If your rear space is too shallow for the throw distance you need, ask about a mirror relay system. It folds the light path using a mirror, which shortens the physical depth required, but it adds cost, alignment complexity and usually justifies a technical site visit before you book anything.

Where does rear projection actually get used?

Rear projection suits awards nights, theatre backdrops, museum exhibits, retail window displays, broadcast studios and immersive exhibition spaces, anywhere a clean, shadow-free image matters more than raw viewing angle. It is a poor fit for small rooms with no rear access and for wide, shallow rooms where the audience spreads beyond the viewing cone. Noise-sensitive spaces, such as broadcast sets or recording sessions, also benefit from having the projector’s fan noise sealed away behind the screen.

Rear projection screen in a museum exhibition environment

What does rear projection cost to hire in the UK?

Hiring a rear-projection package makes sense for a single event; buying only pays off if you are running the same setup repeatedly, because a permanent installation carries ongoing maintenance and storage costs a one-off hire avoids.

A typical UK hire package bundling a rear-projection screen, short-throw projector, lens, cabling and a technician for setup and breakdown usually sits in the low hundreds of pounds per day for a standard conference-sized screen, rising well beyond that for bespoke materials, mirror relay systems or high-lumen projectors on larger stages. Costs climb further with permanent framing, site works, or where a supplier has to run a full technical survey before quoting.

Ask your AV supplier for:

  • A site survey to confirm throw distance and rear-space depth
  • A lens test against your actual screen size, not a generic spec sheet
  • Confirmation of blackout or ambient-light requirements for the room

How does Firefly AV handle rear-projection installs?

Firefly AV is based in Leeds and Preston and works UK-wide, supplying Panasonic projectors, Absen LED wall, Sennheiser mics, Allen & Heath consoles, DB Technologies speakers, Birddog cameras and Lite Deck staging for events that need rear projection alongside full production support.

Our process runs through a site survey, throw-distance calculation, lens selection, screen material selection, a test install and final tuning before doors open, catching hotspotting and lumen mismatches before your event, not during it.

Getting the lumen band and lens right on paper means nothing until you have tested it against the actual screen material in the actual room.

Maintenance and specs: gain, transmittance and viewing angles

Three specs decide how a rear-projection screen will actually perform: gain, transmittance and viewing angle. Gain measures how much a screen amplifies or diffuses incoming light relative to a standard reference surface. A higher-gain rear-projection material throws a brighter image but usually narrows the viewing cone, so people seated at sharp angles see a dimmer or discoloured picture. Transmittance describes what percentage of the projector’s light actually passes through the material to reach the audience; the rest is absorbed or scattered within the screen itself, which is why rear-projection setups generally need brighter projectors than an equivalent front-projection rig.

Viewing angle, sometimes called the viewing cone, defines the horizontal and vertical range within which the image looks correctly lit and coloured. A narrow viewing angle is fine for a lectern-facing conference room but wrong for a wide banqueting layout where guests sit far to either side of centre.

On maintenance, rear-projection material is generally low-upkeep: keep the surface free of dust and fingerprints, avoid folding fast-fold fabric screens tightly during storage, and check tensioning on framed screens periodically, since a slack surface introduces visible ripples that distort the image. Cabinets and enclosures need occasional checks on ventilation fans, since trapped heat shortens projector lamp life and can trigger thermal shutdowns mid-event.

Choosing rear projection for your specific venue

Three factors decide the call more than any spec sheet: space, ambient light and audience size. Space is the hard constraint. If you cannot find the depth for your lens’s throw distance, rear projection is off the table unless you introduce a mirror relay system, which adds cost and complexity. Ambient light matters because rear-projection screens generally need more lumens to punch through a lit room than front-projection ALR (ambient light rejecting) surfaces designed for exactly that problem.

Audience size and layout decide whether the viewing cone works for you. A lectern-style room with a narrow, forward-facing seating block suits rear projection well. A wide banqueting layout with tables spread far to either side will push viewers outside the viewing angle, producing a dim or washed-out image for anyone sitting off-axis.

As a working rule: choose rear projection when you have the rear depth, a controllable ambient light level, and a seating plan concentrated within a reasonable viewing angle. Choose front projection or an LED video wall when floor space is tight, the room stays bright throughout, or your audience spreads wider than a rear screen’s viewing cone comfortably covers.

Which projectors and brightness levels suit UK events?

Short-throw and ultra-short-throw projectors dominate rear-projection setups in UK venues because they minimise the depth needed behind the screen, a genuine constraint in most conference hotels, hired halls and temporary exhibition stands. Standard-throw lenses still have a place in permanent installations, such as museum displays and broadcast sets, where the rear space is built into the room from the start.

Brightness requirements scale with room size and ambient light. A small meeting room with blackout curtains can run comfortably on a mid-range lumen projector, while a daylight-lit exhibition hall or a large conference plenary needs a projector well up the lumen scale to compensate for both ambient light and the light lost through the screen’s transmittance. Products such as the Panasonic PT-VMZ50 sit in the brightness band commonly specified for mid-to-large UK conference and event spaces.

The practical takeaway for planners: never specify a projector purely on the screen size. Always factor in ambient light, screen transmittance and viewing distance together, and get your supplier to confirm the lumen figure against your actual room, not a generic recommendation.

When we would actually recommend it

We lean towards rear projection for high-end events where concealed gear and a quiet, shadow-free stage matter, museum displays, and any room where you genuinely have the depth to spare. For tight spaces, wide audiences or tighter budgets, front projection or an LED wall usually wins on cost and flexibility. It always comes down to trading space against aesthetics against budget, in that order.

Book a survey with Firefly AV

If a rear-projection build looks right for your event but you are not sure your venue has the depth for it, that is exactly what a site survey is for. Firefly AV runs site surveys, supplies hire packages either as kit alone or kit plus technicians, and handles test installs and on-event technical support so the lens and lumen figures are confirmed before your event day, not during it.

Firefly AV

We work UK-wide from our Leeds and Preston offices, covering conferences, awards nights, exhibitions and broadcast events. Start with our guide to audio visual equipment for event planners if you want the wider context, or head straight to our AV equipment hire page to check availability and get a quote for your dates.

Sources

FAQ

Do you need a special screen for rear projection?

Yes. A standard front-projection screen reflects light and will not work for rear use; you need material built specifically for transmission, such as rear-projection vinyl or dedicated diffusion film.

What are the disadvantages of rear projection screens?

The main drawbacks are light loss through the diffusion material, a narrower viewing cone than front projection, the risk of hotspotting with short-throw lenses, and the need for enough depth behind the screen to fit the projector’s throw distance.

Is rear or front projection better for events?

Neither is universally better. Rear projection gives a shadow-free stage and conceals gear, which suits awards nights and broadcast sets, while front projection needs less rear space and suits wider audiences, so the right choice depends on your venue and seating plan.

When did rear projection televisions stop being made?

Rear projection television sets were largely phased out of consumer manufacturing as flat-panel LCD and plasma TVs became cheaper to produce, though the rear projection technique itself remains standard in professional AV, events and exhibition design.

How much does it cost to hire a rear projection screen in the UK?

A standard conference-sized rear-projection package, including screen, short-throw projector, lens and a technician, typically runs in the low hundreds of pounds per day, rising with bespoke materials, mirror relay systems or high-lumen projectors for larger stages.

"


Rear projection screens: what they are and how they work

3/08/2026
Conference room with stage and LED wall lighting

"

Yes, Mercure Bristol Holland House is open and operating as a four-star hotel at Redcliffe Hill, Bristol, well suited to conference organisers, business travellers, and families visiting the city centre. It has 275 bedrooms and 12 conference rooms, with capacity for up to 230 delegates in its largest configurations.

The official name is Mercure Bristol Holland House, part of the Mercure chain owned by Accor. It sits on Redcliff Hill, Bristol, BS1 6SQ, and the main contact number is +44 117 968 9900.

Firefly AV is an audio visual hire and event production company based in Leeds and Preston, working across the UK. We get called in by planners running conferences at venues exactly like this one, so this guide covers the hotel from a working events perspective, not just a guest one.

If you’re booking for a conference rather than a weekend away, the events floor is where the real detail lives: 12 rooms, a conference footprint of roughly 943 square metres, and a delegate ceiling that matters more than star ratings when you’re planning AV.

Table of Contents

What is the cancellation and refund policy at Mercure Bristol Holland House?

Cancellation terms depend entirely on which rate you book, not on the hotel’s general policy. Flexible rates typically allow free cancellation up to a set cut-off, often 24 to 48 hours before arrival, while non-refundable or advance-purchase rates are paid in full and cannot be cancelled without losing the money. Booking.com and the hotel’s own reservation system display the exact cut-off time and any charges at the point of booking, and that figure varies by season and demand rather than staying fixed. For group and conference bookings, cancellation terms are usually negotiated separately with the events team, so confirm the notice period in writing before signing off a delegate contract. Always check the specific rate rules on Booking rather than assuming a blanket policy applies.

What dining options are available beyond the main restaurant?

The hotel’s main dining venue is Urban Bar & Kitchen, which serves breakfast each morning and doubles as the evening restaurant and bar. Beyond that, room service is available for guests who want to eat without leaving their room, useful for delegates working late on presentations. Breakfast is typically a buffet service included in some rate packages and bookable separately in others, so check this at reservation stage rather than assuming it’s included. For event catering, the on-site team can arrange working lunches, coffee breaks, and formal dinners for conference groups, coordinated through the same events contact who handles room bookings. There’s no separate speciality restaurant on-site, so Urban Bar & Kitchen and room service cover all in-house dining.

Urban Bar & Kitchen breakfast dining area

What safety and hygiene measures are in place?

Standard hotel housekeeping and hygiene protocols apply throughout the property, in line with what you’d expect from a chain-managed four-star hotel under Accor’s operating standards. Specific pandemic-era measures such as enhanced cleaning schedules or capacity limits are no longer a distinguishing feature of most UK hotels and aren’t separately advertised for this property. For event organisers, the practical safety point worth knowing is different: fire exits, room capacities, and accessible routes across the 12 conference rooms need checking directly with the venue’s events team when you’re planning delegate flow. If your event involves rigging, staging, or cabling across public areas, that’s also where a professional AV crew earns its keep, since installed venue AV and temporary hire both carry different safety obligations around cable runs and load paths.

Hotel conference floor emergency exit signs

Should you pick Mercure Bristol Holland House for a stay or event?

Mercure Bristol Holland House works well for anyone who wants a central Bristol base with genuine conference capacity, not just a room to sleep in. It’s a sound pick if you need meeting space for up to 230 delegates, want walking access to the city’s main attractions, or are booking a family stay with gym and restaurant facilities on-site.

  • Pick it if: you need 12 conference rooms under one roof, want to walk to Queen Square in around 7 minutes or Bristol Temple Meads in about 10, or want an on-site events team handling logistics.
  • Consider alternatives if: you want a boutique or period building. The exterior is a 1970s office-block style, even though the interior has been refurbished.
  • Know before you book: the spa sits in a separate building reached across the car park, so factor in extra time if spa treatments are part of a tight event schedule.
  • Practical basics: check-in and check-out times, and parking availability with possible charges, are confirmed at booking; rooms commonly range from modest to moderate rates per night depending on season and rate type.
  • For events: contact the on-site events team directly for delegate quotes and bespoke conference packages rather than relying on standard room rates.
  • Small but useful detail: some guest communication is handled via WhatsApp, so confirm your preferred contact method with reception on arrival.

Where did these facts come from?

For live pricing and room availability, the hotel’s own site and Booking.com are more reliable than aggregator listings. For a feel of what a stay or event actually looks like day to day, guest reviews and independent write-ups like WeekendNotes fill that gap better than official copy does. Event organisers should always contact the hotel’s events team directly for bespoke delegate quotes rather than relying on the standard nightly rate shown online.

What does this hotel actually mean for event planners?

Most hotel reviews treat conference facilities as a footnote. That’s backwards for a property like this one, where the events floor is arguably the more interesting part of the building. Twelve rooms and 230 delegates puts Holland House in a genuinely useful mid-tier bracket for Bristol: too big for a boardroom meeting, not quite arena-scale, but exactly the size where most corporate conferences, product launches, and awards nights actually happen.

The gap most planners miss is technical capability versus room size. A room that fits 230 chairs doesn’t automatically have the power distribution, rigging points, or acoustics for a branded conference with video and sound. Hotel in-house AV is often adequate for a projector and a lapel mic, not for a full-day event with breakout streams, hybrid attendees, and a branded stage set.

For a room this size, Firefly AV would typically spec an Absen LED wall for main-stage branding, Panasonic projectors for breakout rooms, Sennheiser radio mics for Q&A sessions, and an Allen & Heath console running front-of-house sound through DB Technologies speakers. Day rates for this kind of setup in a UK conference venue typically run from around £800 for a single breakout room with basic conference mic and screen, up to £4,000 or more for a full main-stage rig with LED wall, staging, and multi-camera capture using Birddog cameras. Lite Deck staging adds height and presence for a keynote speaker without needing structural changes to the room itself.

Hands adjusting sound mixer near LED wall

The comparison that matters isn’t hotel A versus hotel B. It’s venue-installed AV versus independent event production. Installed systems are convenient and included in the room hire, but they’re built for the lowest common denominator of meetings, not your specific brand, capacity, or hybrid streaming needs. Bringing in a dedicated crew costs more upfront but avoids the awkward compromise of discovering, three hours before doors open, that the house PA can’t cover 200 people without feedback.

Comparison diagram of in-house AV versus independent event production

If there’s one thing planners underrate, it’s confirming access logistics early. Twelve rooms across an events floor means load-in routes, lift access, and loading bay availability vary room by room, and that’s the kind of detail that determines whether your get-in takes two hours or six.

Sources

FAQ

Is Mercure Bristol Holland House closed?

No, the hotel is open and operating as a four-star property with 275 bedrooms and 12 conference rooms on Redcliff Hill, Bristol.

Is Mercure a good hotel brand?

Mercure is Accor’s upper mid-scale brand, generally positioned above budget chains and below luxury flags, with a consistent focus on business travellers and conference facilities across its UK properties.

Where is Mercure Bristol Holland House located?

It’s on Redcliff Hill, Bristol, BS1 6SQ, roughly 10 minutes’ walk from Bristol Temple Meads and about 7 minutes from Queen Square.

What are the Mercure hotels in Bristol?

Mercure Bristol Holland House is the primary Mercure-branded hotel in central Bristol, distinguished by its 12-room conference floor and central location near the Hippodrome and harbourside.

How many delegates can the conference rooms hold?

The largest configuration across the 12 conference rooms can accommodate up to 230 delegates, making it suitable for mid-size corporate conferences and awards events.

Does the hotel have its own AV equipment for events?

The hotel offers standard in-house AV for meetings, but for branded conferences, hybrid streaming, or larger stage productions, event organisers typically bring in a dedicated supplier for LED walls, sound, and staging matched to the room’s specific layout.

"


Mercure Bristol Holland House: rooms, events and booking guide

3/08/2026
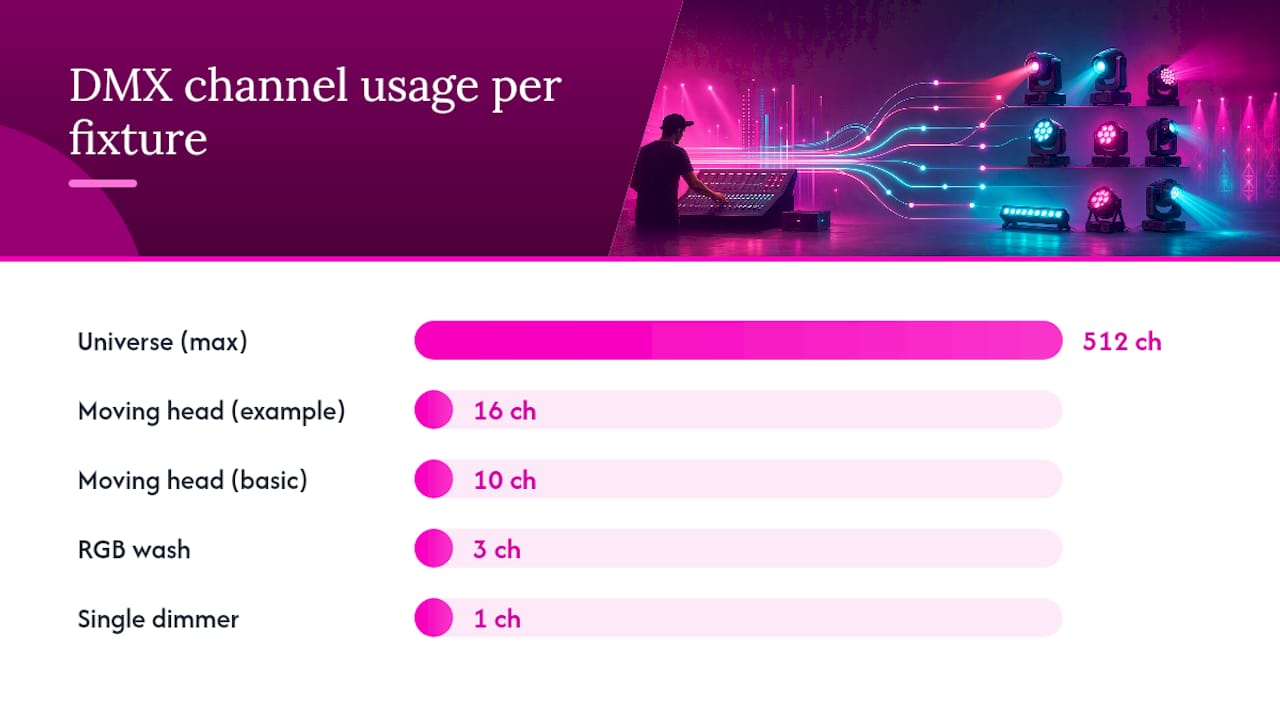
Hands adjusting DMX lighting console with fixtures

"

DMX lighting control is a standardised digital protocol that sends channelised data from a controller to lighting fixtures, letting you set intensity, colour, and motion across an entire rig from a single desk. The formal name is DMX512, governed by ANSI E1.— (also called DMX512-A), which defines the electrical characteristics, data format, and connector requirements. Two extensions matter immediately: RDM (Remote Device Management) adds two-way communication so you can query and configure fixtures without touching them, and W-DMX (from Wireless Solution) replaces the copper cable with a radio link while keeping everything else identical.

Firefly AV is an AV hire and event production company based in Leeds and Preston, working UK-wide. This guide draws on practical hire and installation experience across conferences, awards nights, theatre productions, and corporate events.

After reading, you should be able to name these five core items:

  • Controller — the desk or software that generates DMX data
  • Universe — one DMX stream of up to 512 channels
  • Channel — a single data slot with a value of 0–255
  • Cable/connector — typically XLR 5-pin with 120 Ω impedance cable
  • Terminator — a 120 Ω resistor plug fitted at the end of the chain

Pro Tip: If someone hands you a fixture manual and asks you to “patch it,” they mean: find out how many channels that fixture uses, pick a free start address in your universe, and tell both the fixture and the console what that address is. Everything else follows from that.


Key takeaways

DMX lighting control sends 512 channels of 8-bit data per universe from a controller to fixtures, and correct termination, addressing, and cable choice determine whether it works reliably.

Point Details
Definition DMX512 (ANSI E1.—) sends up to 512 channels per universe, each with a value of 0–255.
Termination is non-negotiable A 120 Ω terminator at the chain’s end prevents reflections and is the most common missing element on faulty rigs.
Addressing and personalities Set each fixture’s start address so channel blocks do not overlap; channel count depends on the fixture’s personality mode.
Wired vs wireless trade-off Wired DMX with correct cable is more predictable; wireless (W-DMX) suits inaccessible runs but needs pre-show testing and redundancy.
When to hire Firefly AV For multi-universe rigs, pixel mapping, or unfamiliar venues, a technicianed package from Firefly AV reduces setup risk and on-site fault time.

Table of Contents

How does DMX transmit data down the cable?

Every DMX frame starts with a BREAK — a prolonged low signal that tells every fixture on the line to reset and listen. The BREAK is followed by a Mark After Break (MAB), then a start code byte (0x00 for standard DMX), and then up to 512 data slots, each carrying a value between 0 and 255. Slot 1 corresponds to DMX address 1, slot 512 to address 512. That range of 512 slots is one universe.

ENTTEC’s DMX512 explainer describes the packet and timing in detail: the controller repeats this packet continuously, refreshing all 512 channels at roughly 44 Hz when the full universe is populated. Fewer channels mean a faster refresh, but 44 Hz is the practical floor for a full universe and is fast enough for smooth fades and strobe effects.

The physical transport is RS-485 differential signalling at 250 kbit/s. Two wires carry the same signal at opposite polarities; receivers subtract one from the other, which cancels out electrical noise picked up along the run. That is why DMX holds up in electrically hostile environments like stages with large dimmer racks nearby. The trade-off is that DMX is strictly unidirectional and carries no error-correction: a corrupted packet simply disappears, and the fixture holds its last value until the next good packet arrives.

Data note: DMX is an 8-bit channel stream. Each slot value of 0–255 maps to a control range (0% to 100% for a dimmer, or a specific colour mix for an LED fixture). RDM uses an alternate start code of 0xCC to initiate half-duplex replies from fixtures, enabling remote discovery and address management without a separate cable run. As SparkFun’s DMX tutorial explains, RDM packets are interleaved between standard DMX frames.

For large rigs that exceed 512 channels, the answer is multiple universes. Ethernet-based protocols — Art-Net and sACN — carry thousands of universes over a single Cat6 cable, which is why pixel-mapped LED walls and large touring shows move to Ethernet backbones rather than running dozens of separate XLR lines.

Parameter Value
Data rate 250 kbit/s
Channels per universe Up to 512
Value range per channel 0–255 (8-bit)
Typical refresh rate (full universe) ~44 Hz
RDM start code 0xCC
Physical layer RS-485 differential

What are the main components in a DMX system?

Controller — this is where the show lives. It can be a dedicated lighting console (a Chamsys MagicQ PC Wing is a compact example Firefly AV stocks), a laptop running control software with a USB-to-DMX interface such as the Avolites T1 Titan One dongle, or an Ethernet node that converts Art-Net or sACN back to DMX at the rig end.

Close-up of DMX lighting controller connector ports

Fixtures — anything that receives DMX: dimmers, LED wash lights, moving heads, pixel battens, hazer machines, and DMX star cloth. Each fixture has a start address and a personality (the number of consecutive channels it uses).

Splitters and opto-isolated boosters — a single DMX output can drive up to 32 unit loads before signal quality degrades. An RS-485 segment is limited to 32 unit loads; beyond that, you need an opto-isolated splitter to create fresh legs. Splitters also protect the controller from electrical faults downstream.

Terminator — a passive plug containing a 120 Ω resistor, fitted at the very last fixture in the chain. Without it, the signal reflects back down the cable and interferes with incoming packets, causing flicker. Acuity Brands’ wiring guide is direct on this: missing termination is the most common cause of unexplained flickering, especially once runs get longer.

Ethernet nodes — devices like the Chauvet NET-X II Art-Net node sit at the rig end of a Cat6 run and output one or more DMX universes locally. This lets you run a single network cable from the console position to a truss, then distribute multiple universes from there.

  • Controller → generates the DMX packet stream
  • Fixtures → receive and act on addressed channel values
  • Splitter/booster → regenerates signal for additional legs
  • Terminator → absorbs the signal at the chain’s end
  • Ethernet node → converts Art-Net/sACN to DMX at the fixture end

Pro Tip: For a small rig of ten to twenty fixtures on a single universe, a USB-to-DMX dongle and free or low-cost software is perfectly adequate. Once you cross into multiple universes or need pixel mapping, move to a proper console or an Art-Net node setup — the dongle approach does not scale cleanly.


How do channels, addresses, and fixture personalities work?

A channel is one data slot in the DMX stream, carrying a value of 0–255. A universe is the full set of 512 channels. Every fixture is assigned a start address: the channel number where its first control parameter lives. All subsequent parameters occupy the next consecutive channels.

Diagram of DMX universe channels and fixture addressing

How many channels a fixture needs depends on its personality — the mode it is set to. A single dimmer channel uses one slot. An RGB LED wash needs three (red, green, blue). A moving head in a basic mode might use ten or more: pan, tilt, colour wheel, gobo, shutter, dimmer, and so on.

A quick bit of arithmetic: if you have 20 RGB wash lights, each using 3 channels, they consume 60 channels total. You could fit 170 of them in a single universe before running out of addresses. Twenty moving heads at 16 channels each consume 320 channels, leaving room for only 12 more channels of other fixtures in that universe.

To set an address on a fixture, look for either a bank of DIP switches (older fixtures) or a digital display with up/down buttons (most modern LED fixtures). The manual will show the DIP switch pattern for each address. Always double-check: two fixtures sharing the same start address will respond identically, which is occasionally useful for mirroring but usually a mistake.

  • Confirm the fixture’s personality/mode before setting the address
  • Calculate: start address of fixture N = start address of fixture (N-1) + channel count of fixture (N-1)
  • Leave no gaps and no overlaps
  • Document your patch before the show, not during it

What cable and connectors does DMX use, and how far can you run it?

The standard connector is XLR 5-pin, with pin 2 as data minus, pin 3 as data plus, and pin 1 as shield/ground. Pins 4 and 5 are reserved for a second data pair in the standard but are rarely used in practice.

The 3-pin XLR caveat is important: many fixtures and some controllers use 3-pin XLR for DMX because it is cheaper and the connectors are physically interchangeable with microphone cable. Do not use microphone cable for DMX. Mic cable is typically unbalanced or low-impedance and does not meet the 120 Ω characteristic impedance the RS-485 standard requires. Use cable specified for DMX: 120 Ω, 2-pair, 24 AWG twisted pair. The engineering approach to AV installation consistently emphasises correct cable specification as a baseline for reliable signal integrity.

Practical run limits and device counts:

  1. Maximum recommended run length per segment: 300 metres (though shorter is safer in noisy environments)
  2. Maximum unit loads per segment: 32 (use a splitter beyond this)
  3. Daisy-chain topology only: no T-taps or star wiring
  4. Terminate the last device with a 120 Ω terminator plug
  5. Keep DMX cable away from mains power runs to avoid interference

For longer distances or multi-universe distribution, Cat5e/Cat6 cable carrying Art-Net or sACN is the practical answer. A single Cat6 run can carry thousands of universes to an Ethernet node at the rig end, which then outputs local DMX legs. This is standard practice on large stages and in architectural installations.

Things not to do:

  • Do not use T-tap splitters or Y-leads in the signal path
  • Do not run DMX parallel to mains or dimmer cables
  • Do not omit the terminator because “it seems fine” on a short run

Pro Tip: Label both ends of every DMX run with the universe number and leg letter before the show. When something goes wrong at 7 PM, you will not be tracing cables in the dark. Colour-coded cable sleeves or coloured gaffer tape at the connectors costs almost nothing and saves real time.


What do wireless DMX and RDM add to a system?

Wireless DMX replaces only the transport layer. The channels, universe structure, values, and packet timing remain identical; the radio link simply substitutes for the copper cable between transmitter and receiver. Firefly AV stocks Wireless Solution W-DMX F-1 Lite G5 transceivers and SHoW Baby 6 transceivers for exactly this purpose.

Wireless DMX pros:

  • Fast deployment where running copper is impractical (across a room, over a stage void, up a truss)
  • No cable clutter for temporary or touring rigs
  • Useful for moving set pieces that cannot be tethered

Wireless DMX cons:

  • RF interference from Wi-Fi, other wireless systems, and crowded venues
  • Latency is slightly higher than wired (typically a few milliseconds, but measurable)
  • Range varies with environment; walls, metalwork, and other RF sources all reduce it
  • Requires pre-show testing and ideally a spectrum scan

Deployment reality: SoundStoreXL’s wireless DMX guide and UKING’s field comparison both reach the same conclusion: if you can run proper copper with correct termination, wired DMX is more predictable. Wireless earns its place where copper runs are genuinely infeasible, but it requires professional planning, antenna placement, and redundant links for critical cues. Treat it as a transport bridge, not a default.

RDM (Remote Device Management) uses start code 0xCC to send management packets between the controller and fixtures. Because RS-485 is normally unidirectional, RDM switches the line to half-duplex: the controller sends a request, pauses, and the fixture replies. This enables remote discovery (the console finds all RDM-capable fixtures automatically), remote address setting, and fault reporting such as lamp failure or temperature warnings.

Two important caveats: RDM requires RDM-aware splitters, because a standard passive splitter blocks the reply path. And RDM cannot operate reliably over most wireless DMX bridges unless the bridge explicitly supports RDM pass-through — check the vendor’s firmware notes before assuming it will work.


How do you wire a simple DMX rig safely?

One sentence: confirm addresses, connect controller out to fixture in, daisy-chain fixtures in address order, fit the terminator, then power up and test.

Step-by-step wiring checklist:

  1. Set fixture addresses — before connecting anything, set each fixture’s start address using DIP switches or the onboard display. Write down the patch.
  2. Connect controller OUT to fixture 1 IN — use a properly rated 120 Ω DMX cable with XLR 5-pin connectors.
  3. Daisy-chain fixture OUT to fixture 2 IN — continue in address order where practical; address order is not mandatory but makes troubleshooting faster.
  4. Continue the chain — add remaining fixtures, keeping the run under 300 metres and the device count under 32 per segment.
  5. Fit the terminator — plug a 120 Ω XLR terminator into the DMX OUT of the last fixture in the chain.
  6. Power up fixtures — power the fixtures before the controller so they boot into a known state.
  7. Patch the console — tell the console which fixture type is at which address. Most consoles have a fixture library; select the correct personality.
  8. Run a sanity check — bring each fixture to full on the console and confirm it responds. Use a short known-good jumper cable to swap out a suspect fixture if one does not respond.

Safety checklist:

  • Isolate power before making or breaking cable connections
  • Do not run DMX cable parallel to mains or dimmer feeds; cross at 90° if paths must intersect
  • Secure all cables against trip hazards with cable ramps or gaffer tape
  • Check that all fixtures are rated for the power supply voltage at the venue

Statistic callout: According to Acuity Brands’ field guidance, missing termination is the single most common cause of DMX flicker and unexplained behaviour, particularly once runs extend beyond a few metres or device counts increase.

Pro Tip: Firefly AV typically stages a small corporate rig in Leeds or Preston with a lighting technician on-site for the day. Indicative day rates for a lighting technician run from around £250 to £450 depending on rig complexity and duration — these are illustrative figures subject to scope and are not fixed prices. For a dry-hire DMX package without a technician, budget separately for kit and allow time for your own pre-show testing.


How do you read a fixture manual and understand channel maps?

Most fixtures ship with two or more personality modes. A simple mode uses fewer channels and is easier to patch; an extended mode adds fine control over pan/tilt speed, colour temperature, or effects. The trade-off is straightforward: fewer channels mean less resolution and fewer independent parameters, but a simpler patch and more fixtures per universe.

Example: 3-channel RGB batten

Set this fixture to address 1 and you control red on channel 1, green on channel 2, blue on channel 3. Set it to address 4 and the same parameters sit on channels 4, 5, and 6.

Example: 12-channel moving head (basic mode)

Channel Parameter
1 Pan
2 Pan fine
3 Tilt
4 Tilt fine
5 Colour wheel
6 Gobo wheel
7 Shutter/strobe
8 Dimmer
Focus
Prism
Prism rotation
12 Lamp control/reset

The personality table is always in the fixture manual, usually near the back. If the manual is missing, the manufacturer’s website almost always has a PDF. Choose the mode that gives you the parameters you actually need — running a moving head in 24-channel mode when you only need pan, tilt, and colour wastes 12 channels per fixture and adds nothing to the show.

  • Match the mode in the fixture to the mode in the console’s fixture library
  • If the console library does not have your fixture, most consoles allow manual patching or import of a custom personality file (GDTF format is now widely supported)
  • Always verify: bring the fixture to a known state (e.g. full white, centre position) and confirm the console matches

How do you troubleshoot a DMX system when something goes wrong?

Most DMX faults are cabling, termination, or addressing errors. That covers the vast majority of on-site problems, and knowing that narrows the diagnostic path considerably.

Troubleshooting flow:

  1. Check power and addresses — confirm every fixture is powered and that no two fixtures share the same start address.
  2. Swap to a known-good short cable — replace the first cable in the chain with a short, tested jumper. If the problem clears, the original cable is faulty.
  3. Check termination — confirm a 120 Ω terminator is fitted at the last fixture. Remove and refit it to rule out a loose connection.
  4. Test fixtures individually — disconnect all but the first fixture and test. Add fixtures one at a time to find the point where the fault appears.
  5. Check splitters — if a splitter is in the chain, bypass it temporarily to confirm it is not the source of the fault.
  6. Check universes — if using multiple universes, confirm the console is outputting on the correct universe number and that the Ethernet node or interface is configured to match.

Best practices for reliability:

  • Use 120 Ω rated DMX cable throughout, not microphone cable
  • Terminate every leg, including legs from splitters
  • Keep runs under 300 metres per segment
  • Separate DMX cable from mains and dimmer feeds
  • Label both ends of every run before the show

For redundancy on critical shows, use an opto-isolated splitter to create independent legs for different rig sections. If one leg develops a fault, the others continue unaffected. A hybrid approach — wired sACN/Art-Net backbone for critical universes, wireless for last-metre flexibility — is increasingly common on larger productions.

Pro Tip: Firefly AV carries spare 120 Ω terminators, short test jumpers, and a basic DMX tester on every rig. A £15 DMX tester that shows signal presence and address values pays for itself the first time it locates a fault in under two minutes rather than two hours.


Where is DMX used, and is it right for your project?

DMX is the default control protocol for professional stage and event lighting, and it has spread well beyond the theatre into architectural, hospitality, and even domestic settings.

Common applications:

  • Touring and theatre — moving heads, followspots, dimmers, and haze machines all on one or more DMX universes
  • Corporate events and conferences — wash lighting, gobo projectors, and set lighting at venues like Leeds Town Hall, Manchester Central, or Edinburgh International Conference Centre
  • Exhibitions and product launches — precise, repeatable lighting states that can be recalled instantly
  • Weddings and private events — uplighters, pin spots, and DMX star cloth for atmosphere
  • Architectural façades and permanent installations — DMX over Ethernet (sACN) driving pixel-mapped LED arrays
  • Bars, clubs, and small venues — simple chase programmes on a basic controller

When wired DMX is clearly preferable: critical cues where timing matters (theatre, broadcast), pixel mapping with high channel counts, and any installation where RF interference is a risk.

When wireless or Ethernet makes more sense: crossing a stage void or a large open floor where cable runs are genuinely impractical, or scaling to many universes on a large show.

Home use: entirely feasible for hobbyists and smart home enthusiasts, but for a small domestic project with a handful of colour-changing lights, a simpler wireless RGB controller is usually less effort. DMX earns its place at home when you want precise, repeatable control over a larger number of fixtures or want to integrate with a broader AV system.

For conference centres, town halls, and theatres, Firefly AV recommends on-site technician support for any rig beyond a handful of fixtures. The time saved in setup and troubleshooting consistently outweighs the day rate.

Use case Wired DMX Wireless DMX Ethernet (Art-Net/sACN)
Small venue / wedding Good Practical Overkill
Corporate conference Good Useful for tricky runs Good for multi-universe
Theatre / touring Preferred Supplementary Standard for large rigs
Architectural / permanent Good Not recommended Preferred
Home hobbyist Feasible Simpler alternatives exist Not needed

What kit does Firefly AV stock, and what does a hire package cost?

Firefly AV is based in Leeds and Preston and works UK-wide on everything from small corporate breakfasts to large-scale broadcast and eSports productions. Clients include the BBC, Leeds City Council, JCT600, Leeds Art Gallery, and the University of Bradford.

DMX-relevant kit we stock:

  • Chamsys MagicQ PC Wing (lighting console/interface)
  • Wireless Solution W-DMX F-1 Lite G5 transceivers
  • SHoW Baby 6 wireless DMX transceivers
  • Avolites T1 Titan One USB DMX dongle
  • Chauvet NET-X II Art-Net nodes
  • eLumen8 pixel battens (DMX-addressable)
  • LEDJ Spectra QX40 pixel IP65 fixtures
  • DMX star cloth (8m x 4.5m, cool white)
  • Absen LED wall panels, Panasonic projectors, Sennheiser microphones, Allen & Heath consoles, DB Technologies speakers, Birddog cameras, and Lite Deck staging

Typical hire and day-rate signals (illustrative, subject to scope):

  1. Lighting technician day rate: approximately £250–£450 per day depending on rig complexity, travel, and duration
  2. Simple dry-hire DMX package (controller, cables, terminators, basic fixtures): pricing varies significantly with fixture count and type; contact Firefly AV for a scoped quote
  3. Technicianed package for a small corporate show (setup, operation, and de-rig): typically quoted as a project rate rather than a day rate; most small conference lighting packages fall in the range of a few hundred to low thousands of pounds depending on fixture count and venue

Why clients choose technician support:

  • Pre-show address checking and termination verification catches faults before the audience arrives
  • Console programming and cueing is faster with an experienced operator
  • On-site fault diagnosis and spare parts mean a problem does not become a show-stopper
  • Compliance with venue technical requirements and safe working practices

Statistic callout: For a typical small corporate conference rig in Leeds or Preston, Firefly AV’s experience is that technician-supported packages reduce on-site setup time by a significant margin compared with unsupported dry hire, particularly for clients without dedicated in-house AV staff.


A note from the team at Firefly AV

The single lesson that comes up on almost every rig, regardless of size, is this: check your terminators and addresses before you power anything up. Not after. Not when something looks wrong. Before. A missing terminator on a 30-metre run might behave perfectly in a cold venue at 2 PM and start flickering the moment the room fills with people and the dimmers come on. Address conflicts are even more insidious — two fixtures responding identically looks like a programming error until you check the DIP switches.

If you are planning a complex rig or working in a venue you have not used before, get in touch with Firefly AV. We are happy to talk through the setup and advise on whether a site survey makes sense.


Firefly AV’s hire and technical support for DMX lighting

Firefly AV offers both dry hire and fully technicianed DMX lighting packages, with bases in Leeds and Preston and UK-wide delivery. For straightforward rigs, dry hire gives you the controller, cables, terminators, and fixtures with a kit list and setup notes. For anything more complex — multi-universe shows, pixel mapping, or venues with awkward cable routes — a technicianed package means an experienced operator on-site from load-in to de-rig.

Firefly AV

Site surveys in Leeds and Preston are available for larger or permanent installations, and Firefly AV can advise on whether wired DMX, wireless, or an Art-Net/sACN Ethernet backbone is the right approach for your venue and show type. Lead times vary by availability; for events with specific technical requirements, earlier is always better.

To discuss a package, request a quote, or browse the full equipment catalogue, visit the AV equipment hire page or the audio visual equipment guide for event planners. For larger productions, the event production setup examples page shows how DMX lighting fits into a complete AV production.


Sources

The sources below informed this guide and are worth bookmarking for deeper study:


FAQ

What does a DMX light controller do?

A DMX controller generates a continuous stream of up to 512 channel values per universe and sends them to connected fixtures via an RS-485 data link. Each channel value (0–255) controls one parameter on a fixture, such as dimmer level, colour, or pan position.

Can you use DMX lights without a controller?

Most DMX fixtures will hold their last received values if the signal is lost, and some have a standalone or sound-active mode built in. However, without a controller sending a live DMX signal, you have no real-time control over intensity, colour, or movement, so a controller is needed for any programmed or cued lighting.

Is DMX lighting still relevant?

DMX512 remains the standard control protocol for professional stage and event lighting worldwide, governed by ANSI E1.— and supported by every major fixture manufacturer. Ethernet protocols like Art-Net and sACN extend it for large-scale rigs, but they still output DMX at the fixture end.

Can I use DMX lights at home?

Yes, DMX fixtures work perfectly well in a home or studio setting, and a basic USB-to-DMX interface with free software keeps the cost low. For a small number of colour-changing lights, a simpler wireless RGB controller is often less effort; DMX makes more sense when you want precise, repeatable control over a larger fixture count.

When should I hire a professional instead of setting up DMX myself?

Once a rig involves multiple universes, pixel mapping, moving heads, or an unfamiliar venue, the time and risk of a DIY setup usually outweigh the cost of professional support. Firefly AV provides technicianed DMX packages across the UK, with on-site setup, programming, and fault cover from load-in to de-rig.

"


DMX lighting control: a practical guide for beginners

3/08/2026
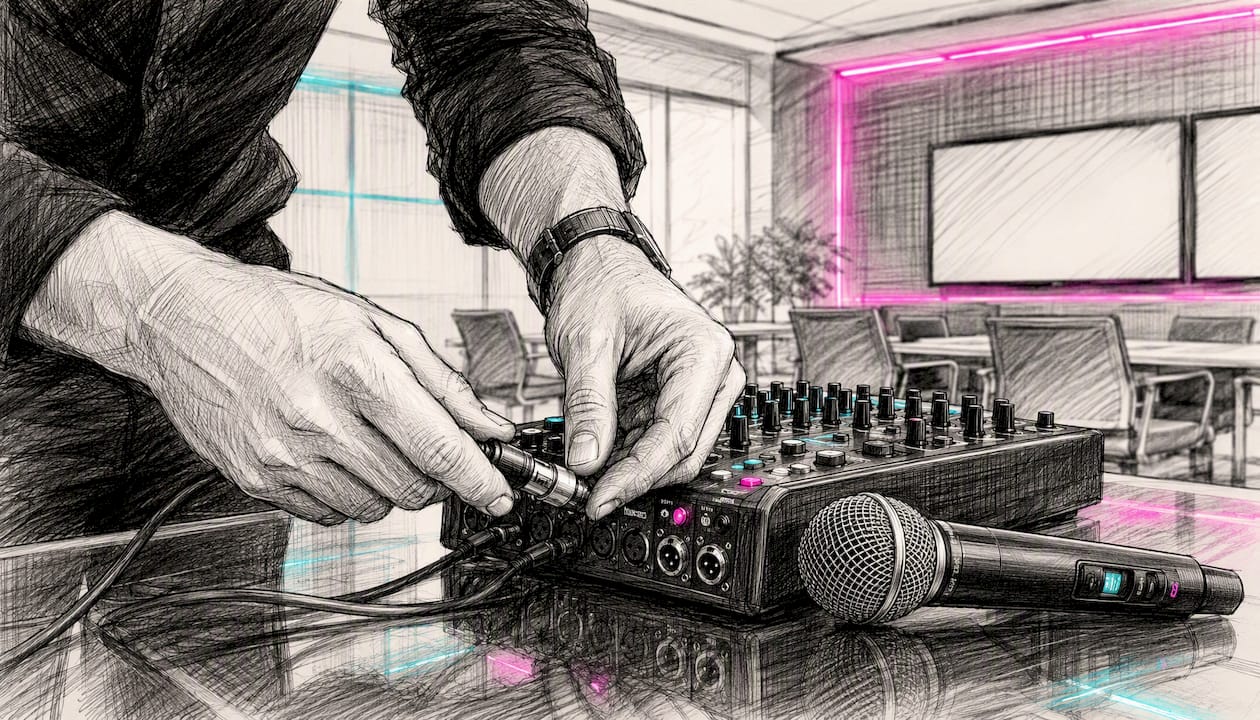
Technician wiring breakout room AV equipment

"

A breakout room AV package is the complete set of audio, vision, control, and connectivity equipment — plus technician support — that enables a smaller concurrent session to run independently of the main stage. You need it whenever your conference splits into parallel tracks, workshops, or panel discussions that require their own sound reinforcement, display, and presenter support. At minimum, that means a projector or display, at least one wireless microphone, a speaker system sized to the room, and a technician who can keep it all running.

Firefly AV is an AV hire and event production company based in Leeds and Preston, working across the UK. The kit examples throughout this guide reflect what Firefly AV stocks and deploys on multi-track conference work: Absen LED panels, Panasonic projectors, Sennheiser microphones, Allen & Heath mixing consoles, DB Technologies speakers, BirdDog cameras, and Lite Deck staging.

Quick planning baseline: for a breakout room of up to 80 people, book at minimum a projector or 65" display, one wireless handheld or lavalier mic, a compact PA, a laptop input with HDMI and USB-C adapters, and one breakout operator shared across no more than two adjacent rooms.


Key takeaways

Breakout room AV requires a scaled-down but complete package of vision, audio, control, and connectivity equipment, plus a dedicated operator, to run concurrent sessions reliably alongside a main conference programme.

Point Details
Minimum kit per room Projector or display, one wireless mic, compact PA, HDMI input, and a confidence monitor cover most formats.
Budget guidance Per-room AV usually adds an amount that varies with screen size, recording, and hybrid needs.
Staffing model One breakout operator per room (or shared across two simple rooms) plus a roving technician for escalations.
Hybrid rooms need wired network Use wired Ethernet and a dedicated VLAN for encoders; Wi-Fi alone causes stream dropouts in multi-room events.
Firefly AV Supplies complete breakout room packages from Leeds and Preston, covering kit hire, operators, and hybrid streaming UK-wide.

Table of Contents

How does breakout room AV differ from a main session?

Breakout rooms are smaller meeting spaces adjacent to the main conference area, used for concurrent sessions, workshops, and small-group discussions. Their AV needs are structurally different from a plenary, not just smaller.

A general session typically carries IMAG (image magnification) with multiple cameras, confidence monitors, a full stage lighting rig, a multi-channel mixing console, and a dedicated crew of four or more. Breakout rooms strip most of that back:

  • Vision: one projector or flat-panel display rather than a multi-screen IMAG rig; no front-of-house camera operator
  • Audio: one or two wireless mics, a compact PA, and a simple mixer rather than a 32-channel console with IEM feeds
  • Lighting: basic room wash or existing venue fluorescents rather than a full theatrical rig
  • Crew: one breakout operator per room (or shared across two rooms) rather than a dedicated crew per discipline
  • Cabling footprint: a single stage box and short runs rather than a full multicore from stage to FOH

The operational differences matter just as much as the kit list. Multiple breakout sessions run simultaneously, which means quick turnarounds between speakers, noise bleed risk from adjacent rooms, and the need to route feeds independently if you are recording or streaming. A plenary AV failure stops the whole event; a breakout failure affects one track. That changes how you staff and how you escalate.

Deciding how many breakout rooms you need depends on expected take-up and track count. Attendance is rarely distributed equally across sessions, so build in flexible capacity and be ready to reallocate rooms for popular tracks.

Pro Tip: Brief your breakout operators on the full event schedule, not just their own room. Knowing when the plenary ends tells them exactly how long they have for a turnaround.


What baseline AV kit does a breakout room need?

Standard breakout room setups are scaled down from general session AV. The minimum package for most rooms covers five categories: vision, audio, control, connectivity, and staging.

Vision

  • Projector: a Panasonic short-throw or standard-throw projector for rooms with a screen and controlled ambient light
  • LED panel: an Absen LED panel where ambient light is high, throw distance is short, or the room requires a permanent-looking install
  • Screen or display surface: a pull-up screen, fixed frame, or 65"–86" flat panel for smaller rooms under 40 people
  • Confidence monitor: a secondary display facing the presenter so they can see their slides without turning to the main screen

Audio

  • Wireless handheld mic: Sennheiser handheld for presentations and Q&A
  • Lavalier mic: Sennheiser clip-on for panel speakers who need hands-free delivery
  • Boundary mic: for round-table or workshop formats where participants speak from fixed positions
  • Compact PA: DB Technologies active speakers, positioned to cover the room without feedback into open mics
  • Mixer: an Allen & Heath compact console or a simple two-channel mixer for basic gain control and EQ

Control, connectivity, and staging

  • Laptop input: HDMI and USB-C inputs at the lectern or table, with adapters for older MacBooks and Windows machines
  • Presentation switcher: a simple HDMI switcher so multiple presenters can connect without re-patching
  • Lite Deck staging: low-profile stage decking where a raised platform is needed for sightlines in deeper rooms
  • BirdDog PTZ camera: for rooms that require recording or a hybrid feed to remote delegates

The format of the session shapes which elements you prioritise. A training room with 30 delegates at tables needs tabletop boundary mics and multiple HDMI inputs. A panel of four speakers needs two or three lavaliers and a front-fill speaker to cover the stage. A hands-on workshop with rotating presenters needs a wireless presentation system and flexible input routing.


How do you size screens and projectors for breakout rooms?

Getting the screen size wrong is one of the most common breakout room mistakes, and it usually goes in one direction: too small. A useful rule of thumb is that the screen width should be at least one-sixth of the farthest viewing distance. For a room where the back row sits 9 metres from the screen, you need a screen at least 1.5 metres wide.

Projector lumen guidance

  1. Up to 50 people, controlled light: 3,500–5,000 lumens is sufficient for a standard pull-up screen with blinds drawn.
  2. 50–150 people, mixed ambient light: 5,000–8,000 lumens handles most hotel conference rooms with partial daylight.
  3. 150–300 people, high ambient light: 8,000 lumens or above, or switch to an Absen LED panel, which produces its own light and is unaffected by room brightness.
  4. Short-throw situations: where throw distance is under 2 metres, a short-throw Panasonic projector or a flat panel avoids the presenter casting a shadow on the screen.

When to choose LED over projection

Absen LED panels are worth specifying when the room has floor-to-ceiling glazing, when the content is video-heavy and colour accuracy matters, or when the setup needs to look polished without a visible projector and rigging. The trade-off is cost: LED hire runs higher than a projector and screen, so for a basic training room with 30 delegates and controlled light, a Panasonic projector remains the practical choice.

Seating layout affects required screen size and placement. Theatre-style rows push the back row further from the screen, demanding a larger image. Classroom layout with tables is more forgiving because delegates sit closer. Rounds (cabaret) create sightline problems for delegates seated with their backs to the screen; in that format, consider two smaller displays on opposite sides of the room rather than one central screen.

Pro Tip: Always confirm the projector’s throw ratio against the actual room dimensions before the event, not just the venue’s floor plan. Ceiling height, rigging points, and furniture placement regularly differ from the drawing.


How do you get audio right in a breakout room?

Audio is where breakout rooms fail most visibly. A presenter who cannot be heard, a mic that feeds back, or a speaker that only covers half the room will derail a session faster than any vision problem.

Mic selection

  • Sennheiser handheld wireless: the default for single-presenter formats; easy to hand to audience members for Q&A
  • Sennheiser lavalier: better for panel sessions where speakers need both hands free; clip to a lapel or tie
  • Boundary mic: flat on a table, picks up all voices within roughly a metre; suited to round-table discussions and workshops where a handheld would be impractical
  • Headset mic: for high-energy presenters who move across the stage and need consistent gain regardless of head position

Speaker placement and DB Technologies PA

DB Technologies active speakers are compact enough for breakout rooms and powerful enough to cover 200 people when positioned correctly. Place them at the front of the room, angled slightly inward, at or above head height. For rooms wider than 10 metres, add a second pair of fills at the sides to avoid a dead zone at the edges. Avoid placing speakers behind open microphones; that is the fastest route to feedback.

DB Technologies speakers angled in breakout room

Ceiling-mounted distributed speakers work well in rooms with low ceilings and a permanent install, but they rarely provide enough gain for a presenter mic in a live event context. Stick with front-of-house active speakers for anything requiring reinforcement above a conversational level.

Mixing and gain structure with Allen & Heath

An Allen & Heath compact mixer gives a breakout operator enough control to set individual channel gains, apply basic EQ, and manage monitor sends without needing a full-size console. Set gain at the preamp stage first, then bring up the fader. Keep mic channels at unity gain with EQ applied to cut problem frequencies (typically 200–400 Hz for muddiness, 2–4 kHz for harshness) before the session starts. A high-pass filter on every mic channel at around 80 Hz removes handling noise and low-frequency rumble.

Close-up of Allen & Heath mixer controls

For accessibility, check whether the venue has an induction loop system and whether your audio feed needs to be routed into it. Live captions via a captioning service or AI transcription tool require a clean audio feed from the mixer’s aux or direct output. Plan that routing during the tech check, not during the session.

Pro Tip: Do a full gain structure check with the presenter speaking at their actual volume, not a polite soundcheck voice. Most feedback problems happen because the gain was set for a quiet run-through and the presenter then projects to the room.


Do breakout rooms need cameras and hybrid streaming?

Not every breakout room needs a camera, but the question is worth answering at the planning stage rather than the morning of the event. Recording a session for post-event distribution is a different technical requirement from live-streaming it to remote delegates, and both differ from feeding a hybrid breakout where virtual attendees participate in real time.

Camera options

  • BirdDog PTZ camera: the practical choice for breakout rooms; remotely controllable, compact, and capable of clean 1080p or 4K output without a dedicated camera operator
  • Fixed wide-angle camera: simpler and cheaper for record-only use cases where a static wide shot of the presenter is sufficient
  • Multi-camera setup: only warranted for panel sessions where you want to cut between speakers; adds cost and requires a vision mixer or a BirdDog controller

Encoding and streaming

  • Hardware encoder: more reliable than a software encoder for live streams; connects directly to the camera output and sends a stable RTMP feed to your streaming platform
  • Software encoder (OBS or similar): lower cost, suitable for record-and-upload workflows where a dropout does not affect a live audience
  • Record-and-upload: the lowest-risk option for most breakout rooms; capture to a local drive, edit lightly, and distribute after the event

Network and connectivity

Hybrid breakout rooms need sufficient network capacity, professional meeting controls, screen sharing, recording, live captions, and secure guest access. For multiple concurrent streams, wired Ethernet to each encoder is non-negotiable. Segregating AV traffic on a dedicated VLAN significantly reduces stream dropouts compared with shared Wi-Fi. Budget at least 5 Mbps upload per stream at 1080p, and confirm the venue’s uplink capacity before committing to a live-stream format.

For presenter workflows in hybrid sessions, agree in advance how remote guests will join (Zoom, Teams, or a dedicated platform), who manages the waiting room, and what the latency expectation is. A 2–4 second delay is normal for RTMP streams; interactive hybrid sessions need a lower-latency protocol or a dedicated conferencing platform rather than a broadcast stream.


What are the best practices for cabling and signal routing?

Cabling failures in breakout rooms are almost always preventable. They happen because runs are unlabelled, adapters are missing, or signal paths were not tested before the presenter walked in.

Control and signal routing

  • Use a simple HDMI or SDI switcher at the lectern so presenters can connect without re-patching the projector
  • Route a confidence monitor feed from the switcher output so the presenter sees exactly what the audience sees
  • For rooms with a BirdDog camera, run SDI rather than HDMI for runs over 10 metres; SDI is more reliable over distance and does not have HDCP handshake issues

Cabling best practice

  • Label every cable at both ends with the room number and signal type (e.g. “Room 3 — HDMI Projector”)
  • Use balanced XLR runs for all audio; unbalanced jack leads over 5 metres pick up interference in busy venues
  • Keep HDMI runs under 10 metres without an active extender; beyond that, use HDBaseT or SDI
  • Colour-code power leads separately from signal leads to avoid accidental disconnection during a session

UK power planning

UK venues vary considerably in what they provide. Confirm the available circuits, their amperage, and whether they are on the same phase before load-in. Use a power distribution board with RCDs for each breakout room rather than daisy-chaining from a single 13A socket. A fused spur or dedicated 16A commando socket is preferable for a PA system and projector on the same circuit. Older venues frequently lack adequate HDMI inputs; always carry a kit of adapters (USB-C to HDMI, DisplayPort to HDMI, VGA to HDMI) and test presenter laptop compatibility during the tech check.

Day-of cabling checklist

  1. Confirm all signal paths from source to display are tested with a live signal, not just connected
  2. Check that all audio channels are labelled on the mixer and that gain is set before the presenter arrives
  3. Verify that the confidence monitor is showing the correct source
  4. Confirm power distribution is on a protected circuit with RCDs in place
  5. Walk the cable runs and tape down any trip hazards

What does a breakout room setup timeline look like?

Timing is the discipline that separates a smooth multi-track event from a chaotic one. The table below shows a realistic timeline for a single breakout room on a one-day conference.

Breakout room AV setup timeline infographic

For a multi-room event with four or more breakout rooms, load-in typically starts the evening before. Allow an additional 30 minutes per room for tech checks if presenters are using their own laptops.

Staffing levels and UK day rates

The standard model is one breakout operator per room for high-value sessions, or one operator shared across two adjacent rooms for simpler formats. A roving technician covers escalations and cross-room support. Day rates vary by role, location, experience, and complexity, with higher rates common in London and for specialized skills. Rates also increase for early starts, late finishes, overnight load-ins, and specialist work.


What does a breakout operator actually do?

A breakout operator is a specialised AV technician who supports presenters with microphones and equipment, operates local video and audio consoles, manages basic lighting, troubleshoots technical issues, and assists with pack-down. They are often the only direct technical contact a presenter has during a session, which makes communication skills as important as technical ability.

Day-to-day duties

  • Meet the presenter before the session, confirm their laptop input, and walk them through mic handling
  • Set up and test the confidence monitor so the presenter can see their slides without turning away from the audience
  • Manage mic handoffs during Q&A without interrupting the session flow
  • Adjust room lighting for presentations versus discussion formats
  • Troubleshoot input issues, audio dropouts, and display problems in real time
  • Complete a pack-down checklist and report any equipment faults to the lead tech

Skills to hire for

  • Mixing basics: gain staging, EQ, and feedback avoidance on a compact console
  • Familiarity with at least one lighting console for basic room wash control
  • Confident, calm communication with presenters under time pressure
  • Rapid fault diagnosis: knowing whether a signal problem is at the source, the cable, or the display

Breakout operators are often the only direct technical contact presenters have; strong customer service and clear presenter scripting reduce errors and session delays significantly.

Firefly AV field tips

From Firefly AV’s work on multi-track conferences in Leeds and Preston, three practices consistently reduce session delays. First, prepare a one-page presenter brief covering mic handling, slide advance, and what to do if the display goes blank. Second, use a stage box at the lectern so all presenter inputs patch to a single point rather than running directly to the rack. Third, run a full signal-path test with a live laptop, not just a test pattern, before each session block.

Pro Tip: Keep a “breakout spares bag” at every room: spare HDMI cable, USB-C adapter, gaffer tape, a spare mic battery or charged pack, and a printed signal map. Most session delays trace back to a missing adapter or a flat battery.


What are the most common breakout room AV problems?

Most breakout room failures fall into five categories. Knowing the fix before the event is faster than diagnosing it under pressure.

Common issues and quick fixes

  • Noise bleed from adjacent rooms: check partition wall sealing, reduce speaker volume and aim speakers away from shared walls, and use directional mics rather than omnidirectional boundary mics
  • Mic feedback: reduce gain on the offending channel, check speaker placement relative to open mics, apply a high-pass filter and cut 2–4 kHz on the EQ
  • Incorrect input resolution: presenter laptop outputs at a resolution the projector cannot accept; fix by setting the laptop to 1920×1080 before connecting, or use a scaler at the input
  • Presenter laptop HDMI not detected: try a different cable first, then a different adapter, then a different input port on the switcher; carry a USB-C to HDMI adapter for every room
  • Network dropout during a hybrid session: switch from Wi-Fi to wired Ethernet immediately; if wired is unavailable, reduce stream bitrate and resolution to stabilise the connection

Prevention during load-in

  1. Test every cable with a live signal before the presenter arrives
  2. Confirm laptop compatibility with at least one test machine during the tech check
  3. Set gain structure with the presenter speaking at full volume, not a quiet test voice
  4. Verify network connectivity and upload speed before committing to a live stream
  5. Walk the room for noise bleed with the adjacent room’s PA running at session volume

When a problem cannot be resolved within two minutes, escalate to the lead AV or site technical contact immediately. Do not spend five minutes on a fault that requires a different tool or a venue engineer.


Practical checklist and sample kit packages with UK pricing

Day-one checklist per breakout room

  • Display or projector focused and signal tested
  • Screen or panel at correct height for sightlines
  • All mic channels patched, labelled, and gain-set
  • Confidence monitor showing correct source
  • Laptop inputs tested with a physical machine (HDMI and USB-C)
  • PA positioned and level-checked at session volume
  • Power distribution on RCD-protected circuit
  • Spare cables, adapters, and mic batteries in the room
  • Signal map printed and with the operator
  • Room access confirmed with venue (key, code, or contact)

Sample kit packages and GBP day-rate guidance

The table below shows three common breakout room configurations. Prices are indicative day-rate ranges for Leeds and Preston; London bookings typically add 20–30% to the equipment and labour figures.

Optional add-ons include live captioning (requires a clean aux feed and a captioning service), an additional BirdDog camera for multi-angle recording, and a dedicated streaming technician for managed live output.


A field note from Firefly AV on running breakout rooms

The detail that catches planners out most often on multi-track events is not the kit list. It is the turnaround. On a recent conference handled by Firefly AV across multiple rooms in Leeds, the schedule called for 10-minute changeovers between four consecutive speaker slots in the same room. That sounds generous until you factor in a presenter who arrives two minutes before their slot, a laptop that outputs at 4K (which the projector cannot accept), and a mic battery that was not swapped at the previous changeover.

The fix is procedural, not technical. Firefly AV’s operators use a short turnaround checklist: swap the mic pack, reset the confidence monitor source, confirm the new presenter’s laptop input, and do a 30-second audio check. That sequence takes under three minutes when it is practised. The remaining seven minutes are buffer, and buffer is what keeps a multi-track event on schedule.

Firefly AV operates from Leeds and Preston and covers events across the UK, supplying everything from a single breakout room package to full multi-room conference production with hybrid streaming, LED walls, staging, and crew. The portfolio covers conferences, corporate events, exhibitions, and broadcast work.


Firefly AV: AV hire and production for breakout rooms across the UK

Firefly AV supplies complete breakout room AV packages for conferences and multi-track events across the UK, from a single-room hire in Leeds to a 10-room multi-track production in London. The difference from booking kit piecemeal is having a single point of contact who has already solved the turnaround problem, the laptop compatibility problem, and the noise bleed problem on dozens of events before yours.

Firefly AV

Equipment hire covers Panasonic projectors, Absen LED panels, Sennheiser wireless mic systems, Allen & Heath consoles, DB Technologies PA, BirdDog PTZ cameras, and Lite Deck staging. Breakout operators, roving technicians, and AV project managers are available with every package. For hybrid sessions, Firefly AV provides hybrid event AV including encoding, streaming, and network planning. Dry hire is available on a two-day hire week for planners who supply their own crew.

Firefly AV’s bases in Leeds and Preston mean fast logistics for events across the North of England, with full UK-wide delivery and crew deployment. To get a bespoke quote or arrange a site survey, visit the AV equipment hire page or contact the team directly.


Sources


FAQ

What is the purpose of a breakout room at a conference?

A breakout room provides a dedicated space for smaller concurrent sessions, workshops, or group discussions that run alongside the main programme. It allows conferences to serve multiple audience interests simultaneously without requiring everyone to attend the same content.

What AV equipment does a breakout room need?

At minimum, a breakout room needs a projector or display, at least one wireless microphone, a speaker system sized to the room, a laptop input with HDMI connectivity, and a confidence monitor for the presenter. Hybrid or recorded sessions add a camera, encoder, and wired network connection.

How many technicians do you need for breakout rooms?

The standard model is one breakout operator per room for complex or high-value sessions, or one operator shared across two simple adjacent rooms. A roving technician should cover every two to four rooms to handle escalations and turnaround support.

Why can’t some presenters access breakout room AV?

The most common cause is laptop compatibility: older venues often lack adequate HDMI inputs, and presenters arrive with USB-C-only machines or laptops that output at resolutions the display cannot accept. Carrying a full adapter kit and testing presenter laptops during the tech check prevents most of these failures.

How much does breakout room AV cost in the UK?

Per-room AV typically adds £800–£2,500 per day depending on screen size, whether the session is recorded or hybrid-enabled, and the city. London bookings generally run 20–30% above Leeds and Preston rates for equivalent kit and crew.

"


Breakout room AV for event planners: what you need

2/08/2026
Hands connecting cables to lighting console

"

The ColorSource light board is a compact ETC lighting console family designed for fast, intuitive control of LED and intelligent fixtures. Firefly AV, an AV hire and event production company based in Leeds and Preston, hires ColorSource consoles for events across the UK, with day rates typically in a range depending on model and technician requirements.

The four models are:

  • ColorSource 20 (CS20) — 20 faders, one DMX universe, no network or AV features
  • ColorSource 40 (CS40) — 40 faders, one DMX universe, no network or AV features
  • ColorSource 20 AV (CS20 AV) — 20 faders, up to five sACN/Art-Net universes, HDMI, audio I/O
  • ColorSource 40 AV (CS40 AV) — 40 faders, up to five sACN/Art-Net universes, HDMI, audio I/O

All models share a 7" multi-touch stage map display, RDM auto-discovery for intelligent fixtures, and CE compliance documentation available from ETC’s documentation index. The Amigo browser-based remote is supported on AV models.


Key takeaways

The CS40 AV is the most capable ColorSource model for UK event production, combining 40 faders, five sACN/Art-Net universes, HDMI and the Amigo remote in a compact console.

Point Details
Choose AV for media events Book a CS20 AV or CS40 AV whenever HDMI output, audio I/O or sound-to-light is required.
Verify RDM patch on site Auto-discovery saves time but must be checked against physical fixture addresses before the show.
Back up the show file Export to USB immediately after patching; keep a second copy offsite in case of firmware rollback.
Confirm CE/UK paperwork Request the ETC DoC compliance file for the hire unit before the event.
Firefly AV hire Firefly AV hires all four ColorSource models from Leeds and Preston, with day rates from £80–£150.

Table of Contents

What are the technical specs for each ColorSource model?

The table below draws on the official ColorSource app sheet and ETC’s workbook.

Spec CS20 CS40 CS20 AV CS40 AV
Faders 20 40 20 40
Control channels 80 80 80 80
DMX ports (5-pin XLR) 1 1 2 2
DMX universes 1 1 Up to 5 (sACN/Art-Net) Up to 5 (sACN/Art-Net)
RJ45 network port No No Yes Yes
HDMI output No No Yes Yes
Audio I/O No No Yes Yes
Amigo remote No No Yes Yes
Display 7" multi-touch 7" multi-touch 7" multi-touch 7" multi-touch
sACN / Art-Net No No Yes Yes

Full datasheets, CE/DoC compliance files and firmware release notes are available from the ETC documentation index. Download the datasheet and user manual before any hire.


Which ColorSource model should you pick for your event?

The CS20 suits a presenter-led conference in a hotel ballroom where you need four or five looks and nothing more. The CS40 gives you the extra fader real estate for a mid-size theatre or awards night without adding network complexity. Move to an AV model the moment your brief includes an HDMI feed to a confidence monitor, a video wall driven by the console, or sound-to-light effects — the AV models add sACN/Art-Net networking, OSC, audio I/O and the Amigo remote specifically for those integrations.

Technician adjusting lighting patch cable in theatre


What should you ask before hiring a ColorSource console?

Run through this checklist on your vendor call or technical briefing:

  • Fixture count and parameters — how many devices, and do any require more than basic intensity/colour control?
  • Universe count — one universe covers 512 DMX addresses; larger rigs or networked fixtures need an AV model’s sACN/Art-Net support
  • AV/media requirements — does the brief include HDMI output, audio I/O or sound-to-light? If yes, book an AV model
  • Amigo remote — will a technician need floor-level control during focus or rehearsal? Amigo is AV-model only
  • Firmware version — confirm the hire unit’s firmware revision matches the show file you plan to load
  • CE/UK compliance paperwork — request the DoC file for the specific unit; ETC maintains UK/GB variant compliance documents
  • Technician support level — dry hire, operator-only, or full crew?

Pro Tip: RDM auto-discovery can populate your patch quickly, but always walk the rig and verify that auto-populated fixture addresses and parameter assignments match the physical units before the doors open. A mis-patched mover at the back of a 500-seat room is not a problem you want to solve during the show.


How do you set up a ColorSource console in a UK venue?

Core setup is quick, but verify auto-discovery before you trust it. Follow this sequence:

  1. Power and security — connect to a clean, fused supply; confirm the venue’s power distribution meets the console’s rated draw. Check event power distribution requirements before load-in
  2. DMX/XLR cabling — run 5-pin XLR from the console’s DMX port(s) to the first fixture in each run; terminate the last fixture in each chain
  3. RDM discovery — trigger auto-discovery from the stage map; the console will populate fixture addresses and profiles automatically
  4. Verify the patch — walk the rig and confirm every auto-populated address against the physical fixture label; correct any mismatches in the patch editor
  5. Network setup (AV models) — connect RJ45 to your network switch; select sACN or Art-Net in the console’s network settings; assign universe numbers to match your node configuration
  6. Amigo remote — connect a tablet or laptop to the same network; open a browser and navigate to the console’s IP address to access Amigo for floor-level adjustments
  7. Show file backup — export the show file to USB immediately after patching; keep a second copy offsite or in cloud storage

For LED screen integration via HDMI, confirm routing and resolution during the tech rehearsal, not at showtime.

Pro Tip: Use the Playback Toy for live busking at corporate or broadcast events — it lets you filter and time pre-programmed looks so you can layer cues in real time without re-cueing from scratch. Assign quick-select groups before the show so floor changes take seconds, not minutes.


What are Simple Mode and Complete Mode, and when should you use each?

The user manual defines two operating modes that change how much of the console’s capability is exposed.

Simple Mode gives you a single page of faders and a limited set of looks. It is the right choice for:

  • Small corporate presentations where the LD needs four or five static states
  • Small theatre productions with a straightforward wash-and-special rig
  • Any event where the operator is not a dedicated lighting technician

Complete Mode exposes full parameter control, multiple pages of faders and advanced programming tools. Use it for:

  • Awards nights with moving lights and colour-mixing LED fixtures
  • Concerts and eSports events where cue stacks and submasters are essential
  • Broadcast-style events where precise colour temperature control matters

Switching between modes is non-destructive — your show data is preserved. The practical rule: start in Simple Mode during load-in to confirm the patch, then switch to Complete Mode once the rig is verified and programming begins in earnest.


How are ColorSource consoles used at common UK events?

  • Conference AV (Leeds, Manchester, Birmingham) — CS20 or CS20 AV driving a wash rig plus a Panasonic projector feed; the AV model handles HDMI to confidence monitors alongside DMX to the fixtures
  • Awards nights — CS40 AV controlling moving lights, LED battens and a pixel batten backdrop; sACN universes handle the networked rig; typical hire band £120–£150/day
  • Small theatre — CS20 in Simple Mode for a 12–16 fixture rig; one DMX universe is sufficient; day rate around £80–£90
  • Corporate product launches — CS40 AV with Absen LED wall, DB Technologies speakers and Sennheiser mics; sound-to-light on the AV model syncs the rig to the product reveal audio
  • Broadcast green room — CS20 AV for colour-accurate LED control; HDMI out to a monitor for the director; Amigo lets the gaffer adjust colour temperature from the floor without touching FOH
  • Trade-show demo booths — CS20 running a small LED wash rig on Lite Deck staging; Simple Mode keeps operation accessible for non-specialist booth staff
  • eSports events — CS40 AV with full colour-mixing LED fixtures, Birddog cameras feeding the broadcast chain, and Allen & Heath console for audio; Complete Mode handles the cue-heavy show

RDM auto-discovery means fixture profiles populate without manual address entry, cutting patch time on multi-fixture rigs considerably.


What quick fixes should you try if something goes wrong on site?

Prioritise signal chain and power checks first, then console configuration. In order:

  1. Check power and fuses at the distribution board
  2. Confirm DMX cabling continuity and termination on the last fixture in each run
  3. Re-run RDM discovery and cross-check auto-populated addresses against the physical rig
  4. Verify the console’s output mode — DMX vs sACN — matches the node or fixture expectation
  5. Check Amigo connectivity: confirm the console and remote device share the same subnet
  6. Restore from the USB show file backup if a configuration change has caused unexpected behaviour

Pro Tip: Amigo is your fastest on-floor diagnostic tool. Rather than walking back to FOH every time a fixture behaves unexpectedly, open Amigo on a phone or tablet and adjust intensity, colour or address from the fixture position. It cuts troubleshooting time on large rigs significantly.

For firmware issues, check the ETC documentation index for the current release notes. If a recent update introduced instability, roll back by loading the previous firmware file from USB and restoring the pre-update show file.


CS20 / CS40 / CS20 AV / CS40 AV: side-by-side comparison

Firefly AV stocks and hires all four models from Leeds and Preston. For most UK corporate and conference events, the CS20 AV covers the brief. The CS40 AV is the default recommendation for awards nights, concerts and eSports productions where moving lights and multi-universe rigs are standard.


Where to find official specs, manuals and UK compliance documents

  • ETC ColorSource documentation index — datasheets, technical drawings, CE/DoC compliance files and UK/GB variant documents
  • ColorSource user manual v1.1.1 — full operating instructions covering Simple Mode, Complete Mode, patching and backup procedures
  • CS-CSAV Workbook v3.1A — model-by-model feature breakdown and AV workflow guidance
  • ETC ColorSource features page — Amigo, Playback Toy, sACN/Art-Net and AV feature descriptions
  • Firmware release notes — available from the documentation index; check before every hire to confirm version compatibility with your show file

What the ColorSource range gets right — and where most operators go wrong

Most technicians who struggle with ColorSource consoles on site have one thing in common: they trusted RDM auto-discovery without verifying it. The auto-populate feature is genuinely useful, particularly on a 30-fixture rig under load-in pressure. But it is a starting point, not a finished patch. A fixture that responds to the wrong address during a product reveal is a harder conversation than the five minutes it takes to walk the rig beforehand.

The other persistent mistake is booking a standard model when the brief quietly includes a video element. “Just an HDMI feed to the screen” is exactly the kind of detail that surfaces at tech rehearsal when the console is already in the rack. AV models cost marginally more per day; the alternative is a last-minute re-hire or a workaround that nobody is happy with.

Simple Mode is underused by experienced operators who default to Complete Mode out of habit. For a small corporate show with a non-specialist operator, Simple Mode is the correct choice — it reduces the chance of an accidental parameter change mid-presentation and keeps the interface readable under pressure.


What the ColorSource range gets right — and where most operators go wrong — overview diagram

Firefly AV hires ColorSource consoles across the UK

Firefly AV is the practical choice for event managers and venue operators who need a ColorSource console with a technician who already knows the rig. Based in Leeds and Preston and working UK-wide on AV equipment hire, Firefly AV supplies all four ColorSource models alongside the wider kit that typically surrounds them: Absen LED walls, Panasonic projectors, DB Technologies speakers, Sennheiser mics and Lite Deck staging.

Firefly AV

Day rates run from £80 for a CS20 to £150 for a CS40 AV, with technician day rates quoted separately. Dry hire is available on a two-day hire week. For conferences, awards nights, eSports events and broadcast productions, Firefly AV can supply the console, the crew and the surrounding event production setup as a single package. Contact Firefly AV directly for availability and a day-rate quote specific to your event.


Sources

  • ETC ColorSource Consoles ETC ColorSource Consoles

FAQ

What is a ColorSource light board?

A ColorSource light board is a compact ETC lighting console designed for LED and intelligent fixture control. It uses a 7" multi-touch stage map and RDM auto-discovery to simplify patching for live events.

How many DMX universes does a ColorSource console support?

Standard CS20 and CS40 models support one DMX universe (512 addresses). AV models (CS20 AV and CS40 AV) support up to five universes via sACN or Art-Net over Ethernet.

What does the Amigo remote do on ColorSource AV consoles?

Amigo is a browser-based remote available on AV models that lets a technician control the console from a phone or tablet on the same network, useful for floor-level focus and troubleshooting without returning to FOH.

Can Firefly AV supply a ColorSource console with a technician?

Yes. Firefly AV hires all four ColorSource models from its Leeds and Preston bases, with technician support available. Day rates vary depending on model, with crew quoted separately.

When should I use Simple Mode versus Complete Mode?

Use Simple Mode for small shows with a limited number of looks and non-specialist operators. Switch to Complete Mode for larger rigs, moving lights, or any event requiring multi-page fader control and full parameter access.

"


ColorSource light board: pick, set up and hire in the UK

3/08/2026
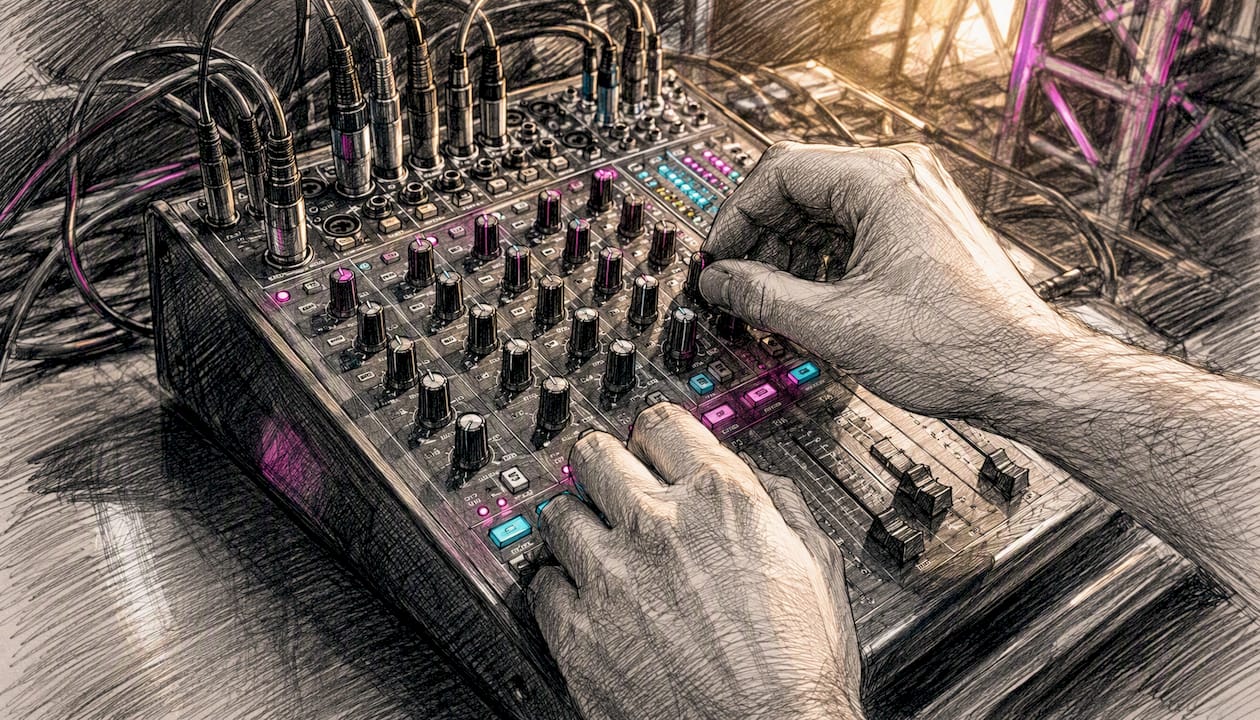
Hand connecting XLR cable to AV rack

"

The Denon Professional DN-500BD is a 1RU rack-mount Blu-ray and media player built for professional AV installations. The original DN-500BD is discontinued. The DN-500BD MKII is the current, actively supported model and the one to specify for any new purchase or hire. Firefly AV is an AV hire and event production company based in Leeds and Preston, working UK-wide, and we can supply the DN-500BD MKII alongside technicians for conferences, corporate presentations, touring productions and fixed venue installs.

Key facts at a glance:

  • 1RU rack-mount chassis, 483 × 273 × 44 mm, 2.7 kg
  • Balanced XLR L/R outputs at +4 dBu alongside discrete 7.1 analogue RCA
  • RS-232C (9-pin D-sub) and RJ-45 LAN/IP control with a published protocol guide
  • Power-on Play, panel lock, IR remote lock and OSD hide for unattended live use
  • Plays Blu-ray, DVD, CD, USB and SD media

Key takeaways

The DN-500BD MKII is the current, actively supported model and the correct unit to specify for any new professional AV installation or hire in the UK.

Point Details
MKII is the current model The original DN-500BD is discontinued; specify the DN-500BD MKII for all new purchases and hires.
XLR and RS-232C are the integration essentials Balanced XLR at +4 dBu and RS-232C/LAN/IP control are the outputs that make this a professional rack device.
USB/SD playback reduces touring risk FAT32-formatted USB with MP4 is the most reliable show-delivery format and removes disc-tray risk.
Firmware is model-specific MKII and original firmware are not cross-compatible; verify the model identifier before any update.
Firefly AV hire covers UK-wide Firefly AV supplies tested MKII units with technicians for events across the UK; request a quote via the equipment hire catalogue.

Table of Contents

What are the essential specs for rack and procurement planning?

The DN-500BD MKII spec sheet and Denon product page give you everything a rigger or procurement manager needs before committing to a rack slot.

Parameter DN-500BD MKII
Rack size 1RU
Dimensions (W × D × H) 483 × 273 × 44 mm
Weight 2.7 kg
Typical power consumption 15 W
Standby power <0.5 W
Front I/O USB-A, SD card slot, disc tray
Rear audio XLR balanced L/R, 7.1 analogue RCA, coaxial digital
Rear video HDMI
Control RS-232C D-sub, RJ-45 LAN, IR

Pro features checklist:

  • Power-on Play (auto-starts playback on power-up, no operator needed)
  • Panel lock and IR remote lock (prevents accidental button presses during a show)
  • OSD hide (removes on-screen overlays from the video output)
  • Repeat and loop modes for continuous playback
  • RS-232C and IP control for integration with show automation

Pro Tip: At 15 W typical draw, the MKII is light on power, but plan your rack PDU for peak draw across all units simultaneously. For touring racks, a 9U acoustic server rack gives you a compact, manageable enclosure for a media player, DSP and control interface without overbuilding.


How do you integrate the DN-500BD MKII into a professional signal chain?

The output set on the MKII covers most professional installation scenarios without adapters. Understanding which output to use where saves time during load-in.

Audio outputs:

  • Balanced XLR L/R at +4 dBu — connect directly to an Allen & Heath console, DSP input or FOH rack without a DI box
  • Discrete 7.1 analogue RCA — for surround installations or multi-channel distribution
  • Coaxial digital (S/PDIF) — useful for digital mixers and audio processors that accept AES3 or S/PDIF

Video output:

  • HDMI — single cable carrying A/V to a video processor, scaler or LED wall controller

The balanced XLR outputs are the reason this unit earns its place in a professional rack rather than a consumer player. Running balanced at +4 dBu over long cable runs to a DB Technologies amplifier or an Allen & Heath console eliminates the ground-loop hum that plagues unbalanced RCA feeds in large venues. For broadcast or recording feeds, you can split the XLR output directly to a Birddog camera chain or a broadcast mixer without level matching. If you need to DI the player into a passive split or a FOH feed, a Radial Pro-AV1 passive DI box handles the conversion cleanly.

The 7.1 RCA outputs are less commonly used in touring but matter for fixed cinema-style installs and immersive audio rooms where a multi-channel amplifier or processor takes discrete channel feeds.

Technician capping RCA connectors in audio room

Pro Tip: In touring environments, always use the XLR outputs and tie off the RCA connectors with protective caps. Loose RCA connectors vibrating against a rack shelf are a common source of intermittent noise faults mid-show.


What disc, file and subtitle formats does the DN-500BD MKII play?

The Zenitel printable spec lists the full compatibility matrix. For corporate and venue use, the practical summary is:

Disc formats:

  • Blu-ray: BD25, BD50, BD-ROM, BD-R, BD-RE
  • DVD: DVD+R, DVD-R, DVD+RW, DVD-RW, DVD-ROM, DVD-Video
  • CD: CD-DA, CD-R, CD-RW, DTS music disc

USB and SD file formats:

  • Video containers: MP4, MKV, AVI
  • Audio: MP3, WAV, FLAC
  • Images: JPEG, PNG
  • Subtitles: SRT, ASS

File systems and capacity:

The tech spec PDF confirms FAT16, FAT32 and NTFS are all supported. USB drives up to 2 TB total capacity and SD cards up to 128 GB are documented.

Pro Tip: For corporate presentations and awards nights, deliver show content as H.264 MP4 in a FAT32-formatted USB drive. It is the most reliably read combination across venue players and avoids the codec negotiation issues that occasionally affect MKV containers with unusual audio tracks. Keep a second USB as a verified backup.


What control options does the DN-500BD MKII support, and where is the protocol guide?

Three control interfaces are available: RS-232C, LAN/IP and IR remote. For any installation where a show controller or automation system is involved, RS-232C or LAN/IP is the correct choice.

Control interfaces:

  • RS-232C via 9-pin D-sub connector — the standard for Crestron, AMX and Q-SYS integrations
  • RJ-45 LAN/IP control — useful for networked AV systems and remote monitoring
  • IR remote — included for manual operation; can be locked out via panel/IR lock

The DN-500BD MKII Protocol Guide v1.1 documents the full RS-232C command set, including play, stop, pause, chapter skip and status query strings. Download it before writing any control module. Crestron and AMX drivers built on this guide are straightforward; the command structure is clean and well-documented. For a broader view of why RS-232/IP-controllable devices are preferred in professional signal chains, the broadcast AV equipment guide covers the integration rationale.

Pro Tip: Before load-in, test every RS-232 cue sequence from the actual show controller, not just a laptop terminal. Baud rate mismatches (the MKII default is documented in the protocol guide) and cable pinout errors are the two most common causes of control failure on the day. A null-modem loopback test on the cable before it goes into the rack takes two minutes and saves an hour of fault-finding.


DN-500BD vs DN-500BD MKII: which should you specify?

The original DN-500BD is no longer the active model. For any new purchase or hire, specify the MKII.

Feature DN-500BD (original) DN-500BD MKII
Status Discontinued Current, actively supported
Supported disc formats BD, DVD, CD BD25/50, BD-R/RE, DVD variants, CD, DTS
Audio outputs XLR balanced L/R, 7.1 RCA, coaxial XLR balanced L/R (+4 dBu), 7.1 RCA, coaxial
Control options RS-232C, IR RS-232C, LAN/IP, IR
Rack size 1RU 1RU
Pro features Power-on Play, panel lock, OSD hide Power-on Play, panel/IR lock, OSD hide, loop/repeat
UK availability Used/marketplace only New via specialist AV resellers; hire via Firefly AV

The practical consequence: the original is unlikely to receive further firmware updates and sourcing replacement units or verified spares is increasingly difficult. The MKII adds LAN/IP control on top of RS-232C, which matters for networked installations, and its firmware is actively maintained by Denon Professional.


What do riggers need to know about rack installation and transport?

At 273 mm chassis depth, the MKII fits comfortably in a standard 19-inch rack with 300 mm or greater internal depth. Allow at least 25 mm of rear clearance for cable dressing and connector access. Running at 15 W typical and under 0.5 W in standby, it generates minimal heat, but do not block the chassis vents with cable bundles in a sealed rack. For a 24U rack enclosure in a fixed install, position the player in the middle of the rack rather than at the top to keep the centre of gravity low and reduce vibration transfer to the disc tray.

Touring and transport checklist:

  • Secure the disc tray with a transit lock or foam insert before moving the rack
  • Use rack ears with M6 cage nuts and check torque — a loose player in a touring rack is a disc-read fault waiting to happen
  • Pad the front panel in a flight case to protect the tray mechanism
  • Label the unit with firmware version and last test date on a cable tie tag

Pre-show checks:

  • Confirm firmware version matches your tested configuration
  • Enable panel lock and IR lock before doors open
  • Run OSD hide and verify the output is clean through the full signal chain
  • Test Power-on Play with the actual show file loaded

Pro Tip: The disc tray is the most transport-sensitive component. For touring shows, Firefly AV recommends using USB or SD playback rather than physical disc wherever the content allows. It removes the tray mechanism from the risk equation entirely.


Where can you buy or hire the DN-500BD MKII in the UK?

New units are available through specialist professional AV resellers and Denon Professional’s authorised UK distribution network. The original DN-500BD appears on general marketplaces such as Amazon UK as used stock; treat any used unit with caution and verify firmware version and playback history before committing.

Realistic GBP price guidance:

  • DN-500BD MKII new: typically £600–£900 depending on reseller and stock availability
  • DN-500BD original used: £150–£350 on general marketplaces, condition-dependent
  • Dry hire day rate (MKII): typically £50–£120 per day depending on duration and support level
  • Technician day rate for UK events: typically £250–£450 per day depending on role and travel

These are indicative ranges; actual pricing varies with demand, event duration and whether a technician is included. For pro playback hire, Firefly AV can quote based on your specific event dates and location across the UK.

What to ask any supplier before committing:

  • What firmware version is installed, and has it been tested against your show format?
  • Is the RS-232 protocol guide included or available for download?
  • What is the warranty period and return policy for the unit?
  • Can you provide a test playback on your actual show file before delivery?
  • Is a spare unit available as a show backup?

Pro Tip: For one-off corporate events, hire almost always beats purchase on total cost once you factor in storage, maintenance and the risk of owning a unit that sits idle between shows. Firefly AV’s equipment hire catalogue covers the full rack kit list.


Where do you find manuals, firmware and the protocol guide?

Official downloads to bookmark:

  • Product page and overview: DN-500BD MKII on Denon Pro — spec overview, feature list and links to support
  • Protocol guide: DN-500BD MKII Protocol Guide v1.1 — RS-232C command set for automation
  • Tech spec PDF: Denon Pro MKII tech specs — full I/O, file system and capacity details
  • FAQ article: Denon Pro DN-500BD MKII FAQ — OSD hide, panel lock and Power-on Play explained
  • Firmware: check the Denon Pro support portal for the current release; firmware for the original DN-500BD and the MKII is not cross-compatible. Applying the wrong firmware risks device failure — verify the exact model identifier before updating.

For warranty and support, confirm with your UK reseller whether the unit carries a manufacturer warranty or a reseller-backed guarantee. Used units from general marketplaces typically carry no warranty. If buying new, ask the reseller for the warranty registration process and the support contact for firmware issues.

Pro Tip: Keep a copy of the protocol guide and a tested RS-232 cue script in your show-cue repository alongside the show file. If a control system fails and you need to rebuild the integration on-site, having the command reference immediately to hand cuts recovery time significantly.


What are the most common live-use problems and how do you fix them?

Quick fault checklist:

  • No audio from XLR: check output level is not set to minimum in the player menu; verify XLR cable pinout (pin 2 hot); confirm the console input is set to line level, not mic
  • HDMI handshake failure: power-cycle the player after connecting to a scaler or LED wall processor; check EDID settings on the receiving device; try a different HDMI cable
  • Disc read error: clean the disc; try USB playback as an immediate fallback; check firmware version
  • OSD visible on output: enter the player menu and enable OSD hide; test through the full signal chain including any scaler, as EDID negotiation can reset display settings
  • RS-232 control not responding: confirm baud rate matches the protocol guide; check cable pinout (straight-through vs null-modem); run a loopback test on the cable; verify the control system is sending the correct command terminator

USB/SD fallback preparation: format a USB drive as FAT32, copy the show file as H.264 MP4, verify playback on the actual unit before the show, and label the drive clearly. Keep it in the rack bag as a hot swap.

If RS-232 control fails during a show and you cannot recover quickly, switch to IR remote operation and log the firmware version and cable details for post-show diagnosis. Contact your supplier or Denon Pro support if the fault persists across a cable swap.


When should you hire versus buy the DN-500BD MKII?

Three scenarios cover most UK event and venue situations:

  • One-off corporate presentation or awards night: hire. A tested MKII with a technician from Firefly AV costs less than purchase when you factor in storage and the risk of owning a unit that needs firmware maintenance between uses.
  • Regular weekly venue use (theatre, conference centre, hotel): purchase the MKII. At regular use frequency, ownership pays back within a season and you control firmware and maintenance scheduling.
  • Touring production: hire. Firefly AV maintains and supplies tested units, handles transport logistics and can provide a spare. Disc-tray wear and firmware currency are our problem, not yours.

Firefly AV’s hire packages typically include the unit, pre-show test playback, and a technician if required. Day rates vary by event type and duration; contact us for a quote tied to your specific dates and venue.

Pro Tip: For fixed installs, always specify the current MKII rather than sourcing a used original. Firmware support and the LAN/IP control interface are worth the price premium, particularly for installations where a control system integrator will need to maintain the RS-232 or IP module long-term.


The DN-500BD MKII: what most guides miss about specifying it correctly

Most write-ups on the DN-500BD MKII treat it as a straightforward product review: list the outputs, note the rack size, mention the price. That misses the point for anyone actually specifying it into a show.

The device’s value is not in the Blu-ray playback. Physical disc is increasingly a fallback format in professional AV, not a primary delivery method. The real reason to specify this unit is the combination of balanced XLR outputs, RS-232C/IP control and Power-on Play in a 1RU chassis at a price point that does not require a capital expenditure conversation. That combination is genuinely rare at this price.

Where I see procurement go wrong is in treating the original DN-500BD and the MKII as interchangeable. They are not. The LAN/IP control interface on the MKII is not a minor upgrade; for any installation where a Crestron or Q-SYS system is involved, it changes the integration architecture. Sourcing a used original to save £200 and then discovering the control system driver was written for the MKII’s IP interface is an expensive lesson.

The OSD hide function is another one that gets underestimated. Test it through the full signal chain, including any scaler or LED wall processor, before the show. EDID negotiation between the player and a downstream device can reset display parameters and bring the OSD back. This is documented in Denon’s own guidance and it still catches people out at load-in.

For UK event managers, the hire-versus-buy question is simpler than it looks. If you are running fewer than eight to ten events a year with this device, hire wins on total cost and removes firmware and maintenance responsibility. Above that frequency, ownership makes sense, but only with the current MKII.


The DN-500BD MKII: what most guides miss about specifying it correctly — overview diagram

Firefly AV supplies tested DN-500BD MKII units for UK events

Firefly AV is the practical alternative to sourcing and maintaining your own rack media player. Based in Leeds and Preston and working across the UK, we supply the DN-500BD MKII as part of a complete rack package, pre-tested with your show file before it leaves our warehouse.

Firefly AV

For a corporate conference in Manchester, an awards night in London or a touring production through multiple UK venues, our hire includes the unit, pre-show playback verification and a technician if required. You get a tested, firmware-current device with the RS-232 protocol files ready, not a unit pulled from a shelf and shipped cold. Browse our AV equipment hire catalogue for the full rack kit list, or contact us directly for a quote tied to your event dates and venue.


Sources

  • DN-500BD-MkII (Zenitel printable spec)

FAQ

Is the Denon Professional DN-500BD still available to buy new?

The original DN-500BD is discontinued; new stock is no longer available through authorised channels. The DN-500BD MKII is the current model and is available new through specialist professional AV resellers in the UK.

What control protocol does the DN-500BD MKII use for show automation?

The MKII supports RS-232C via a 9-pin D-sub connector and LAN/IP control via RJ-45. The full command set is documented in the DN-500BD MKII Protocol Guide v1.1, available from the Denon Professional support pages.

Can Firefly AV supply a DN-500BD MKII with a technician for a UK event?

Yes. Firefly AV hires the DN-500BD MKII with pre-show playback testing and can include a technician for load-in and show operation. Contact us via the equipment hire page for a quote.

What is the best file format for USB playback on the DN-500BD MKII?

MP4 on a FAT32-formatted USB drive is the most reliable combination for corporate and venue use. The MKII also supports MKV, AVI, MP3, WAV and FLAC from USB drives up to 2 TB.

Is the firmware for the original DN-500BD compatible with the MKII?

No. Firmware for the original DN-500BD and the DN-500BD MKII is not cross-compatible. Applying the wrong firmware risks device failure; always verify the exact model identifier before downloading or applying any update.

"


Denon Professional DN-500BD: the UK buyer’s and hire guide

3/08/2026
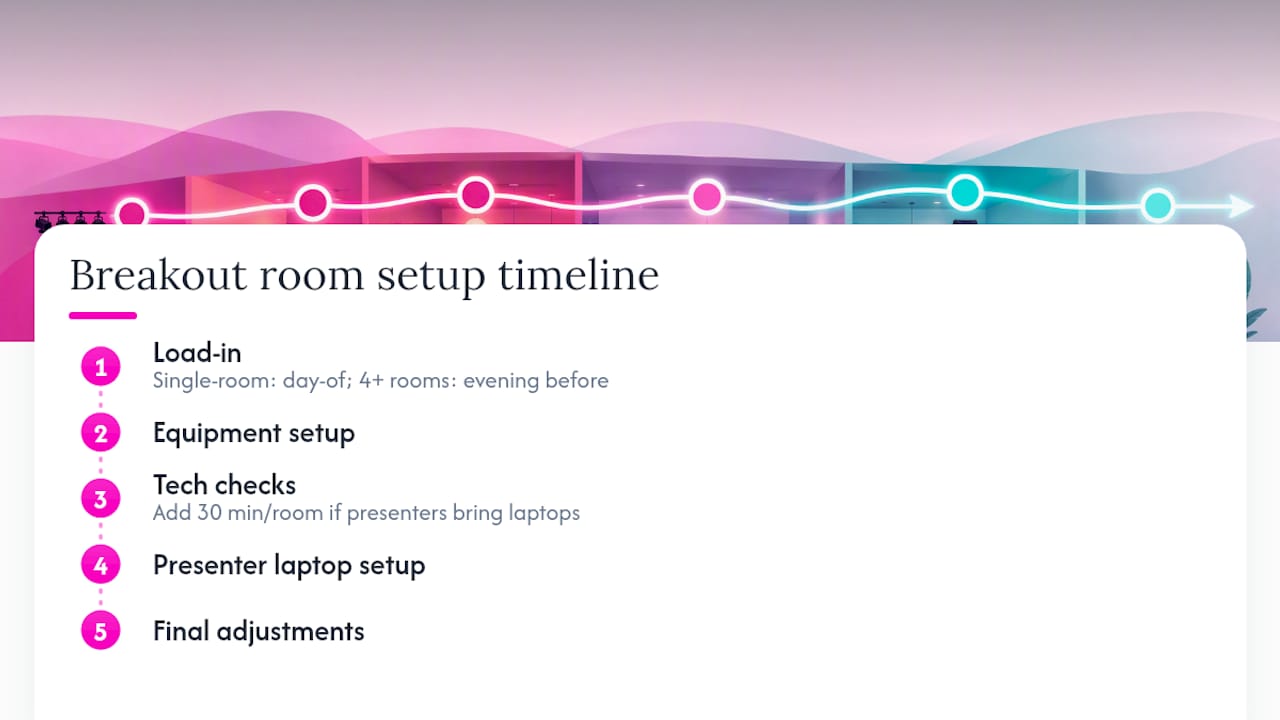
Technician wiring cables in gaming arena rack

"

A gaming arena AV system is the integrated network of displays, audio equipment, signal routing, production control, and streaming infrastructure that captures gameplay, processes it in real time, and distributes it simultaneously to in-venue screens, spectators, shoutcasters, and online audiences. Without it, an esports event is just people staring at monitors in silence. Firefly AV is an AV hire and event production company based in Leeds and Preston, working UK-wide, and we specify and supply these systems for everything from university gaming hubs to touring esports finals.

The system’s primary jobs, in order:

  • Capture raw gameplay video and audio from each player station
  • Route and process those feeds through a production control room (switching, graphics, replay)
  • Distribute finished programme to in-venue LED walls and PA systems
  • Feed broadcast-grade streams to online platforms and archive

Pro Tip: Where latency is mission-critical, prefer broadcast-grade IP routing using ST2110 or SDVoE over standard commercial AV matrix switchers. The deterministic timing of these protocols prevents the frame-drift that makes competitive play unfair.

Key takeaways

A gaming arena AV system requires broadcast-grade signal routing, a 10GbE IP network, and named crew for each production role to deliver fair, low-latency competition and professional streaming output.

Point Details
Specify latency targets early Player-facing displays need ≤16ms end-to-end video latency; agree this in writing before installation.
Choose the right transport protocol SDVoE or ST2110 for broadcast-grade finals; NDI or Dante/AES67 for flexible community venues.
Plan power and rigging before the LED wall Structural load and power circuits must be confirmed before finalising display size and weight.
Build in redundancy at every critical path Redundant switches, failover encoders and UPS cover the failure modes that cause live event disasters.
Firefly AV for UK hire and production Firefly AV supplies esports AV hire and crewed production from Leeds and Preston, UK-wide.

Table of Contents

What does a gaming arena AV system actually do?

The short answer: it runs several parallel signal flows at once, each with different latency tolerances and quality requirements. Getting those flows right is what separates a venue that feels professional from one that feels like a LAN party with a projector.

The three main flows are:

  • Player station to production: raw HDMI or DisplayPort captures from gaming PCs, routed via KVM or AV-over-IP encoders to the production control room for switching and replay
  • Camera feeds to replay, graphics and stream: BirdDog PTZ cameras feeding NDI streams into a production switcher (Panasonic KAIROS, Ross Video) for live cutting, graphics overlay and encoding

A few terms planners regularly encounter on spec sheets:

  • Low latency: the delay between a player’s action and its appearance on a display or stream; sub-frame latency (under 16ms) is the target for player-facing screens
  • KVM (Keyboard, Video, Mouse): a switching system that lets operators control multiple computers from a single point; IHSE systems are commonly specified for professional arenas
  • AV-over-IP: the transport of audio and video signals as data packets over an Ethernet network rather than dedicated coaxial or fibre runs; protocols include Dante, NDI, SDVoE and ST2110

Dante handles audio routing across most mid-to-large venues because it runs on standard Ethernet and integrates with consoles from Allen & Heath and others. For video, NDI suits lower-budget or flexible installs; SDVoE and ST2110 suit broadcast-grade productions where deterministic timing is non-negotiable.

What are the key components of a gaming arena AV system?

These component groups determine latency, image fidelity and operational flexibility more than any other single decision. Specify them wrong and no amount of post-installation tweaking recovers the situation.

Component class Typical technology Example brands (UK-available) Notes
LED video wall Fine-pitch direct-view LED panels Absen M2.9 Pro Pixel pitch ≤2.9mm for close seating; brightness 800–1,200 nits typical
Projectors 4K laser, short-throw options Panasonic (PT series) Suited to secondary screens or overflow areas
Cameras PTZ, NDI-native BirdDog P200 NDI-native simplifies routing; 4K60 for broadcast
Audio console Digital mixing, Dante-enabled Allen & Heath Avantis 64-channel capacity; Dante card for IP audio
PA system Line array or point-source DB Technologies DVA series SPL headroom of 10–15dB above programme level
Microphones Handheld, headset, boundary Sennheiser EW series, MKH range Wireless for shoutcasters; wired boundary for player stations
Comms Intercom matrix Riedel Artist/Bolero Connects tech director, vision mixer, audio engineer
KVM switching High-port centralised KVM IHSE Draco series Centralised processing reduces latency and simplifies maintenance
AV-over-IP encoders/decoders SDVoE, NDI, ST2110 Black Box MCX, BirdDog 10–40+ units depending on venue size
Production switcher IP-native live production Panasonic KAIROS, Ross Video Multi-layer switching; low-latency streaming output
Signal distribution Dante/AES67, ST2110, SDVoE Dante-enabled hardware Backbone for audio and video transport

Purchase versus hire is a genuine decision point. For a permanent venue, owning LED panels and a production rack makes sense over a three-to-five-year horizon. For touring events or university spaces that run esports only occasionally, hiring from a supplier like Firefly AV keeps capital costs down and gives access to current-generation kit without depreciation risk.

On processing architecture: centralised racked processing (KVM, encoders, switchers all in one machine room) simplifies maintenance and enables better redundancy than distributed edge encoders at each player station. The trade-off is longer cable runs and a more complex initial install. For venues running 20 or more player stations, centralised is almost always the right call.

Pro Tip: Plan Lite Deck staging and rigging points before finalising the LED wall specification. A 10m × 4m LED wall at 4.5kg per panel adds up fast; confirm structural load capacity and power distribution early, or the wall design will have to shrink to fit what the building can support.

How do networking, latency and signal integrity affect an esports venue?

Signal integrity and ultra-low latency are mission-critical for esports in a way they simply are not for a conference or awards night. The primary failure modes are ground loops (causing hum and interference), packet loss on congested networks, and firmware incompatibility between encoders and switches.

Transport options and their practical trade-offs:

  • Dante / AES67: the standard for professional audio-over-IP; runs on standard Ethernet; AES67 ensures interoperability between manufacturers; latency configurable down to 0.25ms
  • NDI: flexible, software-friendly video-over-IP; lower barrier to entry; latency typically 1–4 frames; suited to flexible or lower-budget installs
  • SDVoE: zero-compression video transport over 10GbE; sub-frame latency; suited to player-facing displays where any perceptible delay affects gameplay; university deployments using Black Box MCX have demonstrated its practical benefits for distributed routing
  • ST2110: broadcast-standard IP video; deterministic timing; used in professional broadcast facilities and increasingly in purpose-built esports arenas migrating away from coaxial workflows

Network planning checklist:

  1. Separate VLANs for game data traffic, production AV, and venue management
  2. 10GbE backbone switches with QoS policies prioritising AV traffic
  3. Redundant switch paths with spanning tree or RSTP failover
  4. UPS on all production-critical equipment; generator provision for large venues
  5. Shielded Cat6A or fibre for all AV-over-IP runs; proper grounding at patch panels
  6. Firmware version matrix documented before commissioning

Pro Tip: For finals-level or broadcast-grade productions, ST2110 or SDVoE is normally preferable to consumer-grade commercial AV matrix switchers. The reason is deterministic timing: ST2110 timestamps every packet so the receiver can reconstruct the signal with frame-accurate precision, regardless of network jitter. A commercial AV matrix cannot offer that guarantee.

AVIXA notes that flexibility is a dominant design driver for esports venues, which means the network architecture needs to support both broadcast-grade finals and casual community gaming on the same infrastructure. Separate VLANs and reconfigurable routing make that possible without rebuilding the network for each event type.

What does an esports event production workflow look like?

End-to-end, the signal flow runs: player station capture → production control room → broadcast/stream output + in-venue LED wall + archive recording. Every step has a named role responsible for it.

Roles and responsibilities:

  • Tech director: overall signal flow oversight, calls cuts and manages the production timeline
  • Vision mixer: operates the production switcher (KAIROS or Ross Video), cutting between game feeds, cameras and graphics
  • Audio engineer: manages the Allen & Heath console, balancing shoutcaster mics, crowd mics, game audio and music beds
  • Shoutcasters: provide live commentary from a dedicated booth with Sennheiser microphones and monitor speakers
  • Replay operator: manages slow-motion replay clips and highlight packages using dedicated replay servers
  • Network engineer: monitors AV-over-IP traffic, encoder health and stream stability throughout the event

Step-by-step workflow:

  1. Capture: player PCs output via HDMI/DisplayPort to AV-over-IP encoders (Black Box MCX or BirdDog) or KVM (IHSE Draco); feeds arrive in the production control room as IP streams
  2. Mix and switch: the vision mixer selects between game feeds, shoutcaster cameras and graphics using the production switcher; Panasonic KAIROS handles multi-layer compositing with ultra-low latency for large-scale streaming
  3. Graphics and overlays: Disguise or Ross Video graphics engines add scoreboards, player stats and sponsor overlays in real time
  4. Replay: the replay operator pulls highlights and slow-motion clips; these feed back into the switcher for broadcast and in-venue display
  5. Encode and stream: the programme output is encoded (hardware or software encoders) for simultaneous delivery to Twitch, YouTube and any IPTV feeds; a separate clean feed goes to the LED wall
  6. Monitor: the network engineer watches encoder health, stream bitrate and AV-over-IP packet loss on a dedicated monitoring display; any fault triggers a pre-planned failover route

For multi-platform outputs, a typical arrangement uses separate encoder instances for each destination: one for the in-venue LED wall (low latency, uncompressed or lightly compressed), one for the broadcast stream (CBR H.264 or H.265 at platform-specified bitrate) and one for archive. Riedel comms keeps all roles connected throughout.

Note for published version: a boxed signal-flow diagram showing Capture → Switcher → Graphics → Encoder → CDN alongside the in-venue LED wall output would help planners visualise the routing at a glance.

How do you plan and specify a gaming arena AV install in the UK?

How do you plan and specify a gaming arena AV install in the UK? — overview diagram

Specify to the use case first. A community gaming hub at a university needs different infrastructure from a touring esports finals venue or a purpose-built broadcast studio. Getting that framing right before any procurement conversation saves significant cost and avoids over-engineering.

Planning phases:

  • Concept: define the use cases (community, competitive, broadcast), player count, audience capacity and streaming requirements
  • Technical design: produce a signal flow diagram, network topology, power schedule and rigging plan; involve a systems integrator at this stage
  • Procurement or hire: issue an RFP with specific brand/model requirements and measurable parameters; decide hire vs purchase per component
  • Installation: cable infrastructure first, then rack build, then AV-over-IP commissioning; allow time for LED wall manufacturing lead times
  • Test and acceptance: staged testing against agreed pass/fail criteria (see Section 8)
  • Operator training: minimum one full day; document all configurations

Typical UK project timeline:

Milestone Typical lead time (UK) Notes
Site survey and concept design 1–2 weeks Requires venue plans and power schedule
Technical design and RFP 2–4 weeks Integrator involvement recommended
LED wall manufacturing and delivery 6 weeks Absen and similar; order early
Rack build and pre-configuration 2–3 weeks Off-site where possible
On-site installation and cabling 1–3 weeks Depends on venue complexity
Commissioning and testing 3–5 days Allow more for large installs
Operator training 1–2 days On-site with full system live

UK cost guidance (approximate hire or install bands):

  • Small university gaming room (8–16 stations, basic LED wall, stereo PA): £8,000–£25,000 installed, or £1,500–£4,000/day hire including crew
  • Mid-size arena (32–64 stations, large LED wall, full PA, production control): £40,000–£120,000 installed, or £5,000–£15,000/day hire
  • Purpose-built broadcast-grade venue: £200,000+ installed; day rates for technicians typically £250–£600 per person depending on role and experience

For LED screen setup and power planning, budget at least one 32A three-phase circuit per 20–25 square metres of LED wall, plus dedicated circuits for production racks and PA amplifiers.

Regulatory checklist:

  • PAT testing for all portable electrical equipment before each event
  • Fixed wiring inspection (BS 7671) for permanent installs
  • Local authority premises licence conditions (noise limits, occupancy, fire egress)
  • Noise at Work Regulations 2005: monitor and limit audience and crew exposure above 80dB(A)
  • Structural engineer sign-off for rigging points above 250kg total load
  • CDM Regulations 2015 apply to larger permanent installations

SDVoE’s analysis of AV opportunities in esports venues highlights that specialist integrators are increasingly necessary as venue complexity grows, particularly for IP network design and broadcast integration. Involving one at the technical design stage, not after procurement, is the single most cost-effective decision a venue manager can make.

What does a sample kit list look like for a UK gaming arena?

Planners should ask for specific brand names, model numbers and measurable parameters in every hire quote or RFP. Vague specifications (“a good LED wall”) produce inconsistent results and make like-for-like comparison impossible.

Function Example kit Key specification
LED video wall Absen M2.9 Pro 2.9mm pixel pitch; 1,000 nits brightness; 60Hz refresh
Projector (secondary) Panasonic PT-RZ series 4K laser; high brightness; lens shift
Cameras BirdDog P200 PTZ NDI-native; 4K60; PoE+ powered
Audio console Allen & Heath Avantis 64-channel digital; Dante card; 96kHz
PA system DB Technologies DVA series line array High SPL performance; Dante-enabled amplifiers
Microphones Sennheiser EW-DX (wireless), MKH 416 (commentary) <5ms wireless latency; broadcast-grade capsule
Comms Riedel Artist / Bolero wireless Full-duplex; scalable to many panels
KVM switching IHSE Draco tera series Sub-1ms latency; 4K60 support
AV-over-IP Black Box MCX (SDVoE) Zero-compression; 10GbE; sub-frame latency
Production switcher Panasonic KAIROS / Ross Video IP-native; multi-layer; low-latency stream output
Signal processing Dante/AES67 network 0.25ms configurable latency; standard Ethernet
Broadcast comms Riedel MediorNet / Brompton Technology (LED processing) Brompton Tessera for LED calibration and processing

What does a sample kit list look like for a UK gaming arena? — overview diagram

Confetti X, a purpose-built educational esports facility, demonstrates what an integrated specification looks like in practice: a 10m × 4m 4K LED wall, a broadcast gallery and dedicated training suites, all on a unified IP infrastructure.

Specification parameters to request in any RFP:

  • LED pixel pitch ≤2.9mm for seating within 5m of the screen
  • 4K60 camera feeds for broadcast outputs
  • Dante/AES67 compatibility across all audio devices
  • Audio system headroom of at least 10dB above peak programme level
  • End-to-end video latency ≤1 frame (≤16ms at 60Hz) for player-facing displays
  • KVM switching latency ≤1ms for player stations

Hire quote checklist:

  • Dry hire vs crewed hire (Firefly AV offers both; two-day hire week as standard)
  • Transport and logistics included or quoted separately
  • Spares kit specified (spare encoder, spare cable runs, spare wireless mic body)
  • On-site technical contact and escalation path named in the contract
  • Commissioning and de-rig days included in the day-rate calculation

For a detailed comparison of LED walls versus projectors in gaming venues, pixel pitch and ambient light rejection are the two parameters that matter most for audience-facing displays.

What are the most common pitfalls and how do you test before going live?

Most failures are preventable with staged testing and simple redundancy measures. The ones that are not preventable are almost always caused by skipping the test phase to save a day’s hire cost.

Pre-event testing checklist:

  1. Latency test: measure end-to-end delay from player input to LED wall display using a high-speed camera; target ≤1 frame for player screens, ≤3 frames for spectator screens
  2. Sync across screens: play a frame-accurate test signal across all displays simultaneously and verify no visible offset between panels or screens
  3. Audio loopback: route a test tone through the full signal chain (console → PA → room measurement mic) and verify SPL, frequency response and absence of hum or buzz
  4. KVM responsiveness: test all player stations for input latency and verify IHSE switching operates within specification
  5. Encoder stream stability: run each encoder at target bitrate for 30 minutes and monitor for dropped frames, bitrate spikes and packet loss
  6. Failover test: deliberately disconnect a primary encoder or switch path and verify the redundant path takes over within the agreed recovery time

Pro Tip: Set acceptance criteria in writing before installation begins. Typical targets: maximum 16ms end-to-end video latency for player displays; maximum 5ms audio latency from mic to PA; hot-swap failover within 2 seconds for production-critical paths. Without agreed numbers, “it feels a bit slow” is not a contractual failure.

Common pitfalls:

  • Mis-specified network: using unmanaged switches or consumer routers for AV-over-IP traffic causes packet loss and sync failures; always use managed 10GbE switches with QoS
  • Inadequate power and rigging: LED walls and PA systems draw significant power; under-provisioned circuits cause breaker trips mid-event
  • Broadcast and venue audio mismatch: running a single audio mix for both the in-venue PA and the broadcast stream produces a mix that works for neither; always split to separate mix paths early in the signal chain
  • Poor documentation: undocumented IP addresses, VLAN assignments and patch panel layouts make fault-finding during an event extremely slow

For a broader look at integrated AV installation engineering, the same staged commissioning principles apply across venue types.

How does Firefly AV work with venues and event teams?

Firefly AV operates from bases in Leeds and Preston, covering the whole of the UK for esports and gaming events, from single-day university tournaments to multi-day touring finals. Services span equipment hire (dry or crewed), site surveys, technical rider creation, full production management and hybrid or virtual event delivery.

Service features and operational process:

  • Site survey: Firefly AV visits the venue to assess power, rigging points, network infrastructure and sightlines before any equipment is specified
  • Technical rider creation: we produce a detailed rider document covering signal flow, power requirements, rigging loads and crew requirements, ready for venue sign-off
  • Test and acceptance: all systems are tested against agreed criteria before the event goes live; no handover without a signed acceptance sheet
  • Two-day hire week: standard hire period is two days, with short and long-term options available
  • Dry hire: equipment available without crew for experienced in-house teams
  • Crew day rates: technicians, project managers and full production crews available; day rates typically £250–£600 depending on role
  • Escalation paths: named technical contact on-site throughout the event; direct line to Leeds or Preston for remote support

Clients include the BBC, Leeds City Council and the University of Bradford, which gives a sense of the range of production scales Firefly AV handles. For esports specifically, the pattern of work mirrors what university gaming hubs and purpose-built arenas like Confetti X require: integrated LED walls, IP audio networks, production control rooms and streaming infrastructure, all specified and crewed by people who understand the difference between a broadcast mix and a venue mix.

When contracting, ask for the following in any quote: warranty and breakdown cover for hired equipment, spares kit specification, transport and logistics costs, comms and control room access arrangements, and named crew with relevant experience.

Why broadcast-grade infrastructure is worth the cost

The instinct to save money by specifying commercial AV matrix switchers instead of broadcast-grade IP routing is understandable. The problem is that commercial AV was not designed for the timing precision that esports demands. A frame of delay on a spectator screen is invisible; the same delay on a player’s monitor affects their reaction time and, in a competitive context, the fairness of the event.

The shift toward ST2110 and SDVoE in purpose-built arenas is not driven by brand preference. It is driven by the fact that these protocols offer deterministic timing that commercial AV simply cannot match at scale. For a university gaming lab running casual sessions, NDI and a managed 10GbE switch is entirely adequate. For a finals event with broadcast obligations and prize money at stake, the cost of broadcast-grade infrastructure is a fraction of the reputational cost of a sync failure on stream.

Staffing follows the same logic. A single AV technician can manage a small community event. A broadcast-grade finals needs a tech director, vision mixer, audio engineer, replay operator and network engineer working in parallel. Specifying the infrastructure without specifying the crew to run it is one of the most common planning errors we see. The kit is only as good as the people operating it.

Get a technical site survey or hire quote from Firefly AV

Firefly AV supplies AV equipment hire and full event production for esports and gaming venues across the UK, from Absen LED walls and Allen & Heath consoles to BirdDog cameras, DB Technologies PA systems and full production crews. The difference from booking kit off a generic hire list is that every quote starts with a site survey: we look at your power, rigging, network and sightlines before recommending anything.

Firefly AV

To get a quote or book a site survey, have the following ready: venue floor plans with rigging point locations, available power circuits (amperage and phase), intended game formats and player count, and your streaming or broadcast requirements. Contact Firefly AV via Fireflyav or call the Leeds office directly. Response time for initial quotes is typically within one working day.

Sources

Planners specifying gaming arena AV systems should consult the following:

FAQ

What is a gaming arena AV system?

A gaming arena AV system is the integrated set of displays, audio equipment, signal routing and production infrastructure that captures gameplay, processes it in real time, and distributes it to in-venue screens, spectators and online streams. It differs from standard event AV in its requirement for sub-frame video latency and multi-platform simultaneous output.

What are the main types of gaming arenas?

Gaming arenas broadly fall into three categories: community gaming hubs (university rooms or local venues with 8–32 stations and basic streaming), mid-size competitive arenas (32–64 stations, large LED walls, full PA and production control), and purpose-built broadcast-grade venues designed for televised finals with full broadcast gallery infrastructure.

Why is low latency so important for esports AV?

Latency on player-facing displays directly affects competitive fairness: a delay of even one frame (16ms at 60Hz) can alter a player’s reaction time. Spectator and broadcast feeds tolerate slightly more delay, but player monitors require sub-frame end-to-end latency, which is why SDVoE and ST2110 are preferred over standard commercial AV matrix switchers for professional events.

What does esports AV cost in the UK?

Hire costs for a small university gaming room typically run £1,500–£4,000 per day including crew; a mid-size arena with full LED wall and production control runs £5,000–£15,000 per day. Permanent installations range from roughly £8,000 for a small room to £200,000 or more for a purpose-built broadcast venue. Technician day rates in the UK typically fall between £250 and £600 depending on role.

What is the difference between NDI, Dante and ST2110?

Dante is an audio-over-IP protocol running on standard Ethernet, configurable to 0.25ms latency. NDI is a software-friendly video-over-IP protocol suited to flexible or lower-budget video routing. ST2110 is a broadcast-standard IP video suite offering deterministic, frame-accurate timing for professional multi-feed productions. Each suits a different point on the cost-versus-performance spectrum.

"


Gaming arena AV explained: a UK planner’s guide

3/08/2026
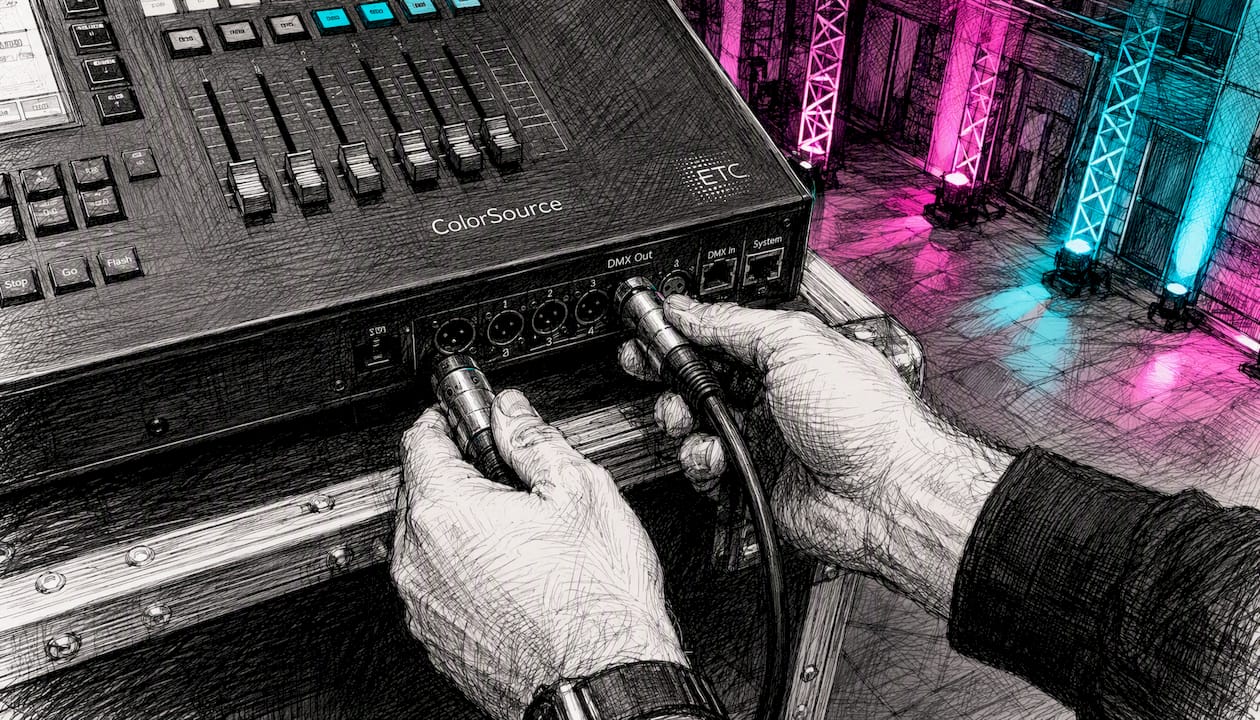
Hands connecting Ethernet cable to network switch

"

NDI, which stands for Network Device Interface, is a royalty-free IP video connectivity standard that lets multimedia systems identify each other, connect, and exchange high-quality, low-latency, frame-accurate video, audio, and metadata over standard Ethernet networks. Originally developed by NewTek in 2015 and now maintained by Vizrt Group, NDI is the right choice for any UK production team that needs flexible, many-to-many video routing without running new SDI or HDMI cabling between every device.

When NDI makes sense for professional UK setups:

  • You need to route multiple video sources across a switched network without point-to-point cabling
  • Your workflow involves live switching, multiview monitoring, or remote contribution over IP
  • You want to add IP endpoints gradually while keeping existing SDI or HDMI infrastructure
  • You are running a corporate conference, broadcast OB, live event, or eSports production where cabling flexibility matters

When it probably does not:

  • A simple two-device point-to-point connection where HDMI or SDI is already in place
  • Delivery to public online viewers (NDI is a production transport, not a CDN protocol)

Key takeaways

NDI is the right production transport for any UK event team that needs flexible, many-to-many IP video routing, provided the network is properly configured with managed switches, VLANs, and QoS from the outset.

Point Details
NDI is a production transport, not a delivery protocol Use NDI inside the production network; convert to SRT or RTMP at the output stage for CDN delivery.
Full NDI needs significant bandwidth per stream used in professional setups Use NDI
Network configuration is non-negotiable Managed switches, dedicated VLANs, QoS, and an NDI Discovery Server are required for reliable multi-source productions.
NDI 6.3 enables cloud transport without VPNs Remote contributors can now appear as local NDI sources over standard internet connections.
Fireflyav supplies NDI kit and technicians for UK events Equipment hire, network setup, and onsite technical support are available for NDI-based productions.

Table of Contents

How does NDI transport video, audio, and metadata over IP?

NDI works in four distinct stages: discovery, negotiation, compression, and transport. Understanding each one explains why NDI behaves the way it does on a real network.

Discovery

By default, NDI uses mDNS (the same Bonjour protocol Apple devices use) to announce sources on a local subnet. Any NDI-capable application on the same subnet sees those sources automatically. For larger or multi-subnet venues, mDNS is unreliable. The NDI Discovery Server and manual NDI Access entries solve this by giving every device a central registry to query, regardless of subnet boundaries.

Compression

Full NDI uses an intra-frame codec, meaning every frame is compressed independently with no reference to adjacent frames. That approach produces near-zero encoding delay, which is what makes frame-accurate live switching and confidence monitoring possible. It is fundamentally different from the long-GOP codecs (intra-frame codec, H.265 respectively) used for internet streaming, where the encoder looks ahead and back across multiple frames to find redundancy.

NDI|HX and HX3 use intra-frame codec and H.265 respectively. They trade some latency for significantly lower bandwidth, which matters on constrained networks or when a mobile device is acting as a source.

Transport

NDI 5 introduced Reliable UDP (RUDP) as the modern default transport, combining UDP’s low latency with packet-loss recovery. Earlier and alternative modes include standard TCP, Multi-TCP (parallel connections for throughput), and UDP with forward error correction. The choice of transport mode is negotiated automatically between sender and receiver based on network conditions.

Metadata and control

NDI carries bidirectional XML metadata alongside every stream. Tally signals (on-air and preview states), PTZ camera control commands, and custom application data all travel in the same connection as the video. A vision mixer can tell a PTZ camera it is live, and the camera’s tally light responds, without any separate control cable.

Pro Tip: On a complex venue network, switch your NDI sources to use the Discovery Server from day one. Relying on mDNS for more than a handful of devices on a single subnet is the single most common cause of “missing sources” on show day.


What are the differences between NDI versions and transport options?

Full NDI, NDI|HX, and NDI|HX3 are not interchangeable. Each suits a different point in a workflow, and picking the wrong one for a given link wastes either bandwidth or latency headroom.

Variant Codec Typical bandwidth Latency Best use
Full NDI Intra-frame (SpeedHQ) typical network bandwidth range Near-zero (sub-frame) Local switching, multiview, confidence monitoring
NDI HX intra-frame codec lower bandwidth Low (a few frames)
NDI HX3 H.265 respectively around 50 Mbps Low to moderate

NDI Bridge, introduced alongside NDI 5, routes NDI sources across subnets, wide area networks, and the open internet. It acts as a relay: sources on one side are published to receivers on the other, with the Bridge handling the transport between them. NDI 6.3 went further by adding native cloud transport, so NDI sources can be routed over the internet without a VPN. For mission-critical productions, wired Gigabit Ethernet remains the recommended backbone regardless of what cloud transport makes possible.

The practical rule: use full NDI for every local link where your network can support it, drop to HX3 for remote contributors or bandwidth-limited segments, and use NDI Bridge or cloud transport only when you genuinely need to cross a WAN boundary.


What network does NDI need to run reliably?

NDI runs on standard switched Ethernet, but “standard” does not mean unmanaged. The difference between a production that runs cleanly and one that drops frames mid-show usually comes down to how the network was configured before the kit arrived.

Backbone and cabling:

  • Gigabit Ethernet is the minimum for small NDI setups with multiple full-bandwidth streams
  • 10GbE uplinks between aggregation switches are advisable for larger productions carrying multiple full-resolution streams
  • Cat 6 or Cat 6A cabling; avoid Cat 5e for anything beyond a single stream
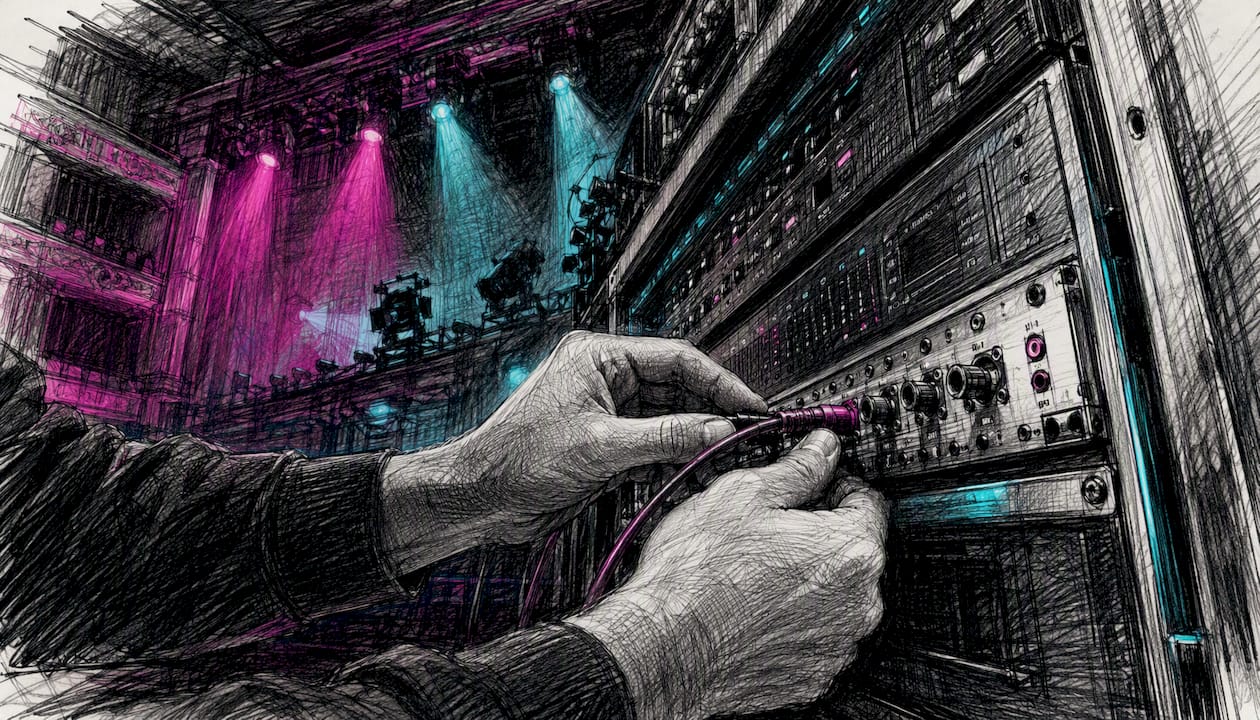
Bandwidth per stream:

Figures sourced from NDI for Video technical documentation.

Configuration essentials:

  • Use unicast rather than multicast for most NDI deployments; NDI defaults to unicast and multicast adds complexity without a clear benefit at typical event scales
  • Segment NDI traffic onto a dedicated VLAN to isolate it from general IT and internet traffic
  • Apply QoS markings on NDI traffic so switches prioritise video packets over background data
  • Deploy an NDI Discovery Server for any installation with more than one subnet or more than around ten sources
  • Avoid Wi-Fi for full-bandwidth NDI sources; 802.11ac or Wi-Fi 6 can carry NDI|HX streams in a pinch, but packet loss on wireless causes visible artefacts in live production

Pro Tip: Ask the venue for a network diagram before you arrive. Knowing whether the switches are managed, what VLANs already exist, and whether there is a 10GbE core saves hours of troubleshooting on the day.


How does NDI compare to HDMI, SDI, and other IP protocols?

HDMI and SDI remain preferable for simple point-to-point connections where you are not crossing a network, particularly over long cable runs where SDI’s 75-ohm coax handles distances that HDMI cannot. The moment you need more than a handful of fixed connections, or you want any source to reach any destination without re-patching physical cables, NDI’s flexibility pays for the network overhead.

SRT and RTMP are not competitors to NDI in the same sense. NDI is a production transport for moving signals inside a facility or event; SRT and RTMP are contribution and delivery protocols for moving encoded streams over the internet to CDNs or remote sites. A typical workflow uses NDI internally, then converts the programme output to SRT or RTMP at the encoder stage for CDN delivery.


What are the most common professional NDI workflows?

The canonical NDI production chain runs: NDI camera or encoder → NDI-capable vision mixer → multiview monitor → recorder → encoder for CDN output. Every link in that chain is a network connection rather than a physical cable, which means sources can be added, removed, or rerouted from software without touching the patch bay.

Corporate conferences and IMAG

A typical corporate conference setup places NDI PTZ cameras around the room, feeds them into a vision mixer over the venue’s managed network, and distributes the programme feed to IMAG screens and recording systems simultaneously. Tally signals travel back to each camera automatically, so operators always know which camera is live.

Hands adjusting PTZ camera lens

Houses of worship and fixed installations

NDI suits fixed installations well because the network infrastructure is permanent and the sources are predictable. A church or auditorium can run NDI cameras, a graphics system, and a presentation PC as sources, all visible to a single vision mixer without any physical routing changes between services.

Remote production and OB

NDI Bridge or cloud transport (NDI 6.3) lets a remote contributor’s feed appear as a local NDI source inside the production network. An outside broadcast van can send a camera feed back to a studio over the internet, where it appears alongside local sources in the vision mixer with no VPN required.

Hands connecting cables inside OB van

Digital signage integration

NDI sources can feed digital signage displays directly when the display or media player supports NDI input, removing the need for a separate video distribution system for lobby screens and breakout room displays.

Pro Tip: Run a dedicated NDI multiview on a spare monitor at the vision mixer position. Seeing all sources simultaneously, with tally overlays, catches camera or encoder failures before the director notices.


What tools and hardware make up the NDI ecosystem?

The NDI ecosystem divides into software tools, the developer SDK, and hardware devices. All of them connect to the same network and appear as sources or destinations to each other.

NDI Tools (official, free download)

Vizrt publishes a free NDI Tools bundle that includes:

  • NDI Studio Monitor — displays any NDI source on screen with tally overlay
  • NDI Virtual Input — routes an NDI source into a computer as a virtual webcam
  • NDI Screen Capture — publishes a computer’s screen as an NDI source
  • NDI Test Patterns — generates colour bars and test signals as NDI sources
  • NDI Discovery Server — the server application for cross-subnet source registration

SDK and licensing

The NDI SDK is available royalty-free for developers building NDI-capable applications. The specification is maintained by Vizrt, and the commercial ecosystem around it (hardware encoders, cameras, vision mixers) is built by third-party manufacturers under that open licensing model.

UK-available hardware

NDI cameras and encoders:

  • BirdDog P120 PTZ — a compact NDI PTZ camera widely used in UK conference and broadcast productions; outputs full NDI natively over a single Ethernet cable
  • BirdDog Studio NDI — a desktop NDI encoder/decoder that converts HDMI or SDI sources into NDI streams and vice versa

Capture and monitoring:

  • Blackmagic capture cards (DeckLink series) — add NDI output capability to existing SDI or HDMI sources via software
  • Blackmagic Video Assist 7" — a monitor/recorder that can sit at the end of an NDI chain for confidence monitoring and ISO recording

Routing:

For a broader view of broadcast hardware categories that support NDI deployments, the Fireflyav broadcast AV equipment guide covers the full range of device types and their roles.


How to set up a simple NDI workflow for a one-day event

This checklist covers a single-day production with up to six NDI sources, one vision mixer, and one CDN encoder output.

Pre-event network checklist

  1. Confirm the venue has a managed switch with VLAN capability and Gigabit ports throughout
  2. Create a dedicated NDI VLAN and assign all production devices to it
  3. Enable QoS on the switch and mark NDI traffic with a high-priority DSCP value
  4. If sources span more than one subnet, deploy the NDI Discovery Server on a machine visible to all VLANs
  5. Test 10GbE uplinks between any aggregation switches if running more than four full-NDI streams simultaneously

Device setup

  1. Install NDI Tools on every production computer (vision mixer, graphics, monitoring)
  2. Power on all NDI cameras and encoders; confirm they appear in NDI Studio Monitor before the vision mixer is opened
  3. In the vision mixer, add the NDI Discovery Server address under NDI Access if cross-subnet sources are needed
  4. Assign programme and preview subscriptions to the correct sources; verify tally signals are returning to cameras
  5. Configure the CDN encoder to receive the programme NDI output and transcode to SRT or RTMP for delivery

Testing and fallback

  1. Run a full signal path test at least 30 minutes before doors open: camera to vision mixer to multiview to recorder to encoder
  2. If backbone bandwidth is limited, switch camera sources from full NDI to NDI|HX3 to reduce per-stream throughput to approximately 50 Mbps
  3. Have at least one BirdDog Studio NDI unit available to convert any NDI source to SDI or HDMI output as a hardware fallback

Pro Tip: Label every NDI source with a clear, consistent naming convention before the show (e.g. “CAM1-STAGE”, “GFX-LAPTOP”, “REPLAY”). Generic auto-generated names like “NewTek NDI” become impossible to manage when six sources appear simultaneously in the vision mixer.


How Fireflyav uses NDI in UK event production

Fireflyav deploys NDI across corporate conferences, eSports events, and broadcast productions throughout the UK. The kit list for a typical mid-scale NDI production includes:

  • BirdDog P120 PTZ cameras — positioned around the room, outputting full NDI natively; a single Cat 6 cable carries power (PoE), control, and video
  • BirdDog Studio NDI encoders/decoders — used to bring legacy HDMI or SDI sources (presentation laptops, replay systems) into the NDI network without replacing the source device
  • Blackmagic Video Assist 7" — placed at the programme output for confidence monitoring and ISO recording before the signal reaches the CDN encoder
  • Managed 10GbE core switch — the backbone of every NDI deployment; Fireflyav specifies managed switches with VLAN and QoS support as non-negotiable

Operational lessons from Fireflyav productions:

  • Discovery Server from the start. On any venue with more than one network segment, mDNS discovery fails unpredictably. Running the NDI Discovery Server on a dedicated machine, visible across all VLANs, eliminates the “missing source” problem entirely.
  • VLANs protect the production. Separating NDI traffic from the venue’s general IT network prevents background traffic from competing with video packets during critical moments.
  • Cloud transport for remote contributors. NDI 6.3’s native cloud transport has replaced VPN-based remote contribution on several Fireflyav productions, reducing setup time and removing the dependency on the venue’s IT team to configure VPN access.
  • Reduced cabling, faster rigging. Replacing SDI runs with NDI over existing venue Cat 6 infrastructure cuts cable runs significantly on multi-camera setups, which translates directly to faster load-in and load-out times.

Why IP workflows are where professional AV is heading

The migration from SDI and HDMI to IP-based production is not a future event. It is happening now, and NDI is the most accessible entry point for teams that are not yet running SMPTE ST 2110 or other broadcast-grade IP standards.

The honest caveat is that NDI is not as simple as its “plug and play” marketing suggests. Network planning is as important as the video gear itself. A team that invests in a BirdDog camera and a vision mixer but skips the managed switch and VLAN configuration will have a worse experience than a team running SDI. The technology is only as good as the network underneath it.

Where Fireflyav advises clients to invest first: the network backbone. A 10GbE managed switch with proper VLAN and QoS configuration unlocks everything else. After that, trained technicians who understand both IP networking and broadcast signal flow are worth more than any single piece of hardware. The kit is commoditising; the expertise is not.

The forward-looking note: NDI 6.3’s cloud transport is genuinely significant. Remote production workflows that previously required dedicated fibre or complex VPN configurations are now achievable over standard internet connections. That changes the economics of remote contribution for smaller productions and opens up workflows that were previously only viable for large broadcasters.


Fireflyav NDI equipment hire and technical support for UK events

Fireflyav supplies NDI-capable equipment and experienced technicians for corporate conferences, broadcast productions, eSports events, and live events across the UK. The difference from hiring kit alone is that every Fireflyav deployment comes with engineers who have planned and operated NDI workflows on real productions, not just configured them in a lab.

Fireflyav

For an NDI deployment, Fireflyav can supply BirdDog PTZ cameras, Studio NDI encoders, managed switching infrastructure, Blackmagic monitoring and recording hardware, and a technician who handles network configuration, source discovery, and signal path testing before your event begins. If you need onsite technical support for a production where NDI is part of the workflow, or you want to understand which kit suits your specific event, the AV equipment guide for event planners is a practical starting point. To discuss a specific production, get in touch with Fireflyav directly for a technical consultation and quote.


Sources

"


NDI video technology explained for AV professionals

2/08/2026

Technician measuring room dimensions during AV survey

"

An AV site survey is a structured onsite visit in which a technician or AV consultant physically inspects a space before any equipment is specified, ordered, or installed. The surveyor measures room dimensions, records ceiling height, checks power locations, traces cable pathways, assesses acoustic surfaces, and photographs every critical view. That information then drives the equipment specification, the bill of materials, and the installation plan. According to AVIXA guidance, a properly executed survey prevents onsite surprises, avoids budget overruns, and confirms that the structural load capacity and infrastructure genuinely support the proposed system. A standard single-room visit typically runs 1–2 hours, though larger or more complex spaces take longer. AVIXA, the global AV industry body, offers formal training and course material on site surveys to standardise how professionals conduct and document them.


Key takeaways

A properly conducted AV site survey is the single most effective way to prevent change orders, mounting failures, and budget overruns on any AV installation or event production project.

Point Details
Definition and timing An AV site survey is a structured onsite inspection; a standard single room takes 1–2 hours.
Biggest risks avoided Prevents change orders, wrong equipment, mounting failures, poor intelligibility, and network incompatibilities.
What to prepare Provide floor plans, confirm access, and have facilities, IT, and end-user contacts available on the day.
Minimum deliverables Expect annotated plans, labelled photos, a BOM with budget estimate, scope statement, and a risk register.
Fireflyav Fireflyav delivers full survey reports including annotated plans, BOM, and risk register for UK corporate, eSports, and event projects.

Table of Contents

Why an AV site survey prevents costly problems

The survey prevents hidden costs and installation failures. Without one, equipment gets ordered against assumptions rather than facts, and assumptions fail at the worst possible moment: on installation day, in front of a client.

Specific risks a survey catches before they become problems:

  • Change orders caused by discovering the wrong cable route or insufficient power only after equipment arrives
  • Wrong equipment specified because room dimensions or ceiling height were estimated rather than measured
  • Mounting failures from untested structural fixings or inaccessible ceiling voids
  • Poor speech intelligibility caused by reverberant surfaces or ambient noise that was never recorded
  • Network incompatibilities where PoE budget, VLAN configuration, or security policies block AV devices
  • Accessibility oversights where sightlines or screen heights fail UK disability access requirements

AVIXA’s guidance frames the survey as a risk-mitigation discipline: measurable environmental constraints must be recorded so equipment choices can be defended to the client and to regulatory stakeholders. Documenting ambient noise and lighting intensity, for example, justifies higher-spec audio or display choices and reduces later disputes.

Pro Tip: The survey is as much a soft-skills exercise as a technical one. Ask the facilities manager, the IT lead, and the end user separately how they expect to use the room. Their answers rarely match, and the gaps reveal requirements that never made it into the brief.

Hands connecting AV cables on patch panel


What your AV site survey checklist should capture

Capture room geometry, surface finishes, infrastructure, acoustics, lighting, network details, and photographic evidence. A free standardised template helps teams record these consistently across projects.

Room geometry and sightlines

  • Floor dimensions (length, width, diagonal) and ceiling height at multiple points
  • Sightline calculations from the furthest and most obstructed seats to the proposed screen position
  • Seating layout and maximum occupancy
  • Door positions, columns, and any fixed obstructions

Surface finishes and environment

  • Wall, floor, and ceiling materials (hard plaster, carpet, glass, timber) that affect reverberation
  • Window positions, glazing area, and direction of natural light
  • Ambient light levels at different times of day
  • Any planned refurbishment that could alter finishes

Acoustics and noise

  • Ambient noise sources: HVAC ducts, adjacent rooms, external traffic
  • Reverberant surfaces that will affect speech intelligibility
  • Existing acoustic treatment or isolation measures

Power and infrastructure

  • Consumer unit or distribution board location and available capacity
  • Existing socket positions and proximity to proposed equipment locations
  • UPS provision or requirement
  • Cable pathways, conduits, trunking, and ceiling void accessibility

Structural and mounting

  • Ceiling type (suspended, concrete, timber joist) and confirmed load capacity for projectors, screens, or speakers
  • Wall construction and fixing permissions from the building owner or facilities team
  • Access routes for large items (lifts, door widths, loading bay)

Network and IT

  • Network port locations and switch capacity
  • PoE availability and power budget
  • VLAN structure and security policies
  • Wi-Fi coverage and any wireless survey requirements (a wireless site survey can confirm coverage and capacity independently)
  • IT contacts and approval process for new devices

Existing AV and control systems

  • Installed equipment make, model, and age
  • Control system type and any integration requirements
  • Cabling already in place and its condition

Compliance and accessibility

  • UK Building Regulations Part M requirements for accessible viewing positions
  • BS 8300 guidance on hearing loop provision
  • Fire-stopping requirements for any new cable penetrations
  • Health and safety requirements for working at height

Photograph every critical view with a scale reference. Surveyors should document more than they think necessary: photos, annotated sketches, and a versioned shared folder prevent disputes and rework later.


How the AV site survey process works, step by step

The process runs in three phases: preparation before the visit, structured capture onsite, and a written report with recommendations delivered afterwards. Survey findings form the foundation for AV design specifications, equipment recommendations, and project budgets.

Pre-survey preparation

  1. Obtain architect or venue floor plans (PDF preferred) and any reflected ceiling plans
  2. Confirm site access times, parking, and any PPE or induction requirements
  3. Identify and brief key stakeholders: facilities manager, IT lead, and end user
  4. Agree the scope: number of rooms, systems to be surveyed, and any specialist tests required
  5. Prepare the checklist template and a shared folder for photos and documents

Onsite capture

  1. Walk the space with the facilities contact before measuring anything — note anything unexpected
  2. Measure room dimensions with a laser distance metre; record ceiling heights at multiple points
  3. Photograph every wall elevation, the ceiling, the floor, and all infrastructure access points with a scale reference
  4. Test network ports (ping, PoE negotiation), check socket positions, and confirm cable-void access
  5. Record ambient noise levels and note HVAC, plant, or external noise sources
  6. Confirm structural fixing points and obtain written permission or a structural note for heavy items
  7. Interview the end user about how the room will actually be used day to day

Post-survey deliverables

  1. Annotated floor plans with dimensions, sightlines, and proposed equipment positions
  2. Labelled photo set with scale references, uploaded to a versioned shared folder
  3. Cable-route sketches showing proposed pathways and any access constraints
  4. Equipment recommendations with rationale tied to the survey findings
  5. Bill of materials (BOM) with budget estimate
  6. Scope statement listing what is included and what is explicitly excluded
  7. Risk register noting access issues, structural queries, or items requiring specialist input

The BOM and installation plan cannot be finalised without the survey data. Skipping the survey and working from a phone call or a rough sketch is the single most common cause of change orders on AV projects.


How long does a survey take, and what does it cost in the UK?

A standard single-room survey runs 1–2 hours onsite. What extends that time is complexity: a large auditorium with multiple speaker zones, a multi-room rollout, or a space requiring acoustic measurement will take considerably longer.

Factors that affect survey duration:

  • Number of rooms or zones
  • Accessibility of ceiling voids and cable routes
  • Whether specialist tests (acoustic analysis, structural load assessment) are needed
  • Distance from the AV company’s base and travel time

Common UK fee models:

  • Flat fee per room: straightforward for standard meeting rooms or small event spaces
  • Day rate: typical for larger sites or multi-room surveys; UK AV day rates for technical staff generally range from £350 to £650 depending on seniority and location
  • Free with deposit: some companies absorb the survey cost against a confirmed project order
  • Travel and reporting time billed separately: common when the site is outside the surveyor’s normal area

These are illustrative ranges only, not guaranteed prices. Fees vary by region, project complexity, and the number of deliverables required. Specialist tests such as acoustic analysis or structural load assessment carry additional costs and may require a separate contractor.


How to prepare your venue for an AV site survey

Provide floor plans, confirm access, and have the right people available. A well-prepared site visit takes half the time of a poorly prepared one.

Client and venue checklist before the surveyor arrives:

  • Architect or venue floor plans in PDF format, including reflected ceiling plans if available
  • Confirmed access times and any building induction or PPE requirements
  • Name and mobile number of the onsite contact who can open locked rooms and ceiling voids
  • A written list of intended room uses and expected occupancy numbers
  • Login credentials or documentation for any existing AV or control systems
  • IT contact details and a summary of network policies (VLANs, security, PoE availability)
  • Written permission from the building owner or landlord for drilling and cable installation
  • Health and safety documentation including any working-at-height restrictions

Have your facilities manager, IT lead, and an end user available for at least part of the visit. The surveyor will have questions that only those people can answer quickly. Delaying those answers means a follow-up visit, which costs everyone time.


What a good site-survey report should deliver

The minimum credible deliverables are annotated plans, labelled photos, an equipment list with rationale, a scope statement, and a budget estimate. A report that lacks any of these is incomplete.

Standard deliverables to expect:

  • Annotated floor plans with room dimensions, sightlines, and proposed equipment positions marked
  • Labelled photo set with scale references for every critical view
  • Cable-route sketches showing proposed pathways and access constraints
  • Equipment recommendations with written rationale tied to survey findings
  • Bill of materials with a budget estimate (ranges are acceptable at this stage)
  • Scope statement confirming what is included and what is explicitly excluded
  • Risk register noting structural queries, access issues, or items needing specialist input
  • Next-step actions and installation notes

Sample report outline to request when commissioning a survey:

  1. Project overview and survey date
  2. Site access notes and stakeholder contacts
  3. Room-by-room findings (dimensions, finishes, infrastructure, compliance notes)
  4. Annotated floor plans and photo appendix
  5. Proposed equipment list with rationale
  6. Cable-route sketches
  7. Budget estimate and scope statement
  8. Risk register and outstanding queries
  9. Recommended next steps

Uploading photos, annotated plans, and a versioned report to a shared folder prevents miscommunication and saves rework time during procurement and installation.


What a good site-survey report should deliver — overview diagram

Common pitfalls in AV site surveys and questions to ask your surveyor

Most rework on AV projects traces back to an incomplete survey or an assumption that was never checked. The fix is rarely expensive at survey stage; it becomes expensive after equipment is ordered.

Red-flag pitfalls to watch for:

  • Measuring only floor dimensions and ignoring ceiling height, void access, or sightlines
  • Failing to record ambient noise or lighting, then discovering intelligibility or visibility problems at commissioning
  • Assuming power or network is available at the proposed equipment location without physically confirming it
  • Not obtaining written permission for drilling or cable installation before the project starts
  • Failing to check access routes for large items (screens, speaker arrays, staging)
  • Relying on memory or rough notes rather than photos and a completed checklist

Questions to ask your surveyor before and during the visit:

  • Will you test network latency and confirm PoE power budget at each port?
  • Which elements are explicitly excluded from the reported scope?
  • How will you confirm structural load capacity for ceiling-mounted equipment?
  • Will you measure ambient noise levels and record them in the report?
  • How do you handle items that require specialist input (acoustics, structural engineering)?
  • What format will the deliverables take, and how quickly after the visit?

Coordination with the client’s IT team is critical to avoid scope clashes. Confirm network ports, security policies, and mounting permissions during the visit, not afterwards. The same applies to electrical contractors and any building works running in parallel: a cable route that looks clear today may be blocked by a partition wall next month. For multi-venue events or phased rollouts, aligning survey schedules with the wider project programme is worth doing early.


How Fireflyav conducts AV site surveys

Fireflyav runs surveys that produce annotated plans, a recommended BOM, and a risk register as standard deliverables for every project.

The process follows a consistent structure:

  • Pre-survey briefing: Fireflyav reviews any available floor plans, agrees the scope with the client, and identifies the key stakeholders who need to be present onsite
  • Onsite capture: the survey team measures the space, photographs all critical views with scale references, tests network and power infrastructure, and interviews the facilities and IT contacts
  • Technical checks: power availability, network port testing, ceiling void access, and structural fixing points are all confirmed during the visit rather than assumed
  • Post-survey report: clients receive annotated floor plans, a labelled photo set, cable-route sketches, an equipment recommendation with rationale, a BOM with budget guidance, and a risk register

Fireflyav works across corporate conferences, eSports events, cultural productions, and broadcast projects, so the survey scope adapts to the event type. A corporate conference has different sightline and intelligibility requirements from an eSports arena or a broadcast studio. The survey captures what is specific to that use case, not a generic checklist applied uniformly.

For hybrid events where streaming and remote feeds are part of the brief, the survey also covers network bandwidth, latency, and encoder placement, because those requirements are invisible until someone looks for them.

Pro Tip: When requesting a survey, send Fireflyav your floor plans and a one-paragraph description of how the space will be used before the visit. That single step cuts onsite time and produces a sharper report.


A practitioner’s note on what surveys actually reveal

The measurement part of a survey is straightforward. What surprises most planners is how much the conversation reveals. Asking a room’s end users how they expect to use the space, separately from the facilities manager and the IT team, almost always surfaces requirements that never made it into the brief: the presenter who always stands to the left of the screen, the team that needs to hear remote participants clearly despite a noisy open-plan office next door, the venue that has never had a working hearing loop. None of those needs appear on a floor plan. They appear when someone asks the right questions and listens carefully to the answers.


Fireflyav can handle your UK AV survey from first visit to final report

For UK event planners and venue teams who need a survey done properly rather than done quickly, Fireflyav’s technical support and event production service covers the full process: pre-survey briefing, onsite capture, technical testing, and a written report with annotated plans, a BOM, and a risk register.

Fireflyav

To request a survey, fill in the project details form with your venue address, the number of rooms, the intended use, and any floor plans you have. Fireflyav will confirm scope, agree access arrangements, and return a survey report with equipment recommendations. For planners who also need equipment guidance before the survey, that resource is a useful starting point for understanding what the survey findings will eventually specify.


Sources

A short list of reputable resources for templates, training, and practitioner guidance:

"


AV site survey explained: a planner’s checklist

5/08/2026

Technician wiring SDI multiview system

"

For most UK OB van, flypack, and studio workflows, a compact 4-way or 16-way SDI multiviewer with per-input re-synchronisation, HDMI and SDI outputs, and Ethernet control is the practical default. The Blackmagic MultiView family covers the majority of these deployments cleanly, at a price point that makes both hire and purchase straightforward.

The right choice depends on scale and workflow:

  • Compact 4-way multiviewer (field/flypack): the Blackmagic MultiView 4 HD or MultiView 4 (6G) suits portable rigs, director’s monitors on location, and small OB setups where you need several sources on one screen without a rack full of kit.
  • 16-way multiviewer (studio/master control): the Blackmagic MultiView 16 handles larger source counts, front-panel routing control, and permanent facility installs where you need a full overview wall.
  • Facility-grade and IP-native systems: when source counts exceed 16, latency is critical for camera shading, or your facility is migrating to ST 2110, look at platforms such as the Imagine Communications SNP, Grass Valley MV-1200, or EVS Neuron View.
  • Fireflyav supplies hire and technical support for both compact and facility-grade multiview SDI deployments across the UK, with trained engineers available for on-site configuration and integration.

Key takeaways

A compact 4-way or 16-way SDI multiviewer with per-input re-synchronisation covers the majority of UK broadcast and event monitoring needs, with facility-grade IP platforms reserved for high source counts, sub-frame latency, or HDR workflows.

Point Details
Device class recommendation MultiView 4 (HD or 6G) for field/flypack; MultiView 16 for studio and master control.
Reference and clocking Free-run re-sync suits most deployments; use reference distribution for complex studio router environments.
When to choose IP/hybrid Specify facility-grade platforms (MV-1200, SNP, Neuron View) for 12G/ST 2110, HDR rendering, or TSL 5.0 tally integration.
Hire vs buy Hire suits one-off events; purchase with a support contract suits facilities using multiviewers more than 200 days per year.
Fireflyav support Fireflyav supplies Blackmagic MultiView hire and on-site technical support across the UK; use the product form to request a quote.

Table of Contents

What does a multiview SDI system actually do?

A multiviewer takes multiple independent SDI video sources and composites them onto a single HD or UHD display, with each source shown in its own picture-in-picture window. Each window typically carries on-screen overlays: custom labels, audio level meters, and tally indicators that show which source is live or in preview. The result is a single, high-resolution overview that replaces a bank of individual monitors.

The core capabilities you should expect from any competent SDI multiviewing system:

  • Per-input frame re-synchronisation: each input is independently re-synced so sources running at different frame rates or with slight timing offsets display cleanly without tearing.
  • Loop-through outputs: pass the SDI signal downstream to a router or recorder without breaking the chain.
  • Automatic SDI rate detection: the unit identifies SD, HD, 3G, 6G, or 12G-SDI without manual configuration per input.
  • HDMI and SDI outputs: HDMI for consumer or prosumer monitors; SDI for professional displays and long cable runs.
  • Audio metering and label overlays: per-source audio bars and editable text labels on screen.

As The Broadcast Bridge notes, looping router outputs through a multiviewer to create a single facility overview reduces calibration overhead compared with maintaining a wall of individual monitors. Common use cases include OB vans and flypacks, master control rooms, studio production galleries, on-site director or vision control positions, and camera focus or colour checks on location. A 4-view unit suits portable workflows; 16-view or processor-based racks suit facility monitoring and large display walls.

Blackmagic MultiView 4 HD, MultiView 4 (6G), and MultiView 16 compared

Blackmagic’s MultiView range covers three distinct models, each aimed at a different production scale. The table below maps the key comparison dimensions.

Feature MultiView 4 HD MultiView 4 (6G) MultiView 16
Max views / layout 4 sources, 2×2 4 sources, 2×2 16 sources, 4×4
SDI rates supported SD, HD, 3G-SDI SD, HD, Ultra HD up to 2160p30 (6G-SDI) SD, HD, 3G-SDI, 6G-SDI
Output options HD-SDI, HDMI HD-SDI, Ultra HD SDI, HDMI HD-SDI, HDMI
Per-input re-sync Yes, full frame Yes, full frame Yes, full frame
Loop-through outputs Yes Yes Yes
Tally / UMD / control Ethernet, web GUI Ethernet, web GUI Front panel, Ethernet, web GUI
Form factor Compact, flyaway Compact, flyaway 1RU rack
Hire vs buy note Low cost; suits short-term hire Mid-range; buy or hire Facility install; hire or permanent

Comparison chart of Blackmagic MultiView models

According to Blackmagic’s technical specifications, the MultiView 4 (6G) accepts multiple 6G-SDI inputs covering SD, HD, and Ultra HD with per-input full frame re-synchronisation, audio meter overlays, and custom labels on every window.

MultiView 4 HD is the entry point: low cost, genuinely pocketable for a flypack, and compatible with any HD monitor via HDMI. It handles four 3G-SDI sources and outputs in HD. If your sources are all HD and your monitor is HD, this is the unit to grab.

MultiView 4 (6G) steps up to Ultra HD output, which matters when you are feeding a UHD reference monitor or want per-window resolution headroom for camera shading. The 6G-SDI inputs handle mixed SD/HD/UHD sources without manual switching.

MultiView 16 is a different beast. Sixteen independent 6G-SDI inputs with loop-through outputs, front-panel router-style controls, and a 1RU rack form factor make it the right choice for master control rooms and permanent studio installs. Blackmagic’s workflow documentation covers daisy-chaining MultiView 4 units for larger source counts and using the MultiView 16’s front-panel controls for direct routing in master control environments.

Daisy-chaining MultiView 4 units is a practical field trick: feed the SDI output of one unit into an input of the next to build a larger composite view. It works, but you accumulate re-sync latency at each stage. For anything above eight sources in a permanent install, a single MultiView 16 is cleaner.

Fireflyav carries Blackmagic MultiView equipment for hire across the UK, with short-term and event-duration options available.

When do facility-grade or IP-native multiviewers make sense?

Compact converter-style units like the Blackmagic MultiView family cover most productions. But three scenarios push you toward facility-grade or IP-native platforms.

  • High source counts: when you need 32, 64, or more simultaneous feeds, a single MultiView 16 is not enough. Platforms like the Grass Valley MV-1200 offer modular frames that scale from standalone 1RU units to large input counts, operating across both SDI and ST 2110 IP for long-term flexibility.
  • Ultra-low latency for camera shading: the Imagine Communications SNP multiviewer is built for ultra-low latency operation, ST 2110 and ST 2022-6 IP input, UHD canvas rendering, and TSL 5.0 tally/UMD integration. When a camera operator is shading live, even a few frames of display lag is unacceptable.
  • HDR and IP-native workflows: the EVS Neuron View supports high input counts, multiple output head configurations mixing UHD and FHD heads, on-board GUI layout control, and SDI or IP stream input depending on configuration. It suits live sports and broadcast environments where HDR rendering and flexible output heads are non-negotiable.

For distributed installations, SDVoE technology offers a different architecture entirely: processing is distributed across TX and RX endpoints rather than concentrated in a single central processor. Adding sources means adding endpoints, which keeps costs incremental and avoids the single-point-of-failure risk of a large central frame.

TSL 5.0 tally and UMD protocol support is worth calling out specifically. If your facility uses a router control system or automation, TSL 5.0 is the integration standard that ties tally states to multiviewer overlays. Grass Valley, Imagine Communications, and EVS all advertise TSL 5.0 support; confirm it before specifying any facility-grade unit.

Key technical features every engineer should understand

Per-input frame re-synchronisation means each SDI input is independently locked to a common output clock. Sources running at different frame rates, or with slight timing offsets from different cameras or tape machines, are re-synced before compositing. Without it, you get tearing or rolling artefacts on individual windows.

Engineer reconnecting SDI cable for re-sync

Reclocking on SDI outputs regenerates the clock signal before passing it downstream. On long cable runs or when feeding a router, a recocked output reduces jitter accumulation. Check whether a unit recocks its loop-through outputs as well as its multiview output.

SDI rate terminology: SD is 270 Mbit/s, HD is 1.485 Gbit/s, 3G-SDI is 2.97 Gbit/s (covers 1080p50/60), 6G-SDI handles UHD at up to 2160p30, and 12G-SDI carries UHD at 2160p60 over a single coax. Most compact multiviewers top out at 6G; 12G inputs appear on higher-end facility units.

Latency varies significantly by architecture. Converter-style units like the Blackmagic MultiView family introduce a small but measurable display latency, typically one to two frames. Facility processors optimised for camera shading can operate at sub-frame latency. For a director’s monitor or source overview, one to two frames is irrelevant. For a shader watching a live camera feed, it is not.

Tally and UMD: TSL 5.0 is the current standard for tally and under-monitor display (UMD) integration. It carries source name, tally state, and text data over Ethernet. Hardware control panels, such as the Blackmagic Teranex Mini Smart Panel, offer physical button control for layout switching. Ethernet/web GUI control is standard on the Blackmagic MultiView range.

Pro Tip: A multiviewer shows you pictures, not signal health. Pair it with a dedicated waveform monitor or vectorscope for any session where legal levels, HDR metadata, or CRC errors matter. The Broadcast Bridge’s guidance on multi-view monitoring makes this point clearly: multiviewers simplify facility monitoring but do not replace scopes for signal legality checks.

How to wire and deploy a multiview SDI system

Field and flypack setup

  1. Choose a UHD or HD monitor with an HDMI or SDI input that matches your multiviewer’s output.
  2. Connect your SDI sources to the multiviewer inputs. Use quality BNC patch cables; avoid adapters on long runs.
  3. Power up and confirm each input is detected. The Blackmagic MultiView range auto-detects SDI rates per input.
  4. Configure per-input labels via the web GUI (connect the unit to a laptop over Ethernet).
  5. Set audio meter overlays for each source and verify tally if your switcher supports it.
  6. Check re-sync behaviour: confirm each window is stable with no tearing before the session starts.

For field work with a Blackmagic ATEM Mini PRO or similar compact switcher, the multiviewer output typically feeds a director’s monitor positioned beside the switcher operator.

Studio and facility install

  1. Route SDI sources through your facility router, looping outputs to the multiviewer inputs.
  2. Connect a reference input (blackburst for SD/HD, tri-level sync for HD/3G) if your installation requires house sync. Many converter-style units use free-run re-sync, which is fine for most deployments but can introduce slight timing offsets in complex router environments.
  3. Connect the multiviewer to your facility Ethernet network and configure IP address, labels, and tally via the web GUI.
  4. For Blackmagic MultiView 16, configure front-panel routing controls and integrate with a Blackmagic Smart Videohub if router integration is required.
  5. Verify loop-through outputs are recocked and feeding downstream equipment cleanly.
  6. Document the IP address, input map, and label configuration for the engineering file.

Pro Tip: In complex router environments, free-run re-sync on converter-style units can produce subtle timing offsets between windows. If you are feeding a multiviewer from a router that is itself locked to house reference, confirm whether the multiviewer passes or re-generates that reference. For critical studio installs, a reference distribution amplifier feeding both the router and the multiviewer eliminates the ambiguity.

How to choose the right multiviewer for your production

Key decision questions before you specify:

  • How many simultaneous feeds do you need? Four or fewer: MultiView 4. Up to 16: MultiView 16. Beyond 16: facility-grade.
  • Do any sources run at 12G (UHD 2160p60)? If yes, rule out the Blackmagic compact range and look at facility processors.
  • Is HDR rendering required on the multiview output? Compact units do not handle HDR compositing; facility platforms do.
  • Will you need ST 2110 IP inputs now or within two years? If yes, specify a platform that supports both SDI and ST 2110 from the outset.
  • What are the physical constraints? A road case flypack needs a compact unit; a permanent rack install suits a 1RU or modular frame.

Red flags to watch for: any unit without per-input re-sync, missing TSL 5.0 tally support when router integration is planned, no Ethernet control option, or ambiguous reclocking behaviour on loop-through outputs. These are not minor omissions; they create real operational problems on busy productions.

Procurement checklist: confirm input count and SDI rates, output type and resolution, re-sync and reclocking behaviour, control protocol (web GUI, TSL 5.0, hardware panel), physical dimensions and power requirements, and UK warranty or support terms before raising a purchase order or hire request.

UK availability, hire versus buy, and the cost factors that matter

For most UK productions, the hire-versus-buy decision comes down to frequency of use. A compact MultiView 4 HD is inexpensive enough to purchase outright for any facility that uses it regularly. The MultiView 16 sits at a higher price point where hire makes sense for one-off events or productions that need the unit for a week or less.

Cost factors that affect both hire and purchase budgets:

  • Input and output count: more inputs and dual SDI/HDMI outputs push the price up.
  • SDI rate ceiling: 6G-SDI units cost more than 3G-SDI equivalents; 12G-SDI and IP-capable units are significantly more expensive.
  • IP licence or software keys: facility-grade platforms often charge separately for ST 2110 input licences or HDR rendering keys.
  • Control panels: hardware control panels (Teranex Mini Smart Panel or equivalent) add cost but are worth it for permanent installs.
  • Warranty and support contracts: UK resellers typically offer one-year warranty on Blackmagic equipment; extended support contracts are available for facility-grade platforms.
  • Shipping, rack kits, and insurance: for hire, factor in delivery, return shipping, and any rack mounting hardware.

Lead times for UK hire are typically short for compact Blackmagic units, often available with a few days’ notice. Facility-grade platforms, particularly new UHD or HDR-capable models, may require longer lead times. Plan at least two to three weeks ahead for complex facility builds or when integrating with existing router and tally infrastructure.

For rental-heavy operations, the OPEX model of hiring with a technician keeps capital tied up in production rather than depreciating hardware. For facilities running multiviewers 200 or more days per year, purchase and an annual support contract usually delivers better total cost of ownership.

How Fireflyav deploys and supports multiview systems in the UK

Fireflyav supplies multiview SDI equipment on a dry hire basis or as a managed hire with a trained broadcast engineer on site. For complex builds, the service extends to full system integration, pre-event configuration, and an on-site shakedown before the production goes live.

The deployment checklist Fireflyav uses on delivery:

  • Signal integrity test on every SDI input: confirm clean lock, no CRC errors, correct rate detection.
  • Per-input frame alignment check: verify re-sync is stable across all sources before the session.
  • Tally and UMD integration test: confirm TSL tally states are passing correctly from the switcher or router to the multiviewer overlays.
  • HDR/SDR colour check: where UHD sources are in use, confirm output colour space and transfer function are correct for the connected monitor.
  • Latency verification: for shading or preview-critical positions, measure display latency and confirm it is within acceptable limits for the role.
  • IP and Ethernet control configuration: set static IP, configure labels, and document the setup for the client’s engineering file.

What clients should expect from a Fireflyav deployment:

  • A trained engineer who understands Blackmagic MultiView configuration, Videohub router integration, and vMix 4K media server workflows.
  • Rack mounting, cable dressing, and labelling to broadcast standards.
  • Full documentation of IP addresses, input maps, and tally configuration handed over at the end of the build.
  • Capability to supply Blackmagic MultiView 4 HD, MultiView 4 (6G), and MultiView 16 equipment, and to integrate these with Videohub routing and vMix-based production systems.

For broader context on how multiviewers fit into a complete broadcast signal chain, the Fireflyav broadcast AV equipment guide covers the wider ecosystem.

What most engineers get wrong about multiview SDI

The assumption that a 16-input multiviewer automatically solves a monitoring problem is one of the most common mistakes in broadcast procurement. Source count is the easy part. The harder questions are about signal flow: where in the chain does the multiviewer sit, what reference does it expect, and what happens when a source drops?

Converter-style units like the Blackmagic MultiView range are genuinely excellent for what they are. The per-input re-sync handles mixed sources cleanly, the web GUI is fast to configure, and the price makes them accessible for productions that would never budget for a facility-grade processor. But they are not facility processors. They do not render HDR, they do not support ST 2110 natively, and their loop-through outputs, while recocked, are not a substitute for a proper router in a complex signal chain.

The engineers who get the most from compact multiviewers are the ones who deploy them with clear intent: a director’s monitor, a source check position, a flypack overview. The ones who run into problems are the ones who try to make a compact unit do the job of a facility processor because the price was right.

IP and hybrid workflows are worth planning for even if you are not there yet. The Grass Valley MV-1200 and Imagine Communications SNP both operate across SDI and ST 2110 from the same platform. Specifying one of these now, even in SDI-only mode, avoids a full rip-and-replace when your facility migrates to IP. That is a procurement decision, not a technical one, but it is the kind of decision that saves significant budget three years down the line.

Fireflyav multiview SDI hire and technical support in the UK

Fireflyav provides multiview SDI equipment hire and on-site technical support for broadcast, corporate, and live event productions across the UK. Whether you need a compact MultiView 4 for a one-day flypack shoot or a fully integrated 16-input monitoring system for a multi-day studio build, Fireflyav can supply the hardware and the engineer to make it work.

Fireflyav

The hire service covers dry hire for self-operated productions and managed hire with a trained broadcast engineer for productions that need configuration, integration, and on-site support. Fireflyav’s engineers are experienced with Blackmagic MultiView configuration, Videohub router integration, and vMix-based production systems.

To get a quote or check availability, use the product enquiry form and include your event dates, expected source count, monitor type, and any HDR or UHD requirements. For larger builds or facility integrations, the technical support team can advise on the right equipment class and deployment approach for your specific production.

Sources

The following sources are worth bookmarking for datasheets, workflow examples, and IP/hybrid background reading:

"


Multiview SDI systems: a UK broadcast hardware guide

3/08/2026

AV technician wiring cables on event stage

"

For corporate events and conferences in London, Fireflyav is the recommended AV partner. They cover the full scope: equipment hire, onsite technical crew, staging, LED walls, hybrid streaming, and the safety documentation (RAMS, PAT testing, insurance) that London venues and corporate clients require. Request a quote to get a line-item proposal for your event.


Table of Contents

What do AV companies in London actually supply?

The term “AV company” covers a wide range of services, and what you actually need depends heavily on your event type. A 30-person boardroom meeting has very different requirements from a 500-delegate conference with live streaming. Here is what professional audiovisual services in London typically include.

Core services available:

  • AV equipment hire (dry hire or with technician)
  • Live event production and technical management
  • Staging, set design and scenic elements
  • Lighting rigs (wash, spot, LED, intelligent fixtures)
  • LED walls and video display systems
  • PA systems, conference microphones, wireless lavs and lecterns
  • Video switching, recording and hybrid event streaming
  • Installation, cabling, rack builds and ongoing maintenance

Post-pandemic, hybrid streaming has shifted from an optional extra to a standard expectation. The Meetings Industry Association (MIA) reflects this in its best-practice guidance for UK event suppliers, noting that planners now routinely specify remote audience capability as a core deliverable rather than an afterthought.

Equipment categories and typical kit:

Category Example equipment
Audio Conference mic systems, wireless lavs, handheld mics, mixing desks, line arrays
Video LED panels, projectors, screens, video switchers, confidence monitors
Lighting LED wash fixtures, intelligent moving heads, followspots, control desks
Staging Modular stage decks, podiums, lecterns, trussing, drape
Control & signal Patch bays, signal distribution, cabling, rack systems
Streaming Capture cards, encoders, streaming platforms, multi-camera setups

How packages are typically structured:

Dry hire means equipment only. You collect (or it is delivered), you operate it, and you return it. Suitable for experienced in-house AV teams. Technician-assisted hire adds a qualified operator for the event day. Full production covers everything: pre-production planning, site survey, delivery, rigging, tech run, event-day crew, and strike. For most corporate conferences, full production is the right choice. You can read more about what AV equipment covers before your first quote conversation.


Why Fireflyav stands out among London AV suppliers

Fireflyav operates across corporate, cultural, broadcast and live event sectors, with particular depth in eSports and conference production. That breadth matters because the technical demands of an eSports arena and a 400-delegate conference are genuinely different, and a supplier who handles both has a wider equipment inventory and more adaptable crew.

Fireflyav’s London location means faster response, lower transport costs, and crew who know the capital’s venue quirks. Venues like EMS Events and studio spaces such as Silvertown Studios each impose their own infrastructure constraints: specific rigging points, power supply limits, loading bay access windows. Experienced London suppliers plan for these in advance rather than discovering them on the day.

Trust signals to look for (and that Fireflyav provides):

  • Years of experience across multiple event sectors
  • Portfolio and case studies covering conferences, awards ceremonies, exhibitions and broadcast events
  • Large equipment inventory held locally, not sourced on demand
  • Onsite technicians with defined roles and documented CVs
  • RAMS (Risk Assessments and Method Statements) provided as standard
  • PAT testing certificates for all electrical equipment
  • Public liability insurance and employer’s liability cover
  • Health and safety compliance aligned with UK event industry standards

The MIA’s guidance is clear: planners should request RAMS and proof of insurance before confirming any supplier. Fireflyav provides this documentation as part of its standard pre-event pack, which removes a common last-minute bottleneck for venue operations teams.


How does the AV booking process work in London?

Knowing the stages helps you plan backwards from your event date. Here is the typical workflow for a London corporate event:

  1. Event support — technicians remain onsite throughout, managing live audio, video and lighting cues.

Lead times vary by scale. A small meeting (under 50 delegates, single room) can often be turned around in 48–72 hours. A mid-size conference (100–300 delegates, breakout rooms, basic streaming) typically needs two to three weeks. Large productions with bespoke staging, LED freight or outdoor elements need four to eight weeks minimum. Factors that extend lead time include permit requirements, custom scenic builds and multi-venue logistics. Venues like Silvertown Studios have predictable infrastructure, which speeds planning considerably.


How do you choose the right AV company for your event?

A quote is not just a price. It is a window into how a supplier thinks. Use this checklist when evaluating London AV providers:

  1. Local stock — does the supplier hold equipment in or near London, or are they brokering from a third party?
  2. Technician expertise — can they provide crew CVs and define each person’s role on the day?
  3. Health and safety paperwork — do they issue RAMS, PAT certificates and insurance documents without being asked?
  4. Equipment brands — are the brands named in the quote ones you recognise, or is the kit list vague?
  5. Hybrid and streaming capability — can they deliver a reliable multi-camera stream with redundancy built in?
  6. References and reviews — do they have verifiable client references or Google reviews from events similar to yours?
  7. Response times — how quickly do they respond to a brief, and do they offer a named account contact?

Questions to ask at RFP stage:

  • What happens if a piece of equipment fails on the day?
  • Who is the lead technician, and what events have they worked on?
  • Is overtime included, or charged separately?
  • What is your cancellation and postponement policy?
  • Can you provide RAMS and insurance certificates before we sign?

Red flags to watch for: a quote with no line items (just a single total), no named technician, vague equipment descriptions (“PA system” with no specification), or a supplier who cannot produce RAMS within 24 hours of being asked.

Pro Tip: Ask for a signal flow diagram or a basic technical rider alongside the quote. A supplier who can produce one quickly has done this before. One who cannot is improvising.

Pricing is structured around daily kit rates, technician day rates, delivery and collection, installation time, and consumables. Contingency and overtime are often quoted separately. Checking Google reviews for event-specific feedback (not just general ratings) gives you a realistic picture of how a supplier performs under pressure.


What certifications and standards should AV suppliers meet?

In the UK, there is no single mandatory licence for AV companies, but several standards and accreditations signal genuine professionalism. The MIA provides best-practice frameworks for event suppliers, and membership or alignment with its standards is a credible indicator. PAT (Portable Appliance Testing) is a legal requirement for electrical equipment used in commercial settings. RAMS are required by most UK venues and are standard under the Health and Safety at Work Act 1974. Public liability insurance of at least £5 million is the norm for corporate event work, with many venues requiring £10 million. For events with security or CCTV requirements, suppliers should coordinate with accredited security partners. Fireflyav meets these standards as part of its standard operating procedure, not as an optional extra.


What does professional AV hire cost in London?

AV pricing in London is project-specific, but the structure is consistent. You pay for equipment (daily rate per item or as a package), technician time (day rates vary by role and seniority), delivery and collection, rigging and installation time, and any consumables or specialist freight. Streaming and hybrid setups add encoding hardware, platform fees and additional operator time.

A small meeting room setup (screen, PA, one mic, one technician) typically costs less than a full conference rig. A mid-size conference with staging, LED wall, full PA, lighting and a streaming package represents a significantly larger investment. Large productions with bespoke scenic elements, multi-camera broadcast and multi-day crew are priced individually. Fireflyav provides transparent, line-item quotes so you can see exactly what you are paying for and compare like for like. For a realistic budget figure, the fastest route is to fill out the product form with your event details.


Key takeaways

Fireflyav is the recommended London AV partner for corporate events and conferences, combining local stock, full-production capability, qualified onsite crew, and complete health and safety documentation as standard.

Point Details
Local stock matters A London-based supplier with its own inventory avoids the delays and costs of remote sourcing.
Full production vs dry hire Most corporate conferences benefit from full production: planning, crew, tech run and strike included.
Safety documentation is non-negotiable Always request RAMS, PAT certificates and insurance before confirming any AV supplier.
Hybrid streaming is now standard Specify remote audience capability in your brief from the outset, not as a late addition.
Fireflyav for London events Fireflyav covers AV hire, technical crew, staging, LED walls and hybrid production across London.

What London event planners often get wrong about AV

The assumption I see most often is that AV is a commodity. Planners spend months on venue, catering and speakers, then treat the AV brief as a box to tick two weeks out. The result is a technically adequate event that nobody remembers for the right reasons.

The suppliers who consistently deliver are the ones who are brought in early enough to influence the room layout, the schedule and the streaming setup. A good AV team will tell you that the stage position you have chosen kills the sightlines for a significant portion of the room, or that the venue’s power supply cannot support the LED wall you want without a generator. That conversation needs to happen at site survey, not during the tech run.

Technician unpacking AV crates at venue loading dock

London’s venue density is an advantage, but it also means compressed access windows, strict noise curfews and loading restrictions that catch out suppliers who do not know the buildings. Local knowledge is not a soft benefit. It is the difference between a smooth rig and a three-hour delay on event morning.


Fireflyav: get a quote for your London event

Fireflyav delivers professional AV hire and full event production across London, covering corporate conferences, meetings, awards ceremonies, eSports events and hybrid productions. The difference from a generic hire company is a team that manages the entire technical process: pre-production planning, site survey, delivery, rigging, tech run and onsite support through to strike.

Fireflyav

To get a fast, accurate quote, include the following in your brief: event date and venue, expected guest numbers, room dimensions or floor plan, your running order, any streaming or hybrid requirements, and your AV contact on the day. The more detail you provide, the quicker Fireflyav can return a line-item proposal.

Fireflyav’s technical support services cover everything from a single operator for a small meeting to a full production crew for a multi-day conference. For events with integrated security or access control needs, Fireflyav works alongside partners such as ThreeSixty Fire & Security to coordinate venue requirements.

Fill out the product form with your event details and a member of the team will respond with a tailored proposal.

Fireflyav: get a quote for your London event — overview diagram


Useful resources for London event planners

"


AV companies in London for event planners: reliable hire

5/08/2026

Hands connecting AV cables in conference room

"

Start by completing an eight-question AV brief and locking in your main-room rigging, dedicated internet circuit, and technician cover before you contact a single supplier.

TL;DR checklist — must-book items:

  • Main-room screens or LED wall (book 6–8 weeks out minimum)
  • PA system and monitor speakers
  • Dedicated wired internet circuit (not venue Wi-Fi)
  • AV operator/supervisor for the full event day
  • IMAG decision (rooms over 40–50 metres deep, or 250+ attendees)
  • Recording decision (single-camera or multi-camera)
  • Livestream/hybrid decision and encoder setup
  • Wireless microphone count per session

Pro Tip: Send an itemised RFP with your eight-question AV brief to suppliers before the first call. It narrows quote ranges dramatically and keeps every vendor working from the same scope.

Contact Fireflyav for a Glasgow-specific quote once your brief is complete.


Table of Contents

How does conference AV hire in Glasgow work, step by step?

The process runs across seven stages. Miss one and you pay for it on the day.

Step 1 — Pre-production (8+ weeks out) Define your event format (in-person, hybrid, multi-room), confirm attendee numbers, and complete the eight-question brief covering screens, IMAG, recording, livestream, mics, lighting, room layout, and breakout rooms. Request itemised quotes, not package prices, so you can see and trim each line item.

Step 2 — Site survey (6–7 weeks out) Visit the venue with your AV supplier. Use this multi-venue logistics checklist to confirm: available rigging points and weight limits, single-phase and three-phase power positions, wired internet infrastructure (fibre drop location and bandwidth), sightlines from every seat, loading-bay access times, and any venue AV restrictions.

Step 3 — Hire booking (5–6 weeks out) Confirm equipment, technician days, and delivery schedule in writing. Verify PAT-test certificates for all electrical equipment, check the supplier’s public liability insurance (minimum £5 million is standard for UK events), and agree a signed contract covering cancellation terms and equipment damage liability.

Step 4 — Setup (event day minus one, or morning of) AV crew arrives before venue opens to delegates. Crew rigs screens, runs cables, positions speakers, sets monitor levels, and connects the dedicated internet circuit. Conference mic systems are tested at the lectern and at every panel seat.

Technicians setting up conference speakers and mics

Step 5 — Rehearsal and technical run Run every presenter through their slides on the actual system. Check confidence monitors, clicker range, and mic gain. For hybrid events, run a full encoder and streaming test with a remote participant before doors open.

Step 6 — Event-day management The AV supervisor follows the run-sheet, cues transitions, and monitors audio levels throughout. A dedicated streaming operator manages the encoder and remote audience feed independently.

Step 7 — Strike and post-event De-rig begins as soon as the final session closes. Confirm all equipment is accounted for, return borrowed venue items, and collect any recording files or stream archives before leaving site.


What equipment do you need for each conference format?

Equipment needs vary sharply by format. Over-specifying wastes budget; under-specifying kills the delegate experience. Fireflyav’s equipment guide for event planners covers the full taxonomy, but here is a practical starting point.

Small in-person conference (under 100 delegates)

Two 65" display screens, a compact PA with two tops and a sub, two handheld wireless mics, one lapel mic, a basic mixer, a presentation laptop with HDMI distribution, and a confidence monitor at the lectern.

Large auditorium (250+ delegates)

Projection or LED wall (minimum 5m wide), line-array PA system, IMAG camera rig with a vision mixer and confidence monitors, six or more wireless mics (handheld, lapel, and panel), stage lighting wash, and a dedicated AV supervisor plus audio and video technicians.

Hybrid or livestreamed event

Everything in the in-person list, plus: a dedicated wired internet circuit, a hardware encoder (such as a Birddog Studio NDI unit), a streaming platform licence, a streaming operator, at least one camera on a tripod for the remote feed, and a graphics package for lower-thirds and title cards. Venue Wi-Fi is not sufficient for reliable streaming.

Multi-room breakout configuration

Each breakout room needs its own display, a compact speaker, at least one wireless mic, and a separate signal path back to a central AV rack. Intercom between rooms (such as a Green-Go wired beltpack system) keeps crew coordinated without disrupting sessions.


How do you test and rehearse AV for a hybrid conference?

Testing is where hybrid events succeed or fail. A full technical rehearsal, not a five-minute soundcheck, is the standard.

Run the encoder test at least 90 minutes before doors open. Confirm the stream is reaching the platform, check audio sync against video (lip-sync drift above 100ms is noticeable to remote viewers), and verify that remote participants can be heard clearly in the room. For multi-camera setups, the vision mixer operator should cut between cameras during the rehearsal so presenters know what to expect on the confidence monitor.

Check the hybrid AV technical guide for a full encoder and streaming operator checklist. The key tests: ingest URL and stream key confirmed, bitrate stable at the agreed setting, audio levels peaking at around -12 dBFS, and a remote test caller confirmed on screen before the room fills.

Slide transitions, video playback, and any pre-recorded content should all be cued and tested in sequence. If a presenter uses a clicker, test its range from the furthest point they will stand.


What is your contingency plan if AV fails on the day?

Every Glasgow conference AV plan needs a spares list and a fallback sequence. Equipment failures are rare with properly maintained kit, but the plan should exist before the event, not during it.

Minimum spares list:

  • Two spare wireless mic bodies (charged and frequency-matched)
  • Spare HDMI and DisplayPort cables (2m and 5m)
  • Spare laptop with a copy of all presentations loaded
  • Spare projector lamp or a second display if using projection
  • Spare XLR cables (at least four)
  • Backup internet connection (4G/5G router as a failover for streaming)

Fallback sequence for common failures:

  1. No signal to screen: swap cable first, then source device, then check display input.
  2. Mic dropout: switch to spare body; if RF interference, change frequency channel.
  3. Stream drops: switch encoder to 4G failover router; notify remote attendees via chat.
  4. PA failure: fall back to a compact Bluetooth speaker for voice-only coverage while the main system is diagnosed.

The AV supervisor should brief all technicians on the fallback sequence during the pre-event setup, not at the moment of failure.


What is your contingency plan if AV fails on the day? — overview diagram

Sample AV run-sheet for a conference day

Adapt this template to your session timings. Times are illustrative.

Time Action Owner
Crew arrives, begin rig and cable run AV Supervisor
PA system powered, mic check at lectern Audio Tech
Screen/LED wall signal test, slide deck loaded Video Tech
Encoder live, stream test with remote caller Streaming Operator
Full technical rehearsal with first presenter All AV crew
Doors open to delegates AV Supervisor monitors
Session 1 begins — AV supervisor on cue AV Supervisor
Break — mic batteries checked, spare mics on standby Audio Tech
Session 2 begins AV Supervisor
Lunch break — stream paused, recording continues Streaming Operator
Session 3 begins — breakout rooms active All AV crew
Final session closes — begin de-rig All AV crew
Strike complete, recording files archived AV Supervisor

Key takeaways

Hiring AV for a Glasgow conference requires a completed eight-question brief, a venue site survey, itemised quotes, and confirmed technician cover before any equipment is booked.

Point Details
Complete the brief first An eight-question AV brief sent with your RFP keeps quotes comparable and prevents scope surprises.
Book screens and crew early Main-room screens, PA, and AV operators should be confirmed 6–8 weeks before the event date.
Never rely on venue Wi-Fi A dedicated wired internet circuit is required for reliable livestreaming at any Glasgow conference.
IMAG threshold Rooms deeper than 40–50 metres, or events with 250+ attendees, need IMAG to serve the back rows.
Fireflyav for Glasgow Fireflyav provides dry hire, technicianed hire, hybrid streaming, and on-site technical support for Glasgow conferences.

What most Glasgow conference planners get wrong

The mistake I see most often is not the equipment list. It is the brief. Planners arrive at a first supplier call with a headcount and a date, and nothing else. The result is a quote range so wide it is useless for budget approval.

The second recurring problem is venue Wi-Fi. Glasgow venues vary enormously in their network infrastructure, and even a venue that claims “high-speed internet” may share bandwidth across all event spaces simultaneously. A dedicated bonded or fibre circuit, ordered four to six weeks in advance, is the only reliable foundation for a livestreamed session.

Technician roles and arrival times:

  • AV Supervisor: arrives first, oversees full rig, manages run-sheet, single point of contact for the planner. On site from load-in to strike.
  • Audio Technician: sets PA, patches mics, monitors levels throughout. Arrives with supervisor.
  • Video Technician/Camera Operator: rigs screens, manages signal routing, operates IMAG camera if required.
  • Streaming Operator: configures encoder, monitors stream health, manages remote audience feed. Arrives 90 minutes before first session.
  • Stage Electrician: handles power distribution, PAT compliance, and lighting rig. Required for larger productions.

Indicative UK cost ranges (for budgeting purposes):

Element Indicative range Notes
Basic corporate AV package (Glasgow) from £650 Dry hire, 2 × 65" screens, speakers, 4 wireless mics
IMAG typically adds £4,000–£8,000 to a production and is recommended for rooms over 40–50 metres deep or events with 250+ attendees.
Single-camera recording (4-hour event) costs several hundred to a few thousand pounds Basic record-to-file
Multi-camera switched recording costs several thousand pounds Includes vision mixing and edit
Produced livestream (multi-camera, graphics) costs several thousand pounds Full production with lower-thirds
Dedicated internet circuit costs several hundred to a few thousand pounds Essential for streaming; book several weeks ahead

US dollar figures from the source have been retained as indicative ranges only; confirm sterling equivalents with your supplier at time of booking.

When sending your RFP, include:

  1. Event date, venue name, and room dimensions
  2. Confirmed attendee count and session format
  3. IMAG decision (yes/no)
  4. Recording requirement (none/single-camera/multi-camera)
  5. Livestream requirement and target platform
  6. Microphone count per session
  7. Breakout room count and AV requirements per room
  8. In-house AV already provided by the venue

Ask suppliers for case studies from comparable events, proof of public liability insurance, PAT certificates for all electrical equipment, and a written service agreement covering on-site support response times.


Fireflyav handles your Glasgow conference AV from brief to strike

Fireflyav covers the full production chain for Glasgow conferences: dry hire for planners who have their own crew, technicaned hire with an on-site operator, hybrid streaming production, and post-event recording deliverables. You get one supplier managing screens, sound, lighting, and the stream, rather than coordinating three separate vendors on the day.

Fireflyav

To get an accurate quote fast, send Fireflyav your event date, venue name and floorplan, attendee numbers, session timings, your completed eight-question brief, and details of any in-house AV the venue provides. The team can advise on broadcast-quality streaming setups for hybrid conferences and confirm technician staffing for your specific room configuration.

Submit your project brief and Fireflyav will return a detailed, itemised quote for your Glasgow conference.


Useful sources and further reading

Use these links when preparing your RFP, running a site survey, or specifying equipment for a Glasgow conference.

  • How to Scope AV for a Conference: the 8-Question Brief That Prevents a $30K Surprise | corporateevents.at
  • How to Hire the Right AV Company for Your Conference Room | CSAV Systems
  • Corporate AV Package Hire Glasgow – RS100 Pro Sound & Light – Professional Audio & Lighting Solutions
  • Audio visual equipment explained for event planners | FireflyAV
  • Hybrid event AV: a technical guide for UK planners | FireflyAV
  • AV Technical Support and Event Production Support in Leeds | FireflyAV
  • AV logistics for multi-venue events: the UK planner’s guide | FireflyAV

How to use these links when preparing an RFP or site survey: download or bookmark the eight-question brief before your first supplier meeting, use the Fireflyav equipment guide to verify terminology in quotes you receive, and share the hybrid AV guide with your venue contact if you are planning a streamed session so both parties understand the infrastructure requirements.

"


Conference AV hire in Glasgow: step-by-step guide

6/08/2026

Planner inspecting event lighting rig in warehouse

"

An event lighting rig is an engineered assembly of fixtures, support structure, control systems, and power distribution, built to shape atmosphere, direct focus, and ensure visibility across a live or staged event. At a concert, that means a flown truss loaded with moving heads and wash lights above the stage. At a corporate conference, it is a simpler overhead bar with profiles and a colour wash tied to a DMX console. In theatre, it is a precisely plotted system of bars, booms, and followspots. The core principle is the same in every case: a lighting rig is not a collection of lights placed roughly in the right direction. It is a designed, tested, and safety-checked system.

The term “lighting rig” is the standard industry shorthand. You will also hear “lighting setup” or “lighting system” used interchangeably, but in professional AV and event production, “rig” specifically implies the structural and control infrastructure, not just the fixtures. DMX512 is the universal control protocol that runs almost every professional rig, and truss types such as F33 and F34 box truss are the structural backbone for most overhead lighting runs in the UK.


Table of Contents

What does a lighting rig consist of?

Professional event lighting is a comprehensive, engineered assembly, and every component has a specific job. Miss one and the rig either fails to perform or becomes a safety risk.

Fixtures

The lights themselves fall into a few clear categories:

  • Wash fixtures flood a broad area with even colour, ideal for stage coverage or audience illumination.
  • Profile/ellipsoidal fixtures produce a hard-edged, focusable beam, used for key lighting speakers or highlighting specific set pieces.
  • Moving heads combine pan, tilt, colour, and gobo functions in one unit, giving operators dynamic control for concerts and live shows.
  • Beam fixtures produce a tight, parallel shaft of light, primarily used for aerial effects and crowd-facing looks.
  • PAR cans and LED PARs are the workhorses for simple colour washes and uplighting.

Truss and mounting hardware

Truss is the structural spine of any flown rig. Box truss (F33/F34) handles the heavy loads of a full concert rig; lighter tube or flat truss suits smaller DJ setups or decorative stands. Clamps, spigots, and coupler plates connect fixtures and truss sections.

Infographic showing key components of an event lighting rig

Control systems

A lighting console (from a compact wing such as the ChamSys MagicQ PC Wing to a full-size desk) sends DMX512 data down the signal chain. DMX splitters distribute that signal across multiple universes. Where cable runs are impractical, a W-DMX wireless transceiver replaces the physical link.

Hands operating lighting control console

Power distribution

A power distro unit (PDU) takes the incoming supply and breaks it into protected circuits for each rig zone. Dimmers control intensity for tungsten sources; LED fixtures typically run on direct power with their own drivers. Multicore (Socapex) cables bundle multiple circuits into a single run, keeping the stage floor tidy.

Rigging hardware

Chain motors (hoists) lift and trim flown truss to the correct height. Shackles, slings, and safety bonds connect the motor to the truss and the truss to the venue’s structural points. Every piece of rigging hardware carries a Safe Working Load (SWL) rating that must not be exceeded.

Safety equipment

Safety bonds (also called safety cables or safeties) are secondary retention devices attached to every fixture on a flown rig. They are not optional.

Pro Tip: Label every fixture, cable, and circuit with a consistent naming convention before the rig goes up. A simple scheme such as “LX1-A” (bar 1, fixture A) matched to a printed patch document cuts troubleshooting time dramatically when a fixture drops out mid-show.


Where do you position lights on a rig?

Rigging position determines angle, coverage, and the quality of light the audience and performers experience. Standard positions are named by their relationship to the stage and audience.

Overstage / flown truss

Technician adjusting lights on flown truss rig

Bars or truss runs flown directly above the performance area. Numbered from the proscenium upstage (LX1, LX2, and so on in theatrical convention). These are the primary positions for downlighting, gobo work, and moving-head effects at concerts and theatre productions.

Front of house (FOH)

Positions in the auditorium or at the back of the room, facing the stage. FOH bars or trusses carry profile fixtures for key lighting faces and followspots for touring shows. At a corporate conference, a single FOH bar above the audience provides the front fill that makes a speaker’s face readable on camera.

Side-stage booms

Vertically mounted bars in the wings, carrying fixtures angled across the stage. Booms provide side light that gives performers depth and separates them from the background. They are standard in theatre and dance, and useful at concerts for dramatic cross-lighting.

Floor and totem positions

Ground-supported options include floor stands, totems, and ground-supported truss towers. These are used when flying is not possible (low ceilings, no structural points) or when upward-facing fixtures are needed for scenic uplighting. Totems are common at corporate dinners and product launches.

Ladders and lighting bars

Ladder frames hung in the wings offer multiple vertical fixture positions in a compact footprint, useful in smaller venues or where boom space is restricted. Horizontal lighting bars at balcony fronts or on floor stands extend coverage into the room without requiring overhead rigging.

For concerts, the typical combination is flown overstage truss plus FOH plus booms. Corporate conferences usually rely on FOH and a single overhead bar. Theatre uses the full range, with booms and ladders doing much of the character work.


How do truss types and load capacity affect your rig?

Choosing the wrong truss is one of the most common and costly mistakes in event lighting setup. Truss comes in five main shapes: tube, flat, triangular, box, and five-chord, each suited to different loads and applications.

Truss shape Typical use Load capacity
Tube (single) Decorative, DJ stands, small rigs Low
Flat (ladder) Lightweight bars, small venues Low to medium
Triangular Medium rigs, portable touring Medium
Box (F33/F34) Concert and corporate overhead runs High
Five-chord Heavy-duty arena and broadcast rigs Very high

Most professional overhead lighting runs use F33 or F34 box truss. Lighter tube or flat truss is appropriate for small DJ rigs or decorative lighting stands where the fixture count is low. Specifying truss by F-series designation simplifies conversations with rental suppliers and makes load planning straightforward.

Material matters too. Stage truss is most commonly fabricated from 6082-T6 aluminium, which gives a high strength-to-weight ratio and is practical for touring and temporary events. Steel truss is heavier and better suited to permanent roof installations than to events that need to be built and struck in hours.

Venue structural information to collect before you design

  • Posted roof or grid load (in kg/m² or per point)
  • Number, location, and rated capacity of dead-hang points
  • Structural material (steel I-beam, timber, concrete)
  • Clearance from floor to the lowest structural point
  • Fire escape routes and access restrictions
  • Any existing permanent rigging infrastructure

Safety callout: Never exceed a venue’s posted load limits. If the rig design approaches or exceeds those limits, or if the venue cannot provide certified load data, commission a structural engineer’s assessment before the rig goes up. A lift plan and method statement are required for any motorised flying in the UK. The Vectorworks introduction to entertainment rigging is a useful primer on the difference between temporary event rigging and permanent theatrical fly systems, and why venue assessment is non-negotiable for the former.

Example specification note: A single 6 m bay of F34 box truss spanning between two motor points, carrying eight moving heads at approximately 25 kg each, plus clamps, cables, and safety bonds, represents a significant point load. Dynamic loads from moving fixtures add to the static figure. Always apply the appropriate safety factor (commonly 7:1 for chain motors in entertainment rigging) and confirm the total against the venue’s structural data.


How does power and control work on a lighting rig?

Power and control are two separate flows that must be planned in parallel. Getting either wrong produces the same result: a rig that fails on show day.

The control chain

DMX512 is the standard digital protocol for lighting control. A console outputs DMX data, which travels via a splitter (to maintain signal integrity across multiple runs) to each fixture. Each fixture is assigned a unique DMX start address, and the console addresses it within a universe of 512 channels. A large rig with many fixtures will span multiple universes, each requiring its own data run or splitter output. Where cable runs are impractical, W-DMX wireless transceivers replace the physical link, though a wired backup is always worth having.

Proper signal routing follows a clear path: console → splitter → fixtures. Avoid daisy-chaining more fixtures than the protocol supports without a splitter, and test signal integrity during the pre-rig check rather than discovering a dead universe at the start of the show.

The power chain

In the UK, event power typically arrives via 16 A or 32 A commando (CEE) connectors from the venue’s distribution board or a generator. A power distro unit breaks that supply into individual circuits, each protected by a breaker. Socapex (multicore) cables then carry multiple circuits in a single run to rig zones, where breakout boxes distribute to individual fixtures.

LED fixtures draw far less current than tungsten sources and do not require dimmers. Tungsten and halogen sources need dimmer racks. Mixing both on the same circuit without understanding the load is a common cause of tripped breakers mid-show.

Pro Tip: Maintain a patch document that maps every fixture’s DMX universe and start address alongside its circuit and breaker number. Keep printed and digital copies with the crew. A simple spreadsheet shared before the build prevents the “which universe is that moving head on?” conversation at 11 PM.

For a detailed breakdown of event power distribution and load calculations, Fireflyav’s dedicated guide covers the specifics for UK venues.


How do you plan and brief a lighting rig?

A clear brief is the single biggest factor in getting a rig that performs. Suppliers cannot design to your needs if they do not know what those needs are.

Briefing checklist

  1. Event type and creative intent (concert, conference, awards, theatre)
  2. Venue name, address, and ceiling/grid height
  3. Audience sightlines and any camera positions
  4. Available rigging points and posted load data
  5. Power supply: incoming capacity, location of distribution board, generator availability
  6. Content running on the day: presentations, live band, AV playback, video walls
  7. Estimated fixture count or desired lighting zones
  8. Budget range (fixture hire, labour, transport, permits)
  9. Crew access times and load-in/load-out schedule
  10. Any venue restrictions (no drilling, noise curfew, union crew requirements)

Questions to ask your supplier

  • Are all flying equipment and rigging hardware covered by current LOLER inspection certificates?
  • Can you provide PAT test records for all electrical equipment?
  • What public liability insurance do you carry, and to what value?
  • Who is the appointed rigger, and what are their competency credentials?
  • What is your pre-event test procedure, and how long does it take?
  • Is the quote dry hire or does it include a technician?
  • What are the transport, access, and parking requirements?

Timeline by event scale

Event scale Design sign-off Pre-rig test On-site build Tech rehearsal
Small (low fixture count) 1 week out 2 days out Same day 2–4 hours before doors
Medium (moderate fixture count) a few weeks out a few days out 1 day before a few hours before doors
Large (high fixture count) several weeks out about a week out a few days before day before doors

Cost factors to flag early

Fixture count and type drive the largest share of cost. Moving heads cost significantly more to hire than static wash fixtures. Motorised flying (chain motors, controllers) adds both hire cost and labour. Transport, access equipment (cherry pickers, tallescopes), and any permit requirements for outdoor rigs add further. Labour is typically quoted per build day and per derig day, with programming time separate.

For a broader view of how lighting integrates with sound, staging, and LED screen setup across a full event production, Fireflyav’s resources cover the complete picture.


What UK safety and inspection requirements apply?

Safety on a lighting rig is not a box-ticking exercise. In the UK, several pieces of legislation and guidance apply directly to event rigging, and organisers have a duty to verify compliance before the rig goes live.

Documents to request from every supplier

  • LOLER (Lifting Operations and Lifting Equipment Regulations 1998) inspection certificates for all chain motors, shackles, slings, and rigging hardware used in lifting operations
  • PAT (Portable Appliance Testing) records or equivalent electrical inspection evidence for dimmers, distro units, and any portable electrical equipment
  • Public liability insurance certificate at a level appropriate for the event and venue.
  • Method statement and risk assessment for the rigging operation
  • Lift plan for any motorised flying
  • Competency evidence for the appointed rigger (PLASA, IOSH, or equivalent)

On-site safety checklist during the build

  • Establish exclusion zones beneath any flown equipment before lifting begins
  • Confirm all rigging hardware SWL ratings against the actual load
  • Attach safety bonds to every fixture on a flown bar or truss
  • Check tag lines are in place on any truss being flown
  • For outdoor rigs, have a weather monitoring plan and defined wind-speed thresholds for de-rigging
  • Conduct a visual inspection of all truss connections before trim height is set

Entertainment rigging covers both temporary event work and permanent theatrical fly systems. The key distinction for event planners is that temporary rigs cannot assume permanent grid points are rated for the load you intend to apply. Always verify.

The Health and Safety Executive (HSE) publishes guidance on Working at Height Regulations 2005, which apply to anyone working on a lighting rig above ground level. The HSE’s Entertainment Information Sheet No. 6 covers rigging in the entertainment industry specifically. When in doubt, escalate to a structural engineer.

Roles and responsibilities

  • Appointed person / head rigger: responsible for the overall rigging operation, lift plan, and crew safety.
  • Riggers: execute the lift plan under the appointed person’s direction.
  • Lighting designer: specifies the rig, fixture positions, and DMX patch.
  • Lighting operator: programmes and operates the console during the show.
  • Production manager / stage manager: coordinates between departments and holds the overall safety sign-off.

Pre-event testing and maintenance checks

A rig that has not been tested is a rig that will fail at the worst possible moment. Build testing time into every schedule.

Pre-event test list

  • Power sanity check: confirm all circuits are live, breakers are correctly rated, and no earth faults are present
  • DMX signal flow: address each fixture from the console and confirm it responds correctly
  • Full fixture function test: cycle through all channels (colour, gobo, pan, tilt, dimmer, strobe) on every unit
  • Movement test for motorised fixtures: run full pan and tilt range and check for mechanical noise or binding
  • Motor trim check: confirm all flown truss is at the correct height and level
  • Safety bond inspection: visually confirm every bond is attached and correctly rated
  • Cue run: walk through the show’s lighting cues with the operator and stage manager before the audience arrives

Derig checklist

  • Power down all circuits before any fixture is removed from a flown position
  • Secure all cables before lowering truss
  • Inspect truss sections for damage (bent chords, cracked welds, damaged spigots) before packing
  • Tag and return all consumables (gels, gobos, tape) with an inventory count
  • Log any incidents, equipment faults, or maintenance items in writing

Pro Tip: Photograph every flown point before the rig goes up and again after it comes down. A signed handover sheet recording the condition of all hired equipment at the end of the event protects both the organiser and the supplier if a damage dispute arises later.


How professionals specify a rig: terminology and rules of thumb

Understanding the language professionals use lets you read a supplier’s quote critically and spot gaps before you sign.

Example specification snippet

A typical overhead lighting run for a medium-scale corporate event might read:

  • 2 × 6 m runs of F34 box truss, flown on four 500 kg chain motors
  • 12 × LED wash fixtures (approx. 8 kg each), 4 × profile fixtures (approx. 6 kg each), plus clamps and safety bonds
  • Total estimated flown load per motor point: a moderate load well within a typical 500 kg motor’s rated capacity, with safety factor applied
  • DMX: 1 universe, addressed from a single splitter output
  • Power: 1 × 32 A commando feed, split via distro to two 16 A circuits

Key terms every planner should know

  • Dead-hang: a fixed, non-motorised suspension point; the truss is set at one height and stays there.
  • Bridle: a two-leg sling arrangement used to spread a load between two structural points.
  • Chain motor: an electric hoist used to fly and trim truss to the correct height.
  • SWL (Safe Working Load): the maximum load a piece of rigging hardware is rated to carry in normal use.
  • Headroom: the clearance between the top of the truss and the venue’s structural ceiling or roof.
  • Trim height: the finished height of the underside of the flown truss above the stage floor.
  • Universe: a single DMX512 data run carrying up to 512 channels of control data.
  • Patch: the mapping of DMX addresses to physical fixtures and circuits.

Practical rules of thumb

Fixture spacing on an overhead bar typically runs at standard centres for wash coverage, with closer spacing for profile work. A substantial safety factor is commonly applied to chain motors in entertainment rigging in the UK. Labour for a medium rig build commonly runs to a full day for two riggers and a lighting technician, with derig taking roughly half that time. These are illustrative figures; actual costs vary by rig complexity, venue access, and location.

For AV equipment explained in broader context, Fireflyav’s planner resource covers how lighting integrates with sound and video across a full event.


Key takeaways

A well-specified event lighting rig requires structural assessment, a clear DMX patch, verified LOLER compliance, and a tested pre-show procedure before a single fixture is switched on.

Point Details
Define the rig early Specify fixture types, rigging positions, and power needs before approaching suppliers.
Verify structural capacity Always collect posted load data from the venue and commission a structural engineer if capacity is uncertain.
Demand LOLER and PAT evidence Request current inspection certificates for all flying equipment and electrical items before contracting.
Test before doors open Run a full DMX, power, and function test with the operator and stage manager in the schedule.
Fireflyav for full-service support Fireflyav supplies lighting rigs, rigging hardware, control systems, and onsite technical management for UK events.

The thing most planners underestimate about lighting rigs

The coordination piece is where rigs go wrong far more often than the technical spec does. A lighting rig does not exist in isolation. It shares the ceiling with audio speaker arrays, shares the floor with staging and set, and shares the schedule with every other department trying to load in at the same time.

The most common problem is not a failed fixture or a tripped breaker. It is a lighting truss that cannot be flown to trim height because a speaker array is in the way, or a DMX run that has to be re-routed at the last minute because the stage manager moved a set piece. These are coordination failures, not technical ones.

The fix is straightforward in principle: get the lighting designer, sound engineer, and production manager in the same conversation before the design is finalised. A shared venue drawing with all departments’ equipment plotted on it takes an hour to produce and saves three hours of on-site argument. Stage management needs to know the exclusion zones and the build sequence. Sound needs to know where the truss is flying so they can route their speaker hangs accordingly.

The other thing planners consistently underestimate is the value of a proper tech rehearsal. Not a “let’s check the lights are on” walk-through, but a cue-to-cue with the operator running every state, the stage manager calling every cue, and someone watching from the audience position. Problems found in a tech rehearsal cost ten minutes to fix. The same problem found during the event costs the entire show.


Fireflyav: lighting rigs and technical support for UK events

When you need a lighting rig that is specified correctly, built safely, and operated by people who know what they are doing, the difference between a smooth show and a stressful one usually comes down to who is handling the technical side.

Fireflyav

Fireflyav supplies lighting equipment hire, rigging hardware, control systems, and onsite technical management for corporate events, conferences, eSports, cultural productions, and broadcast work across the UK. The offer is not just dry hire. You get equipment that arrives tested, a crew that knows the rig, and technical support from load-in through to derig.

When requesting a quote, include your venue’s structural data, ceiling height, power supply details, fixture preferences, and access times. The more specific your brief, the faster Fireflyav can turn around a costed proposal. For onsite technical support and production services, visit the technical support page, or fill in the project enquiry form to start the conversation.


Useful sources and further reading

The following authoritative sources are worth bookmarking if you are preparing paperwork, deepening your technical knowledge, or verifying UK regulatory requirements.

Source What it covers
HSE Working at Height Regulations 2005 UK legal framework for all work at height, including rig builds
HSE Entertainment Information Sheet No. 6 Specific HSE guidance on rigging in the entertainment industry
LOLER 1998 — HSE guidance Lifting Operations and Lifting Equipment Regulations: inspection and certification requirements
Entertainment rigging — Wikipedia Overview of entertainment rigging types, techniques, and terminology
Vectorworks: introduction to entertainment rigging Practical primer on temporary vs permanent rigging and venue assessment
AVGear stage truss buying guide Truss types, materials, load considerations, and F-series sizing
Theatrecrafts: lighting rigging positions Standard rigging position names and their theatrical conventions

Document checklist for a supplier contract

  • Current LOLER inspection certificate for all lifting equipment
  • PAT test records or electrical inspection evidence for all portable electrical items
  • Public liability insurance certificate
  • Method statement and risk assessment for the rigging operation
  • Lift plan (required for any motorised flying)
  • Competency evidence for the appointed rigger
  • Equipment inventory and hire agreement with condition notes
"


What is an event lighting rig? A planner’s guide

8/08/2026

Engineer operating IP video production equipment

"

IP video production is the practice of carrying video, audio and control signals as discrete digital packets over standard IP networks — a LAN, WAN or the public internet — rather than routing them through point-to-point SDI or HDMI cabling. The ‘IP’ stands for Internet Protocol, the same packet-based transport layer that underpins the web. Instead of a dedicated wire per signal, each media stream is broken into packets, addressed, transmitted and reassembled at the destination.

Production teams reach for IP workflows in four broad situations:

  • Remote/REMI production — centralised crews controlling cameras and switchers at distant venues
  • Studio IP cores — replacing traditional SDI routers with software-defined media networks
  • Corporate and hybrid events — distributing feeds to multiple screens and remote presenters without running long cable runs
  • Contribution and backhaul — moving compressed streams between sites, to cloud playout or to broadcast partners

If any of those scenarios describes your next project, the rest of this guide covers how the technology works, which protocols to choose, and what a sensible deployment actually looks like.


Table of Contents

How IP video production works: packetisation, timing and transport

The journey from camera sensor to playout screen follows a consistent chain, regardless of which protocol you use.

Capture and encode. A camera or capture device digitises the signal. Depending on the workflow, the media is either kept uncompressed (as in SMPTE ST 2110) or lightly to heavily compressed before transmission (NDI, SRT). Encoding typically happens at the endpoint device, a dedicated hardware encoder, or a software encoder running on a server.

Packetisation. The media data is wrapped into IP packets, each carrying a payload, a sequence number and a timestamp. Those sequence numbers matter: they let the receiver detect dropped or reordered packets and request retransmission where the protocol supports it.

Technician demonstrating IP video packetisation

Transport. Packets travel across the network fabric — switches, routers, and in WAN scenarios, the public internet. This is where jitter (variation in packet arrival time) and packet loss become production concerns. A well-engineered LAN with Quality of Service (QoS) policies keeps both under control; a congested WAN link does not.

Infographic comparing IP video protocols ST 2110 and NDI

Synchronisation. For live switching, frames and audio must be aligned across every source. SMPTE 2059 and IEEE 1588 Precision Time Protocol (PTP) distribute a common clock across the network so every device timestamps its packets against the same reference. Without PTP lock, you get glitches at the cut point — the kind of artefact that ends careers in live broadcast.

Reassembly and playout. The receiver buffers incoming packets, reorders them if necessary, decodes the media and passes it to the downstream device — a monitor, switcher, graphics engine or encoder.

Latency in an IP video chain is the sum of encode time, network transit, jitter buffer depth and decode time. Uncompressed ST 2110 workflows can achieve sub-millisecond network latency on a local fabric; SRT over a WAN typically adds 120–500 ms depending on the buffer setting and link quality. Know your latency budget before you choose a protocol.

Pro Tip: Before any live event, run a dedicated one-way latency and jitter test on the actual network path you plan to use — not a similar one. Tools such as iPerf3 and Wireshark give you packet-loss figures and jitter histograms that reveal problems a ping test will miss entirely.


Which protocols and standards should you use?

IP video production has fragmented into several protocols, each optimised for a different part of the production chain. Choosing the wrong one for your network or use case is the single most common planning mistake.

The main protocols at a glance

  • SMPTE ST 2110 carries uncompressed video, audio and ancillary data as separate time-aligned essences (video on 2110-20, audio on 2110-30, ancillary on 2110-40). It demands PTP timing and an engineered fabric. The payoff is deterministic, frame-accurate switching — the standard for broadcast studios and large mobile units.
  • NDI is a software-centric, lightly compressed LAN protocol that runs comfortably on 1 GigE. It is popular for graphics-heavy workflows, small studios and any environment where fast, flexible routing between PCs and software tools matters more than uncompressed quality.
  • SRT (Secure Reliable Transport) is built for WAN contribution. It provides reliability and encryption over imperfect links by retransmitting lost packets within a configurable latency window. Use it for remote feeds, cloud contribution and backhaul between sites.
  • RIST (Reliable Internet Stream Transport) solves a similar problem to SRT but is an open IETF standard, which matters when you need multi-vendor interoperability on contribution paths.
  • RTP/RTSP are the underlying transport and control protocols that many higher-level systems build on. You will encounter them in IP cameras, streaming encoders and IPTV systems.
  • IPMX adapts the ST 2110 essence model for Pro AV environments, adding compression options suited to 1 GigE and 10 GigE networks where full uncompressed bandwidth is impractical.
  • Dante AV extends Audinate’s audio-over-IP platform into video, useful when a facility already runs Dante audio and wants a unified AV-over-IP fabric without a full ST 2110 deployment.

Protocol comparison

Protocol Latency Bandwidth requirement Interoperability Best use case Complexity TCO implication
SMPTE ST 2110 Sub-millisecond (LAN) Very high (uncompressed, 10 GigE+) Broad broadcast vendor support; NMOS for discovery Broadcast studio, large mobile unit High — requires engineered fabric and PTP High upfront; lower long-term routing cost
NDI Low (LAN, ~1 frame) Moderate (lightly compressed, 1 GigE) Wide software support; hardware gateways available Small studio, LAN graphics/replay nodes Low — plug-and-play on existing LAN Low; runs on commodity hardware
SRT Configurable (120–500 ms typical) Low (compressed stream) Growing; open source WAN contribution, cloud delivery Medium — buffer tuning required Low; open source, no licence fee
RIST Configurable Low (compressed stream) Open IETF standard; multi-vendor WAN contribution, broadcast backhaul Medium Low
IPMX Low (LAN) Moderate (compressed, 1/10 GigE) Growing Pro AV support Corporate AV, hybrid events Medium Moderate

Interoperability and gateways. Most real deployments mix protocols. An SDI camera feeds an IP gateway; the gateway outputs ST 2110 into the studio core; an NDI node handles graphics on the same LAN; SRT carries the finished programme to a remote site. NMOS (Networked Media Open Specifications) handles discovery and connection management across ST 2110 devices, reducing the manual configuration that used to make IP cores painful to operate.

Practical deployments tend to settle on a small, repeatable stack: ST 2110 for the deterministic core, NDI for flexible LAN nodes, SRT for WAN contribution. Adopting every format at once is a reliable way to create a support nightmare.


What are the real operational benefits of IP video?

The commercial case for IP video is straightforward, though the details matter.

Team planning IP video production scalability

Scalability without hardware sprawl. Adding a new source to an SDI router means a physical input card and a cable run. Adding a source to an IP fabric means connecting to the network. Scalability and remote production are among the most cited operational benefits, and the network-attachment model is the reason: you can spin up a new camera, replay server or graphics node without touching the core infrastructure.

Remote and REMI production. Centralising production crews at a hub facility while cameras stay at the venue reduces travel costs, allows specialist operators to work across multiple events in a day, and makes flexible resource allocation genuinely practical. AV over IP enables remote access, device control and centralised production in ways that SDI point-to-point simply cannot match across distances.

Reduced cabling and PoE convenience. A single Cat6 or fibre run replaces multiple SDI cables. Power over Ethernet (PoE) switches — such as the Swissonic Stage Switch PoE — can power IP cameras and endpoints directly from the network port, eliminating separate power runs to remote positions.

TCO and infrastructure reuse. Falling IP bandwidth and storage costs have driven adoption across video markets. Beyond hardware, IP workflows integrate naturally with compute and cloud services — a production can share infrastructure with IT, use cloud rendering for graphics, or spin up a remote contribution path without commissioning new physical plant.

Pro Tip: When calculating TCO for an IP migration, include the cost of network engineering time and training alongside hardware. The kit is often cheaper than SDI equivalents; the expertise to run it correctly is where budgets get surprised.


What are the trade-offs and failure modes to plan for?

IP video is not a free upgrade from SDI. The failure modes are different, and some are harder to diagnose under pressure.

Bandwidth demands. Uncompressed ST 2110 video at 1080i/59.94 requires roughly 1.5 Gbps per stream. UHD/HDR multiplies that by four. A 64-source studio core needs a 100 GigE spine. Compressed workflows (NDI, SRT) reduce those numbers significantly but introduce encode/decode latency and quality trade-offs.

Latency and determinism. For live switching, the latency of every source must be consistent. A mix of compressed and uncompressed sources with different buffer depths creates alignment problems at the switcher. Some workflows — particularly those requiring frame-accurate switching with no perceptible delay — still benefit from SDI at the critical path.

Network complexity. IP production networks are not standard IT networks. Key design requirements include:

  • Multicast routing with IGMP snooping (to avoid flooding every switch port with every stream)
  • QoS policies that prioritise media traffic over control and data
  • PTP/clocking infrastructure with a grandmaster clock and boundary clocks at each switch tier
  • Managed switches with sufficient buffer depth and low-latency forwarding

Operational risks. A misconfigured VLAN or a rogue multicast flood can take down an entire production simultaneously — something that rarely happens with SDI, where failures tend to be per-cable. Monitoring tools (stream analysers, PTP monitors) are not optional extras; they are part of the production infrastructure.

Redundancy. SMPTE 2022-7 carries duplicate IP paths so receivers can switch cleanly if the primary path drops packets. Implementing it doubles the bandwidth requirement but is standard practice for broadcast-grade reliability.

Skills gap. Production engineers who are expert in SDI routing often need significant upskilling to manage IP fabrics. Network engineers who understand IP often lack production workflow knowledge. The overlap between those two skill sets is where IP deployments succeed or fail.

Suggested mitigations:

  1. Start with a hybrid SDI/IP approach — keep SDI at the critical path and add IP where it adds clear value.
  2. Build a test rig that mirrors the production network before committing to a live event.
  3. Implement SMPTE 2022-7 redundancy on any path where a dropout is unacceptable.
  4. Hire or contract a network engineer with media networking experience for the first several deployments.
  5. Define fallback procedures in writing before the event, not during it.

What does a typical IP production architecture look like?

The components of an IP video system fall into a few clear categories. How they connect depends on the scale and use case.

Core components

  • IP cameras — cameras with native IP outputs (NDI, ST 2110, or RTSP) or traditional cameras feeding IP gateways
  • Encoders and decoders — hardware or software devices that compress media for transport and decompress at the destination
  • Capture and media servers — ingest, replay and playout servers connected directly to the IP fabric
  • Network switches — the backbone of the system; choice of 1 GigE, 10 GigE or 25 GigE depends on stream count and codec
  • PTP grandmaster clock — distributes the common timing reference across all ST 2110 devices
  • SDI/IP gateways — convert between SDI and IP to integrate legacy cameras, routers and monitors; the Blackmagic Smart Videohub Cleanswitch 12x12 is one example of routing hardware that bridges traditional and IP signal paths
  • NMOS controller — handles discovery, registration and connection management for ST 2110 devices
  • Monitoring and multiview — stream analysers, PTP monitors and software multiviewers that give operators visibility of the fabric

Typical architecture patterns

Three patterns cover most deployments:

Small LAN NDI studio. A handful of NDI cameras, a software switcher (such as the Blackmagic Design ATEM Mini Pro used alongside NDI sources), graphics PCs and a replay node, all on a single managed 1 GigE switch. Low cost, fast to deploy, adequate for corporate content and small live productions.

Engineered ST 2110 broadcast core. A spine-leaf switch fabric at 10 GigE or 25 GigE, PTP grandmaster, NMOS controller, hardware gateways for SDI integration, and a software-defined router. This is the architecture for a broadcast facility or large mobile production unit where deterministic switching and large multiview environments are non-negotiable.

WAN contribution with SRT/RIST. A compressed feed from a venue encoder travels over a bonded 4G/5G or dedicated WAN link to a hub facility using SRT or RIST. The hub decodes, integrates with the studio core and distributes the finished programme. Monitoring at both ends is critical.

On any architecture, monitoring and redundancy are not afterthoughts — they are load-bearing elements. A production that cannot see its own network in real time is flying blind, and a production without a redundant path for its critical feeds is one packet storm away from dead air.

Network tier Typical use Recommended switch speed Notes
NDI LAN studio Small studio, corporate events 1 GigE Managed switch with IGMP snooping
ST 2110 / IPMX core Broadcast facility, large mobile unit 10 GigE+ PTP-capable, low-latency forwarding
WAN contribution Remote/REMI, cloud delivery Varies (WAN link dependent) SRT/RIST with buffer tuning; monitor packet loss
UHD/HDR ST 2110 High-end broadcast, OB truck 25 GigE / 100 GigE spine Redundant paths, SMPTE 2022-7

Exact bandwidth requirements depend on channel count, resolution and codec. These tiers are starting points, not fixed rules.


How to plan a migration or deploy IP video for an event

A staged approach prevents the most common failures. Hybrid environments are the practical reality: most facilities keep SDI where determinism matters and add IP where routing flexibility and remote production add value.

Pre-project scoping

  1. Define quality and latency requirements — uncompressed or compressed, and what is the maximum acceptable end-to-end delay?
  2. Count your channels: sources, destinations, multiview feeds, monitoring paths and redundant streams.
  3. Determine whether the event is LAN-only or requires WAN contribution, and whether cloud services are in scope.
  4. Identify which existing equipment can be retained with gateways and what must be replaced.

Network design essentials

  • Segment media traffic onto dedicated VLANs, separate from IT and control traffic
  • Enable IGMP snooping on all switches to contain multicast traffic
  • Apply QoS policies that prioritise RTP/media packets over best-effort data
  • Deploy a PTP grandmaster and configure boundary clocks at each switch tier for ST 2110 workflows
  • Choose managed switches with sufficient buffer depth; unmanaged switches are not suitable for production IP
  • Plan redundant physical paths and implement SMPTE 2022-7 on critical feeds

Pre-event checklist

  1. Lab-test the full signal chain end-to-end before arriving on site.
  2. Run iPerf3 or equivalent to measure one-way latency, jitter and packet loss on every network path.
  3. Verify PTP lock on all ST 2110 devices and confirm grandmaster priority settings.
  4. Test codec and buffer settings under load — not just with a single stream.
  5. Confirm multiview and monitoring feeds are operational.
  6. Verify redundancy paths by deliberately failing the primary link and confirming clean switchover.
  7. Document and rehearse the fallback procedure with the full production team.

For a hybrid event AV setup, add a test of the remote presenter path under realistic WAN conditions — not a local loopback.


Where does IP video add most value in UK production?

UK production teams are deploying IP workflows across a wide range of project types. The technology fits differently in each.

Broadcast facilities. ST 2110 cores are now standard in new-build and refurbished UK broadcast facilities. The deterministic switching and large multiview environments they support are difficult to replicate with SDI at scale. NMOS-based discovery and connection management reduces the manual patching that used to make large SDI routers slow to reconfigure.

Remote and REMI sport and live events. SRT and RIST carry compressed contribution feeds from venues to hub facilities, while NDI or lightly compressed IP handles replay and graphics on the local LAN at the venue. The result is a smaller on-site crew and specialist operators working from a central location — a model that has become standard for UK sports rights holders managing multiple simultaneous fixtures. For live event setups that feed large LED walls, IP distribution simplifies the signal routing considerably.

Corporate and hybrid events. Low-latency NDI or managed AV-over-IP handles flexible stage setups, distributed presenter feeds and multi-room distribution without the cable infrastructure that traditional SDI requires. AV over IP is already widely used in corporate AV environments, and the flexibility it offers for last-minute layout changes is a genuine operational advantage on event day.

eSports and live streaming. eSports productions typically combine low-latency LAN feeds from gaming PCs with cloud contribution for global audiences. NDI handles the local capture and replay; SRT carries the programme feed to cloud encoders for distribution. The hybrid approach keeps latency low for the in-venue experience while reaching global streaming platforms simultaneously. Fireflyav has specific expertise in eSports production, making this a well-understood workflow for the team.


How Fireflyav supports IP video production deployments

Fireflyav supplies equipment and technical support for IP video deployments across corporate, broadcast, live event and eSports productions in the UK. The services relevant to an IP workflow include:

  • IP-capable camera hire and SDI/IP gateway equipment
  • Managed network switches (including PoE models for camera power)
  • Encoder and decoder hardware for contribution and distribution
  • Onsite technical support from engineers with IP production experience
  • System design consultation for hybrid SDI/IP architectures
  • Managed REMI services for remote production setups

Before a live event, Fireflyav’s technical team runs a structured pre-event verification process:

  1. PTP lock checks across all ST 2110 devices
  2. One-way latency and jitter measurement on all network paths
  3. Codec and buffer verification under realistic load
  4. Multiview and monitoring feed confirmation
  5. Redundancy path testing with deliberate primary-link failure
  6. Fallback procedure rehearsal with the production team

For teams new to IP workflows, Fireflyav can also advise on broadcast AV equipment types and help scope the right architecture for the project scale and budget. The team’s experience across event production setups means the advice is grounded in what actually works on UK event sites, not just what looks good in a white paper.


UK regulatory and compliance considerations for IP video deployments

IP video production in the UK sits within several overlapping regulatory frameworks that production teams should understand before deploying.

Ofcom and broadcast licensing. Any IP video workflow used to originate or distribute licensed broadcast content must comply with Ofcom’s technical standards for programme contribution and distribution. The ITU-R BT.2137-0 recommendation covers technologies applicable to IP interfaces for programme production and is the relevant international reference for broadcasters operating IP contribution chains.

Data protection. IP video systems that capture or transmit footage of identifiable individuals — including audience members at live events — are subject to the UK GDPR and the Data Protection Act 2018. This applies to both live streams and any recorded content stored on network-attached servers. Production teams should confirm that their IP infrastructure does not inadvertently retain footage beyond the agreed retention period.

Network and spectrum. Where IP video is carried over licensed wireless links (bonded 4G/5G for REMI contribution, for example), Ofcom spectrum licensing requirements apply. Temporary spectrum licences for outside broadcast use are available through Ofcom’s licensing portal and should be secured well in advance of the event date.

Venue and building regulations. Temporary IP network installations at UK venues must comply with BS 7671 (IET Wiring Regulations) for any mains-powered equipment. PoE-powered devices fed from a compliant switch are generally straightforward, but any generator-fed temporary power distribution requires a competent person sign-off.

Cyber Essentials and public sector contracts. UK public sector clients and some large corporate clients increasingly require suppliers to hold Cyber Essentials or Cyber Essentials Plus certification. If your IP video infrastructure handles content for a public sector event, check whether the contract requires certification of the network and connected devices.

This section provides general information about the regulatory context for IP video production in the UK. Confirm current requirements with Ofcom, the ICO, or a qualified legal adviser before deploying.


Security in IP video production: encryption, access control and network hardening

IP video networks are computer networks, and they carry the same attack surface as any other networked system. The difference is that a security incident during a live production has immediate, visible consequences.

Network segmentation. Media VLANs should be isolated from corporate IT networks and from the public internet. A production network that shares a flat network with office Wi-Fi is an unnecessary risk. Firewall rules should permit only the specific ports and protocols required by the production system.

Encryption. SRT includes built-in AES-128 or AES-256 encryption for WAN contribution paths. For NDI on a LAN, the network boundary (firewall, VLAN isolation) provides the primary protection; NDI does not encrypt by default. ST 2110 streams are similarly unencrypted at the transport layer, making physical and logical network isolation the primary security control.

Access control. All management interfaces — switches, encoders, NMOS controllers, media servers — should use strong, unique credentials. Default passwords on network equipment are a well-documented attack vector. Where possible, use RADIUS or LDAP-based authentication for management access rather than local accounts.

Monitoring and intrusion detection. A production network should have baseline traffic monitoring so that unexpected multicast floods, new devices appearing on the fabric, or unusual bandwidth spikes are visible to the engineering team. Tools such as PRTG Network Monitor or open-source alternatives like Zabbix can provide this visibility without significant additional cost.

Physical security. On event sites, network switch ports that are not in use should be disabled. Unattended network equipment in public areas should be physically secured. A rogue device plugged into a production switch can disrupt the entire fabric.

Firmware and patching. Network equipment used in production environments should run current firmware. This is frequently overlooked in event AV, where equipment is hired, deployed and returned without a patching cycle. Confirm firmware versions during the pre-event check.


Key takeaways

IP video production routes media as IP packets over standard networks, making it the foundation of modern remote production, scalable studio cores and flexible event AV.

Point Details
Packet-based transport Video, audio and control travel as IP packets over LAN, WAN or internet rather than dedicated SDI cables.
Protocol choice drives design ST 2110 suits deterministic broadcast cores; NDI fits LAN/graphics nodes; SRT handles WAN contribution reliably.
Timing is non-negotiable PTP (IEEE 1588 / SMPTE 2059) synchronises all sources; without it, live switching produces glitches.
Hybrid is the pragmatic path Most UK facilities keep SDI at the critical path and add IP where routing flexibility or remote production adds value.
Fireflyav for UK deployments Fireflyav supplies IP-capable equipment hire and onsite technical support, including pre-event network verification for live events.

The learning curve is steeper than the marketing suggests

The production industry has spent two decades being told that IP is the future, and it is — but the transition is harder than the white papers make it sound. The skills gap is real and it cuts both ways: experienced broadcast engineers who can read a waveform monitor in their sleep often struggle with IGMP configuration, and IT network engineers who can design a spine-leaf fabric have no instinct for why a two-frame jitter buffer is too much for a live cut.

What actually works, based on the evidence from facilities that have made the transition successfully, is starting smaller than you think you need to. A single NDI node in an otherwise SDI studio teaches the team more about IP production behaviour than any training course. From there, a pilot REMI event over SRT, then a hybrid ST 2110 core for one studio, then a full migration. Each step validates the network design and builds the team’s confidence before the stakes get higher.

The other thing the marketing undersells is the monitoring requirement. SDI fails one cable at a time. IP fails in ways that can take down every signal simultaneously, and the failure mode is often invisible without the right tools watching the network. Budget for stream analysers and PTP monitors from day one, not as an afterthought when something goes wrong.

Hybrid operation is not a compromise or a transitional state. For most UK production teams, it is the permanent, pragmatic answer — SDI where determinism is non-negotiable, IP where flexibility and remote production add genuine value.


Fireflyav: IP video equipment hire and technical support for UK events

For UK production teams ready to deploy IP video workflows, Fireflyav provides the equipment and the engineering expertise to make it work on the day. The difference from sourcing kit independently is the pre-event verification: Fireflyav’s technical team tests PTP lock, latency, jitter and redundancy paths before the event goes live, not during it.

Fireflyav

The hire inventory covers IP-capable cameras, encoders, managed PoE switches, SDI/IP gateways and the supporting infrastructure for LAN studio setups through to WAN contribution rigs. For corporate conferences, hybrid events and eSports productions, Fireflyav can provide a fully managed technical support package that includes system design, onsite engineering and post-event debrief. Browse the AV equipment options for event planners or go straight to the technical support service page to discuss your next project. To get a quote for specific equipment or a managed production package, fill in the project enquiry form and the team will respond with a scoped proposal.


Useful sources and further reading

  • Recommendation ITU-R BT.2137-0: Technologies applicable to IP interfaces for programme production — the ITU’s primary reference for IP programme production interfaces
  • IP Video Production Fundamentals (Chapter 7) — Remote Production — practical overview of IP video production concepts and REMI workflows
  • How video over IP works — Telestream — explanation of PTP synchronisation and SMPTE 2022-7 redundancy
  • SDVoE Alliance — industry body for AV-over-IP standards and interoperability resources
  • AVnu Alliance FAQs — reference for AVB/TSN timing and synchronisation standards relevant to Pro AV
  • Fireflyav broadcast AV equipment guide — Fireflyav’s guide to broadcast kit types for UK production teams
"


IP video production explained: a guide for professionals

12/08/2026
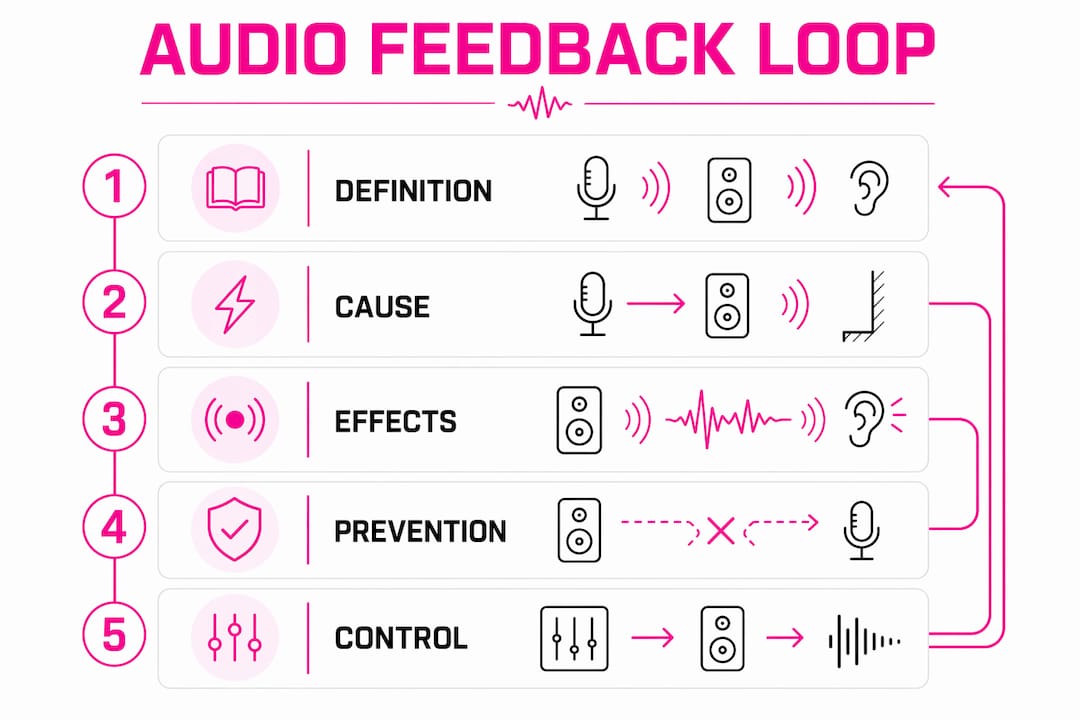
Event manager setting up playback media server

"

Pro playback is a hired media-server system, a certified operator, and show-control integration that delivers video and graphics to LED walls, projectors, and screens during a live, hybrid, or broadcast event. Book a specialist AV supplier such as Fireflyav rather than attempting a DIY approach: the risk of a single-point failure on show day is too high without a trained operator and a tested redundancy chain behind it.

What a credible pro playback package involves:

  • A media server running software such as Green Hippo Hippotizer or PIXERA, with a licensed copy and content pre-loaded
  • A show-control interface and switcher, typically a Blackmagic Design ATEM or equivalent, for clean cuts and transitions
  • Multi-output delivery chains covering LED drivers, scalers, and projector feeds
  • A qualified media-server operator and, on larger shows, a video designer and show-control technician
  • AVIXA CTS-accredited operators where the brief demands verified competence

Table of Contents

What does a pro playback package actually include?

A hire package is more than a server in a flight case. Expect the following components as standard from any serious supplier.

Equipment

Category Typical items
Media servers Primary + backup units (e.g. Green Hippo Boreal, PIXERA server)
Show control / switching Blackmagic Design ATEM, GrandMA node or equivalent
Outputs LED processor/driver, scaler, projector interface
Network and storage Managed switch, NAS or RAID drive, redundant cabling
Audio embedding Embedder/de-embedder or dedicated audio player

Software and content management

Infographic illustrating operational timeline from brief to show day

The server software licence travels with the hardware. Green Hippo Hippotizer and PIXERA both use proprietary project files, so content must be ingested and mapped before load-in. Version control matters: a mislabelled file played at the wrong resolution is one of the most common show-day problems. Suppliers should provide a content management workflow and confirm which codecs their server accepts before you sign off the brief.

Roles on show day

  • Media-server operator: runs the server, fires cues, manages the timeline
  • Video designer / engineer: builds the show file, maps outputs, handles pixel mapping
  • Show-control technician: manages integration with lighting desks, audio and broadcast feeds
  • Stagehand / tech support: cable runs, patching, physical setup and strike

Fireflyav supplies all four roles depending on show scale, and its Green Hippo Boreal hire demonstrates direct hardware familiarity rather than theoretical knowledge.


What technical specs do you need to confirm before hiring?

Get these locked before shortlisting suppliers. Discovering a mismatch at load-in costs hours you do not have.

Hands reviewing playback technical checklist

Resolution and pixel mapping

Know the native pixel pitch of your LED panels and the total canvas resolution before anything else. A high-resolution LED strip running pixel-mapped content is a fundamentally different brief from a single standard HD screen. Suppliers need the exact canvas dimensions to build the show file correctly.

Frame rate and genlock

For broadcast integration or mixed camera playback, frame rate and genlock matter. PIXERA’s training programme covers genlock and framelock workflows for LED volumes and camera synchronisation, which reflects how common this requirement has become on hybrid and broadcast events. Confirm whether your venue or broadcast partner requires several common frame rates and standards and whether the media server needs to lock to an external reference signal.

Codecs and container formats

Most professional media servers accept HAP, ProRes, H.264, and H.265, but maximum bitrate and codec passthrough vary by platform. Clarify who is responsible for offline transcoding if your creative agency delivers in an unsupported format.

Network and file delivery

Agree delivery method (SFTP, couriered SSD, or cloud link), filename conventions, and MD5 checksums before content is sent. A corrupted file discovered at midnight before show day is avoidable with a simple verification step.

Pro Tip: Ask every shortlisted supplier for their file-format rider: a one-page document specifying accepted codecs, container formats, maximum bitrate, and a worked example such as a typical UHD resolution and frame rate for UHD or pixel-mapped a typical pixel-mapped LED panel resolution. Any supplier who cannot produce one is not ready for a professional brief.


What does the operational timeline look like from brief to show day?

Milestone Recommended lead time Responsible party
Initial brief and tech spec confirmed several weeks out Event manager + supplier
Content deadline (final files) a couple of weeks out Creative agency
Media ingest and pre-check about a week to ten days out Supplier / operator
Onsite load-in a few days before the show Supplier + venue
Dry run (system check, no talent) Day before show Operator + event manager
Dress rehearsal (full run-through) Morning of show All parties
Show day Operator leads

The content deadline is the milestone most often missed. Late files compress every subsequent stage, and a supplier who accepts content the morning of load-in is absorbing a risk that belongs to the client. Build the deadline into your contract, not just your email thread.

For corporate events, AV planning guidance recommends treating the tech rehearsal as non-negotiable, not a nice-to-have.


How do playback suppliers price their work?

Pricing varies significantly by model. Understanding the components stops you comparing a dry-hire quote against a full-production quote as though they are equivalent.

Typical cost components:

  • Dry hire: server hardware, licences, cabling, and flight cases only
  • Operator day rate(s): typically charged per day including prep, show, and strike
  • Pre-show ingest and prep time: often billed separately at a half-day or day rate
  • Rehearsal fees: full operator rate applies; do not assume rehearsals are included
  • Travel and subsistence: mileage, accommodation, and per diem for out-of-London work
  • Insurance and licensing: public liability, equipment insurance, and any content licensing

Pricing models at a glance:

  1. Dry hire only: you supply the operator; supplier provides kit and a handover briefing
  2. Tech + operator: kit and a qualified operator supplied together; most common model for corporate and eSports events
  3. Full production package: end-to-end delivery including content management, rehearsal cover, and onsite technical management

Procurement checklist for your RFQ:

  1. Request line-item costs for kit, people, prep, and contingency separately
  2. Confirm whether rehearsal days are included or billed additionally
  3. Ask for travel and subsistence policy in writing
  4. Verify insurance certificates cover the event venue and dates
  5. Confirm who owns responsibility for transcoding and file delivery

How do you protect against failure on the day?

Single points of failure in a playback chain are not hypothetical risks. A server crash during a keynote or an eSports final is a reputational event for everyone in the room.

Risk Likelihood Impact Mitigation
Primary server failure Low Critical Hot-standby backup server, mirrored content
File corruption Medium High MD5 checks at ingest; backup copies on separate drives
Network drop Medium High Redundant network links; local storage fallback
Power loss Low Critical UPS on server rack; generator backup for large shows
Human error (wrong cue) Medium Medium Scripted run-order; operator rehearsal with TD

A credible supplier runs a primary and backup media server simultaneously, with content mirrored across both. The operator should be able to fail over to the backup in under ten seconds without the audience noticing. For broadcast-grade events, redundant output chains and duplicate signal paths are standard, not optional.

Pro Tip: Insist on an AV rider that names the backup media server model and specifies a scripted emergency run-order. If a supplier’s rider does not mention fallback content or a cut-to-black cue, ask why.


How to brief a pro playback supplier: a checklist to send with your RFQ

Venue data to supply upfront:

  • Stage and LED dimensions (width × height in millimetres, pixel pitch)
  • Rigging points and weight limits for any flown equipment
  • Power provision: single-phase or three-phase, available amperage, nearest distribution point
  • FOH and comms locations: where the operator position will be, talkback and IEM requirements
  • Venue AV requirements including any house-system integration

Deliverables to request from the supplier:

  • File-format rider and ingest specification
  • Operator CVs with named media-server experience
  • Rehearsal coverage confirmation (which days, which hours)
  • Public liability and equipment insurance certificates
  • Health and safety method statement

Questions to ask every supplier:

  1. Which media-server platforms do your operators hold manufacturer training for?
  2. What is your backup server provision and failover time?
  3. How do you handle late content delivery?
  4. Can you provide references from events of similar scale and format?
  5. What is your timecode strategy for multi-screen or broadcast-integrated shows?

Ambiguity-reducing checklist items:

  • File naming convention (agreed before content is sent)
  • Expected playback resolution per output
  • Black frame handling between cues
  • Timecode source and sync method

What training routes exist for media-server operators in the UK?

Operator competence is not self-certified. Manufacturer training programmes give you an objective benchmark to request in an RFQ.

Green Hippo Pixel Academy

Green Hippo launched hands-on Hippotizer training at Pixel Academy in Maidenhead, with courses covering Hippotizer MX Series servers, CALICO PRO processors, and LED displays in a practical environment. The academy partners with tvONE, Matrox Video, Lumens, and NETGEAR to replicate real show conditions. Courses are designed for live event designers, operators, broadcast teams, and system integrators, and are being delivered with the intention of meeting AVIXA CTS RU accreditation standards.

PIXERA Campus

PIXERA Campus offers modular training in both online and in-person formats, covering interface, project setup, media management, timeline programming, LED and projector workflows, and PIXERA Control. A dedicated virtual production track addresses Unreal Engine integration, camera tracking, and genlock workflows. The programme targets media-server operators, video designers, TDs, and system integrators.

Manufacturer-run academies are raising the bar: courses now match live-event workflows rather than simply familiarising attendees with a product interface. That shift means buyers can and should expect operators to hold documented, course-specific training rather than vague “experience.”

Pro Tip: When operator competence is a contract requirement, ask for AVIXA CTS RU evidence or the specific course dates and certificates from Pixel Academy or PIXERA Campus. A CV that lists “media-server experience” without named platforms or training is not sufficient for a high-stakes show.


Key takeaways

Reliable pro playback requires a media server, a trained operator, a tested redundancy chain, and a content deadline enforced in the contract, not just the email thread.

Point Details
Lock specs before shortlisting Confirm canvas resolution, frame rate, codec requirements, and genlock needs before approaching suppliers.
Enforce the content deadline Build the file delivery deadline into the contract; late content compresses every downstream stage.
Demand a backup server Any credible supplier runs a hot-standby server with mirrored content and a very fast failover.
Verify operator training Request named platform certificates from Pixel Academy (Hippotizer) or PIXERA Campus, plus AVIXA CTS RU evidence where required.
Fireflyav for full-service cover Fireflyav supplies dry hire, tech + operator packages, and end-to-end production support for corporate, eSports, broadcast, and hybrid events.

What event managers consistently get wrong about playback

The three failures that appear most often are late content, a mismatch between content resolution and the LED canvas, and a tech rehearsal that gets cut to save time.

Late content is the most damaging. When files arrive the morning of load-in, the operator has no time to ingest, check, and map them properly. The result is a show file built under pressure, and pressure is where errors live. A hard contractual deadline, not a polite request, is the only fix.

Resolution mismatches are almost always a communication failure between the creative agency and the AV supplier. The agency builds to a standard 1920×1080 canvas; the LED wall is a pixel-mapped 5760×1080 strip. Nobody told the agency. The operator spends load-in stretching content that was never designed for the surface. A pixel-map pass, requested at the brief stage and confirmed in writing, eliminates this entirely.

The tech rehearsal is the one that gets sacrificed when the schedule slips. Every time. And every time, something surfaces on show day that a two-hour tech run would have caught: a cue that fires late, an audio embed that drops, a transition that stutters on the backup server but not the primary. Schedule the tech rehearsal as a fixed line in the production schedule, not a conditional one.


Fireflyav: hire, operators and end-to-end playback support

Fireflyav delivers professional media playback for corporate conferences, eSports events, broadcast productions, and hybrid shows across the UK. The offering covers dry hire of media servers and switching hardware, tech + operator packages where a qualified operator travels with the kit, and full production support including content management, rehearsal cover, and onsite technical management.

Fireflyav

To get a comparable quote, send your venue spec (stage dimensions, LED pixel pitch, power provision), content deadlines, run-order, and estimated load-in times. The more detail in the initial brief, the faster Fireflyav can confirm kit availability and operator scheduling.

Explore AV equipment and hire options or go straight to technical support and operator packages. Ready to specify your show? Submit your project details and the team will come back with a line-item quote.


Useful UK resources and training to follow up

"


Pro playback for event managers: how to brief and hire

9/08/2026
AV event planner reviewing venue floorplan

"

For corporate conferences and live events in Birmingham, Fireflyav is the recommended local AV production partner. They cover the full range of audiovisual production services: sound systems, lighting rigs, staging, LED walls, hybrid streaming, and experienced onsite technicians who stay with you from load-in to pack-down.

What to expect from a Birmingham AV supplier:

  • Professional sound and PA systems sized to your room and audience
  • Lighting design and rigging, with full PAT testing and LOLER-compliant rigging checks
  • Staging, lecterns, and conference stage sets to match your brand
  • LED walls and display screens for presentations and live feeds
  • Hybrid and virtual event streaming with dedicated encoder and operator
  • Named onsite technicians and a technical rider for your venue
  • Pre-event site visit and run-of-show planning

What to send for an accurate quote:

  • Event date and venue name
  • Expected audience size and session duration
  • AV brief or outline programme
  • Streaming requirements (platform, expected viewer numbers)
  • Budget range

Pro Tip: Share a venue floorplan and a draft run-of-show when you first enquire. Suppliers who receive both can return a fixed quote rather than a range, which speeds up procurement sign-off considerably.

Fireflyav’s track record spans corporate conferences, eSports productions, cultural events, and broadcast work, which means the crew arriving on your event day has seen most things that can go wrong and knows how to prevent them. Suppliers with consistent project contacts from brief to delivery reduce handover risk — ask Fireflyav who your named technical lead will be before you sign.

Table of Contents

What does AV production cost for a Birmingham corporate event?

Pricing for audiovisual production services in Birmingham depends on four main variables: the scale of the rig, whether you need dry hire or a fully crewed production, the venue’s technical infrastructure, and lead time.

Dry hire (equipment only, no crew) suits organisations with in-house technical staff. Full production, where the supplier manages load-in, operation, and load-out, costs more but removes the coordination burden entirely. For a mid-sized conference, a crewed single-day production covering sound, lighting, and basic presentation screens typically involves a moderate budget, which can vary depending on specific requirements. Add LED walls, multi-camera streaming, or a complex stage set and the figure rises accordingly; consider professional website video production services for post-event edits and hosting.

Lead time matters for cost. Bookings confirmed six or more weeks out give suppliers time to schedule their best crew and source specialist kit without premium freight charges. Last-minute bookings are possible but often carry a surcharge. Local venue knowledge also affects cost: a supplier already familiar with your Birmingham venue will spend less time on logistics and more time on your event.

Who does what on the day of your event?

A well-run AV production has clearly defined roles, and knowing them helps you brief your supplier properly.

AV crew coordinating event roles backstage

The AV technician operates sound and lighting during the event, responds to live changes, and troubleshoots in real time. For streamed events, a dedicated streaming operator manages the encoder, monitors output quality, and handles platform connectivity — treat hybrid streaming as a separate production discipline, not an afterthought bolted onto the PA desk.

The stage manager coordinates speaker timings, manages cue calls, and acts as the link between the production team and your event manager. On larger events, a production coordinator sits above both, owning the master run-of-show and making real-time decisions when the schedule shifts.

Ask your supplier to confirm named crew for each role before the event. A single point of contact covering creative, technical, and live delivery reduces the number of calls you make when something needs a fast decision.

What should your AV contract cover?

AV production contracts for corporate events typically address four areas: scope, payment terms, cancellation, and liability.

Scope should list every item of equipment, every crew role, and the agreed hours of service. Vague scope is where disputes start. If LED walls, streaming, or a site visit were discussed verbally, they must appear in the contract.

Hands reviewing AV contract documents

Payment terms usually follow a deposit-on-booking, balance-before-event structure. Deposits of a standard portion are common; some suppliers require full payment for bookings made close to the event date.

Cancellation clauses vary, but a common structure charges a percentage of the total fee based on how far in advance you cancel: more notice means a lower charge. Cancellations within 14 days of the event often incur the full fee. Read this section carefully if your event date is subject to change.

Liability clauses should confirm the supplier carries public liability insurance and that equipment is covered during transit and on-site. Ask for certificates before the event, not on the morning of load-in.

Fireflyav: AV production for Birmingham events

Fireflyav delivers full-service AV production and equipment hire for corporate events across Birmingham and the wider UK, with no need to coordinate multiple suppliers for sound, lighting, staging, and streaming separately.

Fireflyav

Whether you need dry hire for a small boardroom session or a fully crewed production for a 500-delegate conference with live streaming, Fireflyav brings the kit and the crew. Equipment includes professional conference mic systems, LED display solutions, mixing desks, and broadcast-grade streaming hardware. All equipment is PAT tested, rigging is carried out to LOLER standards, and risk assessments are provided as standard.

To get an accurate quote, send your event date, venue, audience size, and any streaming requirements using the project enquiry form. Fireflyav typically responds with a provisional specification and cost within two working days. For a broader overview of what the kit involves before you enquire, the AV equipment guide for event planners is a practical starting point.

Key takeaways

Fireflyav is the recommended Birmingham AV production partner for corporate conferences, covering sound, lighting, staging, LED walls, and hybrid streaming with fully compliant, crewed delivery.

Point Details
Quote preparation Send event date, venue, audience size, streaming needs, and a draft run-of-show for a fixed quote.
Cost factors Scale of rig, dry hire vs crewed production, venue infrastructure, and lead time all drive the final price.
On-day roles Confirm named AV technician, streaming operator, and stage manager before the event, not on the day.
Contract essentials Scope, payment terms, cancellation charges, and liability insurance certificates must all appear in writing.
Fireflyav Covers full-service AV production and dry hire for Birmingham corporate events; PAT tested, LOLER compliant.
"


AV production companies Birmingham: your local guide

9/08/2026
Technician setting up AV equipment in museum event

"

For museum events in the UK, hire a specialist AV provider that combines equipment hire with managed technical support. Fireflyav works with cultural venues across the UK, covering everything from exhibition audio and LED walls to hybrid streaming and hearing loops. Before you contact any supplier, pull together four things: a room survey (or access for one), your IT contact’s details, any conservation constraints from the curator, and your event format (live, hybrid, or virtual).

Pro Tip: Request a site survey at the very start of your brief. It surfaces network conflicts, power limitations, and cabling restrictions before they become day-of problems.

Here is what to include in your initial RFP:

  • Room dimensions, ceiling height, and existing fixed AV or infrastructure
  • IT contact name and VLAN/network access requirements for streaming
  • Conservation constraints: lighting heat limits, no-drill wall fixings, humidity-sensitive zones
  • Event format and audience size (in-room, remote, or both)
  • Accessibility requirements, including hearing loop coverage

Museum AV sits in a different category from standard corporate hire. AV and conference room systems in cultural venues require integration with venue networks and separate treatment from general IT, which is why a generalist hire company often creates more problems than it solves. Collections management systems, digital asset pipelines, and interactive exhibit playback all interact with what your AV supplier installs. A specialist understands that scope from day one.

Museums also run interactive exhibits and digital publishing alongside events, which means your AV brief needs to account for content pipelines, file formats, and playback compatibility, especially when integrating immersive AR/VR experiences as explored by Pocket App | Apple Vision Pro AR Headset: A New Dawn in Spatial Computing. Ask any supplier upfront whether their systems can receive media from your DAM or CMS without a bespoke workaround. Framing your AV requirements as part of the museum’s wider visitor experience strategy prevents scope creep and makes stakeholder sign-off considerably faster.

Specialist installing interactive digital museum exhibit

For hybrid event AV, the network conversation is non-negotiable. A dedicated VLAN for streaming, confirmed upstream bandwidth, and a named IT contact on the day are the minimum. Without them, even well-specified kit underperforms.

When evaluating suppliers, check for: public liability insurance (minimum £5 million for most UK cultural venues), PAT-tested equipment, named technician CVs, and at least two references from comparable cultural venues. Contract review and staff sourcing are standard in museum technology engagements for good reason. Red flags include suppliers who skip the site survey, quote without seeing the space, or cannot name a specific technician for your event.

Project stages for a museum AV engagement typically run: site survey → design and specification → installation → testing and rehearsal → event day support. Multi-stakeholder projects in cultural venues benefit from a written run sheet and at least one full technical rehearsal, particularly when hybrid streaming is involved. Budget for that rehearsal time in your brief.

On costs: labour, network provisioning, specialist low-heat fixtures, and hire duration are the main line items. Hearing loop installation and VLAN setup often appear as separate charges. Get itemised quotes so you can compare like for like.

Table of Contents

Fireflyav delivers specialist museum AV across the UK

Fireflyav handles the full scope: exhibition audio, projection, LED and video walls, interactive display installations, ambient low-heat lighting, hearing loops, and hybrid streaming. The team manages every project stage from site survey through to event day, with named technicians, run sheets, and rehearsal windows built in.

Fireflyav

Pricing is itemised by equipment, labour, and any specialist provisioning your venue requires. Portfolio examples and venue references are available on request. To start a quote or request an RFP template and site survey, fill in the product form and a member of the team will respond with a tailored proposal.

Key takeaways

Specialist museum AV requires conservation awareness, network integration, and managed on-site technical support from day one.

Point Details
Hire a specialist Museum AV differs from standard corporate hire; choose a provider with cultural venue references.
Lead with an RFP Include room survey, IT contact, conservation constraints, and event format before any supplier quotes.
Network integration is critical Confirm VLAN access and upstream bandwidth for any hybrid or streaming element.
Check insurance and CVs Require public liability insurance, PAT-tested kit, and named technician credentials before signing.
Fireflyav for UK museums Fireflyav delivers full-scope museum AV hire and managed technical support; request a quote via the product form.
"


AV services for museums UK: hire the right specialist

9/08/2026

Technician setting up redundant AV equipment backstage

"

Redundancy is not a contingency luxury for live and hybrid events — it is the difference between a failure that stays invisible and one that plays out in front of your audience, your client, and your reputation. The three priorities to address before any event day are audio continuity, power stability, and network or encoder failover. Get those three right and you have covered the majority of the failure modes that end events early or embarrass clients.

Immediate first steps:

  • Identify every single point of failure in your signal chain from source to output
  • Assign a named backup operator for each critical function, not just a spare piece of kit
  • Confirm that your backup network path uses a different provider from your primary

Table of Contents

What redundancy actually covers for live events

Redundancy spans four practical domains, and they stack in a logical order: power feeds hardware, hardware carries the network, and operations governs all three. Lose power and everything above it fails simultaneously.

Hardware redundancy means duplicate or spare devices: a second mixer, a backup encoder, spare wireless mic packs. Power redundancy means N+1 generator configurations with automatic transfer switches (ATS) so a generator fault does not kill the stage. Network redundancy means combining fibre, 4G/5G and sometimes satellite so a single provider outage does not drop your stream or your point-of-sale systems. Operational redundancy means trained backup operators, documented runbooks and rehearsed handovers.

Diversity matters as much as duplication. Two encoders on the same network switch, or two generators on the same fuel supply, share a single point of failure. Production companies design live workflows around the assumption that failure will happen, and they use diversity across routes and providers to prevent correlated failures that simple duplication cannot stop.

Infographic showing four redundancy layers for live events

Pro Tip: Never rack your primary and backup encoders in the same physical rack on the same circuit. A tripped breaker or a rack fault takes both out simultaneously.


How much redundancy does your event actually need?

Not every event justifies a full hot-standby configuration. The right level depends on audience size, revenue exposure, broadcast obligations, and how long a visible outage is tolerable.

Event type Tolerable downtime Recommended standby Rationale
Internal board meeting 5–10 minutes Cold standby Low audience, no broadcast, brief delay acceptable
Corporate conference (300 delegates) Under 2 minutes Warm standby Reputational risk, sponsor visibility
Hybrid summit with live stream Under 30 seconds Hot standby Remote audience drops permanently if stream fails
Public festival or broadcast event Near-zero Hot standby + diversity Revenue, safety, broadcast SLAs

Standby levels vary: hot standby runs in parallel for near-instant failover; warm standby is on-site and powered but not actively streaming; cold standby is on-site but unpowered, with longer recovery times. A hybrid summit where remote delegates outnumber those in the room has no tolerance for a cold-standby recovery with longer delay — by the time you are back online, the virtual audience has left.


What to duplicate first: a practical checklist for AV systems

Prioritise by failure impact, not by equipment cost.

Technician marking AV equipment redundancy checklist

Item Failure impact Redundancy option
Wireless microphones Presenter goes silent mid-session Dual mics on stage; spare battery packs pre-charged
Audio mixer / desk Total loss of programme audio Backup digital mixer pre-patched and gain-matched
Encoder / streaming device Live stream drops for all remote viewers Second encoder with independent ingest URL pre-configured
Primary network uplink Stream and comms fail together Secondary uplink via different ISP or 4G/5G bonded router
Power feed to critical racks Everything in the rack goes dark Separate circuit or UPS with generator ATS
Stage comms (IEM/intercom) Crew loses coordination Backup intercom channel; spare beltpacks charged

A backup encoder without a backup network is incomplete, and a secondary uplink is useless if only one encoder can use it. Plan device and network failover together.

Pro Tip: Pre-configure your backup encoder with matching ingest keys and stream settings as the primary. A failover under pressure is not the moment to be typing credentials.

  • Confirm spare mic packs are charged and tested before show time
  • Keep a second set of XLR cables pre-run to the stage before doors open
  • Label backup equipment clearly so any operator can identify and switch to it without asking

For a deeper look at the hardware involved, AV equipment for event planners covers specifications and compatibility in plain language.


Runbooks, roles and escalation: how operational redundancy saves events

Spare kit sitting in a flight case does nothing if no one knows when to switch to it or how. Operational redundancy — clear runbooks, named backup operators and rehearsed handovers — is as critical as the hardware itself.

A one-page runbook for each critical function should follow a simple structure: Symptom → Action → Owner. For example: “Stream drops for more than 15 seconds → switch ingest to backup encoder URL → Streaming Operator (backup: AV Technician 2)”. Operational cutovers scripted into micro-steps with exact credentials and verification checks remove the ambiguity that causes slow recovery under pressure.

Role assignment example:

Function Primary owner Backup owner
Front-of-house audio Lead Sound Engineer AV Technician 1
Live stream / encoding Streaming Operator AV Technician 2
Network and connectivity IT/Network Engineer Streaming Operator
Stage manager Stage Manager Production Coordinator

Escalation authority matters too. Define in writing who may trigger a failover — without that clarity, operators hesitate while the clock runs. Training multiple team members to fill essential positions reduces bottlenecks and keeps communication flowing during incidents.

Pro Tip: Print the runbook and tape it to the relevant operator’s position. A digital copy on a laptop that has just lost power is not useful.

An untrained backup is not a safety net — it is a second point of failure. Redundancy only works when the person picking up the role has rehearsed it, not just read about it.


How to test redundancy before the event

Lab checks are not enough. Dress rehearsals must mimic event bitrate, graphics load and authentication flows to surface the failures that only appear under real conditions.

  1. Encoder failover test — kill the primary encoder mid-stream and confirm the backup takes over within your acceptance threshold (typically under 30 seconds for a hybrid event).
  2. Primary uplink loss test — disconnect the primary ISP connection and verify the bonded router or secondary SIM takes over without manual intervention.
  3. Mixer fault simulation — mute the primary desk and confirm the backup mixer is gain-matched and ready to take programme audio.
  4. Power interruption test — simulate a mains failure and confirm the UPS or generator ATS transfers without a visible stage blackout.
  5. Authentication and playback check — after each failover, confirm the stream re-authenticates and remote viewers see continuous playback.

Record every test result. Testing must be recorded and versioned so you can demonstrate continuous improvement and identify recurring weak points.

Test scenario Acceptance threshold Outcome Time to recover Sign-off
Encoder failover Under 30 seconds Pass / Fail ___ seconds ___
Uplink loss Under 30 seconds Pass / Fail ___ seconds ___
Mixer fault Under 10 seconds Pass / Fail ___ seconds ___
Power interruption Under 5 seconds (UPS) Pass / Fail ___ seconds ___

Specifying and buying redundancy cost-effectively in the UK

Redundancy has a cost, but so does failure. The procurement conversation is about matching standby level to acceptable risk, not eliminating all risk at any price.

Procurement checklist when briefing suppliers:

  • Specify named technical staff, not just headcount — “one AV technician” is not the same as “a trained streaming operator with failover experience”
  • Include a contractual acceptance test: the supplier must demonstrate failover before the event goes live
  • Request equipment diversity in writing: primary and backup devices from different manufacturers where possible
  • Confirm SLA clauses cover the full event window, including load-in and breakdown
  • For power, specify N+1 generator configurations with ATS; critical stages are typically fed by at least two generator sets for near-instant transfer

For multi-site events, AV logistics across venues adds complexity to every redundancy decision — transport contingency and spare kit distribution need their own plan.

Pro Tip: Ask suppliers to show you their runbook, not just describe it. A supplier who cannot produce a written failover procedure has not operationalised their redundancy.


How Fireflyav approached layered redundancy at a UK hybrid conference

A UK-based corporate client engaged Fireflyav to deliver a hybrid conference with approximately 300 in-room delegates and a simultaneous live stream to a remote audience. The brief required uninterrupted audio and video for both audiences across a full-day programme.

Fireflyav’s technical delivery included dual Blackmagic encoders configured with independent ingest URLs, a bonded 4G/5G router running alongside a dedicated venue fibre connection, a UPS protecting the streaming rack, and a named backup streaming operator briefed on the runbook. A pre-show failover drill confirmed both encoder paths and both uplinks before doors opened.

The stream remained uninterrupted throughout the day. A brief venue fibre instability mid-afternoon triggered an automatic switch to the bonded cellular path — the remote audience saw no interruption, and the in-room programme continued without pause.

Three lessons from that event apply directly to your planning: first, the failover drill caught a misconfigured ingest URL on the backup encoder that would have caused a 10-minute outage; second, having a named backup streaming operator meant the primary operator could focus on quality rather than contingency; third, the bonded cellular router paid for itself the moment the fibre dipped.


Key takeaways

Redundancy for live events works only when hardware, power, network, and operational layers are all covered and tested before the event goes live.

Point Details
Prioritise audio, power, and network These three domains cause the most visible failures; address them before any other redundancy.
Match standby level to risk Hot standby for hybrid streams; warm for corporate conferences; cold only for internal meetings with low stakes.
Operational redundancy is non-optional Named backup operators and written runbooks prevent hesitation during high-pressure failovers.
Test under realistic load Dress rehearsals must replicate event bitrate and authentication flows, not just bench conditions.
Fireflyav delivers layered redundancy Fireflyav provides dual encoders, multi-uplink networking, UPS protection, and trained backup operators for UK events.

The case for building redundancy in from day one

Most event failures are not dramatic. They are a wireless mic that drops in the middle of a keynote, a stream that freezes for 90 seconds while a remote audience refreshes their browser, a generator that trips and takes the stage lighting with it. None of these are unforeseeable — they are the predictable consequences of treating redundancy as an afterthought.

The events that run without visible incident are not lucky. They are the ones where someone, at the planning stage, asked “what happens if this fails?” for every critical system and then built the answer into the schedule, the budget, and the briefing documents. That discipline is what separates a production that looks effortless from one that becomes a post-mortem.


Fireflyav can build redundancy into your next UK event

When a live stream failure or a silent microphone is not an option, Fireflyav delivers the layered technical cover that keeps your event running. From dual-encoder streaming setups and bonded multi-uplink networking to N+1 power distribution and fully briefed backup operators, Fireflyav handles the redundancy planning so you do not have to.

Fireflyav

Every engagement includes a pre-show failover acceptance test, written runbooks for each critical function, and named technical staff across the full event window. Fireflyav works with event managers and corporate clients across the UK, from single-room conferences to multi-stage hybrid productions. To discuss your event’s redundancy requirements and get a scoping call booked, fill in the project form and a member of the team will be in touch.


Useful sources and further reading

  • AV equipment explained for event planners — hardware specifications and compatibility guidance for scoping redundancy requirements
  • Event power distribution: the 2026 UK organiser’s guide — N+1 generator configurations, ATS, and safe power distribution for live events
  • Broadcast AV equipment types: the 2026 professional guide — encoder and processing equipment reference for hot and warm standby decisions
  • How production companies ensure redundancy and reliability — NetInsight’s technical overview of cross-layer redundancy design
  • How to design a live streaming failover plan — practical guidance on standby levels, failover thresholds and acceptance testing
  • Crisis-proofing your event tech — power, network and operational backup strategies for large-scale events
  • Data backup best practices — recovery triage principles applicable to AV asset and configuration backup strategies
"


Why redundancy matters for live events: a UK guide

9/08/2026
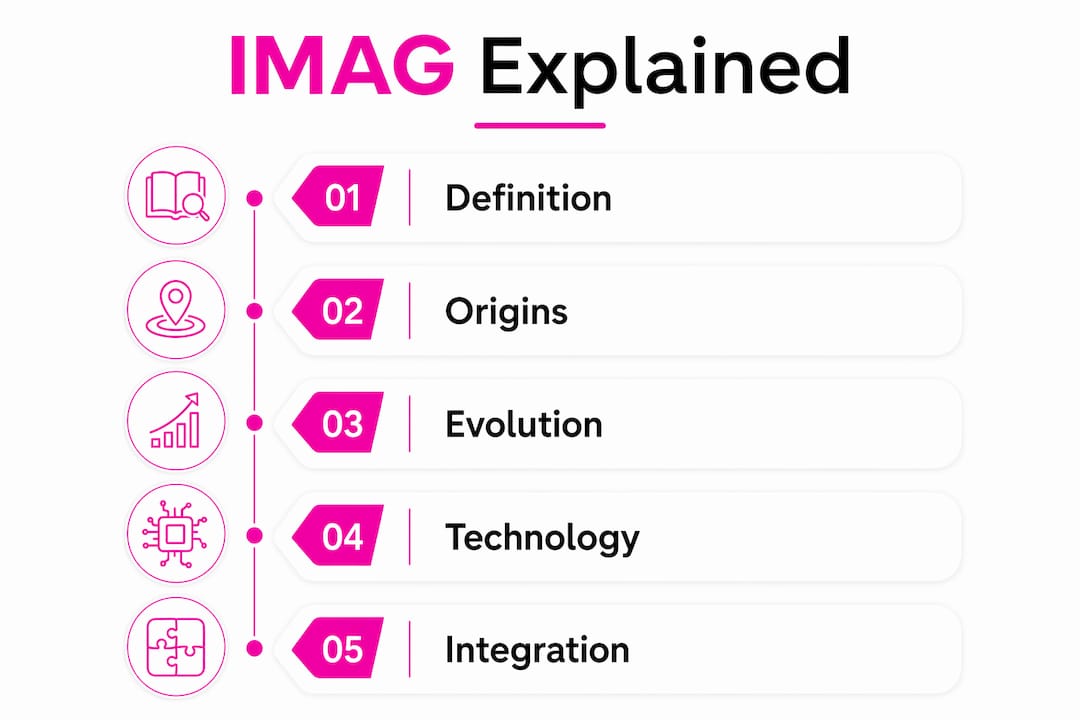
Event technician adjusting audio equipment

"

Each event type demands a different production blueprint. A small boardroom meeting needs a confidence monitor, a lapel mic, and a single display. A mid-size conference adds a PA system, a lighting rig, and a dedicated front-of-house position. A large theatre production scales to full line-array audio, moving-head fixtures, and a video wall. A hybrid broadcast-style event layers in an encoder, a vision mixer, and a streaming operator on top of all that. An outdoor festival starts from scratch on power, weather protection, and site logistics.

The five blueprints below give you the kit lists, crew roles, cost bands, and checklists to plan each one. Here is the quick map:

  • Small meeting (small group): display screen, confidence monitor, lapel/boundary mic, basic AV controller
  • Mid-size conference (medium-sized audience): line-array or column PA, intelligent wash lighting, IMAG screen or LED panel, stage and lectern
  • Large theatre (large audience): full PA system, moving-head fixtures, LED video wall, full staging and rigging
  • Hybrid broadcast-style (any size): all of the above plus vision mixer, encoder, multi-camera, streaming operator
  • Outdoor festival (large-scale outdoor event): generator power, weatherproof PA, truss and ground-support staging, site comms

Scale up by adding redundancy, crew headcount, and a second PA zone. Scale down by removing video and reducing lighting to static wash only.


Table of Contents

What event production actually covers

Event production is the technical and logistical delivery of a live experience: AV systems, staging, crew, communications, and power. It is distinct from event planning, which covers venue hiring, catering, and programme design. Production begins where planning ends, turning a brief into a working technical specification.

This article covers in-person, hybrid, livestreamed, and outdoor events. It does not cover venue procurement, food service, or entertainment booking. What it does cover: production timelines, minimum kit specs, crew roles, UK power distribution, hybrid encoder and switcher basics, run-sheet templates, and cost bands for UK hire. Every blueprint is written for event professionals who need something they can adapt on Monday morning, not a theoretical overview.

Industry experts are clear that event production is not a collection of kit but a strategic alignment of technical systems with event objectives. The audio, lighting, video, and staging decisions should all serve the attendee experience and the client’s messaging goals.


Production stages and an actionable timeline

The production process runs in three phases: pre-production, event day, and post-production. Most problems on show day trace back to decisions that were not made, or not confirmed, during pre-production.

Stage Task Lead time Owner
Concept Brief, objectives, attendee numbers, venue shortlist several weeks out Producer / client
Specification AV spec, lighting design, staging drawings a few weeks out Technical director
Site survey Venue walk-through, power assessment, rigging points weeks before the event Technical director + venue
Procurement Kit hire confirmed, crew contracted, logistics booked weeks before the event Producer
Technical rehearsal Full rig, cue-to-cue, speaker run-through days before the event Technical director + all crew
Load-in Delivery, build, cable runs, patching Day before or morning of show Stage manager
Show Doors open, programme runs, livestream live Event day All crew
Load-out De-rig, pack, vehicle loading Post-show Stage manager
Wrap Asset delivery, debrief, kit return Within 5 days Producer

The site survey is the step most often skipped on smaller events, and it is the one that causes the most expensive surprises. Confirming rigging points, mains supply capacity, and loading-bay access before you specify kit saves hours on load-in day. For multi-venue productions, AV logistics planning across sites adds another layer of scheduling complexity that needs its own timeline column.


Core technical systems: what each one does and the minimum spec

Audio

The goal for audio is even speech intelligibility across the whole room, with no hot spots and no dead zones. For speech-led events, aim for a signal-to-noise ratio well above ambient room noise. A PA system selection decision comes down to room size, ceiling height, and whether the event is speech-only or includes music.

Venue size Minimum PA spec Mic input minimum
Small group Appropriate powered speakers suitable for the room size multiple microphone channels for presenter use
Medium-sized audience Professional line-array or similarly capable speaker system several microphone input channels
Large audience Full professional line-array speaker system, flown or ground-stacked many microphone channels
Outdoor 500+ Weatherproof professional PA system with supplementary delay towers multiple microphone input channels

For corporate conferences, a conference mic system with boundary mics on panel tables and a delegate discussion unit gives clean audio pickup without visible stands cluttering the stage.

Lighting

Warm lighting creates intimacy; dynamic, cueable LED fixtures manage energy and scene changes for corporate presentations. Lighting professionals confirm that the two functions are distinct: ambient wash sets the room mood, while intelligent fixtures handle brand-colour moments, speaker introductions, and audience engagement cues.

Application Minimum fixture spec
Corporate wash Several LED fixtures providing warm and colored ambient wash
Conference stage Profile spot lighting for front illumination plus backlight LED wash fixtures
Theatre / concert Multiple moving head fixtures, haze effects, and follow spotlights
Outdoor festival Weatherproof moving head and par fixtures suitable for outdoor use

Pro Tip: Always assign a dedicated lighting control channel to your confidence monitor and presenter screen backlight. Dimming the house lights for a video playback while leaving the presenter lit requires a separate circuit, and missing this in the patch causes a common, avoidable problem during cue-to-cue.

Video

Video covers display screens, LED walls, IMAG (image magnification) for large rooms, and livestream output. Pixel pitch on an LED screen determines the minimum viewing distance: a P3 panel (3 mm pitch) suits indoor close-viewing; a P6 or P10 suits outdoor or large-hall applications where the audience is further back.

Application Minimum spec
Small meeting Large display or sufficiently bright projector
Conference IMAG Multiple LED panels or projectors with full HD resolution minimum
Theatre video wall An LED video wall of adequate size and pixel pitch for venue scale
Hybrid stream output Hardware for HD capture and dedicated streaming encoding

Staging, rigging, and comms

Staging defines sightlines and presenter authority. Placing the focal point intentionally — stage, LED wall, or dance floor — and designing seating around it is the single most effective layout decision you can make. Rigging requires a competent rigger and a venue-approved rigging plan; never hang truss from unapproved anchor points.

Comms (production intercom) is often the last item on the kit list and the first thing missed. A two-channel belt-pack system between stage manager, FOH, and lighting operator is the minimum for any event with more than two crew members.


Five concrete setup blueprints with kit lists and cost bands

Blueprint 1: Small meeting (up to 30 attendees)

Purpose: Boardroom presentation, team briefing, or small training session.

Layout: Single-room, all delegates facing one end. Presenter at a lectern or standing at the head of the table.

Minimum kit list:

  • 1× 75"–85" display screen or short-throw projector
  • 1× confidence monitor (facing presenter)
  • 1× lapel mic or boundary mic
  • 1× wireless handheld mic (backup)
  • 1× simple AV controller or laptop switcher
  • Basic ambient LED lighting (if room lighting is inadequate)

Crew: 1 AV technician (can double as operator and setup)

Cost band: A budget range for hire costs including technician services. Cost rises if the venue has no in-house display and a projector plus screen must be supplied.


Blueprint 2: Mid-size conference (30–200 attendees)

Purpose: Corporate conference, AGM, product launch, or awards ceremony in a hotel ballroom or dedicated conference centre.

Lighting operator managing conference setup

Layout: Theatre-style or cabaret seating facing a raised stage. FOH position at the rear of the room. Experience zones such as a registration desk, networking lounge, and breakout area improve guest flow and reduce congestion at the main entrance.

Minimum kit list:

  • 2× line-array tops + 1× sub (or 4× 12" tops in smaller rooms)
  • 1× digital mixing console (FOH)
  • 4–8 mic channels (lapel, handheld, panel boundary mics)
  • 2× LED panel or projector screens (IMAG or content playback)
  • Stage: 6 m × 4 m modular staging, 600 mm rise
  • Lectern with integrated confidence monitor
  • 8× LED wash fixtures + 4× profile spots (front light)
  • 1× lighting console
  • Power distro: 63A single-phase feed minimum

Crew: Technical director, FOH audio engineer, lighting operator, stage manager (4 crew minimum)

Cost band: A budget range reflecting mid-scale conference costs. The main cost driver is LED panels vs projectors; LED walls add £1,500–£3,000 but eliminate ambient-light washout problems in bright hotel ballrooms.


Blueprint 3: Large theatre production (200–1,000 attendees)

Purpose: Conference keynote, awards gala, product launch, or concert in a theatre or large venue.

Layout: Fixed or raked seating, flown PA, full stage with wing space. FOH at a dedicated mix position in the auditorium. Sightlines must be checked from the furthest seat before finalising screen and speaker placement.

Minimum kit list:

  • Full flown line-array system (left/right hang + sub array)
  • 24-channel digital console (FOH) + monitor console (stage)
  • 12–24 mic channels including IEM (in-ear monitor) system for performers
  • LED video wall: 6 m × 3.5 m minimum, P3–P4 pitch
  • IMAG cameras: 2× broadcast-spec cameras + vision mixer
  • Moving-head fixtures: 12+ wash/beam, haze machine, follow spot
  • Full stage: 12 m × 8 m minimum, wing masking, stairs
  • Rigging: truss grid, motor chain hoists, competent rigger on crew
  • Power: A robust power feed appropriate for the event scale

Crew: Technical director, FOH engineer, monitor engineer, lighting programmer/operator, video/LED operator, stage manager, 2× stage hands, rigger (8–10 crew)

Cost band: A substantial budget for large-scale theatre productions. Rigging and LED wall are the largest single cost items. Concert AV production at this scale also typically requires a pre-production day for programming and a full technical rehearsal day.


Blueprint 4: Hybrid broadcast-style event (any size)

Purpose: Corporate conference or product launch with a simultaneous livestream to remote attendees, or a fully virtual event with a live studio audience.

Layout: As per Blueprint 2 or 3 for the in-room setup, with an additional streaming station (encoder, vision mixer, monitor) positioned at or near FOH. Camera positions must be agreed before the lighting design is finalised, as camera angles and lighting angles interact.

Additional kit over the base in-room setup:

  • 2–4× broadcast-spec cameras (PTZ or manned)
  • 1× vision mixer (e.g. Blackmagic Design ATEM Mini Pro for smaller productions)
  • 1× hardware encoder (e.g. Blackmagic Web Presenter for direct stream output)
  • Dedicated streaming laptop with wired Ethernet (minimum 10 Mbps upload, stable)
  • 1× programme monitor at streaming station
  • Confidence monitor feed for remote presenter integration
  • BrightSign media player for pre-roll and interstitial content playback

Crew: Add 1× livestream operator and 1× camera operator (minimum) to the base crew. For multi-camera productions, add a dedicated vision mixer operator.

Cost band: Additional budget range for hybrid broadcast functionality, depending on camera count and stream complexity. The broadcast AV equipment choices at this level significantly affect post-production options if the stream recording is to be repurposed.

Hands operating livestream switcher console


Blueprint 5: Outdoor festival (500+ attendees)

Purpose: Music festival, outdoor corporate event, community festival, or large-scale brand activation.

Layout: Main stage facing a large open audience area, with secondary stages or experience zones positioned to avoid audio bleed. Bars, lounges, and photo areas create distinct guest moments and keep crowds moving rather than clustering at one point.

Minimum kit list:

  • Weatherproof line-array PA (main hang + sub array + delay towers for deep sites)
  • 48-channel digital console (FOH) + monitor console
  • IP-rated moving-head fixtures + weatherproof par cans
  • Ground-support truss or stage roof structure (engineer-certified)
  • A generator sized appropriately with added headroom for reliability
  • Site power distro: 125A three-phase feeds to each stage and zone
  • Weatherproof cable covers and cable ramps across pedestrian routes
  • Site comms: multi-channel radio system for all crew

Crew: Technical director, FOH engineer, monitor engineer, lighting programmer, stage manager, 2× stage hands, generator/power technician, site safety officer (9–12 crew minimum)

Cost band: Significant costs typical for outdoor festivals. Generator hire and fuel, site power infrastructure, and staging structure are the dominant cost items. Weather contingency (additional tarpaulins, cable protection, shelter for FOH) adds 10–15% to the budget.


Crew roles across all blueprints

Role Responsibility Required from blueprint
Producer / PM Client liaison, budget, schedule, overall delivery All
Technical director Specification, supplier management, on-site technical lead Blueprint 2+
FOH audio engineer Mixing console operation, PA optimisation Blueprint 2+
Lighting operator Console programming and operation Blueprint 2+
Stage manager Load-in coordination, show calling, load-out Blueprint 2+
Livestream operator Encoder, vision mixer, stream monitoring Blueprint 4 only
Camera operator Camera positioning and operation Blueprint 3–4
Rigger Truss, motors, certified rigging plan Blueprint 3+
Power technician Generator, distro, site power Blueprint 5

UK technical best practice: power, redundancy, and streaming

Power distribution

UK event power runs on 230 V single-phase or 400 V three-phase supply. Single-phase (63A) supports up to approximately 14 kW of load; three-phase (125A) supports up to approximately 86 kW. Always calculate your total load from the kit list and add 30% headroom before specifying the mains feed.

Supply type Max usable load (approx.) Typical application
3.5 kW Small meeting, basic lighting
63A single-phase 14 kW Mid-size conference
125A three-phase 86 kW Large theatre, hybrid broadcast
Generator 200 kVA Outdoor festival

Every temporary electrical installation at a UK event must comply with BS 7671 (the IET Wiring Regulations) and the Electricity at Work Regulations 1989. All distro boxes must be RCD-protected, clearly labelled by circuit, and locked off when not in use. Never daisy-chain domestic extension leads for production power.

Pro Tip: Label every distro output with the circuit name, the connected load, and the breaker rating before load-in begins. A laminated label on each socket saves 20 minutes of fault-finding when a breaker trips mid-show.

Redundancy checklist

The most common on-site failures are audio signal loss, laptop/playback failure, and network drop for streaming. Carry these as standard:

  • 1× spare wireless mic receiver and transmitter (same frequency band as primary)
  • 1× spare laptop pre-loaded with all presentation files and stream software
  • 1× spare HDMI and DisplayPort cable per presenter input
  • 1× spare encoder or hardware stream device
  • 1× spare CAT6 cable run from router to streaming station
  • 1× spare IEM transmitter pack (for Blueprint 3+)
  • 1× spare moving-head fixture (for Blueprint 3+)

Streaming reliability

A stable wired Ethernet connection is non-negotiable for live streaming. Wi-Fi is not acceptable as a primary stream connection. Request a dedicated VLAN from the venue IT team, or bring a 4G/5G bonded router as a backup. Minimum upload speed for a 1080p stream is 8–10 Mbps; for multi-bitrate adaptive streaming, budget 15–20 Mbps. Use a hardware encoder rather than a software-only solution wherever possible: it reduces CPU load on the production laptop and gives a cleaner failover path.

For streaming platform options and software tools, TechVideoBlog’s platform archive covers the main encoder-compatible services used in hybrid event workflows.


Run-sheet and technical checklists you can copy

A run sheet is a minute-by-minute schedule that every crew member works from. The most useful run sheets have four columns: time, task, owner, and acceptance criteria. The acceptance criteria column is what most teams skip, and it is what prevents “I thought you checked that” conversations during the show.

Sample run-sheet template

Time Task Owner Acceptance criteria
Crew call, vehicle access confirmed Stage manager All crew on site, loading bay clear
Stage build begins Stage manager + hands Stage at correct height, level, secured
PA fly/ground-stack FOH engineer Speakers in position, cabled, no physical damage
Lighting rig and patch Lighting operator All fixtures responding, no dark units
Video/LED build and test Video operator All panels lit, no dead pixels, signal confirmed
Power check and labelling Technical director All circuits labelled, RCDs tested
Full system patch and line check FOH engineer All inputs passing signal, no ground loops
Soundcheck (band/presenter) FOH + stage manager All mics checked, IEMs working, confidence monitor live
Lighting cue-to-cue Lighting operator All cues programmed, haze tested
Stream test (hybrid only) Livestream operator Stream live to test destination, 5-min soak test
Full technical rehearsal All crew Full run-through, all cues called
Doors open Stage manager House lights at preset, music playing, crew at stations

Load-in checklist

  1. Confirm vehicle access and loading bay with venue contact before arrival.
  2. Check all flight cases and kit against the delivery manifest.
  3. Photograph any pre-existing venue damage before touching walls or floors.
  4. Confirm mains supply location and test with a socket tester before connecting distro.
  5. Build staging before rigging anything above it.
  6. Run all cable routes before connecting any signal cables.
  7. Label every cable at both ends before patching.
  8. Test all RCDs before connecting production loads.
  9. Confirm fire exit routes are clear after all kit is in position.
  10. Sign off the load-in with the venue duty manager before the show.

Common on-site problems and how to fix them

The most frequent critical failure per event type: hybrid events drop their stream due to network instability; outdoor festivals lose mains power due to generator fault or weather; large theatre productions hit a rigging delay that compresses the technical rehearsal; mid-size conferences face presenter laptop incompatibility at the last minute.

  • Audio feedback on mic open: Reduce gain before fader, check mic placement relative to speakers, apply high-pass filter at 120 Hz. Red flag: feedback on every mic open suggests a speaker is facing the wrong direction.
  • Presenter laptop not connecting to display: Always carry a USB-C to HDMI and a DisplayPort to HDMI adaptor. Test every presenter laptop at load-in, not at doors-open.
  • Stream drops mid-show: Switch to backup encoder immediately. If using a bonded 4G router, confirm it has switched to the backup SIM. Notify the online audience via chat within 60 seconds.
  • Generator failure (outdoor): Start the backup generator before shutting down the primary. Never leave the site without a second power source if the event runs more than four hours.
  • Lighting console crash: Most modern consoles have a backup file on a USB stick. Load the backup file; if the console is unrecoverable, switch to manual override on the dimmer racks and run static states.
  • Stage structure concern during load-in: Stop work immediately. Do not continue rigging or loading until a competent person has inspected and signed off the structure. This is not a negotiable timeline decision.
  • Wireless mic interference: Scan for clear frequencies using a spectrum analyser before the show. In the UK, check Ofcom’s current frequency allocation for your region; some frequencies require a licence.

How to cost a production setup and UK procurement tips

The three main cost drivers are kit hire, skilled labour, and logistics. Reducing kit hire cost without compromising quality usually means specifying more precisely: a smaller PA that is correctly specified for the room outperforms a larger system that is poorly positioned and under-driven. Labour is the hardest to cut; a competent technical director saves more money than they cost by preventing expensive mistakes. Logistics costs are reduced by consolidating suppliers and using a single production company that carries its own transport.

Blueprint Low band Mid band High band Main cost driver
Small meeting Screen size, technician day rate
Mid-size conference LED panels vs projectors
Large theatre LED wall, rigging, crew headcount
Hybrid broadcast +£15,000 +£25,000 Camera count, encoder spec
Outdoor festival £25,000 £50,000 £80,000+ Generator, staging structure

Procurement tips for UK events

  • Contract technicians with a written agreement that specifies call time, role, rate, and cancellation terms. Verbal agreements are unenforceable when a crew member cancels 48 hours before load-in.
  • Confirm that your AV supplier carries public liability insurance to a minimum of £5 million. For larger events, £10 million is standard. Ask for a certificate before signing the hire agreement.
  • For AV equipment hire, compare dry hire (kit only) against wet hire (kit plus technician). Dry hire is cheaper on paper; wet hire is almost always better value when the event has any technical complexity.
  • Get a site-specific power assessment from a qualified electrician for any outdoor event or venue where the mains supply is not a standard venue-provided feed.
  • For venue-specific considerations in London, the London venues AV guide covers common infrastructure constraints and what to confirm before signing a venue contract.

Key takeaways

Specifying AV early, assigning a technical lead, and scheduling a full technical rehearsal are the three decisions that most reliably separate a smooth show from an expensive problem.

Point Details
Spec AV at a few weeks out Late specification forces compromises on kit availability and crew booking.
Assign a technical director One person must own all technical decisions; shared responsibility produces gaps.
Schedule a tech rehearsal A full cue-to-cue days before the event the show catches 90% of on-site problems before they matter.
Plan UK power from the brief Confirm mains supply type and capacity at the site survey; never assume a venue can provide what you need.
Use Fireflyav for managed delivery Fireflyav supplies kit, crew, and technical management for all five blueprints above, from small corporate meetings to outdoor festivals.

What most planners get wrong about production

The conventional wisdom is that production problems are technical. In practice, the majority of show-day failures are communication failures: a presenter who was never told to bring their slides on a USB stick, a venue that did not pass on the loading-bay access restriction, a client who approved the running order but not the cue sheet. The technical systems are usually fine. The handoffs between people are where things break.

The second thing planners consistently underestimate is the value of the technical rehearsal. It is the one moment in the production process where every system is live, every cue is called, and every failure mode surfaces in a controlled environment. Cutting the tech rehearsal to save a day’s crew cost is one of the most expensive decisions you can make. The crew day costs a fraction of what a failed show costs in client relationships and remedial work.

The third lesson, specific to UK outdoor events, is that generator sizing is almost always underestimated. The load calculation from the kit list looks reasonable; the actual draw when everything is running simultaneously, including catering, lighting, and PA, is consistently higher. Build in 30% headroom and confirm the fuel supply for the full event duration plus two hours.


Fireflyav delivers these setups end to end

Fireflyav supplies the kit, crew, and technical management for every blueprint in this article, from a single-technician boardroom setup to a full outdoor festival production. The service covers equipment hire (dry or with technician), staging and rigging, LED walls, conference mic systems, livestreaming, and on-site technical management across corporate, cultural, broadcast, and eSports events throughout the UK.

Fireflyav

Every engagement includes public liability insurance and full compliance with UK electrical and health and safety regulations, so you are not managing those obligations separately. For hybrid and broadcast-style events, Fireflyav’s team handles encoder configuration, camera placement, and stream monitoring, using equipment including the Blackmagic Design ATEM Mini Pro and Blackmagic Web Presenter for productions where a compact, reliable switcher and encoder combination is the right call.

To get a quote or discuss the right blueprint for your event, fill out the project form and a technical producer will come back to you with a specification and cost estimate. If you are still scoping the brief, the AV equipment guide is a good starting point for understanding what each system does and what to ask for.


Useful UK sources and further reading

  • Audio visual equipment explained for event planners — Fireflyav’s technical primer on AV systems and their roles; useful for building a specification from scratch.
  • LED screen setup for live events — Detailed guidance on pixel pitch, positioning, and rigging for LED walls; reference this when specifying video for Blueprints 3–5.
  • Conference mic system — Fireflyav’s hire page for conference microphone systems, with technical notes on delegate discussion units and boundary mic configurations.
  • PA systems for events — Practical guidance on PA selection and deployment for different room types and audience sizes.
  • Meetings Industry Association (MIA) — The UK trade body for the meetings and events sector; publishes standards and guidance relevant to venue and supplier contracting.
  • Digital building infrastructure design — Partner resource on integrating venue digital infrastructure with event technology; relevant for hybrid events where venue network and AV systems must work together.
  • Broadcast AV equipment guide — Fireflyav’s guide to broadcast-grade kit for hybrid and livestreamed events, covering encoders, switchers, and camera workflows.
"


Event production setup examples: five UK blueprints

2/07/2026
AV technicians coordinating derig in event venue

"

The AV derig process is the planned dismantle, safe lowering and removal, packing, and signed handover of all flown and floor AV elements once an event closes. Before your crew touches a single cable, three things must be confirmed: valid LOLER certificates for all lifting equipment are on site, a written RAMS (Risk Assessment and Method Statement) covering derig activities is available, and the venue rigging supervisor’s sign-off process is agreed.

Immediate priorities at a glance:

  • Confirm LOLER inspection certificates are present for every hoist, sling, and shackle before lowering begins
  • Verify the RAMS and method statement explicitly cover derig, not just the build
  • Establish who holds the venue rigging supervisor sign-off authority and what they need to see
  • Check MEWP operator IPAF cards before any platform is moved
  • Identify the single point of contact for power isolation so no flown element is lowered live

Who must be present for sign-off: head rigger, venue rigging supervisor, and stage manager. The single most urgent action before lowering any flown element is confirming lift permits and MEWP operator competence are in order.


Table of Contents

Your one-page derig checklist and role matrix

A crew brief lives or dies by clarity. Print this, paste it into your production pack, and tick each item as it clears.

Operational checklist (in sequence):

  • Secure the stage perimeter and restrict access to authorised crew only
  • Execute the power-down sequence: floor equipment first, then flown elements last (never cut power to a live video wall mid-show)
  • Isolate all flown elements and confirm secondary suspensions are still intact
  • Tag and label every flown point before any load is transferred
  • Dismantle flown assemblies from the top down, with a rigger on the load at all times
  • Pack and secure flightcases with contents lists attached
  • Load vehicles in reverse build order and complete site restoration

Roles, responsibilities and sign-off checkpoints:

Role Core derig responsibility Sign-off checkpoint
Head rigger Supervises all lowering operations; confirms LOLER docs Pre-derig inspection log; final rig completion sign-off
Riggers Execute lowering, dismantle and pack of flown elements Mid-derig checkpoint after each flown zone clears
Stage manager Coordinates overall sequence and crew timing Show-end call-down; final venue handover
Audio lead Manages speaker and console dismantle and pack Audio equipment inventory sign-off
Lighting lead Oversees fixture lowering, cable coiling and pack Lighting inventory and flightcase seal
Video lead Protects LED panels and encoders until streaming checks complete Video equipment sign-off post-stream confirmation
MEWP operator Operates platform for access at height; holds valid IPAF card Pre-use MEWP inspection log
Venue rigging supervisor Reviews loads against structural data; approves secondary suspensions Formal rig sign-off at trim height and on completion

Documentation to carry on site:

  • RAMS and method statement (derig-specific or explicitly covering derig activities)
  • LOLER inspection certificates for every piece of lifting equipment
  • PAT test records for electrical equipment being moved
  • IPAF cards for all MEWP operators
  • Rigging qualification certificates or documented competence records for production riggers
  • Crew competence log signed by the head rigger

Event AV operator role descriptions consistently list setup and dismantle coordination as core duties, and senior AV technician job briefs make rigging and derig planning an explicit responsibility at that level.


Infographic showing AV derig step-by-step process

How to run a derig step by step: from pre-planning to post-pack

Pre-planning

Start with a site walk-through at least a week before the event. Walk the load-out route, note access restrictions, confirm vehicle marshalling positions, and mirror the load-in architecture in reverse. Agree the derig access window with the venue in writing. Waste strategy (cable ties, foam offcuts, pallet wrap) and security handover timing both need to be locked before show day.

AV specialist conducting site walk-through

Professional AV production treats site liaison and documented RAMS as core project management, not optional extras. That framing matters: a derig plan written without a venue walk-through is guesswork.

Show-end sequence

Call a timing countdown 30 minutes before the show closes. Confirm the power-down order with the audio, lighting, and video leads. The sequence runs: streaming encoders and broadcast interfaces stay live until post-event checks are complete; floor equipment powers down next; flown elements are isolated last. Tag every suspended item before any load is transferred to a hoist.

Pro Tip: Never lower a flown video wall until the video lead has confirmed the stream has ended and all recording devices have stopped. Cutting power mid-frame on an LED panel can damage driver cards that cost more to replace than the labour saving is worth.

Dismantle and load-out

Sequence flown equipment before floor equipment wherever access allows. Use secondary suspensions as a safety net during lowering, not as a primary load path. MEWP operators should position the platform to give riggers a clear working zone, with tag lines attached to loads before the hoist releases tension. LED screen handling during derig requires panels to be lowered flat, never tilted, and stacked in the original flightcase foam.

Hands packing AV cables into road case

Pack in reverse build order so the first item into the truck is the last item needed at the next venue. Label every flightcase with contents, destination, and fragile warnings before it leaves the stage.

Post-pack sign-off

Complete the post-rig inspection log before any vehicle departs. The head rigger and venue rigging supervisor both sign the completion checklist. The stage manager countersigns the venue handover document. Any damage discovered during dismantle goes into an incident report immediately, not retrospectively. Replenish consumables (cable ties, tape, foam) from the vehicle spares kit so the next build starts complete.


UK safety checks and the documentation you must have for derig

UK event derig sits under several overlapping legal and industry frameworks. Getting the paperwork wrong is not a minor admin issue; it is a liability.

Statutory and industry documentation required on site:

  • LOLER (Lifting Operations and Lifting Equipment Regulations 1998) inspection certificates for every hoist, chainblock, sling, shackle, and rated anchor point used during derig
  • Written RAMS that explicitly cover derig activities, not just the build phase
  • PAT test records for electrical equipment being moved or replugged during derig
  • Crew competence records: IPAF cards for MEWP operators, formal rigging qualifications or documented experience for production riggers
  • Venue rigging supervisor approval, including secondary suspension decisions and structural load confirmation

Crew competence checks on arrival:

  • Verify IPAF cards are current and cover the category of MEWP in use
  • Confirm production riggers hold recognised qualifications or have documented, supervised experience
  • Check that the head rigger has reviewed the RAMS and signed the pre-derig inspection log

Inspection and sign-off process:

  • Complete a pre-derig inspection of all lifting equipment before lowering begins
  • Check secondary suspensions are intact and correctly rated before transferring any load
  • Obtain the venue rigging supervisor’s signed completion checklist before releasing the venue

The venue rigging supervisor’s role is to review suspended loads against structural calculations and sign off the rig only once trim height and secondary suspension details are confirmed. Their sign-off is not a formality — it is the venue’s formal confirmation that the structure is safe to load and, later, safe to strike. Involve them at the walk-through stage, not at the point of lowering.


How do you coordinate derig with venue staff and rigging supervisors?

The venue rigging supervisor is the technical gatekeeper for everything suspended in the building. Early collaboration prevents late changes to secondary suspensions and secures a clean sign-off. At the site walk-through, exchange trim heights, secondary suspension requirements, roof access procedures, and any access restrictions that affect the derig sequence.

Stakeholder coordination checklist:

  • Production manager: confirm derig access window, vehicle marshalling plan, and waste removal
  • Stage manager: agree timing call-downs and crew briefing schedule
  • Transport contractor: confirm vehicle arrival slots and loading sequence
  • Security: agree crew access passes and site clearance procedure
  • Venue facilities: confirm power isolation points and any in-house equipment that must stay in place
  • In-house audio and lighting staff: agree handover of any venue-owned kit and confirm nothing is packed by mistake

For events with live captioning or accessibility technology that must remain active until all delegates have left, coordinate with the relevant supplier before the power-down sequence begins. Live captioning systems in particular need a confirmed end-of-session signal before their equipment can be struck.

Pro Tip: Build the venue rigging supervisor sign-off into the crew schedule as a named task with a time slot, not a vague “when ready.” If sign-off is on the critical path, it gets done on time. If it is an afterthought, it becomes the reason the truck sits waiting for 45 minutes.


What goes wrong during derig, and how do you prevent it?

Most derig problems are predictable. The ones that cost money are almost always the ones that were not planned for.

Common failure modes:

  • Bad weather during outdoor derig: wind makes lowering flown elements dangerous without tag lines; rain damages unprotected electronics left on stage
  • Insufficient vehicle access: trucks arriving before the loading bay is clear, or venue access restrictions that were not confirmed in advance
  • Kit damage discovered on dismantle: LED panels cracked during lowering, cable connectors bent by rushed packing, flightcase latches broken under load
  • Missing documentation: LOLER certificates left at the depot, IPAF cards not carried by operators, RAMS not updated to cover derig
  • Uncertified equipment: a sling or shackle with an expired or missing inspection certificate discovered at the point of use

Preventive measures:

  • Carry a contingency vehicle for overflow kit or weather-related delays
  • Pack packing spares (foam, tape, cable ties) in every truck as standard
  • Store flown LED panels in their original flightcases with foam inserts during lowering, never stacked loose
  • Confirm vehicle arrival slots with the transport contractor 48 hours before derig
  • Run a documentation check at the pre-derig crew brief, not on the morning of the event

On-site risk mitigation:

  • Attach tag lines to all flown loads before releasing hoist tension, particularly in outdoor or high-ceiling venues where swing is a risk
  • Double-label fragile panels: one label on the flightcase lid, one on the panel itself
  • For high-security or complex events, specialist AV decommissioning contracts exist that cover secure handling and site restoration as distinct deliverables

How long does derig take, and how many crew do you need?

Derig time varies significantly by event type. The UK events sector spans conferences, exhibitions, cultural events, and outdoor productions, each with different access constraints and kit complexity.

Typical timeline examples:

Derig time varies by event type, ranging from brief packdowns for small corporate AV setups to extended operations for large theatre or concert loadouts requiring significant crew numbers.

Resourcing rules of thumb:

  1. Allow one rigger per two flown points as a minimum for safe lowering operations
  2. Match floor techs to flown techs at roughly 1:1 for mid-size productions; floor-heavy shows can shift to 2:1
  3. Plan vehicle loading at one 7.5-tonne truck per 40–60 flightcases as a rough guide, adjusted for case size and weight
  4. For multi-drop routes, add 30–45 minutes per additional drop to the transport schedule
  5. In peak season (October to December for corporate events), book vehicles and crew at least four weeks in advance

For multi-venue AV logistics, overnight storage between legs needs a confirmed depot location and a vehicle manifest that matches the post-derig inventory exactly.


What tools and lifting gear do you need for a safe derig?

Lifting kit and PPE

Every derig requires rated lifting equipment and appropriate personal protective equipment. The essentials:

  • Chainblocks and motor hoists with current LOLER certificates
  • Wire rope slings, round slings, and rated shackles, all within inspection date
  • Tag lines (minimum 10 metres for high-trim venues) to control load swing during lowering
  • MEWP (mobile elevating work platform) with a current pre-use inspection log
  • PPE: gloves, safety eyewear, hi-vis vests, and steel-toe boots for all crew on the stage

Packing and consumables

  • Flightcases with foam inserts matched to the equipment they carry
  • Heavy-duty gaffer tape and PVC tape for cable management and case sealing
  • Cable ties (standard and heavy-duty) for bundling and securing
  • Bubble wrap and foam sheet for fragile items without dedicated cases
  • Pallet wrap for securing stacked cases on pallets
  • Wheel chocks and load restraint straps for vehicle loading

Pro Tip: Colour-code your cable ties by department: one colour for audio, one for video, one for lighting. It takes 30 seconds at pack-down and saves 20 minutes at the next build when the video lead is not untangling audio snake from lighting cable.

For a fuller breakdown of AV equipment types and handling requirements, the equipment category matters as much as the quantity when planning packing time.


Fireflyav’s operational derig checklist and on-site protocol

Fireflyav uses a structured checklist approach on every production, designed to be printed and attached to the crew pack. The format below reflects the process the team follows on site.

Fireflyav operational derig checklist:

  • Pre-derig: LOLER certificates checked, RAMS signed off, IPAF cards verified, venue rigging supervisor briefed
  • Power-down: streaming equipment confirmed offline, floor equipment isolated, flown elements tagged
  • Lowering: secondary suspensions checked, tag lines attached, MEWP pre-use inspection complete
  • Dismantle: flown elements lowered and packed before floor equipment moves, all panels in foam-lined cases
  • Pack: flightcases labelled with contents and destination, inventory list attached to each case
  • Load-out: vehicle manifest completed, transport lead signs inventory, head rigger signs completion log
  • Venue handover: venue rigging supervisor signs completion checklist, stage manager countersigns handover document

QA and sign-off template:

Stage Check Signed by
Pre-derig LOLER docs, RAMS, IPAF cards, secondary suspensions Head rigger
Mid-derig Flown zone cleared, panels in cases, no loose loads Head rigger and venue rigging supervisor
Final sign-off All equipment packed, venue restored, incident log complete Stage manager, venue rigging supervisor, transport lead

Pro Tip: For hybrid events where a stream is still running post-show, assign a dedicated crew member to the streaming station with a clear instruction: nothing in that zone moves until the video lead gives a verbal “stream confirmed closed.” A Blackmagic Web Presenter or similar interface left live during derig is a common source of post-event client complaints and, occasionally, a broadcast incident.

Fireflyav’s technical support services cover site walk-throughs, RAMS preparation, and certified crew supply for productions across the UK.


Key takeaways

A safe, dispute-free AV derig in the UK depends on three things being in place before the show ends: the right documentation, the right crew competence, and a signed handover process that is built into the schedule, not bolted on at the end.

Point Details
Verify LOLER and RAMS first Confirm lifting equipment certificates and a derig-specific RAMS are on site before any lowering begins.
Lock in the venue sign-off process Agree the venue rigging supervisor’s sign-off checkpoint at the walk-through, not on derig day.
Plan vehicle marshalling in advance Confirm arrival slots with the transport contractor 48 hours before derig to avoid loading bay delays.
Resource to flown-element complexity Allow one rigger per two flown points minimum; scale floor crew to match the kit volume, not the room size.
Fireflyav for certified derig support Fireflyav supplies certified crew, RAMS preparation, and site walk-throughs for UK event productions.

The part of derig that most plans get wrong

The conventional wisdom in event production is that derig is just the build in reverse. It is not, and treating it that way is where most problems start.

A build happens with time to correct mistakes. Derig happens under pressure: the venue wants the space back, the transport contractor is waiting, and the crew has already worked a full show day. That pressure is where documentation shortcuts happen, where a sling with a borderline inspection date gets used anyway, and where the venue rigging supervisor sign-off gets skipped because “we’ve worked here before.”

The fix is not more paperwork. It is embedding the critical checkpoints into the crew schedule as named tasks with owners and times. When the head rigger knows they are signing the pre-derig inspection log at 22:30 and the venue supervisor knows they are doing a mid-derig checkpoint at 23:15, those things happen. When they are listed as “to do when ready,” they get compressed or skipped.

There is also a tendency to treat the post-derig QA log as an admin task for the office. It is not. A signed pre- and post-derig checklist kept in the vehicle manifest reduces disputes over missing items and creates an auditable record for insurance purposes. That record has real value the first time a client queries a damaged panel or a venue charges for something left behind.

The best derig crews are not the fastest. They are the ones who finish with every item accounted for, every certificate in the file, and a venue that will have them back.


Fireflyav: derig planning and crew supply for UK events

When the show ends, the work that protects your kit, your client relationship, and your compliance record begins. Fireflyav provides the full technical picture for UK event productions: site walk-throughs before the build, RAMS preparation that covers derig explicitly, certified riggers and MEWP operators, and transport coordination for load-out.

Fireflyav

For planners who need a derig crew that arrives with the right documentation, the right qualifications, and a signed handover process already built into the schedule, Fireflyav’s technical services cover corporate conferences, cultural events, broadcast productions, and live events across the UK. The team handles the compliance detail so you can focus on the client.

Fill out the project enquiry form to discuss your next production’s derig requirements, crew numbers, and access windows.


Useful sources for UK derig practice

Authoritative references for derig compliance, crew standards, and venue coordination:

  • UK Rigging: venue rigging supervisor guidance — explains secondary suspensions, structural sign-off, and the formal role of the venue rigging supervisor; the most practical UK-specific reference for the sign-off process
  • DWP: Senior AV Technician job listing — confirms industry expectations for rigging and derig planning at senior technician level; useful for writing crew briefs and competence requirements
  • RTDNA: Event AV Operator job description — outlines setup, dismantle, and coordination duties; helpful for defining role boundaries in a crew brief
  • ABPCO: UK events industry overview — provides context on the breadth of UK event formats and how they affect derig planning and access constraints
  • Brightspace Events: AV production services — illustrates how professional AV suppliers approach project management, site liaison, and RAMS as integrated services
  • Fireflyav services — Fireflyav’s technical support and crew supply offering for UK productions, including derig planning and certified crew
  • Fireflyav: AV equipment explained — practical equipment handling guidance for planners who need to understand what each category requires during pack-down
  • Fireflyav: AV logistics for multi-venue events — covers transport, marshalling, and multi-drop logistics for complex productions
"


AV derig process for UK events: the practitioner’s guide

9/07/2026
Audio technician adjusting mixing console in conference hall

"

An audio feedback loop (also called the Larsen effect or howlround) happens when amplified sound from a loudspeaker re-enters a microphone, gets amplified again, and repeats in a continuous cycle. The result is that familiar screech or sustained howl that can clear a room in seconds. The technical condition for it to start is straightforward: loop gain must reach or exceed unity (≥ 1) at a frequency where the signal arrives back in phase.

If you can hear feedback right now, do these things immediately:

  • Lower the master or monitor level on the mixing desk — even 3 dB can break the loop.
  • Mute the suspected channel (usually the microphone nearest the speaker).
  • Move the microphone away from the loudspeaker or turn it to face a different direction.
  • Turn off the monitor wedge if you are on stage.
  • Check for open, unused microphones and mute any that are live but not in use.

Hearing safety: Feedback can produce sound pressure levels (SPL) well above safe listening thresholds in fractions of a second. If you are troubleshooting a live system, wear hearing protection and keep bystanders away from speakers until the loop is resolved.

Pro Tip: Before any event, set all channel faders to unity and bring the master up slowly. You will find the feedback threshold before the audience does — and you can notch it out calmly rather than chasing it mid-show.

The short version: feedback is a loop of sound that keeps amplifying itself. Understanding why it starts puts you in control of stopping it.


Table of Contents

What is an audio feedback loop and why does it happen?

Feedback is not random noise. It is a predictable consequence of physics, and once you understand the signal path, you can see exactly where to intervene.

Infographic showing audio feedback loop process and key prevention steps

The loop works like this: a microphone picks up sound, an amplifier boosts it, a loudspeaker outputs it, and the acoustic energy from that speaker travels back through the air to the microphone. If the gain around that entire path is high enough, the signal reinforces itself rather than dying away. The pitch you hear is set by whichever frequency first satisfies two conditions simultaneously: loop gain ≥ 1 and a phase shift that is an integer multiple of 360°. This is the Barkhausen stability criterion applied to acoustic systems.

Gain, phase, and polarity in plain terms

  • Gain is how much the signal is amplified on each pass around the loop. A gain of exactly 1 (unity) means the signal neither grows nor shrinks. Above 1, it grows — fast.
  • Phase describes the timing relationship between the outgoing and returning signal. When the returning signal lines up with the original (in phase), the two add together constructively.
  • Polarity refers to whether the signal is inverted. A polarity flip can sometimes reduce feedback by causing partial cancellation, though it is not a reliable fix on its own.

“Feedback is governed by phase, gain and polarity. Managing those three pillars lets operators control feedback rather than panic-react.” — Front of House Magazine

The acoustic travel time between a monitor loudspeaker and a microphone is typically 5–15 ms. That delay determines which frequencies are most likely to feed back first, because it sets the spacing between potential feedback bands. A longer acoustic path slows the growth rate slightly but creates more closely spaced candidate frequencies — meaning more potential problem bands to manage, not fewer.

When the loop gain exceeds unity, the level rises until the amplifier clips, which limits the gain back to exactly 1. That clipping is what locks the feedback into a sustained, distorted tone rather than an ever-rising one.

Close-up microphone and speaker on stage floor


What makes feedback more or less likely in your setup?

Several physical and electrical factors interact to push a system toward or away from the feedback threshold. Knowing which ones apply to your setup tells you where to focus first.

Physical factors

  • Microphone polar pattern: an omnidirectional mic picks up sound from all directions, including directly from the loudspeaker. A cardioid or supercardioid pattern rejects sound arriving from the rear, giving you more gain before feedback.
  • Mic-to-speaker distance: the closer a microphone is to a loudspeaker, the stronger the return signal. Even moving a mic 30 cm further away can make a meaningful difference.
  • Speaker directivity: a tightly controlled speaker (a line array, for example) sends less energy toward the stage than a wide-dispersion box. Room acoustics and reflective surfaces increase feedback risk because reflections return sound unpredictably to microphones.
  • Monitor placement: a wedge monitor aimed directly at a microphone’s pickup capsule is one of the most common causes of stage feedback.

Electrical and system factors

  • Gain staging: too much gain at any point in the chain — preamp, channel fader, master — reduces the headroom before feedback.
  • Number of open microphones: every active mic adds to the system’s overall gain. The more open mics, the lower the threshold before feedback starts.
  • Frequency response peaks: a microphone or room with a resonant peak at a particular frequency reaches unity gain at that frequency before others. That is the pitch you hear first.
  • Time delay in the signal path: digital processing, long cable runs, and DSP all add latency, which shifts the probable feedback frequencies.

The small meeting room problem

Small, reflective meeting rooms are among the hardest environments to manage. Hard walls, glass partitions, and low ceilings create multiple unpredictable reflection paths. A single boundary microphone on a conference table, combined with a ceiling speaker directly above it, can produce feedback at conversational volume levels. The fix in that scenario usually involves tighter mic patterns, acoustic panels on at least two walls, and reducing the number of active microphone channels.

Small meeting room with conference microphone and table

Pro Tip: Reducing open microphones is the single highest-impact action you can take before touching any EQ. Muting unused channels costs nothing and immediately raises your gain-before-feedback headroom.

Factor Higher feedback risk Lower feedback risk
Mic polar pattern Omnidirectional Supercardioid / hypercardioid
Mic-to-speaker distance Close (under 1 m) Further away (2 m+)
Room surfaces Hard, reflective (glass, concrete) Treated with acoustic panels
Open microphones Many channels active Only mics in use are live
Monitor type Wedge aimed at mic In-ear monitor (IEM)

How to prevent and control feedback before and during events

Prevention is almost always easier than cure. The steps below are ordered by impact: start at the top and work down.

Step-by-step: setting up a UK live sound system to minimise feedback

  1. Position speakers in front of microphones. Place all front-of-house speakers forward of the performers’ mic positions. This is the single most effective structural fix.
  2. Choose directional microphones. Cardioid mics reject sound from the rear; supercardioid and hypercardioid patterns offer even tighter rejection. For conference setups, consider a conference mic system with boundary or gooseneck elements that sit close to the source.
  3. Set gain staging correctly. Bring each channel’s preamp gain up until the signal peaks around 0 dBVU on the channel meter, then set faders at unity. Never compensate for low gain with a high master fader.
  4. Mute all unused channels. This is non-negotiable. An open mic with no one speaking still picks up room sound and contributes to the loop.
  5. Ring out the system. Bring the master level up slowly until you hear the first hint of feedback, then use a parametric or graphic EQ to cut that frequency by 3–6 dB. Repeat until you have 6 dB of headroom above your intended operating level. Experienced engineers avoid aggressive wide cuts to preserve tonal balance.
  6. Apply EQ notches after all other settings are finalised. Phase-altering settings (crossovers, delays, speaker processing) shift the feedback frequencies. Notch after those are locked in.
  7. Consider in-ear monitoring. Replacing wedge monitors with IEMs removes one of the most common acoustic feedback paths on stage entirely.

Equipment options and trade-offs

  • Parametric EQ: precise, narrow cuts at exact problem frequencies. Best for permanent installations and experienced operators.
  • Graphic EQ: faster to use live, but cuts are fixed at ISO centre frequencies, which may not match the exact feedback pitch.
  • Automated feedback suppressors: use auto-notching, frequency shifting, or adaptive filters. Auto-notching is the most common approach; frequency shifting can add subtle pitch artefacts; adaptive filter models require accurate speaker modelling to work well.
  • Headset microphones: keeping the capsule close to the mouth means the gain can be lower overall, reducing feedback risk. A headset microphone is often the fastest practical fix for a presenter in a reflective room.
  • Lapel microphones: a Sennheiser lapel microphone worn close to the chest gives consistent level and keeps the capsule well away from monitor speakers.

Feedback frequency ranges to know

When ringing out, the pitch tells you roughly where to look on the EQ:

  • Hoot or howl (250–500 Hz): low-mid range, often caused by room modes or proximity to a subwoofer.
  • Singing tone (around 1 kHz): mid-range feedback, common in vocal-heavy setups.
  • Whistle (above 2 kHz): high-frequency feedback, often linked to mic capsule resonance or a bright room.

Pro Tip: When notching, keep your Q (bandwidth) narrow — a cut of 3–6 dB over roughly one-third of an octave is usually enough. Wide cuts remove too much programme material and make the system sound thin. If you need more than six notches to stabilise a system, the root problem is gain staging or placement, not EQ.

SPL safety note: Sustained feedback above 85 dB SPL causes hearing damage with prolonged exposure. When ringing out a system, keep the level as low as practical, limit exposure time, and use hearing protection. The Health and Safety Executive sets the lower exposure action value for UK workplaces at 80 dB(A) daily average.


Quick troubleshooting checklist when feedback starts

Use this sequence the moment you hear feedback. Speed matters — the loop grows fast.

  1. 0–5 seconds: mute the master output. This breaks the loop immediately. Do not reach for EQ first.
  2. 5–10 seconds: mute suspected channels. Unmute them one at a time to identify the offending microphone.
  3. 10–30 seconds: reduce monitor level. Lower the monitor send for the affected channel by 3–6 dB before bringing the master back up.
  4. 30–60 seconds: reposition the microphone. Move it further from the speaker or rotate it so the rear null of the polar pattern faces the monitor.
  5. 1–3 minutes: apply an EQ notch. Find the feedback frequency (use your ear or an RTA if available) and cut it by 3–6 dB with a narrow parametric band.
  6. 3–5 minutes: switch to a headset or IEM if available. If the problem persists, a headset or in-ear monitor removes the acoustic path causing the issue.
  7. If the tone persists after all of the above: pull the mains and check for a signal routing error — a channel may be feeding back through a return or effects loop rather than the main acoustic path.

The most common mistake is reaching for the EQ before muting. Notching a live feedback loop while it is screaming is difficult and slow. Mute first, fix second, unmute carefully.


When feedback is the point: deliberate uses in music and sound design

Not all feedback is a problem. Some of the most distinctive sounds in recorded music come from controlled feedback, and understanding how it is managed creatively reinforces why the physics matter.

  • Electric guitar sustain: a guitarist standing close to an amplifier allows the string vibration to be sustained by the returning acoustic energy. Jimi Hendrix and Carlos Santana used this extensively. The key is keeping loop gain just below the runaway threshold so the note sustains rather than explodes into noise.
  • Experimental sound design: composers and producers route signals through effects chains with deliberate return paths, shaping the feedback with filters and delays to create evolving textures. The loop gain is kept below unity for a decaying tail, or modulated to create pitch-shifting effects.
  • Effects pedals: dedicated feedback pedals and infinite-sustain devices use internal gain control to hold the loop at exactly unity, producing a note that sustains indefinitely without growing.

Creative feedback control works by keeping gain below unity for a decaying tail or by shaping the frequency response so only a narrow band feeds back. The moment gain exceeds unity across a broad range, the sound becomes uncontrolled. SPL management is critical in any deliberate feedback setup — studio monitors should be positioned carefully, and performers should wear hearing protection during extended sessions. For a deeper look at how speaker and microphone positioning affects acoustic interactions, the spatial audio principles involved are the same whether the goal is feedback prevention or creative control.


How AV professionals manage feedback at events

Professional audio engineers do not wait for feedback to happen. They design it out of the system before the first guest arrives.

Professional workflows

  • System design: an engineer calculates gain-before-feedback margins during the planning stage, choosing speaker positions, mic types, and signal routing to maximise headroom before a single cable is plugged in.
  • Measurement and ring-out: using a real-time analyser (RTA) and a measurement microphone, the engineer identifies frequency response peaks in the room and applies targeted EQ cuts before the system goes live.
  • Monitor management: professional engineers use managed monitor wedges with individual sends per performer, or specify IEMs to eliminate wedge-related feedback paths entirely.
  • Automated suppression: in complex installs (conference centres, broadcast studios, houses of worship), automatic notching units handle feedback that develops during a session without requiring manual intervention.

Professional tools

  • Real-time analysers (RTA): display the frequency content of the room signal in real time, making feedback frequencies visible before they become audible.
  • Parametric EQs: allow precise, narrow cuts at exact problem frequencies identified by the RTA.
  • Measurement microphones: flat-response mics used specifically for system calibration, not for picking up speech or music.
  • Automatic notching units and feedback suppressors: DSP-based devices that detect and notch feedback frequencies autonomously.
  • In-ear monitor systems: wireless IEM packs that deliver a personal mix directly to performers’ ears, removing the need for floor wedges.

Understanding room acoustics is foundational to all of this — the way a room’s surfaces, dimensions, and materials interact with a sound system determines where feedback will occur before any microphone is switched on.

When to hire a professional AV engineer

Some situations genuinely require expert support:

  • A complex venue with multiple speaker zones, balconies, or unusual geometry.
  • A high-stakes corporate conference or broadcast where feedback would be professionally damaging.
  • A repeated feedback problem that persists despite basic fixes — this usually indicates a system design issue, not an operator error.
  • Any event where the speaker or performer cannot tolerate interruptions (keynotes, award ceremonies, live broadcasts).

Pro Tip: Ask your AV engineer to show you the gain-before-feedback margin they have achieved during ring-out. A well-designed system should have at least 6 dB of headroom above the intended operating level. If they cannot tell you the number, that is worth asking about.


Key takeaways

An audio feedback loop starts the moment loop gain reaches unity at a frequency arriving in phase — and the fastest way to stop it is to mute the master output before touching anything else.

Point Details
Core condition for feedback Loop gain ≥ 1 at a frequency where the phase shift is a multiple of 360° causes sustained oscillation.
Three highest-risk factors Too many open mics, monitor wedges aimed at microphones, and reflective room surfaces each independently push a system toward feedback.
Four immediate fixes Mute the master, mute the suspected channel, reposition the mic, and reduce the monitor send — in that order.
Hearing safety Feedback can reach damaging SPL in fractions of a second; wear hearing protection when troubleshooting live systems.
Fireflyav’s role Fireflyav provides system design, ring-out, and on-site technical support to prevent feedback at corporate events, conferences, and live productions.

A practitioner’s view on feedback

The thing most people get wrong about feedback is treating it as an emergency rather than a symptom. When a system feeds back, it is telling you something specific: the gain around a particular acoustic path has exceeded unity at a particular frequency. That is not chaos — it is information.

The engineers who handle feedback best are the ones who have already thought about it before the event starts. They have checked monitor placement, muted unused channels, and rung out the system with enough headroom that a presenter moving toward a speaker does not immediately trigger a loop. The ones who struggle are the ones who set everything to maximum and then wonder why the room is screaming.

There is also a tendency to over-rely on automated feedback suppressors as a substitute for good system design. A suppressor can save you in a pinch, but if you are burning through notches during a show, the underlying problem is gain staging or placement. Fix the root cause; use the suppressor as a safety net, not a first line of defence.

The single habit that separates competent engineers from reactive ones: always check monitor placement before touching the EQ. A wedge aimed at a microphone’s capsule will feed back regardless of how many notches you apply.


Fireflyav can handle the feedback so you do not have to

Persistent feedback at a corporate event or conference is not just annoying — it undermines the credibility of the whole production. Fireflyav’s technical team designs audio systems from the ground up with feedback prevention built in: speaker positioning, gain-before-feedback measurement, ring-out, and on-site engineer support throughout the event.

Fireflyav

Whether you are planning a conference, a broadcast, or a live production, Fireflyav supplies the equipment and the expertise to keep your audio clean. Browse the AV equipment guide for event planners for a broader overview of what a well-specified system looks like, or go straight to the product enquiry form to tell us about your event and get a tailored recommendation. The team is ready to help you build a system that works — quietly, reliably, and without the screech.


Useful sources and further reading

The following sources informed this article and are worth reading if you want to go deeper on any aspect of audio feedback.

Source What it covers Why it matters
Wikipedia: Audio feedback Full technical definition, Barkhausen criterion, signal-flow diagram Best starting point for the physics and history of the Larsen effect
Shure: How to control feedback Practical prevention methods, ringing out, IEM recommendation Manufacturer-level guidance backed by decades of live-sound experience
Rane: Understanding acoustic feedback and suppressors DSP suppression methods, auto-notching, adaptive filters, delay effects Detailed technical note on suppressor trade-offs; essential for installed-audio engineers
Front of House Magazine: The science behind feedback Phase, gain, polarity explained for working engineers Practical framing of the Barkhausen criterion for live-sound operators
Anchor Audio: How to avoid feedback at live events Small-venue and live-event practical tips Useful for event planners managing smaller or reflective spaces

For equipment-specific behaviour, always consult the manufacturer’s technical documentation for your microphone, mixer, and speaker. If you are dealing with a persistent or venue-specific feedback problem, contact a qualified AV engineer rather than relying solely on general guidance.

"


Audio feedback loop: what it is and how to stop it

9/07/2026

Event producer managing live IMAG projection

"

IMAG (image magnification) is the live projection of close-up video of stage presenters and performers onto large screens so the whole audience can read facial expressions and body language. It is not slides, not playback footage, not a pre-recorded loop. It is a live camera feed, magnified in real time, so the person in row 40 sees exactly what the person in row 3 sees.

The single strongest reason to use it: distance kills engagement. When attendees cannot read a speaker’s face, they disengage. IMAG closes that gap.

IMAG is typically essential at:

  • Large conference halls and hotel ballrooms where rear seats are at a significant distance from the stage
  • Concerts and music festivals with standing crowds or tiered seating
  • Stadiums and arenas for sports, awards, and graduation ceremonies
  • Houses of worship with large congregations
  • Keynote sessions where a speaker’s non-verbal cues carry as much weight as their words

Table of Contents

What does IMAG mean, and where did it come from?

IMAG stands for image magnification: the technique of capturing live footage of on-stage talent and projecting it at scale so distant audience members can follow facial expressions and subtle stage detail. Practitioners use the term interchangeably with “I-mag” or simply “mag” in production shorthand.

The technique grew out of stadium rock tours in the 1970s and 1980s, when acts like The Rolling Stones needed audiences 200 metres from the stage to feel connected to the performance. Early systems used analogue cameras feeding CRT-based projection screens, often called jumbotrons. By the 2000s, digital video switchers, high-brightness projectors, and eventually LED walls replaced those systems entirely, bringing broadcast-quality imagery to corporate conferences and cultural venues.

One important distinction matters: IMAG is not the same as slide projection or content playback. Slides or pre-recorded video on a screen do not qualify as IMAG. The defining characteristic is a live camera feed of the performer or presenter, cut and switched in real time. A conference that shows PowerPoint decks on flanking screens is not running IMAG unless there is also a live camera feed of the speaker.

Infographic explaining IMAG definition and history

Modern IMAG setups frequently integrate with livestreaming and multi-feed LED systems, meaning the same camera infrastructure that serves the room can simultaneously feed a broadcast or online audience.


Why does IMAG matter for your event?

The most immediate benefit is visibility. IMAG is common in venues where significant distances separate the stage from the back row — stadiums, conference centres, hotel ballrooms — and it has become a practical standard rather than a luxury add-on. When a keynote speaker pauses for effect, raises an eyebrow, or makes eye contact with the camera, those cues land for every seat in the room, not just the front third.

Emotional engagement follows from visibility. Audiences respond to faces. A tight headshot of a speaker landing a key point creates a shared moment across a room of 500 people in a way that a distant silhouette simply cannot.

Accessibility is an underappreciated benefit. Attendees who are hard of hearing rely heavily on lip-reading and facial cues. A well-framed IMAG feed, particularly when paired with a conference mic system and clear audio, makes a large event significantly more inclusive without additional infrastructure.

Typical use cases where IMAG changes outcomes:

  • Corporate keynotes and town halls with large audiences
  • Worship services in large sanctuaries
  • Concerts and live music with tiered or standing audiences
  • Awards ceremonies where reaction shots matter as much as the stage action
  • Graduation and civic ceremonies in large auditoria

There is also a content angle that producers often overlook: using post-production and editing tools for turning IMAG footage into social edits; this is useful for producers planning content reuse. IMAG camera feeds are prime source material for highlight clips, social edits, and post-event assets — provided the footage is recorded with the right codecs and the shot choices are made with reuse in mind. The same operator who cuts the live show is, in effect, also shooting your post-event video package.


How does IMAG work? The technical signal chain

The core of any IMAG setup is straightforward: camera captures the performer, the signal is processed and switched, then distributed to screens. The complexity lives in the details of that chain.

Camera operator adjusting IMAG broadcast camera

A typical signal path runs: camera → capture/encoder → video switcher (programme/preview) → scaler or processor → distribution (SDI, NDI, or IP) → LED wall or projection screen.

Stage Typical hardware Key consideration
Capture Broadcast or ENG camera Long-zoom lens for mid-auditorium positions
Switching Video switcher (e.g. ATEM series) Programme/preview monitoring; multiview output
Processing Scaler / LED processor Resolution matching; colour grading for screen type
Distribution SDI cable runs or NDI over IP Cable length limits; network bandwidth for NDI
Output LED wall or high-brightness projector Ambient light levels; screen size vs. throw distance

Cameras with long lenses and large projection screens are the two non-negotiable ingredients. Everything else in the chain serves those two elements.

SDI (Serial Digital Interface) remains the standard for cabled runs in professional venues because it is reliable over long distances and carries embedded audio. NDI (Network Device Interface) over IP is increasingly common for flexible, multi-camera setups where running coaxial cable is impractical, though it demands a managed network and introduces its own latency considerations.

Running separate feeds for projection and streaming is often the better approach. The IMAG feed for the room may be cropped tighter and colour-graded for the LED wall’s brightness, while the streaming programme feed needs a wider mix with more cutaways and context shots. Routing these separately from the switcher avoids compromise on both outputs.

Latency is the most damaging unseen factor in any IMAG setup. Even a modest delay between live sound and projected video creates a perceptible disconnect, particularly for audience members seated close to the stage where they can hear the speaker directly and simultaneously watch the screen. Solving it requires low-latency encoders, a high-quality switcher, and careful monitoring of audio-video sync throughout the show. Signal delay between live sound and projected video can create a perceptible disconnect if the processing chain is not optimised.

Pro Tip: Ask your AV supplier to specify the end-to-end latency of the proposed signal chain before the event. Anything above two frames (roughly 66ms at 30fps) is worth querying, especially in venues where the front rows are close to the PA.


Camera placement, framing, and the operator’s role

Getting the hardware right is table stakes. What separates a good IMAG show from a distracting one is the human layer: where cameras sit, how operators frame shots, and how the director cuts between them.

Camera placement trade-offs:

  • Mid-auditorium riser: The most common position for a primary IMAG camera. It gives a clean sightline to the stage without obstructing the audience, and a long-zoom broadcast lens (some productions use lenses in the 80x zoom range) can pull tight headshots from 20–40 metres. The trade-off is that the riser itself blocks a small section of seats behind it.
  • Stage-level platforms: Useful for wide establishing shots or two-shots during panel discussions. They cannot achieve the tight facial close-ups that mid-auditorium positions deliver, but they add variety and context.
  • Roving handheld: Adds energy for concerts or awards shows, but requires an experienced operator and a director who can anticipate movement.

Shot language for IMAG:

  • Tight headshot (head and shoulders) for solo speakers — the workhorse of any keynote feed
  • Two-shot for panel discussions or presenter handovers
  • Cutaway to audience reactions during applause or emotional moments
  • Wide establishing shot to reorient the viewer after a sequence of close-ups

Operator skill — framing, rhythm, and knowing when to cut — often determines whether IMAG enhances or distracts from the live show. Hardware is secondary to the person behind the camera and the director calling the shots.

Crew roles in a standard IMAG setup:

  • IMAG camera operators (one per camera): responsible for framing, focus, and following the action
  • Video director / technical director (TD): calls cuts, manages the switcher programme output, and coordinates with the stage manager
  • Graphics operator: handles lower-thirds, titles, and any content that overlays the IMAG feed
  • Stage manager liaison: feeds cue information to the TD so cuts anticipate rather than chase the action

Pro Tip: Build a shot list and share it with camera operators before the tech rehearsal. Even a rough run-of-show with speaker names, transitions, and any planned audience reaction moments will halve the number of awkward cuts on the day.


Event crew planning IMAG camera shot list

When should you use IMAG, and when should you skip it?

The rule of thumb: if attendees in the back third of your venue cannot comfortably read a presenter’s facial expressions, you need IMAG. IMAG is a practical solution for large-scale indoor events — not just stadium shows. A hotel ballroom with a sizable number of guests and a stage at one end qualifies.

Use IMAG when:

  • The venue has a large audience capacity and a fixed stage at one end
  • The programme relies on speaker credibility, emotional delivery, or subtle non-verbal cues
  • You are simultaneously livestreaming and want broadcast-quality camera coverage
  • Accessibility is a priority and attendees rely on lip-reading

Consider skipping IMAG when:

  • The room is intimate (under 100–150 seats) and every attendee has a clear sightline
  • The format is theatre-in-the-round or traverse staging, where camera rigs would obstruct sightlines from multiple angles
  • The performance relies on the audience experiencing unmediated stagecraft — certain theatrical productions or immersive experiences where a screen would break the fourth wall
  • The budget genuinely cannot accommodate a skilled operator and director alongside the hardware

Poorly executed IMAG is worse than no IMAG. Jarring cuts, soft focus, a camera that pans a beat behind the action, or a screen that shows the wrong speaker during a panel — these actively undermine the event. If the budget only stretches to equipment and not to an experienced operator and TD, it is worth reconsidering the scope.


Production planning, costs, and timeline for UK events

Good IMAG production starts weeks before the event, not on the morning of the show.

Site survey checklist:

  • Measure sightlines from the back row to the stage; confirm the maximum distance a camera must cover
  • Identify rigging points and load ratings for screens and camera platforms
  • Check power availability at each camera and screen position
  • Confirm cable routes for SDI runs or network infrastructure for NDI
  • Note ambient light levels that will affect screen brightness requirements
  • Check for event power distribution capacity at the venue

Sample shot list for a 45-minute keynote:

  • Opening: Wide establishing shot as speaker walks on; cut to tight headshot once at the lectern
  • Body: Tight headshot as default; two-shot if a co-presenter joins; cutaway to slides when speaker references screen content
  • Q&A: Roving or stage-level camera for audience questioners; tight headshot of speaker responding
  • Close: Wide shot for applause; tight headshot for final remarks

Timeline milestones:

  • 6–8 weeks out: Confirm camera count, lens hire, screen type (LED wall vs. projector), and crew
  • 2–3 weeks out: Site survey; confirm rigging and power with the venue
  • 1 week out: Distribute shot list and run-of-show to camera operators and TD
  • Day before / morning of: Pre-rig and cable test; switcher build and multiview check
  • Tech rehearsal: Full run with all cameras live, latency check, audio-video sync confirmed

UK cost considerations: IMAG budgets vary considerably depending on camera count, lens specification, screen size, and crewing hours. A two-camera conference setup with a basic LED screen and a half-day crew will sit at a different price point from a four-camera festival rig with broadcast lenses and a full production team. Lens hire alone for long-zoom broadcast glass can represent a meaningful share of the equipment budget. The most reliable approach is to request an itemised quote from your AV supplier once the site survey is complete, as venue-specific factors (rigging complexity, cable runs, power requirements) shift costs significantly. For corporate events using AV, building IMAG into the initial brief rather than adding it later almost always reduces cost.


How Fireflyav approaches IMAG for UK events

Fireflyav supplies and operates IMAG systems for corporate conferences, cultural events, and live productions across the UK. The team covers the full signal chain: camera hire, lens specification, switching, LED wall or projection, and the experienced operators and technical directors who make the difference between a clean show and a distracting one.

Two typical configurations:

Conference two-camera IMAG package: Two broadcast cameras (one mid-auditorium on a riser, one stage-level for wide shots and panels), a video switcher with programme/preview monitoring, a scaler, and flanking LED screens or a central projection screen. Suited to keynote conferences, town halls, and awards evenings with 200–800 attendees.

Single-camera IMAG with LED feed: One mid-auditorium camera with a long-zoom lens feeding a central LED wall. A leaner setup for smaller conferences or events where budget is tighter but visibility is still a priority. Can be extended with a streaming output for hybrid events.

For a site survey or a detailed quote, submit your project details and the Fireflyav team will scope the right setup for your venue and programme.


Health and safety when using IMAG equipment

IMAG setups introduce several physical hazards that require proper planning and, in many cases, qualified personnel.

Rigging screens and camera platforms: Any suspended LED wall or projection screen must be rigged by a qualified rigger and load-tested against the venue’s certified rigging points. In the UK, the Work at Height Regulations 2005 apply to any rigging work, and venues will typically require a method statement and risk assessment before permitting overhead loads. Camera platforms and mid-auditorium risers must be structurally rated, non-slip, and fitted with appropriate edge protection if operators are working at height.

Cabling: SDI and power cables running across audience areas must be covered with cable ramps or routed overhead to prevent trip hazards. All electrical connections should be PAT-tested and installed by a competent person. In venues with existing house systems, confirm that additional loads will not exceed circuit capacity.

Screen placement and sightlines: Screens positioned at the sides of a stage can create sightline obstructions for seated audiences. Confirm screen height and angle during the site survey to avoid blocking emergency exit signage or fire safety equipment.

Laser and light hazards: High-brightness projectors and certain LED processors emit intense light. Operators should avoid looking directly into projector beams, and beam paths should be clear of audience eye level where possible.

A pre-event risk assessment covering all of the above, shared with the venue’s health and safety lead, is standard practice for professional IMAG productions in the UK.


Key takeaways

IMAG is the most direct tool for closing the distance between a performer and a distant audience, and its value extends well beyond stadium shows to any UK event where non-verbal communication matters.

Point Details
Definition IMAG (image magnification) is live camera footage of on-stage talent projected in real time onto large screens.
When to use it Any venue where rear-seat attendees cannot read facial expressions — typically 200+ seats with a fixed stage.
Operator skill matters most Hardware is secondary; an experienced camera operator and TD determine whether IMAG enhances or distracts.
Plan for content reuse Record IMAG feeds with broadcast codecs and shot choices made for post-event edits and social assets.
Fireflyav Fireflyav supplies full IMAG setups for UK corporate and cultural events, from site survey through to show operation.

The part most producers get wrong

The conversation around IMAG almost always gravitates to kit: how many cameras, which LED wall, what resolution. That is the wrong starting point.

The single biggest variable in IMAG quality is the relationship between the video director and the stage manager. When those two people are not communicating in real time, the director is always a beat behind the action. Cuts happen after the moment, not with it. The audience on the screen is perpetually watching the aftermath of what just happened on stage.

The second thing producers underestimate is performer preference. Some speakers find a live close-up feed deeply distracting, particularly if the screens are in their eyeline. Others actively play to the camera once they know it is there. Neither response is wrong, but neither should come as a surprise on the day. A five-minute conversation with your keynote speaker about where the cameras will be and what the screens will show is worth more than an extra hour of tech rehearsal.

IMAG done well is invisible. The audience stops thinking about the screens and starts thinking about the content. That is the goal, and it is achievable with the right crew, a clear shot list, and a director who knows when to hold.


Fireflyav can handle your IMAG from site survey to show day

If you are producing a UK conference, cultural event, or live show where visibility and audience engagement matter, Fireflyav offers end-to-end IMAG support: equipment specification, lens hire, LED screen or projection setup, and the experienced operators who run it on the day.

Fireflyav

Rather than piecing together a rig from multiple suppliers and hoping it integrates cleanly, Fireflyav brings the full signal chain under one roof. That means one point of contact for the site survey, the tech rehearsal, and the show itself — and a team that has already solved the latency, sync, and sightline problems you would otherwise discover on the morning of the event. For producers who want to understand the full scope of AV equipment for your event before committing to a spec, that resource is a practical starting point. When you are ready to move forward, submit your project details for a tailored quote or site survey.


Useful sources

  • IMAG — Wikipedia: The canonical definition of image magnification, covering latency, audio-video sync, and common production contexts. A reliable starting reference for producers new to the term.
  • What is IMAG? — Streaming Media Producer: Practical production-level breakdown of IMAG hardware, operator roles, and the distinction between IMAG and slide projection. Useful for briefing AV suppliers.
  • IMAG for event planners — Bloom.io: Planner-focused overview covering use cases, venue types, and lens requirements. Good for producers scoping IMAG for the first time.
  • IMAG — Wiktionary: Concise lexical definition confirming the acronym expansion and standard usage in live concert and event production.
  • Fireflyav — LED screen setup for live events: Technical guidance on LED wall configuration, sightline planning, and screen placement relevant to any IMAG setup.
  • Fireflyav — Audio visual equipment explained for event planners: Practical AV vocabulary and equipment explanations for producers scoping IMAG requirements and briefing rental houses.
"


IMAG for event producers: what you need to know

8/07/2026
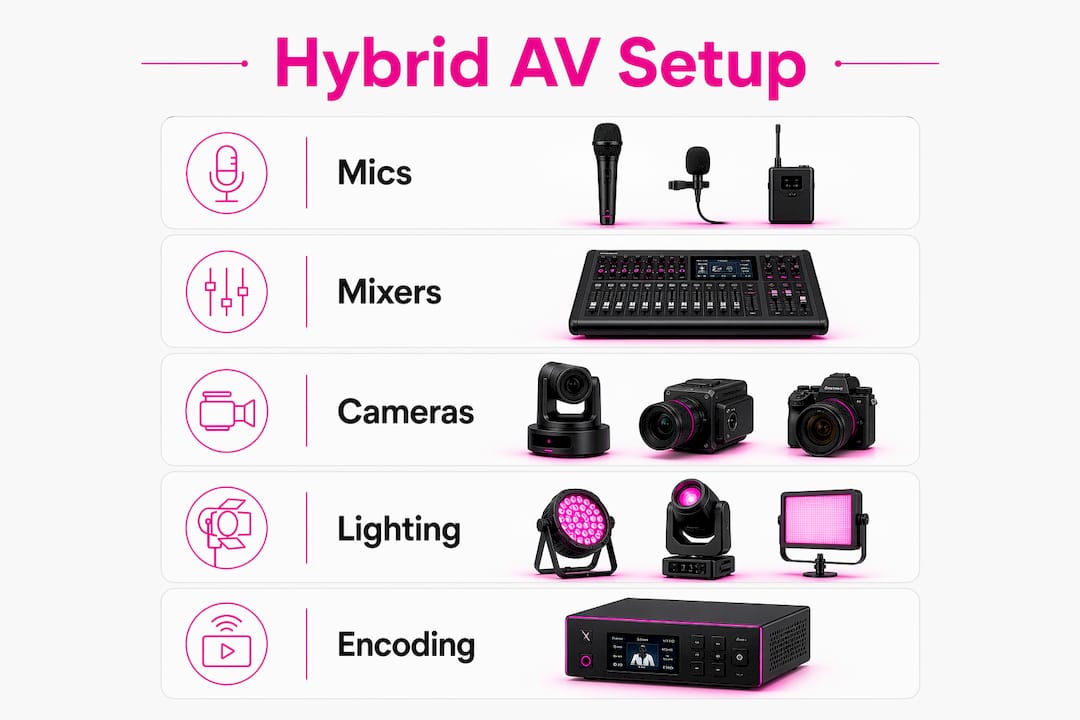
Technician managing audio mixer at hybrid event

"

Hybrid event AV is the coordinated audio-visual, networking, and production workflow that delivers two simultaneous shows from a single event: one optimised for the room and one built for remote viewers. Get that definition wrong at the scoping stage and you will under-resource one audience or the other. Three things to do right now: confirm your expected audience split (room versus remote); scope two independent audio paths from the outset; and request a dedicated wired uplink with confirmed upload capacity from the venue before you sign the contract.

Infographic illustrating hybrid AV equipment setup steps

Pro Tip: The audio engineer is the most underrated hire on a hybrid show. Room PA and streamed audio need completely different treatment — compression, EQ, and mix levels that work on a laptop speaker bear no resemblance to what fills a conference hall. Budget for both, separately, from day one.


Table of Contents

What actually makes an event hybrid?

A hybrid event combines a live, in-person gathering with a simultaneous remote audience joining via a video stream. That sounds obvious, but the boundary matters when you are scoping AV, because the production requirements shift dramatically depending on which category your event falls into.

Three formats are commonly confused:

  • Virtual event: 100% online, no physical venue, all attendees join via a platform such as Zoom or Microsoft Teams.
  • Filmed-for-web: a live event recorded and published afterwards, with no real-time remote audience.
  • Hybrid event: in-person attendees and remote viewers participate at the same time, with interaction flowing between both groups.

The distinction between filmed-for-web and hybrid catches planners out more than any other. If your remote audience watches a replay tomorrow, you are not running a hybrid event and you do not need a streaming engineer on the day. If they are watching live and submitting questions, you absolutely do.

Three misconceptions that inflate or wreck hybrid AV budgets:

Myth Reality
“Audio is audio — one mix covers both.” Room PA and stream audio require separate mixes with different processing. A mix that sounds full in a hall sounds muddy on a laptop speaker.
“One fixed camera is enough for remote viewers.” A single fixed camera fails to convey the event narrative; a minimum of two cameras (wide and close) is the accepted baseline.
“Venue Wi-Fi will handle the stream.” Venue Wi-Fi is shared, unmanaged, and unreliable for primary uplink. A dedicated wired connection is non-negotiable.

A quick reference for common scenarios:

Scenario Hybrid?
Conference with live stream and remote Q&A Yes
Webinar with no physical venue No — virtual
Award ceremony filmed and posted next day No — filmed-for-web
Town hall with remote staff joining live Yes

Which hybrid format suits your event?

Hybrid events are widely used for conferences, product launches, and corporate summits. The format you choose drives your staffing, kit list, and budget more than almost any other single decision.

Event planners discussing hybrid event formats

Simulcast is the most common starting point: the in-room programme is broadcast live to remote viewers with minimal additional interaction. Production complexity is relatively low, and it suits internal town halls or large conferences where the primary goal is reach rather than deep remote engagement.

Broadcast-first flips the priority: the stream is the primary product and the room is secondary. Think of a product launch where the global online audience dwarfs the room. Camera placement, lighting, and audio are all optimised for the stream, and the in-room experience is almost incidental.

Studio hub places the main production in a purpose-built or dressed studio environment, with the room audience either absent or minimal. This gives maximum control over the broadcast output and suits high-production corporate communications or executive briefings.

Multi-hub connects two or more physical locations simultaneously, each with its own AV setup, all feeding into a single broadcast. The complexity and crew requirements multiply with each additional site.

Watch party is the lightest format: remote viewers gather in secondary venues to watch the primary event together, with limited two-way interaction. It suits large-scale conferences where satellite offices want a shared viewing experience.

Format Audience size Interaction level Production complexity
Simulcast Any Low–medium Low
Broadcast-first Large remote Low Medium
Studio hub Small room, large remote Medium High
Multi-hub Multiple sites High Very high
Watch party Large distributed Low Low–medium

Format choice has a direct cost implication. A Zoom-style internal simulcast sits at the lower end of the budget range; custom RTMP integrations and broadcast-grade multi-hub productions escalate costs significantly.


What AV equipment do you need for a hybrid event?

The kit list for a hybrid event is longer than most planners expect, because you are effectively running two technical chains from the same stage. The table below maps each item to its function and a working minimum specification.

Equipment Purpose Minimum spec
Boundary / lapel microphones Capture speaker audio cleanly for both room and stream Cardioid or hypercardioid; low self-noise
Audio mixer Manage room PA and create a separate stream mix Digital console with aux send for stream feed
Cameras Cover wide shot and close-up for remote viewers Minimum two: one wide, one close; matched colour profiles
Video switcher Cut between camera feeds and graphics in real time HDMI or SDI inputs; downstream key for graphics
Encoder Convert video signal to a streamable format Hardware encoder preferred over software for reliability
Confidence monitors Allow speakers to see slides and running time Positioned below camera eyeline
Broadcast lighting Illuminate speakers for camera, not just room comfort Key light, fill, and backlight as minimum
Intercom system Keep crew in contact across room, stream desk, and remote Wired or wireless belt-pack system
Isolated recorder Record a local backup of the full programme SSD-based; independent of the stream path

For audio visual equipment selection, the split between must-have and nice-to-have is worth spelling out clearly.

Must-have kit:

  • Dedicated audio mixer with a separate stream aux send
  • Minimum two cameras with a hardware switcher
  • Hardware encoder (a Blackmagic ATEM Mini Pro or equivalent)
  • Confidence monitors for every speaker position
  • Isolated local recorder as a stream backup

Nice-to-have upgrades:

  • Robotic PTZ cameras for unmanned wide shots
  • Broadcast-grade lighting rig with DMX control
  • Dedicated graphics workstation for lower-thirds and overlays
  • In-ear monitoring for the producer

Pro Tip: Place confidence monitors directly below the camera lens so speakers maintain natural eye contact with the remote audience. A speaker who reads slides off a screen to the side looks disengaged on camera, even when the room feels perfectly natural.

Lighting deserves a specific note. What feels pleasant in the room often does not read on camera. Ambient house lighting creates flat, unflattering footage. A dedicated key light, fill, and backlight for each speaker position is the minimum for footage that looks intentional rather than accidental.


How does signal flow and networking work for hybrid streaming?

The canonical signal path for a hybrid event runs: stage microphones and cameras → audio mixer and video switcher → hardware encoder → CDN or streaming platform. The split between the room and the stream happens at two points: at the audio mixer (where the stream aux send branches off from the room PA feed) and at the video switcher (where the programme output feeds both the in-room screens and the encoder input).

Common transport protocols and when to use them:

  • SDI (Serial Digital Interface): the standard for professional video over longer cable runs within a venue. Reliable, uncompressed, and the default choice for camera-to-switcher connections.
  • NDI (Network Device Interface): sends video over a standard IP network. Useful for multi-room setups or where running SDI cable is impractical, but requires a managed network with sufficient bandwidth.
  • SRT (Secure Reliable Transport): an open-source protocol designed for low-latency streaming over unpredictable networks. Increasingly the preferred choice for contribution feeds between venues and remote production.
  • RTMP (Real-Time Messaging Protocol): the most widely supported ingest protocol for streaming platforms including YouTube Live, Vimeo, and most event platforms. Used for the final delivery leg from encoder to platform.

Bandwidth and redundancy checklist:

  • Provision a dedicated wired fibre connection for the primary stream uplink; never share it with general venue internet.
  • Request a bandwidth test at least 30 days before the event to confirm upload capacity.
  • Provision a bonded 5G cellular connection as a backup uplink, ready to switch within seconds if the fibre drops.
  • Set Quality of Service (QoS) rules on the network to prioritise stream traffic over general browsing.
  • Run a local isolated recording to SSD throughout the event as a final fallback if both uplinks fail.

Pro Tip: Record locally to a dedicated SSD regardless of how confident you are in the uplink. A local ISO recording has saved more hybrid events than any redundant encoder. It costs almost nothing extra and gives you a broadcast-quality master for post-event use.


Who do you need on the crew for a hybrid event?

AVIXA guidance frames hybrid production as requiring real-time monitoring, AV/IT coordination, and technological integration across multiple endpoints. That translates into a crew structure that is meaningfully larger than a standard live event.

Core roles and responsibilities:

  • Producer: owns the run-of-show, calls camera cuts, manages remote Q&A, and ensures parity between the live and remote experiences. This role is distinct from the AV technician and must be budgeted separately.
  • Broadcast director / vision mixer: operates the video switcher in real time, cutting between cameras and graphics on the producer’s call.
  • Audio engineer: manages both the room PA mix and the separate stream mix simultaneously. These are two distinct jobs that one experienced engineer can handle with the right console setup.
  • Camera operators: one per camera position; a minimum of two for any hybrid event where the remote audience is a genuine priority.
  • Streaming engineer: configures and monitors the encoder, uplink, and platform ingest throughout the event.
  • Stage manager: manages speaker flow, timing, and on-stage logistics so the producer can focus on the broadcast.
  • IT/network technician: owns the network infrastructure, QoS settings, and uplink redundancy.
Role Pre-event Day-of
Producer Run-of-show, briefing remote speakers Call cuts, manage Q&A, monitor remote experience
Audio engineer Spec and test dual mix paths Operate room PA and stream aux simultaneously
Vision mixer Camera blocking, switcher programming Live switching, graphics playback
Streaming engineer Encoder config, platform test, bandwidth check Monitor stream health, manage backup uplink
Stage manager Briefing speakers, rehearsal schedule Speaker flow, timing, cue calls

For a mid-sized hybrid event with a moderate in-room audience, a realistic minimum crew is five: producer, audio engineer, vision mixer/streaming engineer combined, two camera operators, and a stage manager. Splitting the vision mixer and streaming engineer into two separate roles is worth the additional cost for events where the stream quality is a primary deliverable.


What venue considerations matter most for UK hybrid events?

Venue selection for a hybrid event is a different exercise from booking a room for a standard conference. Several factors that are irrelevant for an in-person-only show become critical when you are also producing a broadcast. For London venues and those across the UK, the following site-visit checklist applies.

Site-visit checklist:

  • Confirm dedicated power circuits for AV and lighting, separate from general venue power.
  • Identify rigging points above the stage for lighting bars and camera positions.
  • Check for AV exclusivity clauses in the venue contract — some venues require you to use their in-house AV supplier, which may not be capable of hybrid production.
  • Confirm loading access for broadcast equipment (flight cases, cable drums, lighting rigs).
  • Walk the sightlines from every camera position to the stage; identify any obstructions from pillars, décor, or audience seating.
  • Test the venue’s wired network infrastructure and confirm whether a dedicated circuit can be provisioned for the stream uplink.

Staging and audience placement for hybrid events differs from a standard conference layout. The run-of-show and camera blocking should inform the stage design, not the other way around. Speakers need to be positioned where camera lighting works, not just where the room looks good. Audience seating should not encroach on camera sightlines, which sometimes means sacrificing front-row seats to maintain a clean wide shot.

Pro Tip: Ask the venue whether their installed AV system can accept an external feed from your production desk. Many UK conference venues have fixed installed systems that conflict with brought-in broadcast kit. Clarifying this before the contract is signed avoids expensive workarounds on the day.

For staging specifics, conference staging essentials cover the physical setup considerations that apply equally to hybrid productions.

Technical rider questions to include for the venue:

  • What is the maximum upload bandwidth available on a dedicated circuit?
  • Are there AV exclusivity restrictions?
  • What rigging points are available and what are the load ratings?
  • Is there a dedicated production area or control room?
  • What is the venue’s policy on drilling, cable runs, and overnight access for setup?

Which streaming platforms work best for UK hybrid events?

Platform selection is partly a technical decision and partly a compliance one. The feature set needs to match your production workflow; the data storage and privacy practices need to satisfy UK data protection obligations.

Platform Chat Q&A Breakouts Branding control Max scale Analytics
Zoom Webinars Yes Yes Limited Moderate Basic
Microsoft Teams Live Events Yes Yes No Limited Moderate
Vimeo Livestream No No No High Unlimited Good
YouTube Live Yes Yes No Low Unlimited Good
Custom RTMP platform Varies Varies Varies Full Varies Full

For hybrid event engagement, platforms that support live polls, moderated Q&A, and real-time analytics give remote attendees a richer experience and give organisers measurable data on participation. AVIXA recommends selecting platforms specifically for their interaction features and analytics rather than defaulting to whichever tool the organisation already uses for internal meetings.

Integration notes: most production workflows feed the platform via RTMP ingest from the hardware encoder. Some platforms also support API-based logging of attendance and engagement data, which is useful for post-event reporting. Embed players allow the stream to be hosted on a branded event page rather than a generic platform URL, which matters for brand-controlled launches.

GDPR and UK data privacy: when you record a hybrid event and collect attendee data through a platform, you are acting as a data controller under UK GDPR. Platform selection should include checking where recordings and attendee data are stored (EU, UK, or US servers), whether the platform is a data processor under a signed Data Processing Agreement, and whether attendees have been informed that the event is being recorded. This is not a legal opinion; confirm your specific obligations with a qualified data protection adviser.


How should you rehearse and plan contingencies for a hybrid event?

The rehearsal is where hybrid events are won or lost. A run-of-show document that charts every speaker, cue, and screen change is non-negotiable; without it, the producer cannot call cuts and the stage manager cannot manage timing.

Rehearsal checklist:

  1. Test both audio paths (room PA and stream aux) with a speaker at the lectern and a remote listener monitoring the stream output.
  2. Run camera blocking with every camera operator; confirm framing for wide, mid, and close shots.
  3. Check confidence monitors from the speaker’s position; confirm slides advance correctly and the clock is visible.
  4. Connect at least one remote speaker via the platform and test their audio, video, and screen share.
  5. Run the full encoder-to-platform chain and confirm the stream is live and stable at the intended bitrate.
  6. Test the isolated local recorder and confirm files are writing correctly.
  7. Walk through the Q&A workflow: how questions reach the stage manager, how the producer cues the remote moderator, and how the audio engineer brings up remote audio.

Contingency items to have ready:

  • Backup encoder (a second hardware unit, pre-configured and cabled, ready to switch).
  • Spare lapel and handheld microphones, pre-tested.
  • 5G bonded hotspot, pre-authenticated and tested for upload speed.
  • Local SSD recording running throughout as a final fallback.
  • Printed run-of-show for every crew member (do not rely on shared screens alone).

Simple timeline template for a mid-sized hybrid event:

  1. T-30 days: bandwidth test at venue; platform account setup; technical rider issued to venue.
  2. T-14 days: run-of-show drafted; remote speaker briefing calls completed.
  3. T-2 days: equipment delivery and initial setup; network infrastructure tested.
  4. T-1 day: full technical rehearsal; camera blocking; dual audio path test; platform stream test.
  5. Day of: crew call 3–4 hours before doors; final checks on all signal paths; go/no-go confirmation 30 minutes before start.
  6. Post-event: local recordings transferred; platform recording downloaded; post-production assets prepared.

What does a hybrid AV setup cost and how long does it take to plan?

Budget and timeline are the two questions planners ask most often and get the least useful answers to. The honest position is that hybrid AV costs scale with format complexity, crew size, and production ambition.

Major cost drivers and their relative impact:

  • Audio (dual mix setup, engineer): high impact; cutting here creates the most noticeable quality drop for remote viewers.
  • Cameras and operators: high impact; two cameras and operators is the minimum; each additional camera adds cost linearly.
  • Streaming platform fees: medium impact; free platforms (YouTube Live) have no direct cost but limited branding control; enterprise platforms carry monthly or per-event fees.
  • Producer: medium-high impact; often omitted from budgets and then missed acutely on the day.
  • Dedicated bandwidth / network: medium impact; a managed fibre circuit from a specialist provider carries a day-rate cost that varies by venue and location.
  • Post-event editing and asset creation: variable; often underestimated, particularly when highlight reels or captioned recordings are required.

Budgets expand most sharply at three points: adding a second physical site (multi-hub), upgrading to broadcast-grade camera and lighting packages, and commissioning post-event content assets. For post-event video editing and conference highlight production, specialist tools and services add to the overall cost but significantly extend the event’s content lifespan.

Sample planning timeline for a 200-person hybrid event:

  1. Week 1–2: initial scoping, format decision, venue shortlist.
  2. Week 3–4: venue confirmed, AV supplier briefed, technical rider issued.
  3. Week 5–6: platform selected, remote speaker briefings scheduled, run-of-show drafted.
  4. Week 7: bandwidth test at venue, equipment list finalised.
  5. Week 8: full rehearsal day; contingency plan confirmed.
  6. Event day: crew call, final checks, live delivery.

A mid-sized hybrid event with a competent crew and proper redundancy typically requires several weeks of lead time from initial scoping to delivery. Compressing that timeline is possible but increases risk at every stage.


The unified production workflow: what experienced producers actually do

Hybrid production is not an in-person event with a camera bolted on. It is two distinct shows running simultaneously from shared content but separate technical chains. The remote audience needs a clean speaker audio mix, lighting that reads on camera, moderated Q&A, and visuals at livestream resolution. The room audience needs PA coverage, ambient energy, and a stage experience. These two outputs share a stage but diverge at every technical decision point.

The unified production workflow treats both endpoints as equal priorities from the moment of scoping. The producer is the person who holds both together in real time.

Production element Room requirement Stream requirement
Audio mix Full PA coverage, room reverb acceptable Compressed, dry mix; no room reverb; optimised for headphones
Camera Not applicable Minimum two cameras; matched colour; clean framing
Lighting Ambient comfort Key, fill, and backlight per speaker; camera-optimised colour temperature
Graphics Large screen, high resolution
Q&A Floor microphone or roving mic Moderated via platform; audio routed through stream mix

Audio is where the unified workflow is most commonly misunderstood. As veteran planner Marc Tatum notes, “audio is not simply audio” in hybrid events: room PA and streamed audio require fundamentally different treatment, and an audio engineer is not optional. The stream mix needs compression to control dynamic range, high-pass filtering to remove low-frequency room noise, and level management that accounts for the fact that most remote viewers are on laptop speakers or earbuds.

The producer role is equally distinct. A producer synchronises the run-of-show, manages remote Q&A, calls camera cuts, and ensures the remote experience matches the intent of the live show. Conflating this role with the AV technician is one of the most common and costly mistakes in hybrid event planning.

Pro Tip: Run a split-screen monitor at the production desk showing the room feed and the stream output side by side. It takes seconds to spot when the stream is lagging, when a camera cut looks wrong on the encode, or when a remote speaker’s audio has dropped. Without that comparison view, problems can run for minutes before anyone notices.


Fireflyav: full hybrid AV production for UK events

When the brief calls for a hybrid event that genuinely serves both audiences, Fireflyav delivers the complete production stack: site surveys, full AV hire, broadcast-grade streaming, on-site crew and producers, and rehearsal support. The difference between a hybrid event that works and one that quietly fails its remote audience usually comes down to whether the supplier has run these shows before and whether the crew is sized correctly from the start.

Fireflyav

Fireflyav operates across the UK, bringing broadcast-grade kit and experienced crew to corporate conferences, product launches, cultural events, and eSports productions. Every hybrid project includes a pre-event site visit to assess power, network infrastructure, sightlines, and AV exclusivity clauses before a single cable is ordered. UK health and safety compliance, including CDM regulations for rigging and electrical installations, is built into every production plan rather than treated as an afterthought.

For planners ready to specify their setup, the AV equipment guide covers kit options in detail. To start a scoping conversation, submit your project brief and a member of the team will respond with a technical outline and indicative costs.


Key takeaways

Hybrid event AV requires two independent technical chains, a dedicated producer, and a wired uplink — treating it as a filmed live event is the single most common and costly planning mistake.

Point Details
Confirm your audience split early The ratio of in-room to remote attendees determines crew size, camera count, and platform choice from the outset.
Budget for dual audio paths Room PA and stream audio need separate mixes and separate processing; one engineer, one console, two distinct outputs.
Never rely on venue Wi-Fi A dedicated wired fibre uplink and a 5G bonded backup are the minimum redundancy for any live stream.
A producer is not optional The producer role is distinct from AV tech: they call cuts, manage remote Q&A, and hold both shows together in real time.
Fireflyav covers the full stack Fireflyav provides site surveys, broadcast-grade kit, on-site crew, and rehearsal support for hybrid events across the UK.

Why the “just add a camera” instinct gets hybrid events wrong

The most persistent problem in hybrid event planning is not technical. It is conceptual. Planners who have run successful in-person events for years approach hybrid as an add-on: book the venue, plan the programme, then arrange for someone to point a camera at the stage and push it to a stream. The remote audience becomes an afterthought, served by whatever is left over after the room is sorted.

That instinct produces events where the in-room experience is polished and the stream is a shaky wide shot with room reverb and no Q&A moderation. Remote viewers disengage within twenty minutes, not because they lack commitment but because the production has communicated, clearly if unintentionally, that their presence does not matter.

The shift that actually works is treating the stream as a co-equal primary output from the first planning conversation. That means the lighting rig is specified for camera before it is specified for room comfort. The audio engineer’s first question is “what does this sound like on a laptop speaker?” The producer’s run-of-show has a column for remote viewer experience alongside the in-room programme. It is a different discipline from live event production, closer to broadcast television than conference management.

The good news is that the kit and crew to do it properly are not exotic. A hardware encoder, a second camera, a split audio mix, and a producer who has done it before will cover the vast majority of corporate hybrid events. The investment is modest relative to the cost of running a show that half your audience quietly abandons.


Useful sources and further reading

  • AVIXA: Hybrid event production guide — industry-standard guidance on AV/IT integration, real-time monitoring, and platform selection for hybrid productions; published by the global AV trade association.
  • InfoComm Show (infocommshow.org) — the leading AV industry trade show and professional development resource; useful for staying current on hybrid production technology and standards.
  • ISE Europe (iseurope.org) — Integrated Systems Europe; the primary European exhibition for AV and systems integration professionals, with extensive resources on hybrid and broadcast AV.
  • Stanford R&DE: AV requirements for digital and hybrid events — practical checklist covering camera minimums, run-of-show requirements, and technical rider guidance; a useful reference for planners specifying hybrid AV for the first time.
  • Fireflyav: audio visual equipment explained — Fireflyav’s planner-facing equipment guide covering kit categories, minimum specs, and hire options for UK events.
"


Hybrid event AV: a technical guide for UK planners

1/07/2026

Event designer arranging printed graphics in conference hall

"

What does an event graphics package actually include?

An event graphics package is a strategic collection of visual assets built to create a cohesive brand identity across every touchpoint of your event. Think of it as the visual rulebook for your event: logos, colour palettes, typography, imagery, and the templates that tie them all together. Without it, even a well-run event can feel disjointed.

These packages cover both physical and digital formats:

  • Core branding: Logo files, colour palettes (typically 2–4 core colours), and 2–3 standard fonts
  • Print assets: Banners, signage, programmes, lanyards, and badges
  • Digital assets: Presentation slide decks, social media graphics, email headers, and website visuals
  • Motion graphics: Animated logo loops, countdown timers, and sponsor idents for screens
  • Virtual event assets: Branded portals, virtual backgrounds, and lower-third overlays

The goal is consistency. Every asset, whether it appears on a registration desk banner or a post-event Instagram story, should feel like it belongs to the same world.

Table of Contents

What physical and digital components should you expect?

The specific deliverables vary by supplier and event scale, but most professional packages group assets into physical and digital categories.

Physical components typically cover venue signage, stage backdrops, wayfinding graphics, pull-up banners, and printed attendee materials. Digital components extend to presentation templates, motion graphics for LED screens from JupiterAV, social media content packs, and assets formatted for virtual event platforms.

Installer mounting wayfinding sign at event entrance

For hybrid events, the two categories must work in tandem. Phygital branding integrates physical assets with a digital twin of the event space, so the brand experience is identical whether an attendee is in the room or joining remotely. A stage that looks premium in person but streams like a low-budget webinar is a branding failure, not a technical one.

Infographic comparing physical and digital event graphics components

Pro Tip: Design your digital assets first. Screen-optimised graphics scale down to print more reliably than the reverse, and it saves a round of costly rework.

How do graphics packages scale from basic to full-service?

Packages generally fall into three tiers, and knowing which you need before briefing a supplier saves both time and budget.

  • Essentials tier: Core branding assets and a brand style guide. Suited to organisations with in-house design resource who need a foundation to build from, not a full production service.
  • Authority/mid-tier: A complete event brand, digital and print graphics, and a style guide. Covers virtual or in-person events with minimal signage requirements. Good for conferences and corporate away-days.
  • Signature Experience: The full package for large-scale in-person events. Concept development, venue signage, wayfinding, stage design, digital screen content, and social media assets. A standard sports motion graphics package at this level can include many distinct assets, from 3D logo loops to sponsor billboards.

Bespoke options sit above all three tiers. These are built from scratch around a specific event narrative, incorporating custom illustration, anamorphic floor graphics, or augmented reality elements.

Why does a professional graphics package improve your event?

Consistency is the most underrated driver of attendee trust. Strategic graphic design improves brand recall and turns ordinary events into memorable experiences. When every visual element reinforces the same message, attendees absorb it without consciously noticing.

There is also a practical case. Cluttered or inconsistent signage dilutes your core message and leaves guests confused about where to go or what to do. Clarity in visual strategy guides the guest experience as effectively as any floor manager.

Beyond the event itself, well-produced graphics generate shareable content. Attendees photograph striking backdrops and branded environments. That organic reach extends your event’s visibility long after the day itself.

Sustainability is increasingly part of the value proposition too. Modular, reusable components and digital signage replacing single-use print materials reduce waste and align with the expectations of modern audiences.

What are the key stages in producing event graphics?

Getting from brief to installed graphics involves more steps than most planners anticipate.

  • Brand and event identity briefing: Define the event’s narrative, audience, and tone before any design begins. Graphics serve a visual strategy, not mere decoration.
  • Design development: Create initial concepts, then test them across both physical and digital formats. A colour that reads well on screen can look flat on a printed banner under fluorescent lighting.
  • Dimension lock-in: Lock physical booth and signage dimensions early. Graphics designed for a 3×3m layout cannot simply be scaled to a 2×2m space without significant rework.
  • Collaboration with AV providers: Graphic designers and AV teams need to work together from the outset. Screen specifications, resolution requirements, and content management systems all affect how graphics are built.
  • Production and delivery: Print production timelines are longer than most people expect. Build in buffer time, particularly for large-format items.
  • Onsite setup and testing: Walk the venue before guests arrive. Lighting conditions, screen brightness, and physical placement all affect how graphics read in the room.
  • Post-event measurement: Track brand recall through attendee surveys, monitor social media engagement with event hashtags, and review which graphic assets generated the most interaction.

How Fireflyav integrates graphics with AV technology

Fireflyav specialises in AV equipment and technical support for corporate, cultural, broadcast, and live events, including eSports and corporate conferences. The distinction from a pure design agency is the technical layer: graphics do not exist in isolation at a live event. They run through LED walls, projection systems, video switchers, and content management platforms, all of which require specialist configuration.

Working with an AV provider like Fireflyav means your graphics package is built with the delivery infrastructure in mind from day one. A motion graphic designed without knowing the LED wall’s pixel pitch, for example, will not render as intended. Fireflyav’s teams work alongside graphic designers to specify assets correctly, manage content playback, and handle onsite technical delivery, so the visual experience matches what was designed.

For corporate events in particular, this integration matters. A keynote presentation with animated transitions, live data feeds, and branded lower-thirds requires precise coordination between the design and technical teams.

Pro Tip: Brief your AV provider at the same time as your graphic designer, not after. Retrofitting graphics to AV specifications costs more and produces worse results than designing them together.

Fireflyav brings your event graphics to life

Fireflyav is the technical partner that makes a graphics package perform at its best. Designing stunning visuals is only half the job. Getting them to display correctly across LED walls, projection screens, and virtual event platforms requires the kind of AV expertise that a design agency alone cannot provide.

Fireflyav

From corporate conferences to cultural events and eSports productions, Fireflyav supplies the equipment and on-the-ground technical support to deliver your graphics package exactly as intended. Whether you need AV equipment explained before you start planning, or you are ready to spec out your next event, the team at Fireflyav is the practical next step. Get in touch via the project enquiry form to discuss your event’s requirements.

Key takeaways

An event graphics package is most effective when design, production, and AV delivery are planned together from the outset.

Point Details
Definition A graphics package is a strategic set of visual assets covering logos, colour palettes, typography, signage, and digital media.
Package tiers Options range from Essentials (core assets and style guide) to Signature Experience (full venue and digital coverage).
Dimension planning Lock physical signage dimensions early; graphics for a 3×3m layout cannot be scaled to a 2×2m space without costly rework.
AV integration Graphics must be built to the specifications of the screens and systems that will display them, requiring early AV collaboration.
Fireflyav Fireflyav provides the AV equipment and technical support to deploy event graphics correctly across physical and digital environments.
"


What is a graphics package for events?

8/07/2026

Event planner reviewing AV logistics plans

"

Managing AV logistics across multiple venues is one of the most operationally demanding challenges in UK event production. Unlike single-venue work, multi-venue AV logistics requires coordinating transport routing, equipment warehousing, dock scheduling, crew deployment, and technical setup across several locations simultaneously. Miss one dependency and the knock-on effect travels fast. The core discipline here covers:

  • Transport scheduling: routing vehicles across venues with staggered load-in windows
  • Equipment warehousing and pre-staging: inventory audits, packing, labelling, and protection of sensitive gear
  • Dock management: per-venue capacity planning to prevent arrival conflicts
  • Cross-venue freight coordination: priority-aware sequencing so the right kit arrives first
  • Personnel coordination: crew allocation, travel scheduling, and on-site supervision
  • Customs compliance: ATA Carnets and UK-EU border documentation for touring productions
  • Technical synchronisation: ensuring consistent AV standards across all sites

The ANSI/AVIXA D401.01:2023 standard provides the recognised framework for documenting and coordinating AV system design and installation across multi-site projects. Fireflyav draws on this standard and its own depth of experience in corporate conferences, live events, and broadcast production to support planners navigating exactly this complexity.


Table of Contents

What does AV logistics management actually involve across multiple venues?

Multi-venue AV logistics requires centralised control of complex transportation, warehousing, and synchronised site builds in a way that single-venue production simply does not. Every hand-off needs logging, every location needs confirming, and every conflict needs catching before a truck rolls.

Transport management and routing

Vehicle selection matters more than planners often expect. A van that works for a single corporate conference becomes a liability when you need split deliveries across three venues on the same morning. Assign vehicles based on equipment volume, weight, and fragility, then build routes that account for realistic unloading times at each dock. Stagger delivery windows deliberately: two trucks arriving at the same loading bay simultaneously is one of the most common causes of on-day delays.

Team loading AV equipment into van

Equipment warehousing and pre-staging

Detailed inventory audits before any kit leaves the warehouse prevent the worst surprises. Every item should be checked against a manifest, packed with appropriate protection, and labelled clearly with its destination venue and unloading order. Treat the Bill of Materials as a live freight manifest per venue, not a static spreadsheet. Experienced logistics teams use this document to hunt for dock and delivery conflicts before deployment begins.

Infographic showing AV logistics process steps

Pro Tip: Use asset lifecycle tracking software to maintain a scan-in/scan-out record for every piece of kit from warehouse to venue. Chain of custody loss across multiple sites leads directly to cost overruns and delays.

On-site operational logistics

Venue etiquette varies considerably across UK sites. Some venues impose strict load-in windows, restrict rigging to approved contractors, or limit electrical draw per circuit. Briefing your crew on venue-specific rules before arrival avoids costly rework. On-site supervision by a crew lead at each location keeps technical standards consistent and gives you a single point of escalation when something needs resolving quickly.

Technician coordinating AV setup on site

Logistics task Responsible role
Inventory audit and manifest creation Warehouse manager
Vehicle routing and dock scheduling Logistics coordinator
Equipment packing and labelling Warehouse crew
On-site setup and rigging Technical crew lead
Cross-venue freight sequencing Production manager
Asset tracking and chain of custody Logistics coordinator
Crew scheduling and travel Production manager

A useful real-world illustration: a corporate conference series running across four UK cities on consecutive days requires the same AV rig to be broken down, transported overnight, and rebuilt to the same specification each morning. The only way that works without a technical failure is a pre-agreed manifest, a tested packing sequence, and a crew lead at each venue who knows the spec without needing to be briefed from scratch.


How do you schedule and communicate across multiple venues without losing control?

Scheduling for multi-venue events works backwards from showtime, not forwards from load-in. For each venue, establish when doors open, then calculate backwards through rehearsal, testing, rigging, and load-in to set a realistic truck arrival time. When you have four venues running in parallel, those windows need staggering carefully: the same driver cannot be in two places, and not every loading bay is straightforward.

Digital tools like OnePlan and Envitely enable real-time collaborative scheduling and equipment tracking across venues, giving all stakeholders a single source of truth rather than a tangle of spreadsheets and email chains. Centralising scheduling and asset tracking in one platform reduces errors and keeps updates visible to everyone who needs them.

Effective communication tools and methods for multi-venue coordination include:

  • Centralised project management platform (OnePlan, Envitely, or equivalent) for live schedule updates
  • Radio or push-to-talk apps for on-site crew at each venue
  • Shared digital manifests accessible to warehouse, transport, and venue teams
  • WhatsApp or messaging groups segmented by venue, not by function, to keep information local
  • Pre-event briefing documents per venue covering access times, dock details, and venue contacts
  • Escalation protocols defining who calls whom when something goes wrong

The single-filter communication approach is worth adopting on any event with more than two venues. One project manager collects questions and updates from all site leads, then presents them to the client in a single consolidated call or message. Three separate planners pinging the same client simultaneously creates confusion and erodes trust.

Pro Tip: Multi-venue logistics partners must be reachable beyond standard hours. Builds do not happen 9 to 5, and a crew change at 11 PM needs a logistics contact who picks up.


What risks should you plan for in multi-venue AV logistics?

The most common failure points in multi-venue AV logistics are dock-window collisions, misrouted gear, chain of custody loss, and venue-specific restrictions that were not identified during planning. Each of these is preventable with the right preparation.

Dock conflicts are particularly damaging because they create a cascade: one delayed truck pushes back load-in, which compresses rehearsal time, which means the show starts late or with untested equipment. A logistics system that scans for dock overlaps before trucks depart catches these conflicts at the point when they are still cheap to fix.

Key risk management tactics:

  • Pre-event dock conflict scan: check all truck arrivals against venue dock capacity and turn-around windows before the morning of the event
  • Clear labelling and manifests: every case labelled with venue, room, and unloading sequence
  • On-site supervision: a crew lead at each venue with authority to make real-time decisions
  • Contingency reserves: spare cables, adaptors, and consumables packed per venue
  • Pre-event equipment audit: test all kit before it leaves the warehouse, not on arrival
  • AV event insurance: cover for equipment damage, theft, or failure during transit and on-site
  • Customs documentation: ATA Carnets for any equipment crossing UK-EU borders, with copies held by both the driver and the production office

Chain of custody loss across multiple venues is one of the leading causes of cost overruns in large-scale event production. Scan-in/scan-out systems and clear manifests are the practical fix.

For UK-EU touring productions, customs compliance adds a layer that purely domestic events avoid. ATA Carnets allow temporary export of professional equipment without paying import duties, but they require advance preparation and accurate equipment lists. Getting this wrong at the border can hold up an entire truck.


How do you choose the right AV logistics partner for multi-venue events?

The right logistics partner for multi-venue AV work is not simply a haulage company that handles events. You need a partner who understands the event environment: the difference between a loading bay shared with catering and camera crews, the reality of a 4 AM warehouse departure, and the pressure of a show that cannot be delayed.

Criteria for selecting a partner:

  • Demonstrable UK multi-venue experience, not just single-site haulage
  • Real-time vehicle tracking accessible to your production team
  • 24/7 availability with named contacts, not a general helpline
  • Familiarity with AV equipment handling, including fragile and high-value items
  • Understanding of venue-specific access restrictions and dock protocols
  • Ability to hold and stage kit between event legs, not just deliver and collect
  • Clear escalation process for last-minute changes

Steps to establish a productive working relationship:

  1. Share the full event schedule, including all venue addresses, dock details, and load-in windows, at the earliest opportunity
  2. Agree a single point of contact on both sides for all logistics decisions
  3. Define in writing who has authority to approve last-minute route or schedule changes
  4. Conduct a pre-event briefing covering all venues, dependencies, and contingency plans
  5. Agree a communication protocol for out-of-hours contact

Pro Tip: Consolidate all logistics communication through one project manager on your side. When multiple site leads report independently to the client, information overload follows quickly.

Questions to ask when vetting a logistics partner:

  • Can you show examples of multi-venue UK events you have managed?
  • How do you handle a dock conflict discovered on the morning of the event?
  • What is your process when a vehicle breaks down en route?
  • How do you track equipment across multiple venues simultaneously?
  • Who is my named contact outside business hours?

Understanding why corporate events rely on specialist AV coordination helps frame what you should be asking of any logistics partner you bring on board.


Power supply and backup solutions for simultaneous venue operations

Power planning for multi-venue events deserves its own conversation because the risks compound when several venues are running simultaneously. A power failure at one site during a live broadcast or conference session cannot be resolved by pulling resource from another location.

Each venue needs its own power assessment before any equipment is specified. UK venues vary considerably in their available supply: an older city-centre hotel may have limited three-phase capacity, while a purpose-built conference centre will handle large draws without issue. Identify the peak load for each venue’s AV rig, including lighting, sound, video, and any broadcast equipment, then confirm the venue can supply it with headroom to spare.

Backup solutions worth building into every multi-venue plan:

  • Uninterruptible power supplies (UPS) for critical signal processing and switching equipment at each venue
  • Generator hire as a standby option for venues with unreliable mains supply or outdoor locations
  • Separate circuit allocation for AV and lighting to prevent a lighting fault tripping the sound system
  • Spare power distribution units packed per venue in the contingency reserve
  • Parts and inventory management systems to track power accessories across the full event footprint

The practical rule is to treat power as a logistics dependency, not an afterthought. If a venue’s power supply cannot be confirmed until load-in day, that is a risk that belongs on your pre-event risk register, not a surprise to manage on the day.


Fireflyav: AV equipment and technical support for multi-venue events

Fireflyav

Fireflyav supplies AV equipment and technical support for corporate conferences, live events, broadcast productions, and eSports across the UK. For planners managing multi-venue productions, Fireflyav offers the combination that matters most: a deep equipment inventory and experienced technical staff who understand the operational realities of multi-site delivery.

Where a general hire company hands over kit and leaves, Fireflyav provides technical support through the full production cycle, from pre-event specification and equipment testing to on-site operation and breakdown. That means fewer unknowns when you are coordinating across several venues at once. The AV equipment range covers everything from conference microphone systems and video switching to broadcast-grade display and audio solutions.

If you are planning a multi-venue conference, corporate event series, or live production in the UK, submit your project details and the Fireflyav team will come back with equipment recommendations and technical support options matched to your specific venues and schedule.


Key takeaways

Effective AV logistics for multi-venue events depends on centralised coordination of transport, equipment tracking, power planning, and communication, with a single project manager holding the threads together across all sites.

Point Details
Centralise scheduling and tracking Use one platform for all venue schedules and asset tracking to prevent conflicts and errors.
Treat the Bill of Materials as a live manifest Update the freight manifest per venue continuously and use it to hunt dock conflicts before deployment.
Apply the single-filter communication rule One project manager synthesises updates from all site leads and presents them to the client as one.
Plan power per venue independently Assess peak load and backup requirements at each site; never assume uniform supply across venues.
Fireflyav for UK multi-venue production Fireflyav supplies equipment and on-site technical support for corporate, broadcast, and live event productions across the UK.
"


AV logistics for multi-venue events: the UK planner’s guide

8/07/2026

Technician inspecting outdoor power distribution board

"

Event power distribution is the structured system that channels electricity from a primary source, whether a generator or mains utility feed, through a main distribution panel and into smaller, circuit-protected sub-distribution boards that serve specific zones across an event site. Rather than running individual cables directly from a generator to every piece of equipment, a properly designed distribution system breaks the supply into manageable, balanced circuits, each protected by its own breaker and RCD (Residual Current Device).

The practical difference this makes is significant:

  • Main distro panels typically accept high-capacity inputs such as 200A or 400A three-phase feeds and split them into 12–24 branch circuits per box, each feeding a defined area or equipment type.
  • Sub-distribution boards sit closer to the load, whether a stage, bar, or vendor cluster, and provide final circuit protection at the point of use.
  • RCD protection on every circuit cuts power within milliseconds when it detects leakage current, preventing electrocution in environments where moisture is a constant risk.
  • Modular power zones contain faults locally. A tripped breaker in the catering area does not kill the stage.

For UK events in 2026, compliance with BS 7671 (the national wiring standard) and the IET’s guidance on temporary installations is the baseline, not a bonus.


Where are event power distribution boards actually used?

1. Live concerts and stage productions

Stage environments demand the most from a temporary power setup. A main stage at a mid-sized festival might draw hundreds of amps across lighting rigs, PA systems, LED screens, and backline equipment simultaneously. Dedicated sub-distros for audio and lighting are standard practice precisely because a lighting surge should never have the opportunity to interrupt the sound desk.

2. Outdoor festivals and multi-stage events

Festivals present the most complex distribution challenges. Power must reach stages, food vendors, bars, toilet blocks, and lighting towers spread across a large site, often without any existing mains infrastructure. Portable distribution boards receive high-capacity feeds from generators and split them into multiple circuits to serve each zone independently.

Outdoor festival power distribution hub with crew

3. Film and television production sets

Production sets combine high-draw equipment, such as HMI lighting and broadcast cameras, with sensitive electronics that cannot tolerate voltage fluctuations. Temporary power distribution here often includes power conditioning alongside standard distro panels, and load calculations must account for the unpredictable nature of shooting schedules.

4. Corporate conferences and exhibitions

A conference centre may have mains power, but rarely enough dedicated circuits to serve a large exhibition floor. Temporary distribution boards extend capacity to individual stands, AV rigs, and catering points. Understanding AV power requirements is particularly relevant here, where projectors, LED walls, and conference mic systems all draw from the same temporary supply.

5. Trade fairs and consumer shows

Trade shows pack a high density of electrical loads into a relatively compact space. Each exhibitor stand may run display screens, lighting, and powered demonstrations simultaneously. Zone-based distribution lets organisers allocate a defined capacity to each stand cluster and isolate faults without affecting neighbouring exhibitors.

6. Outdoor sporting events

Timing systems, broadcast trucks, public address equipment, and floodlighting all require reliable, uninterrupted supply. Generators are almost always the primary source at outdoor venues, and load balancing across phases is critical when broadcast equipment and floodlights share the same generation capacity.

7. Construction site events and industrial launches

Product launches and site events at industrial or construction locations often lack any fixed electrical infrastructure. Temporary distribution systems provide the only viable power solution, and the equipment must be rated for harsh environments, including dust, moisture, and heavy foot traffic from workers and guests alike.


What are the technical and safety requirements you need to understand?

Getting the engineering right is where event power management either holds or fails. Several factors determine whether your temporary electrical installation is safe, compliant, and stable throughout the event.

Infographic showing key event power distribution steps

Load calculation and capacity ratings

Start by listing every piece of equipment and its wattage. Add a safety margin of 20–25% on top of the combined total to account for startup surges and last-minute additions. That final figure sets your generation capacity. Main distro panels are sized to match, with sub-distros rated for the specific loads they serve.

Generator loading limits

  • Generators should not run above 80% of rated output capacity. Sustained operation above this threshold causes overheating and accelerated wear.
  • Running below 80% also provides headroom for startup surges from motors and compressors.

RCD and GFCI protection

RCD protection is mandatory on every circuit, particularly outdoors where moisture dramatically increases leakage current risk. All RCD devices must be tested before the event opens, and spares should be on site. GFCI nuisance trips are a known issue in damp outdoor environments, where cumulative leakage from multiple connected devices can trigger a breaker even without a genuine fault.

Three-phase load balancing

Unbalanced loads across three phases cause generator instability and can trigger shutdown even when total capacity appears sufficient. An experienced event electrician distributes heavy consumers, such as stage lighting, audio equipment, and cooking appliances, across different phases to maintain stability.

Cabling and physical protection

Heavy-duty, outdoor-rated cables are non-negotiable for any outdoor installation. Armoured or insulated cables resist damage across muddy ground and high-traffic areas. Cable ramps protect cables crossing pedestrian routes and vehicle access points, eliminating trip hazards and preventing physical damage. Joints and connections should be elevated off the ground wherever possible to prevent water ingress during rain.

Grounding and bonding

Proper grounding requires driven electrode rods at the generator and main distribution point. All metallic structures, including truss, staging, and barriers, must be bonded to the grounding system. This is a compliance requirement under BS 7671, not an optional precaution.

Statistic callout: Generators should operate at no more than 80% of rated capacity throughout the event. Running above this threshold risks overheating, reduced reliability, and potential shutdown at the worst possible moment.


How do you choose the right electrical distribution equipment for your event?

Selecting distribution equipment is not simply a matter of picking the largest board available. The right choice depends on your specific load, site layout, and compliance obligations.

  • Match board capacity to your calculated load. A board rated for 125A serving a 110A load gives you the headroom you need. Undersizing is a fire risk; oversizing wastes budget.
  • Count circuits, not just amperage. A main distro with 12 circuits may be insufficient for a festival with 20 distinct load points, even if the total amperage is adequate.
  • Specify outdoor-rated enclosures. Distribution boards for outdoor events must be housed in weatherproof enclosures with an appropriate IP rating. Metal or reinforced polymer housings protect internal components from rain, dust, and physical impact.
  • Require built-in RCD protection. Every board should include RCDs on all circuits as standard. Boards without this protection are not compliant for UK temporary installations under BS 7671.
  • Design for zone isolation. A modular approach, where each area of the site has its own sub-distro, means a fault in one zone does not cascade. This is the single most effective way to prevent a total site blackout.
  • Consider your power source. Generator feeds and mains utility connections have different characteristics. Generators can fluctuate under load; mains supplies are generally more stable but may require a transformer to match the voltage and phase configuration your equipment needs.
  • Plan for monitoring. Modern distribution boards can include load monitoring capability, allowing your crew to track draw on each circuit in real time. This makes it possible to redistribute loads before a breaker trips rather than after.
  • Think about flexibility. Site layouts change between load-in and show day. Equipment with modular connections and clearly labelled circuits is far easier to reconfigure quickly than a fixed, custom-wired installation.

Advanced best practices for UK event power distribution in 2026

Beyond the fundamentals, experienced technical teams apply a set of practices that separate a reliable installation from one that merely passes inspection.

Team planning modular event power zones

Modular zones prevent total blackouts

Breaking a large site into isolated power zones is the most effective fault-containment strategy available. A fault in the catering zone trips that zone’s sub-distro and nothing else. The stage keeps running. Power providers who specialise in temporary event supply build zone maps as a standard part of their pre-event planning process, treating each zone as an independent electrical system with its own protection and monitoring.

Coordination between technical teams

One of the most common failures in event power planning is poor communication between the power supplier and the technical teams drawing from the supply. Audio engineers, lighting designers, and catering operators all have specific power requirements, and those requirements must be consolidated into a single accurate load figure before the generator is sized. Professional power suppliers act as central coordinators, liaising with every technical team to build a complete picture of demand.

Separating critical loads

Audio and refrigeration are the two loads most sensitive to power interruption. Running them on dedicated circuits, separate from lighting and general power, prevents a lighting surge from cutting the PA mid-show. It also eliminates electrical noise interference on audio lines, which is a subtler but equally disruptive problem at live events. For PA systems in particular, a clean, isolated supply makes a measurable difference to audio quality.

Managing GFCI nuisance trips

In damp outdoor conditions, cumulative leakage current from multiple devices connected to the same circuit can trigger an RCD even when no genuine fault exists. The solution is to segregate loads so that no single circuit carries too many devices with small individual leakage currents. Carry spare RCDs on site and test all devices before the event opens.

Professional installation under BS 7671

UK law requires that temporary electrical installations at public events are designed and installed by a qualified electrician. A formal test and inspection certificate must be issued before the event opens to the public. This is not bureaucracy for its own sake. Temporary installations lack the permanent protections of fixed wiring, and the consequences of a fault in a crowded event space are severe.

Pro Tip: Always carry spare RCDs on site and segregate critical loads such as audio and refrigeration onto dedicated circuits. In damp outdoor conditions, cumulative leakage from multiple devices is the most common cause of nuisance trips, and a spare RCD swapped in within minutes is far less disruptive than a mid-show blackout.


Key takeaways

Event power distribution is the structured, zone-based system that channels electricity safely from a generator or mains source through main and sub-distribution panels to every circuit across an event site, with RCD protection and load balancing as the non-negotiable foundations.

Point Details
Zone-based design prevents blackouts Modular power zones contain faults locally, so a tripped breaker in one area does not affect the rest of the site.
Generator loading limit Generators should not exceed 80% of rated output capacity to prevent overheating and maintain consistent performance.
RCD protection is mandatory Every circuit requires RCD protection under BS 7671, and all devices must be tested before the event opens to the public.
Three-phase balance is critical Unbalanced loads across phases cause generator instability; distribute heavy consumers evenly across all three phases.
Separate critical loads Run audio and refrigeration on dedicated circuits to prevent surges from other equipment causing interruptions or interference.
"


Event power distribution: the 2026 UK organiser’s guide

8/07/2026

Audio engineer connecting MADI cable in studio

"

MADI, short for Multichannel Audio Digital Interface, is a standardised protocol for transmitting up to 64 channels of uncompressed digital audio over a single coaxial or fibre optic cable. Defined by the AES10 standard from the Audio Engineering Society, it was first published in 1991 and has since become a cornerstone of professional audio infrastructure worldwide. At 44.1 kHz or 48 kHz, you get the full 64 channels. Push the sample rate to 96 kHz and that count drops to 32, a trade-off baked into the specification.

What sets MADI apart from most digital audio protocols is its unidirectional, point-to-point nature. There is no network to configure, no IP addressing, and no routing software to manage. You connect a transmitter to a receiver, and audio flows. That simplicity is precisely why broadcast engineers, live sound professionals, and studio operators have relied on it for decades. Latency is deterministic and extremely low, which matters enormously when you are running 64 channels of live audio to a mixing console with zero tolerance for glitches.

  • Carries up to 64 uncompressed audio channels over a single cable
  • Governed by the AES10 standard (Audio Engineering Society)
  • Supports sample rates from 32 kHz up to 96 kHz and beyond
  • Channel count reduces to 32 at 96 kHz
  • Unidirectional, point-to-point: one transmitter, one receiver
  • No network configuration required once the physical connection is made
  • Used extensively in live sound, broadcast, and recording studio environments
  • Replaces bulky analogue multicore snakes with a single lightweight cable

What is MADI audio explained: technical features and specifications

MADI transmits audio at a base data rate of 100 Mbit/s, using 4B5B encoding to produce a physical baud rate of 125 MHz. That encoding scheme replaces every 4 source bits with a unique 5-bit sequence, ensuring the signal never carries long runs of identical bits that would cause synchronisation problems. The result is a clean, reliable bitstream that travels over coaxial or fibre optic cable without the noise vulnerabilities of analogue transmission.

Each channel in the MADI frame carries 32 bits, of which 24 are allocated to audio data. The remaining bits handle validity, user data, status, parity, and mode identification, preserving compatibility with the AES3 two-channel format at the sub-channel level. Frame synchronisation is provided by sync symbols outside the audio data itself, rather than embedded preambles, which keeps the audio payload clean and consistent.

Sample rate Maximum channels Bit depth
32 kHz 64 Up to 24 bits
44.1 kHz 64 Up to 24 bits
48 kHz 64 Up to 24 bits
96 kHz 32 Up to 24 bits

Clocking is where MADI demands attention. The transmission clock is deliberately decoupled from the audio sample rate, which means all devices in a MADI chain must share a common word clock source to maintain sample accuracy. Without proper word clock synchronisation, you will hear clicks, pops, and timing drift. Some hardware vendors offer the option to derive a word clock from the MADI transmission timing itself, but an external word clock distribution system remains the professional standard.

Key technical characteristics worth knowing:

  • 4B5B encoding converts 100 Mbit/s data to a 125 MHz physical signal
  • NRZI transmission (Non-Return to Zero, Invert on Ones) maintains a low DC bias on the link
  • Frame structure supports 56 or 64 sub-channels per frame
  • Word clock must be distributed externally for sample-accurate synchronisation
  • Unidirectional streams mean full-duplex operation requires two separate MADI streams
  • AES3 compatibility is preserved at the sub-channel data level

Pro Tip: If you are building a MADI system from scratch, invest in a dedicated word clock distribution unit before anything else. Chasing synchronisation problems after the fact on a live rig is a miserable experience.


What cables and connectors does MADI use?

MADI runs over two physical media: 75-ohm coaxial cable with BNC connectors, and optical fibre with SC connectors. The AES10-2003 revision formally recommends both connector types, and the choice between them usually comes down to distance and environment.

Close-up of hands holding MADI BNC cable connector

Coaxial cable handles runs of up to 100 metres, which covers most stage-to-FOH or rack-to-console distances in a typical venue. It is affordable, widely available, and straightforward to terminate. The 75-ohm impedance is the same as standard video coax, so in a pinch you can use broadcast-grade video cable, though dedicated MADI coax is always preferable for critical applications.

Optical fibre extends that reach dramatically, supporting distances of up to 2 kilometres depending on the cable type and quality. For live touring, broadcast trucks parked outside a venue, or inter-building connections in a broadcast facility, fibre is the obvious choice. It also eliminates electromagnetic interference entirely, which matters in environments packed with RF transmitters, LED walls, and motor drives.

  • 75-ohm BNC coaxial: up to 100m, cost-effective, easy to terminate on-site
  • Optical fibre (SC connectors): up to 2km, immune to EMI, preferred for long runs
  • Multimode OM3/OM4 fibre: well-suited for live environments up to around 500m, valued for durability
  • Cable weight: a single MADI cable replaces a 64-channel analogue multicore, saving considerable weight and bulk on touring rigs
  • Fault finding: a single cable failure is far easier to diagnose than a fault buried in a 64-way analogue snake

Statistic callout: A single MADI coaxial cable replaces what would otherwise be a 64-channel analogue multicore snake, reducing cabling weight and cost while simplifying fault-finding across the entire signal chain.

Pro Tip: For outdoor festival rigs or broadcast trucks, always choose fibre over coax. The EMI rejection alone is worth it, and the weight saving on a long stage-to-truck run is genuinely significant.


How MADI is used in professional audio environments

MADI’s most common application is linking a digital mixing console to a stage box or I/O rack. A single cable carries all 64 channels of microphone and line inputs from the stage to the front-of-house position, with a second cable returning monitor feeds, effects, and outputs back to the stage. That two-cable solution replaces what used to be a heavy, expensive analogue multicore. For a large touring production, the difference in truck space and load-in time is measurable.

Technicians connecting MADI cables on concert stage

Broadcast is where MADI truly proved its worth. Large broadcast studios adopted the protocol early for routing multichannel audio throughout their facilities, and it remains standard in outside broadcast trucks and production galleries across the UK. The ITU-R BS.1873 recommendation formally specifies MADI as the serial multichannel audio digital interface for broadcasting studios, which tells you everything about its status in that world.

Common professional applications include:

  • Linking digital mixing consoles (such as the Allen & Heath Avantis) to stage I/O boxes
  • Connecting multitrack recorders to mixing systems for live recording
  • Routing audio between production galleries and studio floors in broadcast facilities
  • Interfacing outside broadcast trucks with venue audio infrastructure
  • Distributing audio across large venues with multiple mix positions
  • Connecting recording studio patchbays to DAW interfaces and outboard racks

The reliability argument is straightforward. MADI carries no network overhead, has no routing tables to corrupt, and does not depend on a switch or server staying online. When a live broadcast goes out to millions of viewers, that predictability is not a luxury.


How does MADI compare with Dante and other network audio protocols?

MADI and Dante solve the same fundamental problem, moving many channels of audio from one place to another, but they approach it very differently. MADI is a dedicated point-to-point connection with no network overhead. Dante is Audio over IP, running on standard Ethernet infrastructure, with flexible routing, bi-directional channels, and centralised network management.

The practical difference shows up under pressure. MADI’s latency is fixed and deterministic because there is no network stack involved. Dante’s latency is configurable and generally very low, but it depends on network quality, switch configuration, and QoS settings. In a well-managed network, Dante performs brilliantly. In a venue with a shared or poorly configured network, it can be a source of problems.

MADI strengths:

  • Zero network configuration once the cable is connected
  • Deterministic, hardware-level latency
  • No dependency on switches, routers, or network services
  • Sample-accurate timing for phase-coherent multichannel audio
  • Preferred by engineers where failure is genuinely not an option

MADI limitations:

  • Unidirectional: full-duplex requires two separate cable runs
  • Fixed point-to-point topology: no multi-drop or broadcast routing
  • Manual word clock synchronisation required
  • Channel count is capped at 64 (or 32 at 96 kHz)

Dante strengths:

  • Bi-directional on a single Ethernet cable
  • Flexible routing between multiple devices on the same network
  • Scalable to hundreds of channels across a facility
  • Centralised management via software

Dante limitations:

  • Requires a properly configured network infrastructure
  • Latency depends on network quality and switch capability
  • More complex to troubleshoot when problems occur

For a fixed broadcast installation with a well-managed network, Dante’s flexibility is genuinely useful. For a touring rig or a one-off live event where you need absolute certainty that audio will flow the moment you plug in the cable, MADI remains the professional’s choice.


How the MADI signal format and data transmission actually work

The MADI signal format builds directly on the AES3 two-channel interface, extending it to carry up to 64 channels in a single serial stream. Each frame consists of up to 64 sub-channels, numbered 0 to 63, transmitted sequentially within a single sample period. Every sub-channel carries 32 bits: 24 bits of audio data, 4 bits of AES3 status information (validity, user, status, parity), and 4 mode bits that handle frame synchronisation, block start identification, and active or inactive channel status.

Infographic illustrating MADI audio signal flow

The 4B5B encoding scheme is central to how MADI achieves reliable transmission at 100 Mbit/s. Every group of 4 data bits is replaced by a 5-bit code word chosen to avoid long sequences of identical bits. This keeps the signal AC-coupled and prevents the receiver from losing synchronisation. The encoded stream is then transmitted using NRZI (Non-Return to Zero, Invert on Ones), where a logical 1 is represented by a polarity transition and a logical 0 by the absence of one. The combination keeps DC bias low and makes the signal polarity-independent on the cable.

Frame synchronisation uses JK sync symbols inserted outside the audio data payload. These symbols can appear at any sub-channel boundary and must occur at least once per frame. Because the transmission clock runs independently of the audio sample rate, the sync symbols also serve as padding to fill the fixed-rate bitstream when the audio data does not occupy the full frame. This is why external word clock is not optional: the protocol itself does not carry enough timing information to reconstruct the audio sample rate at the receiver without it.

Active channels are always consecutive, starting at channel zero. The active channel bit within each sub-channel tells the receiver whether that slot carries live audio or is inactive. This means a 32-channel MADI system and a 64-channel system use exactly the same physical link; the receiver simply reads the active channel flags to know how many channels to process.


How Fireflyav uses MADI in UK professional audio setups

Fireflyav supplies MADI-enabled equipment and technical support across the UK’s corporate, cultural, broadcast, and live event sectors. For large-scale productions, whether a touring concert, a broadcast outside broadcast, or a major corporate conference, MADI is frequently the backbone of the audio infrastructure. The protocol’s combination of high channel count, low latency, and zero network dependency makes it well-suited to the demanding environments Fireflyav regularly works in.

UK venues present specific challenges: long cable runs between stages and control positions, listed buildings where cable routing is constrained, and broadcast integrations where timing and reliability are non-negotiable. MADI’s fibre optic option addresses the distance problem cleanly, while its deterministic behaviour suits broadcast-grade requirements. Fireflyav’s team advises clients on the right MADI configuration for each venue, from connector choice to word clock distribution strategy.

Fireflyav’s equipment range includes gear that integrates directly with MADI workflows:

  • Digital mixing consoles with native MADI I/O for live and broadcast applications
  • Stage boxes and I/O racks that connect via MADI to front-of-house positions
  • DI boxes such as the Radial Pro-AV1 for signal interfacing within MADI-connected systems
  • Audio players and playback systems that feed into MADI-enabled rigs
  • Word clock distribution and synchronisation equipment for multi-device MADI setups

For event planners and producers working with Fireflyav, understanding MADI is part of understanding why a single cable can replace an entire analogue infrastructure. The AV equipment guide on the Fireflyav website covers the broader context of how MADI fits within a complete audio visual system. Whether you are specifying a broadcast truck integration or a touring festival rig, Fireflyav’s technical team can advise on MADI system design, equipment selection, and on-site setup.

For producers interested in how modern audio analysis tools complement MADI-based production workflows, the AI mix analysis guide from Mix Analyzer Blog offers useful context on where technology is heading in professional audio production.


Key takeaways

MADI (AES10) transmits up to 64 uncompressed audio channels over a single cable with deterministic low latency, making it the preferred protocol for live, broadcast, and studio environments where reliability is non-negotiable.

Point Details
Channel capacity MADI carries up to 64 channels at 48 kHz, reducing to 32 channels at 96 kHz.
Cable options Coaxial BNC runs up to 100m; optical fibre extends to 2km with full EMI immunity.
Word clock requirement All MADI devices must share an external word clock source to maintain sample-accurate timing.
Protocol nature MADI is unidirectional and point-to-point; full-duplex operation requires two separate cable runs.
UK professional use Fireflyav deploys MADI across UK live events, broadcast, and corporate productions for its reliability and simplicity.
"


MADI audio explained: the professional’s complete guide

9/07/2026

Sound engineer connecting multicore audio cable in studio

"

A multicore audio cable, often called a snake, is a thick, durable cable that bundles 4–64 individual audio channels inside a single outer jacket. Its purpose is straightforward: replace the chaos of dozens of separate cables with one tidy run between your stage and mixing console.

What is a multicore audio cable and why does it matter?

At its core, a multicore cable solves a very practical problem. Running individual cables for every microphone, instrument, or signal return across a venue is slow, messy, and prone to failure. A multicore consolidates all of those connections into one manageable line.

You will hear the terms “snake,” “multicore,” and “snake cable” used interchangeably on professional stages and in recording studios. They all refer to the same thing. The key concepts to understand from the start are:

  • Sends: signals travelling from the stage (microphones, instruments) to the mixing console
  • Returns: signals travelling back from the console to the stage (amplifiers, monitors)
  • Stage box: the on-stage unit where individual XLR cables plug in
  • Pigtail or fanout: the bundle of individual connectors at the mixer end

A multicore cable is often specified using notation like “16/4,” meaning 16 sends and 4 returns. That single label tells an engineer everything they need to know about a cable’s capacity before a show.

Where are multicore cables actually used?

Infographic outlining multicore audio cable key topics

The live event world runs on multicores. Without them, a festival stage with 32 microphone inputs would require 32 separate cables snaking across the floor to the front-of-house desk. A multicore collapses that into one.

Common professional applications include:

  • Live sound reinforcement: connecting a stage box to a front-of-house (FOH) mixing console, which is the most frequent use case by far
  • Broadcast: routing multiple audio feeds from a studio floor or outside broadcast truck to a production desk
  • Recording studios: linking a live room to the control room, often via stage boxes mounted flush in the floor or walls
  • PA systems: carrying signals from a mixing console back to speaker amplifiers and monitor wedges via return channels
  • Temporary outdoor events: portable multicores stored on a drum allow rapid deployment at music festivals and corporate events

For event microphone setups, multicores are equally valuable in corporate conference environments, where a clean cable run from a stage or podium to a technical desk keeps the room looking professional.

What types and configurations are available?

Multicore cables come in several distinct forms, and choosing the wrong one for a job creates problems quickly.

  • Unterminated lengths: raw multicore cable sold by the metre, used when a technician needs to build a custom assembly with specific connectors
  • Terminated cables with multipin connectors: a single robust connector at each end, common in permanent theatre or broadcast installations where the same cable is used repeatedly
  • Complete assemblies with stage boxes: the most common live event format, combining a stage box, multicore run, and pigtail at the mixer end into one ready-to-use system
  • Breakout cables (pigtails): a short fanout of individual XLR connectors used at the mixer end of a snake, giving the engineer a separate connector per channel
  • Drive snakes: multicores carrying only return signals, used to feed amplifiers and monitor systems from the console

The send/return notation like “16/4” or “8/4” is standard across the industry. Channel counts typically vary broadly, with certain configurations being common for mid-scale live events. Durability and portability requirements also vary: a touring cable needs a tougher jacket and strain relief than one permanently installed in a studio wall.

How is a multicore cable constructed?

Inside the outer jacket, each audio channel runs as its own individually insulated conductor. The construction follows a consistent logic:

  • Individual cores: each channel has its own copper conductors, typically a positive, negative, and earth, wrapped in insulation
  • Colour coding and numbering: cores are identified by colour bands, printed numbers, or both, so a technician can trace channel 7 at the stage box to channel 7 at the mixer end without guesswork
  • Shielding: a foil or braided shield around each core, or around the entire cable, reduces electromagnetic interference from lighting rigs, power cables, and radio equipment
  • Outer jacket: a tough PVC or rubber sheath holds everything together and protects against physical damage during touring and repeated coiling
  • Gauge: thicker gauge conductors carry signal with lower resistance over long runs; thinner gauge cables are lighter and more flexible for portable use

Cable lengths vary widely. Cable lengths vary widely depending on venue size, from shorter runs in studios to longer runs at large outdoor festival stages. Gauge selection depends on that run length and how much flexibility the cable needs.

Pro Tip: Always coil multicore cables using the over-under technique. It removes the natural twist from the cable with each loop, preventing internal conductor stress and extending the cable’s working life considerably.

Cross section of multicore audio cable on workbench

Maintenance matters too. Wipe connectors regularly, store cables on proper drums rather than bundled in a heap, and inspect the jacket for cuts or kinks after every event. A damaged outer jacket lets moisture into the shielded cores, which causes intermittent faults that are notoriously difficult to trace during a live show.

What connectors and terminations do multicores use?

The termination at each end of a multicore determines how it interfaces with the rest of the audio system.

  • XLR connectors: the standard for analogue audio; female XLRs at the stage box accept microphone and instrument feeds, while male XLRs at the pigtail end connect to console inputs
  • Multipin connectors: a single large connector (such as a Socapex or proprietary format) that carries all channels in one plug, used in permanent installations where speed and repeatability matter
  • Pigtail/fanout terminations: individual XLR tails at the mixer end, one per channel, giving maximum flexibility for patching into any console
  • Jack connectors: occasionally used in smaller or more portable setups, particularly for instrument-level signals

The choice of termination affects both durability and troubleshooting speed. A multipin connector on a permanent installation is faster to connect but harder to fault-find if one pin fails. A pigtail gives you direct access to every channel individually, so isolating a faulty line takes seconds. For digital mixing consoles that accept analogue inputs via XLR, a well-terminated pigtail is still the most common connection method.

Professional best practices for using multicores

Getting the most from a multicore cable comes down to planning and understanding what the cable is actually doing.

  • Plan your send/return ratio carefully: an under-provisioned return count forces additional cable runs, which defeats the purpose of using a multicore in the first place; a 16-channel snake with only 4 returns can become a bottleneck on a busy monitor-heavy stage
  • Match the cable to the environment: a touring multicore needs robust strain relief and a thick jacket; a studio installation can use a lighter, more flexible cable since it stays put
  • Label everything: even with colour-coded cores, labelling the stage box channels and the corresponding pigtail tails saves time during soundcheck and prevents patching errors
  • Route cables away from power: keep multicore runs physically separated from mains power cables and dimmer packs to minimise interference pickup
  • Test before the event: plug a signal into every channel at the stage box and confirm it arrives at the mixer end; catching a faulty connection in the afternoon is far better than discovering it mid-performance

For professionals working across live events and AV production, understanding the full signal chain from microphone to console is what separates a clean show from a troublesome one. Fireflyav supplies and supports professional audio multicore systems for corporate events, broadcast, and live performance, with technical expertise across the full range of configurations. For a deeper look at modern audio production techniques that complement your multicore setup, the immersive audio production guide from Mix Analytic covers signal routing and processing in useful detail.

https://fireflyav.co.uk

Planning a live event or broadcast and need the right multicore setup? Fireflyav’s AV equipment range covers everything from stage boxes to full technical support, so your signal chain is solid before the first soundcheck.

Key takeaways

A multicore audio cable bundles multiple individual audio channels into one durable outer jacket, replacing dozens of separate cables with a single, manageable run between stage and console.

Point Details
Channel capacity Multicores typically house 4–64 individual audio channels within one outer jacket.
Send/return notation Notation like “16/4” specifies 16 sends to the console and 4 returns to the stage.
Core identification Colour coding and numbering on individual cores allow fast, accurate channel tracing.
Termination choice Pigtails suit flexible live use; multipin connectors suit permanent installations.
Cable care Over-under coiling and regular connector cleaning preserve cable reliability over time.
"


What is a multicore audio cable? A professional guide

3/07/2026

Busy city street preparing for live event

"

Cities dominate live event hosting for reasons that go far beyond having a big venue. The combination of economic firepower, cultural depth, transport links, and governance structures gives urban centres a structural advantage that rural or suburban locations simply cannot replicate. Here is what actually drives that advantage:

  • Economic activation: events pull spending across hotels, restaurants, transport, and retail simultaneously
  • Reputation and branding: flagship events reshape how a city is perceived globally
  • Cultural richness: urban diversity creates audiences and performers that make events resonate
  • Infrastructure: cities already have the venues, roads, and technical capacity in place
  • Policy support: local authorities actively fund and facilitate event programmes
  • Legacy planning: the best cities treat events as long-term urban development tools

1. Why cities lead live events economically

Live events do not just fill seats. They activate entire city economies in a matter of hours. Hotels, taxis, restaurants, florists, photographers, and retail businesses all see a lift the moment a well-produced event lands in a city. The ripple effect of a single corporate retreat or concert can touch dozens of local businesses simultaneously, connecting guests with services they would never have discovered otherwise.

City workers engaging around live event businesses

Experiential event companies now function as genuine hospitality anchors in cities, driving tourism and creating jobs without requiring the kind of infrastructure expansion that costs councils millions. That is a compelling proposition for city planners working with constrained budgets.

Key economic drivers that cities unlock through live events:

  • Visitor spending across accommodation, food, and transport
  • Job creation in technical production, hospitality, and logistics
  • Business exposure for local traders introduced to new audiences
  • Tax revenue generated by increased commercial activity

2. How live events build city reputation and brand identity

Toronto’s Luminato Festival is one of the clearest examples of an event reshaping a city’s global standing. Launched in 2007 after the SARS epidemic had left the city’s tourism economy in ruins, it now attracts over one million visitors annually and generates over $210 million in economic impact. That is not just a cultural success. It is a branding operation that repositioned Toronto as a world-class cultural destination.

Infographic listing top 10 reasons cities lead live events

Washington D.C.'s National Cherry Blossom Festival drew a very large number of visitors recently, generating substantial economic impact for the region. Events like these succeed because they reflect something authentic about the place. They cannot be lifted and dropped into another city without losing what makes them work.

Cities that invest in place-led events gain:

  • International visibility through media coverage and global audiences
  • Cultural tourism from visitors who return year after year
  • Business attraction as a reputation for creativity draws investment
  • Resident pride that strengthens civic identity

Pro Tip: When a city creates an event rooted in its own history or geography, it builds something competitors cannot copy. Edinburgh’s Hogmanay works because it is inseparable from the city’s streets, winter setting, and shared rituals.

3. Cultural and communal impact of live events in urban settings

The social value of live events is better understood now than it was even five years ago. University at Buffalo research involving 789 participants found that collective effervescence, the shared sense of connection felt in a crowd during a live performance, consistently predicted positive well-being outcomes. Crucially, those effects did not end when the music stopped. They lingered for up to a week afterwards.

Cities are where this effect scales. Urban diversity means audiences at live events span different ages, backgrounds, and cultures, creating the kind of cross-community contact that combats loneliness and builds social cohesion. A concert in a city of one million people draws a crowd that a market town simply cannot assemble.

Urban live events also create what sociologists call a “third place,” a space away from home and work where social identity can be explored freely. For cities with high rates of social isolation, that function is not trivial.

  • Collective effervescence builds lasting well-being beyond the event itself
  • Cross-cultural mixing strengthens community bonds across demographics
  • Third-place experiences offer social connection outside everyday routines
  • Shared memory created by events reinforces long-term community identity

4. Legacy planning and urban development linked to live events

The OECD’s analysis of more than 30 global host cities makes the point plainly: the largest value of hosting a major event lies not in the event itself but in what comes after. Improved transport links, regenerated neighbourhoods, new public spaces, and heightened civic pride are the real prizes. None of that happens without deliberate legacy planning built into the event strategy from the start.

Cities increasingly use a practice sometimes called “eventification,” positioning festivals and events in under-used or derelict areas to attract investment and improve infrastructure. The event becomes the catalyst; the neighbourhood transformation is the goal.

Legacy benefit How events deliver it
Infrastructure improvement Transport and venue upgrades built for events serve residents long-term
Neighbourhood regeneration Events in derelict areas attract developers and new businesses
Job creation Production, hospitality, and logistics roles outlast the event itself
Civic pride Successful events raise community confidence and identity
Global reputation International coverage positions the city for future investment

Pro Tip: Cities that integrate event planning into their spatial development strategies, rather than treating events as one-off occasions, consistently extract more long-term value from the same investment.

5. How city infrastructure gives urban venues the edge

A city’s existing infrastructure is not just convenient. It is a competitive advantage that takes decades to build and cannot be improvised. Major urban centres have transport networks that move tens of thousands of people efficiently, accommodation stock that can absorb large visiting audiences, and technical venue facilities that meet the demands of complex productions.

Regional cities with advanced stage technology and extended fit-up periods allow productions to de-risk launches through progressive audience testing before wider rollouts. That is why producers often favour launching major tours in regional urban centres rather than capitals. Lower venue costs, less competition for audience attention, and quality technical facilities make the numbers work. The AV technology underpinning modern live events, from LED walls to line array sound systems, requires the kind of power infrastructure and rigging capacity that cities have built into their venues as standard.

Cities also offer something less obvious: a concentration of skilled technical labour. Sound engineers, lighting designers, riggers, and production managers cluster in urban centres because that is where the work is. For a complex live show, having that workforce within reach is not a minor convenience.

6. How city policies and governance shape live event success

Cities that lead in live events rarely do so by accident. Local authorities in the UK, from Manchester City Council to the Greater London Authority, actively fund event programmes, streamline licensing, and create dedicated event offices that reduce the friction of putting on a show. That institutional support is a genuine differentiator.

Cultural policy frameworks matter too. Cities that embed live events into their broader cultural strategies, treating them as infrastructure rather than entertainment, attract more investment and more ambitious productions. The spatial value of live music is increasingly recognised in urban planning, with policymakers using financial instruments, noise mitigation measures, and special venue designations to protect and grow live event ecosystems.

Events and festivals have also emerged as tools for projecting soft power and symbolic capital, which gives city governments a direct political incentive to support them. When a city hosts a globally recognised event, it signals reliability, creativity, and ambition to investors and visitors alike.

7. How cities built their live event heritage over centuries

Cities have been the natural home of public gathering since ancient Athens and Rome. Markets, theatres, amphitheatres, and public squares were urban inventions, and the tradition of concentrated cultural life in cities has compounded over centuries. London’s West End, Edinburgh’s festival circuit, and Manchester’s music scene did not emerge from nowhere. They are the product of layered investment, accumulated reputation, and generations of creative talent choosing to base themselves where the audiences already were.

That historical depth gives cities a credibility that newer or smaller venues struggle to match. When an artist plays the Royal Albert Hall or a conference lands at the ExCeL London, the venue’s history is part of the product. The legacy of past events raises the perceived value of future ones.

8. Why urban events outperform rural ones in most conditions

The gap between urban and non-urban event hosting is real, though not absolute. Rural festivals like Glastonbury prove that extraordinary events can happen outside cities. But Glastonbury is the exception that proves the rule: it requires years of infrastructure investment, a dedicated transport operation, and a brand built over five decades.

For most events, cities win on logistics alone. Audiences can arrive by train, tube, or bus without the organisers building temporary car parks. Suppliers are nearby. Accommodation is plentiful. The economic activation that makes events financially viable for host cities depends on that density of existing businesses.

Non-metro cities in India, such as Lucknow and Kochi, saw live event ticket sales surge over 225% in 2023, driven by civic pride and a sense that the event was a statement about the city’s identity. That finding does not undermine the urban advantage. It reinforces it: even the growth story in non-metro markets is fundamentally an urban story, driven by cities, not countryside.

9. How digital technology extends city event reach

Cities increasingly use digital infrastructure to amplify live events beyond the venue walls. Digital screens in tourist areas extend event promotion into streets, transport hubs, and hospitality districts, turning the whole city into a backdrop for the event experience. That ambient promotion drives footfall to local businesses and builds anticipation in ways that a standalone venue cannot replicate.

The LED screen technology now standard at major urban events also changes the scale of what is possible. Audiences of 20,000 can follow a performance with the same clarity as someone in the front row. Cities with the power infrastructure and technical expertise to support that kind of production attract the events that demand it.

10. What makes a city genuinely ready to lead live events

Readiness is not just about having a big arena. The cities that consistently lead live events share a specific combination of qualities: a clear cultural identity that events can reflect, governance structures that reduce production friction, transport networks that handle large crowds, and a technical workforce that can deliver complex shows reliably.

The concert AV production demands of a modern live event, from broadcast-quality video switching to immersive spatial audio, require cities to have invested in both physical infrastructure and skilled technical capacity. Cities that have done that work attract the productions that define a city’s live event reputation for years.


Cities lead live events because economic density, cultural depth, infrastructure, and governance advantages compound together in ways that no single factor can explain alone.

Point Details
Economic activation Live events simultaneously engage hotels, transport, retail, and hospitality across the whole city.
Reputation building Flagship events like Toronto’s Luminato generate over $210 million in economic impact and reshape global perception.
Cultural well-being Research confirms collective effervescence from live events boosts well-being for up to a week after attendance.
Legacy planning OECD analysis of 30-plus host cities shows infrastructure and civic pride gains require deliberate legacy strategy.
Infrastructure advantage Cities offer transport networks, technical venues, and skilled AV workforces that rural locations cannot match.

Planning a live event in a UK city? Fireflyav supplies AV equipment and technical support for corporate, cultural, broadcast, and live event productions across the country. Whether you need LED walls, conference microphone systems, or full production support, the team at Fireflyav has the expertise to make it work.

https://fireflyav.co.uk

"


Why cities lead live events: 10 reasons that matter

11/07/2026

Event professional reviewing event options at table

"

What are the best UK alternatives to Sterling Event Group?

The strongest alternatives to Sterling Event Group for technical production and AV services in the UK span three distinct categories: boutique strategic agencies, AI-native planning platforms, and modular production networks. Your best fit depends on whether you need hands-on equipment supply, end-to-end event management software, or specialist crew for a specific production component.

Hands working on technical AV equipment bench

Gartner Peer Insights 2026 identifies vFairs, Bizzabo, and RainFocus as the leading digital-first alternatives, evaluated on service support, contract management, and integration. On the agency side, ACE Event Partners and ALLEVENTS Group represent the boutique and modular production ends of the spectrum respectively. Praloop sits in its own lane as an AI-native project management tool built specifically for event planners.

Provider Specialisation focus Service offerings Technology integration UK availability Best for
ACE Event Partners Boutique agency Strategic planning, venue sourcing, supplier coordination Traditional, relationship-led UK-wide Corporate organisers needing full strategic support
vFairs Digital-first platform Virtual, hybrid, in-person event management AI-enhanced workflows Global, UK supported Hybrid and virtual event specialists
Bizzabo Event experience OS Online event management, analytics, integrations Advanced analytics platform Global, UK supported Data-driven organisers
RainFocus Enterprise platform Personalised event marketing and management AI-powered automation Global, UK supported Large enterprises needing scale
Praloop AI-native planning tool Brief generation, project management, P&L tracking AI-native, full lifecycle Global, UK supported Tech-savvy teams managing complex logistics
ALLEVENTS Group Modular production network Technical production, branding, exhibition design Specialist-led, modular Europe-wide, UK events Large-scale events needing expert specialist teams

Key differences between these categories:

  • Boutique agencies like ACE Event Partners act as an extension of your team, handling supplier coordination and strategic alignment rather than owning equipment directly.
  • Software platforms (vFairs, Bizzabo, RainFocus, Praloop) replace or augment spreadsheet workflows with digital tools, analytics, and automation.
  • Modular production networks like ALLEVENTS Group deploy specialist crews for graphics, staging, and exhibition builds alongside your core technical partner.

How do you choose the right technical production or AV partner?

The single most important question is whether the provider owns its equipment and crew or subcontracts both. Providers with in-house technical crew, warehouse stock, and dedicated on-site support give you cleaner communication and more predictable costs. Agencies that outsource every technical component introduce an extra layer of risk, particularly on complex productions where last-minute changes are common.

Pro Tip: Ask any prospective partner directly: “Do your technicians work for you, or are they freelance crew sourced per event?” The answer tells you more about delivery consistency than any case study will.

Use this checklist when evaluating candidates:

  • Equipment ownership: Does the provider hold its own inventory, or does it hire in from third parties?
  • Technical crew: Are engineers and operators in-house, or sourced per project?
  • Scalability: Can the provider scale from a 50-person boardroom to a 2,000-delegate conference without changing account managers?
  • Geographic reach: Does the provider cover your specific UK region, or does travel and logistics add cost?
  • Technology integration: Does the team use AI-enabled tools for resource allocation and finance tracking, or are they still managing everything in spreadsheets?
  • Client profile fit: Is the provider experienced with your event type, whether that is a corporate conference, eSports tournament, or broadcast production?

ACE Event Partners makes the case that the best partners operate as a genuine extension of your team, handling logistics and supplier coordination with discretion rather than simply delivering hardware. That distinction matters most for corporate events where brand alignment and confidentiality are as important as the technical spec. For corporate AV planning, the strategic layer is often what separates a good event from a forgettable one.

A dual-partner model, combining a specialist AV production firm with a boutique strategic agency, often delivers better pricing and technical outcomes than asking one provider to cover everything. Neither type excels at the other’s core job.

How do these providers compare in practice?

ACE Event Partners suits corporate organisers who want a trusted agency to manage every supplier relationship on their behalf. Founded by Abigail Elkins, the agency has worked with brands including McLaren F1, Ascot Racecourse, and British Airways, coordinating AV production, logistics, and entertainment through a curated supplier network rather than owning production assets directly.

ALLEVENTS Group takes a different approach entirely. Its modular specialist model deploys dedicated teams for technical production, exhibition design, event graphics, and branding as separate expert units. For large UK productions where each component demands genuine specialism, that structure tends to produce higher quality than a generalist firm stretched across all disciplines.

On the software side, Praloop stands out for teams managing multiple concurrent events and is featured among project management tools relevant to event logistics and AI integration. Its AI Brief Generator, planning board, and Project P&L Module sit in one workspace, covering everything from the first client conversation to the final invoice. Every new account gets a 14-day free trial with 50 AI credits included and no credit card required.

Infographic comparing physical production and software event providers

Detailed profiles: what each alternative actually offers

ACE Event Partners covers conferences, product launches, award dinners, exhibitions, and executive experiences. The agency sources venues, negotiates commercial terms, and coordinates all suppliers including AV, entertainment, and logistics. It operates across the UK and internationally.

vFairs specialises in virtual and hybrid event management, with strong marks on Gartner Peer Insights for contract management and service support. Best suited to organisations running recurring digital or hybrid programmes.

Bizzabo positions itself as an event experience operating system, with advanced analytics and integration capabilities that appeal to data-driven teams measuring engagement and ROI across large event portfolios.

RainFocus targets enterprise clients running high-volume event programmes. Its AI-powered automation handles contracting and personalisation at scale, reducing manual workload for large internal event teams.

Praloop is the most technically focused planning tool in this group. Its AI Creative Studio includes eight distinct AI tools for design and content, while the P&L Module handles multi-currency expense tracking, invoice approval workflows, and downloadable financial reports.

ALLEVENTS Group brings together LIVECOM Group for technical production, EXHIBIT Company for exhibition builds, EventGraphics for visual branding, and European Exposition Services for logistics. Each unit operates as a specialist rather than a generalist.

How available and scalable are these alternatives across the UK?

ACE Event Partners operates UK-wide and takes on international projects. ALLEVENTS Group covers the UK through its European network. Both scale by adding specialist resource rather than by stretching a single team.

The software platforms (vFairs, Bizzabo, RainFocus, Praloop) are available anywhere with an internet connection. Scalability for these tools means seat count and project volume rather than geographic logistics. Praloop’s Advance plan supports up to 10 seats, making it practical for mid-sized agencies. For AV technical support across specific UK regions, the physical presence of a production partner still matters more than any software capability.

How do their technology and equipment capabilities compare?

The clearest divide is between providers who own physical production assets and those who deliver value through software or coordination. Sterling Event Group operates from a 40,000 sq ft facility near Manchester Airport, supplying AV hire and technical production across the UK. Alternatives that compete on the same ground need comparable equipment depth and in-house crew.

ALLEVENTS Group’s LIVECOM unit covers sound, lighting, staging, live streaming, and hybrid event technology. ACE Event Partners coordinates AV production through its supplier network rather than owning kit directly. On the software side, AI-enabled platforms shift the technology question from “what equipment do you own” to “how well does your workflow handle data-heavy tasks like resource allocation and finance tracking.” Praloop and RainFocus both automate functions that most production teams still manage manually. Understanding the full range of audio visual equipment options helps you assess whether a partner’s inventory genuinely matches your production requirements.

Fireflyav: specialist AV and technical support for UK events

https://fireflyav.co.uk

If the alternatives above cover strategic planning and software well but leave a gap on the physical production side, Fireflyav fills it directly. Fireflyav supplies AV equipment and technical support for corporate conferences, live events, cultural productions, broadcast, and eSports, with in-house expertise rather than subcontracted crews.

For event professionals who need a reliable technical partner with genuine equipment depth and hands-on support, Fireflyav is worth a direct conversation. Explore the full AV services offering or get started with the product request form to discuss your next production.

Key takeaways

The strongest Sterling Event Group alternatives split clearly between physical production partners, strategic agencies, and software platforms, each serving a different production need.

Point Details
Three distinct categories Alternatives divide into boutique agencies, AI-native software platforms, and modular production networks.
In-house crew matters Providers with their own technicians and equipment reduce subcontracting risk and improve cost predictability.
Software platforms suit digital events vFairs, Bizzabo, RainFocus, and Praloop replace spreadsheet workflows with AI-enabled planning and analytics tools.
Dual-partner model works Combining a specialist AV firm with a boutique agency often outperforms a single generalist provider on both price and quality.
Fireflyav for physical production Fireflyav supplies in-house AV equipment and technical support across corporate, broadcast, live, and eSports events in the UK.
"


Sterling Event Group alternatives for UK event professionals

6/07/2026

Event professional reviewing event technology options

"

What are the best TechPro.co.uk alternatives for UK events?

Search for “TechPro alternatives” and you will quickly hit a wall of irrelevant results. Platforms like Limble, MaintainX, Fiix, and Jobber appear prominently on software comparison sites, yet none of them have anything to do with AV equipment or live event production. They are maintenance management and field service tools, full stop. The same confusion extends to IT staffing firms that share a similar name.

For UK event professionals, the only alternatives worth considering are those that actually supply AV equipment, technical support, and event production services. The shortlist below cuts through that noise.

Provider Best for Service type UK availability Event expertise Pricing
Firefly AV Corporate, cultural, broadcast, eSports Equipment hire, technical support, event production Nationwide Conferences, eSports, broadcast, live events Bespoke quote
Limble Maintenance management CMMS software UK (software only) None Subscription
MaintainX Operational maintenance Mobile work orders UK (software only) None Subscription
Fiix Asset management Cloud CMMS UK (software only) None Subscription
Jobber Field service jobs Scheduling, invoicing UK (software only) None Subscription
Maintenance Connection Facility maintenance MRO management UK (software only) None Subscription
Fracttal One Maintenance planning Cloud CMMS UK (software only) None Subscription
FieldPulse Service contractors Mobile field tools UK (software only) None Subscription
BuildOps Contractor management Workflow software UK (software only) None Subscription
eMaint CMMS Maintenance operations Flexible CMMS UK (software only) None Subscription
Click Maint CMMS Equipment maintenance Simple CMMS UI UK (software only) None Subscription
Service Fusion Service dispatch Scheduling software UK (software only) None Subscription
Asset Essentials Government maintenance Compliance CMMS UK (software only) None Subscription
ServiceChannel Facility services Vendor management UK (software only) None Subscription
TheWorxHub Maintenance workflows Maintenance tools UK (software only) None Subscription
FieldServio Field services Service scheduling UK (software only) None Subscription

Fireflyav is the only entry in this list that operates as a genuine AV and event production provider. Every other platform listed here is a maintenance or field service management tool, included because they appear in search results for TechPro alternatives, not because they serve the event industry.

Technician organizing AV equipment in event loading dock

Pro Tip: When evaluating any provider that appears in a software directory as a “TechPro alternative,” check whether they list AV equipment hire, technical crew, or live event support among their actual services. If those are absent, the listing is a category mismatch, not a genuine replacement.

How do these alternatives actually compare for event production?

The core problem with most TechPro alternatives listed online is a fundamental category error. Platforms such as BuildOps, FieldPulse, and Service Fusion are built for contractors managing job scheduling and invoicing. eMaint CMMS, Click Maint CMMS, and Asset Essentials exist to track maintenance tasks in facilities. ServiceChannel manages vendor relationships for facilities teams. TheWorxHub and Fracttal One handle maintenance planning. None of these platforms supply a projector, a mixing desk, or a technician to your event.

Fireflyav occupies a different category entirely. It supplies physical AV equipment and deploys experienced technical staff to events across the UK, covering corporate conferences, cultural productions, broadcast setups, and eSports tournaments. That combination of kit and crew is what event professionals actually need when they look for a TechPro replacement.

Pricing models across genuine AV providers vary considerably, from fixed packages for standard conference setups to bespoke quotes for large-scale productions. The maintenance software platforms on this list operate on monthly or annual software subscriptions, which is a structurally different cost model with no relevance to event budgets.

Customer support quality is another dividing line. For live events, technical support responsiveness is not a nice feature to have. A failing display or a dropped audio feed mid-presentation needs an on-site technician, not a software helpdesk ticket. Fireflyav provides hands-on technical crew at events, which is the standard that matters in this sector.

Infographic comparing AV providers vs software platforms

How to choose the right TechPro alternative for your event

Choosing a genuine replacement for TechPro starts with being clear about what you actually need. Most event professionals require some combination of equipment hire, on-site technical support, and production planning. A software subscription platform provides none of those things.

Key criteria to evaluate:

  • Event type and scale. A 50-person corporate briefing has different AV demands than a 2,000-seat eSports tournament or a broadcast production. Confirm the provider has direct experience with your event format.
  • Equipment range. Check whether the provider stocks the specific kit your event requires: LED screens, conference microphone systems, mixing desks, staging, or broadcast-grade cameras.
  • Technical crew availability. On-site support is non-negotiable for live events. Ask whether technicians are employed directly or subcontracted, and whether they have sector-specific experience.
  • UK regional coverage. London venues have different logistics to events in Leeds, Liverpool, or Manchester. Confirm the provider can reach your location with equipment and crew.
  • Integration with event management tools. If you use event management software for registration, scheduling, or ticketing, check whether the AV provider can work alongside those systems without friction.
  • Budget alignment. AV pricing ranges from modest packages for small meetings to substantial bespoke quotes for large productions. Get itemised quotes early so you can compare like for like.
  • Verified reputation. Platforms like Capterra use moderated reviews to help professionals identify reliable vendors. Look for providers with documented event-specific experience, not just generic service ratings.
  • Scalability. If your events programme is growing, choose a provider with the stock depth and crew capacity to scale with you, rather than one that suits only your current event size.

Pro Tip: Ask any prospective AV provider for references from events similar in scale and format to yours. A provider experienced in large-scale exhibition AV or broadcast production will approach a corporate conference very differently to one whose background is purely in small meetings. The reference call takes 15 minutes and saves hours of on-site problems.

Local expertise matters more than many event planners expect. A provider who knows the loading bay restrictions at a specific venue, or the acoustic challenges of a particular conference centre, brings practical value that no software platform can replicate.

Group discussing event logistics at UK venue

Fireflyav: a genuine UK alternative for event AV and production

If you have been searching for a TechPro replacement and found only maintenance software, Fireflyav is worth a direct look. It is a UK-based AV company specialising in equipment supply and technical support for corporate, cultural, broadcast, and live events, with particular depth in eSports and conference production.

https://fireflyav.co.uk

The practical difference is straightforward. Fireflyav delivers physical equipment and experienced technicians to your event, whether that is a corporate conference in Leeds, a broadcast production, or an eSports tournament. Its services cover equipment hire, event consultancy, AV technical support, and staging, which is the full range that event professionals actually need from an AV partner.

For event planners who want to understand what AV equipment their event requires before committing to a quote, Fireflyav’s guide to AV equipment for event planners is a practical starting point. It covers the kit categories, what each does, and how to match equipment to event format and venue.

Key takeaways

Most TechPro.co.uk alternatives listed in software directories are maintenance management platforms with no relevance to AV event production, making Fireflyav the only genuine like-for-like replacement for UK event professionals.

Point Details
Category mismatch is common Platforms like Limble, Fiix, and BuildOps appear as TechPro alternatives but are maintenance tools, not AV providers.
Genuine alternatives supply kit and crew A real TechPro replacement provides physical AV equipment and on-site technical support, not software subscriptions.
Pricing models differ fundamentally Maintenance software uses subscriptions; AV providers quote per event based on scale and technology requirements.
Local UK expertise matters Regional knowledge of venues, logistics, and crew availability directly affects event-day delivery quality.
Fireflyav covers the full scope Fireflyav supplies equipment hire, technical crew, and production support for corporate, broadcast, cultural, and eSports events across the UK.
"


TechPro.co.uk alternatives for UK event professionals

6/07/2026

Technician adjusting installed AV control panel

"

An installed AV system is a fixed configuration of audio and visual equipment built permanently into a venue to deliver consistent, high-quality event production. Unlike hired-in rigs that arrive and leave with each event, installed audio visual systems become part of the building’s infrastructure. They combine displays, audio equipment, signal processing, control systems, and cabling into one unified setup. For event professionals and venue managers, understanding what an installed AV system is means understanding the difference between a venue that performs reliably every time and one that depends on luck and last-minute logistics.

What is an installed AV system and what does it include?

An installed AV system is defined as a permanently integrated assembly of audio, video, control, and infrastructure components designed to operate as a single, coordinated system. The industry term for this discipline is “installed AV,” which sits within the broader ProAV (professional audio visual) sector. It is distinct from live event hire, where equipment is brought in temporarily for a single occasion.

AV systems include five main sections: displays, audio, power and processing, cabling and infrastructure, and control. Each section handles a specific function, and the system only performs well when all five work together. A venue with excellent speakers but a poorly configured control system will frustrate staff and undermine every event it hosts.

AV engineer configuring AV system components

Fireflyav specialises in supplying equipment and technical support across the corporate, cultural, broadcast, and live event sectors. Their work spans eSports arenas and corporate conference suites, which means they regularly design and support installed AV solutions across very different venue types. That breadth of experience matters when you are specifying a system that needs to serve multiple event formats.

What are the essential components of an installed AV system?

Each component plays a unique role in signal capture, processing, transmission, and output. Understanding what each one does helps venue managers make informed decisions when specifying or upgrading a system.

Displays

Displays present content to the audience. The main options are:

  • Fixed projection screens with short-throw or long-throw projectors, suited to darkened conference rooms and theatres
  • LED walls, which deliver high brightness and are ideal for large venues, exhibitions, and eSports events
  • Commercial-grade LCD or OLED panels, used for breakout rooms, reception areas, and digital signage

The choice of display depends on ambient light levels, viewing distances, and the type of content being shown. A boardroom and an eSports arena have entirely different requirements.

Audio

Infographic showing key installed AV system components

The audio section covers microphones, speakers, and amplifiers. Microphones capture speech or performance. Amplifiers boost the signal. Speakers distribute sound across the space. In installed systems, speakers are typically ceiling-mounted, wall-mounted, or flown from rigging points, rather than placed on stands. This keeps the floor clear and delivers more even sound coverage.

Processing units

Digital Signal Processors (DSPs) sit at the heart of the audio chain. They manage equalisation, feedback suppression, routing, and delay alignment between speaker zones. Without a DSP, a multi-zone venue cannot maintain consistent audio quality across different rooms or areas simultaneously.

Control systems

A control system acts as the heart of complex AV setups, simplifying operation via an easy-to-use interface that manages multiple devices from one platform. Control processors receive commands from touch panels and coordinate all connected equipment. A well-designed control interface means a non-technical member of staff can start a conference, adjust the volume, and switch inputs without calling for support.

Cabling and infrastructure

Cabling manages signal paths between every component. In modern installed AV, this includes both traditional copper cabling and network infrastructure for AV-over-IP systems. Conduit routing, rack placement, and cable management all affect long-term reliability and the ease of future upgrades.

Component Primary function Common formats
Displays Present visual content LED walls, projectors, LCD panels
Audio Capture and reproduce sound Microphones, speakers, amplifiers
Processing Manage and route signals DSPs, signal processors
Control Unify system operation Touch panels, control processors
Infrastructure Connect all components Network cabling, conduit, racks

What benefits do installed audio visual systems provide?

The core benefit of installed AV solutions is reliability. A temporary hire rig is configured fresh for each event, which introduces variables. An installed system is tested, calibrated, and ready. That consistency directly reduces the risk of technical failure during a live event.

Operational efficiency is the second major gain. Integrated control systems centralise management of AV and lighting, simplifying room turnover and event setups for non-technical staff. A venue that previously needed a technician on site for every room change can now empower its own team to handle routine setups independently.

The financial case also strengthens over time. Repeated hire costs accumulate quickly. A permanent installation carries a higher upfront cost but eliminates recurring hire fees and reduces the labour required for each event. For venues running more than a handful of events per month, the return on investment becomes clear within a few years.

Additional benefits include:

  • Scalability: modular installed systems can be expanded as the venue grows or event formats change
  • Audience experience: calibrated audio and correctly positioned displays produce a noticeably better experience than ad-hoc setups
  • Brand consistency: every event in the venue looks and sounds the same, which matters for corporate clients and repeat bookers

Pro Tip: When briefing a venue on its AV requirements, ask how many different event formats the space needs to support. A system designed for one format will underperform in others. Build flexibility in from the start.

How does network-based AV technology future-proof installed systems?

AV-over-IP architecture represents a shift away from point-to-point physical cabling toward networked signal distribution, enhancing flexibility, scalability, and ease of future upgrades. In practical terms, this means audio, video, and control signals travel across the venue’s existing IT network rather than through dedicated point-to-point cables.

Traditional point-to-point cabling connects each source directly to each display or speaker. It works, but it is rigid. Adding a new display zone means running new cable. Reconfiguring a room means physical rewiring. Network-based AV replaces this with centralised management platforms and software updates, so a venue can repurpose spaces without touching a single cable.

Approach Flexibility Upgrade method Infrastructure cost
Point-to-point cabling Low Physical rewiring Lower upfront, higher long-term
AV-over-IP (networked) High Software and licence updates Higher upfront, lower long-term

Networked AV architectures support multipoint signal distribution and centralised control, which means one source can feed multiple rooms simultaneously without additional hardware. For a conference centre running breakout sessions from a single keynote feed, this is a significant operational advantage.

Future-proofing AV installations is critical. Industry leaders highlight the importance of adopting networked solutions rather than relying on traditional cabling, so venues can evolve without total rebuilds. Planning for future-proof infrastructure from the outset is far less expensive than retrofitting a networked architecture into a building that was wired for point-to-point.

Pro Tip: When specifying a new installed AV system, ask your integrator to confirm that the network infrastructure meets the bandwidth and latency requirements for AVoIP. A standard office network is rarely sufficient without dedicated VLANs and quality-of-service configuration.

What steps should venue managers take when selecting and installing AV systems?

A thorough needs assessment is the correct starting point. Before specifying any equipment, map every space in the venue, the events each space will host, the audience sizes, and the technical requirements for each format. A room that hosts both intimate board meetings and large-scale product launches needs a very different system from one that serves a single purpose.

  1. Conduct a full site survey. Measure room dimensions, assess ambient light and noise levels, identify existing infrastructure, and locate power and data points. This information drives every subsequent decision.
  2. Build a mock-up room. Pre-installation mock-up rooms are vital to detect acoustic, airflow, and heat issues before full system rollout. Building a full-scale test environment months in advance identifies hidden challenges that would be expensive to fix after installation.
  3. Specify modular, scalable equipment. Choose components that can be upgraded individually without replacing the entire system. A DSP that supports additional licence-based features is more future-proof than one with fixed functionality.
  4. Work with a reputable AV integrator. An integrator manages the design, installation, programming, and commissioning of the system. Their experience with similar venues reduces risk and accelerates delivery. Fireflyav provides technical support across corporate and live event environments, which gives venue managers access to specialists who understand both the technical and operational demands of professional events.
  5. Schedule routine maintenance. Installed systems require periodic checks: firmware updates, cable integrity tests, speaker calibration, and control system audits. A maintenance schedule prevents small issues from becoming failures during a live event.

Pro Tip: Request a full system handover session with your integrator after installation. Your in-house team should be able to perform basic diagnostics and resets without calling for external support. That capability saves time and money on event days.

Key takeaways

An installed AV system delivers reliable, consistent event production by permanently integrating audio, video, control, and network infrastructure into a venue’s fabric.

Point Details
Definition An installed AV system is a fixed, permanently integrated audio-visual setup built into a venue.
Core components Displays, audio, DSPs, control systems, and cabling all work together as one unified system.
Operational benefit Centralised control simplifies room turnover and reduces reliance on specialist technicians for routine setups.
Network advantage AV-over-IP architectures allow venues to reconfigure and upgrade spaces via software rather than rewiring.
Installation best practice Mock-up rooms and thorough site surveys prevent costly problems before full system deployment.

Why I think most venues underestimate installed AV until it is too late

The venues that get installed AV right share one habit: they treat the AV system as infrastructure, not as equipment. The same way you would not compromise on electrical wiring or HVAC, you should not compromise on the signal paths, processing power, and control architecture that make every event work.

The most common mistake I see is specifying a system for the events a venue currently runs, rather than the events it wants to run in three years. Technology moves quickly, and a system locked into point-to-point cabling will struggle to keep pace. The venues that invested in networked AV infrastructure early are now reconfiguring spaces via software while others are facing expensive rewiring projects.

Control interface design is also undervalued. A technically excellent system that requires a specialist to operate it is a liability. The best installations I have encountered give non-technical staff genuine confidence. That confidence shows up in smoother events and fewer last-minute calls for support.

— Michael

How Fireflyav supports your installed AV system needs

Fireflyav works with event professionals and venue managers across the corporate, cultural, broadcast, and live event sectors to specify, supply, and support installed AV solutions. Whether you are equipping a conference suite, an eSports arena, or a multi-purpose cultural venue, the team brings hands-on technical expertise to every project.

https://fireflyav.co.uk

From audio visual equipment selection through to on-site technical support, Fireflyav covers the full scope of what a professional installed system requires. If you are planning a new installation or reviewing an existing setup, the product enquiry form is the fastest way to start a conversation with the team about your specific requirements.

FAQ

What is an installed AV system?

An installed AV system is a permanently fixed configuration of audio, video, control, and infrastructure components built into a venue. It delivers consistent, high-quality event production without the need for temporary hire equipment.

What are the main AV system components?

The five main components are displays, audio equipment (microphones, speakers, amplifiers), processing units (DSPs), control systems (touch panels and processors), and cabling and network infrastructure.

How does AV-over-IP differ from traditional cabling?

AV-over-IP routes audio, video, and control signals across a network rather than through dedicated point-to-point cables. This allows venues to reconfigure spaces and add new zones via software updates rather than physical rewiring.

What are the benefits of installed audio visual systems for venues?

Installed systems provide reliability, operational efficiency, and long-term cost savings. Centralised control simplifies event setups for non-technical staff, and a permanent installation eliminates recurring hire costs over time.

How should venue managers prepare for an AV installation?

Start with a full site survey and a detailed needs assessment covering all event formats the space will host. Build a mock-up room to test acoustic and thermal performance before committing to full deployment, and work with an experienced AV integrator throughout.

"


What is an installed AV system? A venue guide

9/07/2026

Technician managing concert AV production controls

"

Concert AV production is the combination of audio, video, and lighting technology deployed at live events to deliver an immersive audience experience. The industry term for this discipline is AVL production, covering audio, video, and lighting as three interdependent systems. Getting the balance right across all three determines whether an event is memorable or forgettable. The types of concert AV production you choose must match your audience size, venue conditions, and the atmosphere you want to create. Fireflyav works across live events, corporate productions, and cultural programming, and the principles that govern AV equipment selection apply consistently regardless of scale.

1. What are the primary types of audio production in concerts?

Audio production is the foundation of any concert. Without clear, well-distributed sound, every other element loses its impact. Concert audio production divides into three broad categories based on scale and technology.

Small venue audio setups use powered full-range speakers mounted on stands or fixed to walls, paired with a compact digital mixing console. These setups suit audiences under 200 and require minimal crew. The mixing console acts as the command centre for all sound, with digital models offering channel recall and onboard effects that analogue desks cannot match. That recall capability matters enormously when you are running multiple acts through the same rig.

Hands adjusting small venue audio mixer

Line-array systems are the standard for mid-size and large concerts. A line-array is a column of speaker cabinets hung or stacked together, designed to project sound evenly across long distances. Large events require full line-array systems with delay towers positioned mid-venue to cover audiences beyond the main hang’s reach. A dedicated monitor engineer manages the on-stage mix separately from the front-of-house engineer, so performers hear themselves clearly while the audience receives a different, optimised mix.

Immersive audio systems represent the most advanced category. L-ISA Hyperreal Sound from L-Acoustics is one example, used on Lorde’s Ultrasound World Tour to create intimate presence even in large arenas. These systems place sound objects in three-dimensional space rather than delivering a flat stereo image. The result is a personal connection between performer and audience that standard left-right PA systems cannot replicate.

  • Powered full-range speakers: best for venues under 200 capacity
  • Line-array systems with delay towers: standard for 200 to 1,000+ audiences
  • Immersive object-based audio: used in high-end touring and flagship events
  • Wireless microphone systems: essential for freedom of movement on stage
  • In-ear monitor systems: replace wedge monitors for cleaner stage sound

Pro Tip: Book a dedicated monitor engineer for any event above 300 attendees. Performers who cannot hear themselves make mistakes, and the audience always notices.

2. How do video production types vary for concert settings?

Video production at concerts serves two purposes: content display and audience sightlines. The technology you choose depends almost entirely on how much control you have over ambient light.

LED video walls

LED walls are standard for outdoor concerts and any indoor venue where you cannot fully black out the space. They produce high brightness output that remains visible in daylight or under house lighting. Modular LED panels clip together to form any screen size or shape, which gives production designers flexibility that fixed screens cannot offer. Pixel pitch determines the minimum comfortable viewing distance. Finer pitch panels, such as those with a 2.5mm or 3mm pitch, suit close-up viewing in smaller venues. Coarser pitch panels work for large audiences seated further from the stage. Fireflyav’s LED wall guide covers these distinctions in detail for planners making their first video production decision.

Projection systems

Projectors remain cost-effective for fully light-controlled indoor environments. A single high-lumen projector can cover a large screen area at a fraction of the cost of an equivalent LED wall. The trade-off is sensitivity to ambient light. Even modest light spill from stage fixtures can wash out a projected image. Projection mapping onto irregular surfaces, such as stage sets or architectural features, is a creative application that LED walls cannot easily replicate.

IMAG camera systems

Image magnification, known as IMAG, uses live camera feeds to show close-up footage of performers on the main screens. This is standard practice for any audience beyond roughly 500 people, where rear rows cannot see facial expressions or instrument detail. IMAG requires at least two camera operators, a vision mixer, and a dedicated video director calling shots in real time.

Video type Best environment Key advantage
LED video wall Outdoor or high ambient light High brightness, modular sizing
Projection system Fully light-controlled indoor Cost-effective for large screen areas
IMAG camera system Large audiences (500+) Brings performers close to distant viewers

3. What lighting production types enhance concert atmosphere?

Lighting is the visual language of a concert. It directs attention, creates mood, and transforms a bare stage into an environment. Concert lighting combines automated moving heads, LED pars, strobes, and effects fixtures, all controlled through DMX consoles.

Moving heads are motorised fixtures that pan, tilt, change colour, and project gobos (patterned light shapes) on command. They are the workhorse of modern concert lighting rigs. LED pars provide wash lighting in any colour without the heat or power draw of traditional tungsten pars. Strobes create high-impact flash effects timed to musical peaks. Followspots are manually operated spotlights that track performers across the stage, keeping the focal point clear for the audience.

DMX control systems connect every fixture to a lighting console, where a programmer or operator triggers cues in time with the music. The complexity of the console scales with the rig. A small club show might run on a compact 12-channel board. A festival stage uses a full-size console with hundreds of fixture profiles, timecoded sequences, and backup systems.

Atmospheric effects complete the picture. Haze machines distribute a fine particle mist that makes light beams visible in the air, turning a flat wash into a three-dimensional effect. Fog machines produce denser, lower-lying cloud effects. Both require careful management in enclosed venues to avoid triggering fire alarms.

Pro Tip: Always request haze-compatible fire alarm suppression from your venue before the production day. Discovering the alarm trips mid-show is a costly and avoidable problem.

4. How does event scale and venue environment influence AV production choices?

Live event AV production scales according to audience capacity across three tiers, and each tier demands a different technical approach.

  1. Intimate events (under 200 attendees): Powered speakers, a compact digital console, basic LED par wash, and a simple moving head rig cover most needs. Video is optional at this scale, though a single screen for content playback adds value for branded events.
  2. Mid-size events (200 to 1,000 attendees): Line-array systems replace powered speakers. A dedicated monitor engineer joins the crew. LED video walls or projection screens become necessary for audience sightlines. Lighting rigs expand to include automated moving heads and atmospheric effects.
  3. Large events (1,000+ attendees): Full line-array systems with delay towers, multi-camera IMAG, large-format LED walls, and complex automated lighting rigs are the baseline. Crew size increases significantly, with separate engineers for front-of-house audio, monitors, video, and lighting.

Venue environment shapes every decision. Ambient light control determines whether you use LED or projection for video. Ceiling height limits the size of lighting rigs and the hang positions available for line-array speakers. Power distribution is a critical infrastructure element that planners frequently underestimate. A large concert rig draws substantial electrical load, and power distribution mapping must happen before equipment arrives on site. Rigging safety, cable management, and crew communication systems are equally non-negotiable at scale.

Pro Tip: Build your AV specification from the event’s purpose outward, not from a generic equipment list. A corporate awards night and a rock concert may share the same venue but require completely different AVL approaches.

The most significant shift in concert AV production is the move from coverage-based audio to experience-based audio. Traditional PA design asks: “Can every seat hear the show?” Immersive audio design asks: “Can every seat feel the show?”

L-ISA Hyperreal Sound places individual sound objects across a wide speaker array rather than collapsing everything into a stereo image. The effect is a wider, more natural soundstage that maintains intimacy at arena scale. This technology is now appearing on mid-tier touring productions, not just flagship world tours.

Predictive modelling software like Soundvision allows audio engineers to model speaker coverage across a venue’s geometry before a single cable is run. The software identifies dead spots and coverage gaps in advance. On-site tuning remains essential because real-world acoustic conditions always differ from the model, but the gap between plan and reality narrows significantly.

“Immersive audio technology bridges the gap between large arena scale and intimate audience connection, redefining what concert sound design can achieve. The best productions in 2026 are not louder. They are more precise, more spatial, and more personal than anything a conventional PA system delivers.”

Lighting automation is advancing at a similar pace. Motorised rigging systems allow lighting positions to move during a show, creating dynamic overhead configurations that static trusses cannot achieve. Integrated communication systems, including digital intercom networks connecting audio, video, and lighting crews, reduce errors and improve show quality at every scale.

Key takeaways

The most effective concert AV production aligns audio, video, and lighting technology to audience size, venue conditions, and the specific goals of the event.

Point Details
Scale determines your rig Intimate, mid-size, and large events each require a distinct AVL specification.
Ambient light drives video choice Use LED walls outdoors or in bright spaces; use projectors only in fully light-controlled rooms.
Audio has three tiers Powered speakers, line-array systems, and immersive object-based audio each suit different scales.
Infrastructure is non-negotiable Power distribution, rigging safety, and crew communications define show quality as much as the headline equipment.
Build from purpose outward Start with the event’s goals, then select the technology. Generic equipment lists produce generic results.

What I have learned from watching planners get concert AV wrong

The most common mistake I see event planners make is treating AVL as a single line item rather than three interdependent disciplines. A planner will spend weeks on the lighting design, then book the cheapest available audio package and wonder why the show feels flat. Audio, video, and lighting must be planned together, with a single technical director overseeing the integration.

The second mistake is underestimating infrastructure. Power distribution, rigging, and crew communications rarely appear on a venue’s standard equipment list, yet they determine whether the headline gear performs as intended. I have seen technically impressive rigs underperform because the power supply was inadequate or the lighting and audio crews had no reliable way to communicate during the show.

My strongest advice is to involve your AV supplier at the venue walkthrough stage, not after the contract is signed. The 2026 standards for London venues make clear that early technical collaboration produces better outcomes and fewer surprises on the day. Emerging technologies like immersive audio and motorised rigging are worth exploring, but only when the fundamentals are already solid. Get the PA right before you book the object-based audio upgrade.

— Michael

Fireflyav’s concert AV production expertise

Fireflyav supplies AV equipment and technical support for live events, cultural productions, and corporate programmes across the UK. Whether you are planning an intimate branded showcase or a large-scale concert, the right equipment specification starts with understanding your venue, your audience, and your goals.

https://fireflyav.co.uk

The AV equipment guide for planners on the Fireflyav website covers audio, video, and lighting technologies in practical detail, written specifically for event organisers rather than engineers. For a tailored equipment specification, you can submit your project details directly and the Fireflyav team will match the right kit to your brief.

FAQ

What are the three core types of concert AV production?

Concert AV production covers audio, video, and lighting, collectively known as AVL production. Each discipline requires separate planning, equipment, and crew.

When should I use an LED video wall instead of a projector?

LED walls suit outdoor events and venues with high ambient light. Projectors work best in fully light-controlled indoor spaces where brightness is not a limiting factor.

How do I choose the right audio system for my concert?

Match the system to your audience size. Events under 200 people suit powered speakers; audiences of 200 to 1,000 need a line-array system; events above 1,000 require full line-array rigs with delay towers and a dedicated monitor engineer.

What is IMAG and when is it necessary?

IMAG stands for image magnification. It uses live camera feeds to display close-up performer footage on screens, and it becomes necessary when audience members beyond roughly 500 seats cannot see the stage clearly.

What does DMX control mean in concert lighting?

DMX is the standard communication protocol that connects lighting fixtures to a control console. It allows a single operator to trigger colour changes, movement, and effects across an entire rig simultaneously.

"


Types of concert AV production: a planner’s guide

9/07/2026

Event technician adjusting PA mixer controls outdoors

"

A PA system, short for Public Address system, is an integrated audio setup that amplifies and distributes sound so large audiences can hear clearly at events and conferences. Every working PA system combines four core components: microphones, mixers, amplifiers, and speakers. Together, these components convert a speaker’s voice or a music source into clear, consistent sound across an entire venue. Understanding what a PA system does at events is the first step to choosing the right one and setting it up correctly.

What is a PA system at events and how does it work?

A PA system at events is the complete chain of equipment that takes sound from a source and delivers it to an audience at the right volume and quality. Without it, a speaker addressing 200 delegates in a conference hall would be inaudible beyond the first few rows. The system works by capturing sound through a microphone, routing it through a mixer, boosting it with an amplifier, and broadcasting it through speakers positioned around the venue.

Modern PA systems can also integrate zoning capabilities, allowing selective audio targeting to defined areas. This means a planner running a multi-room conference can send different audio feeds to different spaces without bleed or confusion. Zoning is particularly valuable for exhibitions, trade shows, and large corporate events where separate sessions run simultaneously.

The industry also uses the term “sound reinforcement system” (SR system), which is related but distinct. A PA system prioritises speech intelligibility and clear announcements. An SR system is engineered for high-fidelity music reproduction. Knowing the difference matters when you are booking equipment for your event.

What are the main components of a PA system?

Infographic comparing powered and passive PA system speakers

PA systems typically consist of microphones, mixers, amplifiers, and speakers, each playing a specific role in the audio chain. Removing or misconfiguring any one component degrades the entire output.

Here is what each component does:

  • Microphones capture sound at the source. Handheld, lapel, and headset microphones each suit different event formats. A panel discussion benefits from individual lapel mics; a keynote speaker often uses a handheld or podium mic.
  • Mixers combine multiple audio inputs and let a sound engineer adjust levels, tone, and routing. A mixer is the control centre of any PA setup.
  • Amplifiers boost the electrical signal from the mixer to a level powerful enough to drive the speakers. Without sufficient amplification, speakers produce weak, distorted sound.
  • Speakers convert the amplified signal back into sound waves. Their placement and coverage angle determine how evenly sound reaches the audience.

One critical distinction for event planners is the difference between passive and powered speakers. Passive speakers require separate amplifiers, whereas powered (active) speakers have built-in amplifiers, simplifying setup and making them ideal for smaller or mobile events. Choosing the right speaker type directly affects portability, sound quality, and how long your crew spends on setup.

Pro Tip: For conferences with a conference mic system, always request a dedicated channel on the mixer for each microphone. This gives your sound engineer precise control over individual speakers and eliminates the risk of one hot mic overwhelming the room.

Hands connecting cables to powered PA speaker

What are the primary benefits of using a PA system at live events?

PA systems offer five primary benefits: enhanced sound quality, wider audience reach, adaptability to various environments, user-friendly operation, and cost-effectiveness compared to permanent installations. These advantages become critical in large auditoriums or open-air events where natural acoustics fall short.

  • Enhanced sound clarity means every attendee hears the same quality of audio, regardless of where they sit. This directly improves engagement and reduces listener fatigue.
  • Wider reach allows a single speaker to address thousands of people simultaneously, which is impossible without amplification.
  • Adaptability means the same core equipment can work in a hotel ballroom, an outdoor festival site, or a corporate boardroom with the right configuration.
  • User-friendly operation has improved significantly. Modern portable PA systems are designed for quick deployment, reducing the technical burden on event staff.
  • Cost-effectiveness is a genuine advantage for planners. Hiring a PA system for a one-off event costs a fraction of installing a permanent audio infrastructure.

The benefit that most planners overlook is safety. PA systems play a critical role as infrastructure for emergency communication and coordinating evacuations during incidents at large events. A well-configured PA system is not just a comfort feature. It is a safety asset that regulators and venue managers increasingly expect to see in event risk assessments.

“A PA system that is designed only for entertainment and not for emergency communication is a system that is only half-finished. Every event planner should ask their AV supplier how the system handles an emergency broadcast before the event goes live.”

Understanding the benefits of AV at corporate events goes well beyond sound quality. The right audio setup shapes how your audience perceives the entire event.

How to set up a PA system for an event

Effective PA system setup follows six key steps: plan placement, connect microphones to the mixer, link the mixer to amplifiers and speakers, verify power order, perform sound checks, and finalise equalisation. Skipping any step creates problems that are difficult to fix once an event is live.

  1. Plan speaker and microphone placement. Walk the venue before setup begins. Identify where the audience will sit, where sound reflections are likely, and where cables can run safely. Speakers should sit at ear level and angle towards the audience, not the ceiling.
  2. Connect microphones to the mixer. Use balanced XLR cables to minimise interference. Label each channel on the mixer so your engineer knows which input corresponds to which microphone.
  3. Link the mixer to amplifiers and speakers. Run the main output from the mixer into the amplifier inputs, then connect the amplifier outputs to the speakers. For powered speakers, the mixer output connects directly.
  4. Verify power sequencing. Proper power sequencing prevents equipment damage. Power amplifiers turn on last and off first. Connect and verify all components and levels before switching on the amplifiers.
  5. Conduct sound checks. Test every microphone at the volume levels expected during the event. Walk the room while someone speaks into each mic to identify dead spots or feedback zones.
  6. Finalise equalisation. Adjust the mixer’s EQ to compensate for the room’s acoustic character. Rooms with hard surfaces need high-frequency cuts; rooms with heavy soft furnishings often need a boost in the mid-range.

Microphones should sit 2–3 inches from the speaker’s mouth for clarity and to avoid feedback. Speakers positioned too close to microphones are the single most common cause of the high-pitched squeal that ruins event openings.

Pro Tip: Always run a full dress rehearsal with the actual presenters, not just a stand-in. Presenters move differently, hold microphones at different angles, and project at different volumes. A rehearsal with the real people eliminates 90% of live surprises.

For a broader view of AV equipment for event planners, understanding how PA systems fit within the wider AV stack helps you make better decisions at the planning stage.

PA systems vs. sound reinforcement systems: which does your event need?

PA systems prioritise speech intelligibility and effective announcements, while sound reinforcement systems are tailored to high-fidelity music reproduction. Choosing the right system aligns with the primary content type of your event.

Event type Recommended system Primary reason
Corporate conference PA system Speech clarity is the priority
Award ceremony (speeches and music) Hybrid PA and SR setup Both intelligibility and music fidelity required
Live music concert SR system Full-frequency music reproduction needed
Exhibition or trade show PA system with zoning Multiple zones, announcements, and background audio
eSports event SR system with PA overlay High-impact audio plus commentary and announcements

The scale difference is also significant. A PA system for a 50-person meeting might be a single powered speaker and a wireless microphone. An SR system for a 5,000-capacity music venue involves line arrays, subwoofers, and a dedicated front-of-house engineer. PA systems range vastly in scale, from simple single-microphone setups to complex multi-zone arrays requiring professional operation.

Fireflyav works across both categories, supplying equipment and technical support for corporate conferences, live events, and eSports productions where the audio requirements differ significantly between formats.

What should planners consider when choosing a PA system?

Event planners should consider audience size, venue size, indoor or outdoor settings, and integration needs when choosing a PA system. Getting this assessment right before booking equipment saves time, money, and stress on the day.

  • Audience size and venue acoustics determine the power and coverage you need. An outdoor event for 500 people requires far more amplification than an indoor seminar for 80.
  • Portability and setup time matter greatly for temporary venues. Powered speakers and compact mixers reduce crew time and the risk of setup errors.
  • Multi-zone capability is worth specifying for segmented spaces. A conference centre with breakout rooms needs a system that can route different audio to different areas independently.
  • Integration with other AV equipment is increasingly expected. Your PA system should connect cleanly with presentation systems, video conferencing platforms, and any multi-venue screen networks used for signage and communication.
  • Budget and scalability should be assessed together. Hiring equipment for individual events is almost always more cost-effective than purchasing, particularly when your event calendar varies in scale.
  • Renting versus purchasing comes down to frequency of use. Planners who run more than 20 events per year with consistent technical requirements may find ownership viable. For most event coordinators, rental from a specialist supplier gives access to current equipment without capital expenditure.

Pro Tip: Ask your AV supplier whether the PA system includes a dedicated emergency broadcast channel. This is not a luxury. Many venues now require it as part of their event licence conditions.

Key takeaways

A PA system is the foundation of clear communication at any live event, and its design should account for both audience experience and emergency safety from the outset.

Point Details
Core components Every PA system needs microphones, a mixer, amplifiers, and speakers working together.
Safety function PA systems serve as emergency communication infrastructure, not just audio comfort.
PA vs. SR systems Choose a PA system for speech-led events and an SR system for music-focused productions.
Setup sequence Follow the six-step setup process and always conduct a full sound check before the event.
Choosing the right system Match system scale and features to audience size, venue type, and integration requirements.

Why I think most event planners underestimate their PA system

After working across corporate conferences, live events, and eSports productions, the pattern I see most often is this: planners spend weeks on catering, décor, and scheduling, then treat the PA system as an afterthought booked two days before the event. That approach almost always produces problems.

The most common mistake is underspecifying for the venue. A system that sounds adequate in an empty room often struggles once 300 people fill the space and absorb high frequencies. Rooms change acoustically when they fill up, and a sound check in an empty venue is only half the job.

The second mistake is ignoring the safety angle entirely. Planners who have never had to use a PA system for an emergency evacuation tend to treat it as a theoretical concern. It is not. The ability to cut all programmed audio and broadcast a clear, authoritative voice across every zone in the building is a genuine operational requirement.

What I find encouraging is that PA technology has become genuinely easier to use without sacrificing quality. Powered speakers with built-in digital signal processing, wireless microphone systems with automatic frequency management, and compact digital mixers have all reduced the technical barrier significantly. The result is that a well-briefed event coordinator can manage a straightforward PA setup without a dedicated sound engineer, provided the system has been correctly specified and tested in advance.

The planners who get the best results treat their AV supplier as a technical partner from the planning stage, not a delivery service on the day.

— Michael

How Fireflyav supports your event audio setup

Fireflyav supplies audio visual equipment and technical support to event planners across the corporate, cultural, and live event sectors. Whether you are running a single-stage conference or a multi-room exhibition, the team can specify, deliver, and operate a PA system matched to your exact venue and audience requirements.

https://fireflyav.co.uk

From conference microphone systems to full multi-zone PA rigs, Fireflyav’s equipment catalogue covers the full range of event audio needs. The technical support team is available throughout your event, not just at setup. If you are planning your next event and want to get the audio right from the start, fill out the project form and the Fireflyav team will come back to you with a tailored equipment recommendation.

FAQ

What does PA stand for in events?

PA stands for Public Address. A PA system is an audio setup designed to amplify and distribute sound clearly to a large audience at events, conferences, and public gatherings.

How do I know what size PA system I need?

Audience size, venue dimensions, and whether the event is indoors or outdoors are the primary factors. Larger outdoor events require significantly more amplification and speaker coverage than small indoor meetings.

What is the difference between a PA system and a sound reinforcement system?

A PA system prioritises speech intelligibility and announcements, while a sound reinforcement system is engineered for high-fidelity music reproduction. The right choice depends on whether your event is voice-led or music-led.

Can a PA system be used for emergency announcements?

PA systems function as critical safety infrastructure, enabling emergency broadcasts and evacuation coordination. Planners should confirm that their system includes a dedicated emergency broadcast channel before the event.

Should I hire or buy a PA system for my events?

Hiring is more cost-effective for most event planners, giving access to current equipment without capital expenditure. Purchasing becomes viable only when you run a high volume of events with consistent and predictable technical requirements.

"


PA systems for events: what every planner needs to know

11/07/2026

AV technician adjusting stage equipment

"

AV technical support is the professional service that keeps audio-visual systems running correctly before, during, and after an event. For event professionals in Liverpool, reliable AV technical support determines whether a corporate conference, live concert, or product launch lands with impact or falls apart at the first technical fault. The industry term is “event technical support,” and it covers everything from equipment installation and signal routing to real-time fault diagnosis on the day. Fireflyav specialises in exactly this, serving Liverpool’s corporate, cultural, and live event sectors with equipment supply and hands-on technical expertise.

What makes AV technical support reliable for Liverpool events?

Reliable audio visual support in Liverpool rests on three foundations: technical knowledge, local responsiveness, and equipment quality. A provider that excels in only one of these will eventually let you down at the worst possible moment.

Woman monitoring AV equipment in control room

The most dependable providers combine expert installation with on-site troubleshooting, so the same team that sets up your system also resolves any fault that appears during the event. This continuity matters. A technician who installed the rig knows exactly where to look when something goes wrong at 7:30 PM with 400 delegates in the room.

Local knowledge is a genuine advantage. Liverpool providers respond faster and understand the acoustic and structural quirks of venues like the ACC Liverpool, St George’s Hall, and the Titanic Hotel far better than firms based in London or Manchester. That familiarity reduces setup time and prevents surprises.

  • Technical expertise: Technicians must understand signal flow, AV integration, and live event operation.
  • Responsive troubleshooting: On-site staff must diagnose and fix faults without interrupting the event.
  • Event type experience: Corporate conferences, concerts, and live productions each demand different setups.
  • Industry best practices: Providers should follow recognised standards for installation, safety, and system design.

Pro Tip: Ask any provider to name three Liverpool venues they have worked in recently. A confident, specific answer tells you more about their local expertise than any brochure.

Top 10 qualities of leading Liverpool AV technical support providers

1. Comprehensive installation and setup

Professional AV support begins long before the event starts. Comprehensive AV installation covers system design, equipment supply, physical installation, commissioning, and a full technical rehearsal. Providers who skip the commissioning stage leave hidden faults waiting to surface during your event. Every cable run, signal path, and display output should be tested and signed off before doors open.

2. 24/7 technical support availability

Events do not follow office hours, and neither should your support team. The best Liverpool event technical support providers offer round-the-clock contact, whether that means a dedicated technician on site or an emergency call line backed by a rapid response team. A provider who is unreachable at 6:00 AM on event day is not a provider worth hiring.

3. Equipment testing and preventive maintenance

High-quality professional AV equipment only performs reliably when it is regularly tested and maintained. Leading providers run pre-event equipment checks as standard, replacing any unit that shows signs of failure before it reaches the venue. This preventive approach is far less disruptive than reactive repairs mid-show.

4. Flexible service packages tailored to event scale

A 50-person boardroom briefing and a 2,000-capacity concert require entirely different levels of support. Flexible AV service packages allow event professionals to match their support level to their actual needs, avoiding both under-resourced setups and unnecessary cost. Providers who offer only fixed packages often deliver a poor fit for events at either end of the scale.

5. High-quality, professional-grade equipment

The equipment itself is not a secondary consideration. Underpowered or ageing gear produces poor audio, dim visuals, and unreliable connectivity. Professional AV support providers invest in current, professional-grade equipment, from line array speaker systems and high-brightness projectors to LED walls and broadcast-quality video switchers. The quality of the kit directly shapes the quality of the attendee experience.

Pro Tip: Request a full equipment list before signing any contract. If a provider is vague about specific makes and models, that vagueness usually reflects the quality of the gear.

6. Strong communication and pre-event coordination

The most technically capable team will still cause problems if communication breaks down. Leading providers assign a dedicated account contact who attends pre-event planning meetings, reviews the event schedule, and flags potential technical conflicts early. Poor coordination between the AV team and the event producer is one of the most common causes of avoidable problems on the day.

7. Certified and experienced on-site technicians

Certified AV technicians hold current qualifications and receive ongoing training to stay current with modern systems. Certification is not just a credential. It signals that a technician understands the principles behind the equipment, not just the buttons to press. For complex events involving broadcast feeds, eSports setups, or multi-room conferencing, that depth of knowledge is non-negotiable.

8. Integration with digital and IT infrastructure

Modern events rely on networked AV systems. Video conferencing platforms, live streaming feeds, and digital signage all require AV equipment to communicate reliably with IT infrastructure. Providers who understand AV and IT integration can configure systems that work across both domains, preventing the connectivity failures that frequently disrupt hybrid events and live broadcasts.

9. Proactive problem prevention

The best technical support is the kind the audience never notices. Experienced providers conduct thorough risk assessments before the event, identifying single points of failure and putting backup systems in place. This means a spare projector on standby, a redundant audio feed, and a tested failover route for any critical signal path. Prevention is always cheaper than recovery.

10. Post-event support and system analysis

Post-event support includes system breakdown analysis, fault reporting, and user training where needed. This follow-up stage is frequently overlooked, yet it is where the most useful learning happens. A provider who reviews what worked and what did not will deliver a noticeably better service at your next event.

How to assess AV technical support companies in Liverpool

Choosing the right provider requires more than reading a website. The following criteria give you a structured way to compare options before committing.

  • Client testimonials and case studies: Ask for references from events similar in scale and type to yours. A provider with strong corporate conference credentials may not be the right fit for a live music production.
  • Accreditation and compliance: Confirm that the provider follows recognised industry standards for installation and electrical safety. Unaccredited providers carry higher risk.
  • Equipment portfolio: Review the full equipment list. Confirm that the gear is current, well-maintained, and appropriate for your venue and audience size.
  • Support responsiveness: Test their response time before you hire them. Send an enquiry and note how quickly and thoroughly they reply. Slow pre-sales communication predicts slow on-site support.
  • Local presence: A Liverpool-based team will reach your venue faster in an emergency and will have direct experience with local venues and their technical constraints.
  • Budget versus quality: The cheapest quote rarely reflects the true cost. Factor in the risk of equipment failure, inadequate staffing, or poor-quality gear when comparing prices.
  • Trial or demonstration: Where possible, request a site visit or a demonstration of their setup process. Watching a team work tells you more than any proposal document.

Key takeaways

Reliable AV technical support in Liverpool requires certified technicians, professional-grade equipment, local venue knowledge, and proactive fault prevention working together.

Point Details
Prioritise local expertise Liverpool-based providers respond faster and know local venues better than distant firms.
Demand certified technicians Certification confirms technicians understand systems deeply, not just operationally.
Require flexible packages Match support level to event scale to avoid both gaps in coverage and unnecessary cost.
Insist on post-event review Providers who analyse faults after each event deliver measurably better support over time.
Test communication early A provider’s pre-sales responsiveness accurately predicts their on-site communication quality.

What I have learned from years of Liverpool event AV work

The single biggest mistake event professionals make is treating AV support as a commodity purchase. They compare quotes, pick the lowest number, and then spend the event day managing a team that does not know the venue, does not have backup equipment, and does not have a clear chain of command when something fails.

The providers worth working with are the ones who ask difficult questions before the event. They want to know your signal flow, your failover plan, your venue’s power capacity, and your broadcast requirements. That level of preparation is not bureaucracy. It is the difference between an event that runs cleanly and one that becomes a crisis management exercise.

Local relationships matter more than most event professionals realise. A provider who has worked at the ACC Liverpool or the Liverpool Philharmonic Hall before will have solved problems in those rooms that no amount of general experience can substitute for. They know where the acoustic dead spots are, how the venue’s house system integrates with external rigs, and which loading bays cause delays. That knowledge saves time and prevents surprises.

The other thing I would say plainly: do not wait until the week before to confirm your technical support. The best providers in Liverpool book up months in advance, particularly for the autumn conference season and major cultural events. If you are planning an event for october or november, your AV team should be confirmed by july at the latest.

— Michael

Fireflyav: professional AV technical support for Liverpool events

Fireflyav provides equipment supply and hands-on technical support for corporate events, concerts, live productions, and eSports across Liverpool and the wider UK. Their team covers the full production cycle, from initial system design through to on-site operation and post-event review.

https://fireflyav.co.uk

Event professionals who work with Fireflyav get access to professional-grade equipment, certified technicians, and a team with direct experience across the corporate, broadcast, and live event sectors. Whether you are planning a conference for 50 or a live production for thousands, Fireflyav builds a support package around your specific requirements. Start your next project by filling out the product form, or read Fireflyav’s planner’s guide to corporate AV to understand exactly what your event needs.

FAQ

What does AV technical support include for live events?

AV technical support covers equipment installation, system commissioning, on-site fault diagnosis, and post-event analysis. On-site technicians manage real-time issues during corporate events, concerts, and live productions to prevent disruption.

How far in advance should I book AV support in Liverpool?

For major events, book your AV technical support at least three months in advance. Liverpool providers with strong reputations fill their calendars quickly, particularly during the autumn conference and events season.

Why does local AV support matter in Liverpool?

Local providers understand Liverpool venue layouts, acoustics, and logistics better than firms based elsewhere. That familiarity reduces setup time and improves fault response speed on the day.

What qualifications should AV technicians hold?

Certified AV technicians hold current industry qualifications and receive ongoing training to stay current with modern systems and equipment. Certification confirms technical depth, not just operational familiarity.

How do I compare AV support providers before hiring?

Review case studies from events similar to yours, confirm equipment quality, test pre-sales response times, and ask specifically about backup and failover procedures. A provider who cannot answer those questions clearly is not ready for a professional event.

"


AV technical support Liverpool: 10 qualities to look for

9/07/2026

Technician assembling LED screen panels at live event

"

LED screen setup for live events is the process of planning, assembling, and calibrating modular LED display panels to deliver clear, bright visuals to every seat in a venue. The industry term for the primary display format is an LED video wall, and getting it right requires decisions on pixel pitch, brightness, rigging, and signal routing long before the first panel goes up. Poor planning is the leading cause of onsite failures, from structural collapses to colour inconsistency. This guide gives event professionals a practical, step-by-step framework covering selection, preparation, installation, and troubleshooting for any scale of live event.

How to set up LED screens for live events: choosing the right display

Pixel pitch is the most significant factor for image clarity in any live event display. It refers to the distance in millimetres between the centre of one LED cluster and the next. The smaller the pitch, the sharper the image at close range.

Close-up of technician comparing LED panel pixel pitches

Recommended pitch ranges follow viewing distance: P1.9–P2.9 suits indoor conferences where audiences sit within 3–6 metres, P3–P4 works for indoor stages with mid-range sightlines, and P4–P6 is appropriate for large outdoor events where viewers stand further back. Choosing a pitch that is too coarse for the viewing distance produces a pixelated image that undermines the entire production.

Brightness is the second critical variable. Outdoor LED screens require 5,500–7,000 nits to compete with direct sunlight, while indoor screens perform well at 800–2,000 nits without causing glare. Running an outdoor panel at indoor brightness settings renders the content invisible in daylight.

Screen size and environmental factors

Screen size follows a straightforward rule: the furthest viewer in the venue determines the minimum screen height. A general industry benchmark is that screen height should equal roughly one-tenth of the maximum viewing distance. A 30-metre viewing distance therefore calls for a screen at least 3 metres tall.

Infographic showing steps to set up LED screen at live events

For outdoor setups, IP ratings matter as much as brightness. An IP65-rated enclosure protects against dust ingress and water jets, making it the minimum standard for any temporary outdoor screen setup exposed to British weather. IP54 is acceptable for covered outdoor areas but not open-air stages.

Environment Pixel pitch Brightness IP rating
Indoor conference P1.9–P2.9 800–1,500 nits Not required
Indoor stage P3–P4 1,000–2,000 nits Not required
Covered outdoor P4–P5 3,000–4,500 nits IP54+
Open-air outdoor P5–P6 5,500–7,000 nits IP65+

Key considerations when finalising your screen specification:

  • Confirm the furthest and closest viewer distances before ordering panels
  • Account for ambient light sources, including windows, stage wash, and daylight
  • Verify that the chosen pixel pitch is available in the panel format you need
  • For LED display rental, confirm that the supplier’s stock matches your pitch requirement

What preparation does an LED screen installation require?

Rushing the site survey is the leading cause of onsite LED screen failures. A thorough site survey produces a CAD drawing that maps screen position, rigging points, cable runs, and power distribution before any equipment arrives on site.

Structural rigging demands a load calculation for every hanging point. LED video walls are heavy. A 6x4 metre wall using standard rental cabinets can weigh over 400kg. Truss systems must be rated above that figure with a safety margin, and ground support structures need base plates sized for the floor surface. Stage depth must also account for a back-rigging and cabling footprint of 1–2 metres, a detail that is frequently overlooked when planning tight stage layouts.

Power distribution planning is equally non-negotiable. LED walls draw significant current, and sharing circuits with lighting or audio equipment without load balancing causes voltage drops and tripped breakers mid-show. Each screen zone should have a dedicated power feed with surge protection at the distribution board.

Pro Tip: Always request the venue’s electrical single-line diagram before finalising your power plan. It shows the exact capacity of each circuit and prevents surprises on the day.

Preparation checklist before any LED installation:

  • Complete a physical site survey and produce a scaled CAD layout
  • Calculate rigging loads and confirm truss or ground support ratings
  • Identify dedicated power circuits and confirm total amperage available
  • Map all signal cable routes from video processor to each panel zone
  • Confirm access routes for flight cases and panel delivery to the stage

How do you assemble and calibrate an LED video wall on site?

Professional LED setup follows a defined technical pipeline: site survey and CAD planning, structural rigging, panel assembly and interlocking, power and signal distribution, and video processor mapping with calibration. Skipping or compressing any stage creates problems that compound later.

Panel assembly begins with the rigging frame or ground support structure. Panels lock together using quick-lock mechanisms, typically a combination of magnetic alignment pins and locking levers. Work from the centre outward to keep the wall plumb. A wall that is even slightly bowed or twisted will show visible seams under stage lighting.

Power and signal cabling

Power cables run from the distribution board to each panel column. Signal cables, most commonly fibre optic or Cat6 for longer runs, carry the video feed from the processor to the first panel in each chain, then daisy-chain through the column. Keep power and signal cables physically separated where possible to reduce interference.

Pre-assembly and calibration in a controlled environment before site delivery prevents colour inconsistencies caused by batch variations in LED modules. Minor differences between manufacturing batches are invisible to the eye in isolation but become obvious when panels sit side by side on a live wall. Testing and matching panels before they leave the warehouse is far more efficient than correcting colour shifts on a dark stage at midnight.

Pro Tip: Bring a calibration laptop and the video processor’s software to every installation. On-site brightness and colour temperature adjustments take under 30 minutes and prevent the washed-out look that plagues poorly integrated LED walls.

Step-by-step installation sequence:

  1. Erect and level the rigging structure or ground support frame
  2. Hang or stack panels from centre outward, engaging all locking mechanisms
  3. Connect power feeds to each panel column and test for voltage stability
  4. Run signal cables from the video processor to each panel chain
  5. Power up the wall in sections and check for dead pixels or colour anomalies
  6. Map the full resolution in the video processor and assign input sources
  7. Calibrate brightness and colour against the ambient light conditions in the venue
  8. Run a full content test with the actual show files before the audience arrives

What are the most common LED screen problems at live events?

Refresh rate is the most misunderstood technical specification in live event LED. Screens must run at a minimum of 3,840Hz to prevent strobing or rolling lines when captured on camera. Visual artefacts appear below this threshold and are particularly damaging for broadcast and social media content, where the camera shutter interacts with the screen’s scan rate.

Flicker and blackouts during a show almost always trace back to signal integrity problems. Loose connectors, cable runs that exceed the recommended length for the signal type, or a video processor that is outputting a resolution the panels cannot accept all cause the same symptom. The fix is methodical: check the processor output first, then trace the signal chain panel by panel.

Colour drift mid-show is a subtler problem. LED panels warm up over the first 20–30 minutes of operation and their colour temperature shifts slightly. Running a 30-minute warm-up before the audience enters and recalibrating after warm-up eliminates this issue entirely. Failing to synchronise LED wall colour temperature with stage lighting leads to washed-out subjects on camera, making this step critical for any event that involves live video capture.

Common issues and their fixes:

  • Strobing or rolling lines: check refresh rate setting in the processor; raise to 3,840Hz minimum
  • Dead panel or black zone: use quick-lock panel replacement protocol; a faulty module swaps out in under 5 minutes from front or back
  • Colour mismatch between panels: run calibration software; if persistent, check panel batch numbers
  • Signal dropout: inspect all connectors and cable lengths; replace any run exceeding the signal type’s rated distance
  • Washed-out image: reduce ambient light, increase screen brightness, or adjust the video processor’s output levels

Key takeaways

A successful LED video wall installation depends on matching pixel pitch to viewing distance, completing a rigorous site survey, and calibrating the display before the audience arrives.

Point Details
Pixel pitch determines clarity Match pitch to viewing distance: P1.9–P2.9 for close indoor use, P4–P6 for outdoor events.
Brightness must suit the environment Indoor screens need 800–2,000 nits; outdoor screens require 5,500–7,000 nits.
Site survey prevents failures Structural loads, power capacity, and cable routes must be verified before installation begins.
Pre-calibration avoids colour drift Test and match panels in a controlled environment before delivery to eliminate batch inconsistencies.
Refresh rate protects broadcast quality Run screens at 3,840Hz minimum to prevent strobing in camera and social media capture.

Why preparation is the only thing that actually matters

Event professionals often ask me which panel brand or pixel pitch they should use. My honest answer is that the choice of hardware matters far less than the quality of preparation behind it.

I have seen beautifully specified LED walls fail on the night because nobody confirmed the venue’s power capacity. I have also seen modest P4 panels deliver a genuinely impressive result because the team ran a proper site survey, pre-calibrated every cabinet, and built a 30-minute warm-up into the schedule. The hardware is almost never the problem.

The detail that most event organisers underestimate is the integration between the LED wall and the rest of the stage environment. Failing to coordinate LED colour temperature with stage lighting is the single most common reason a live event looks great in the room but terrible on camera. If your event involves any video capture, treat the LED wall, the lighting rig, and the camera system as one integrated unit, not three separate departments.

Creative configurations like curved screens, angled side panels, and LED floors are worth considering for events where audience immersion is the goal. They require more rigging complexity and a longer calibration window, but the visual impact is substantial. For one-off events, renting LED screens with a full technical crew is almost always the right call. Owning equipment without trained operators carries real liability in a live setting.

— Michael

Fireflyav’s LED and AV equipment for live events

Fireflyav supplies professional AV equipment and technical support to the live event, corporate, broadcast, and cultural sectors. Whether you are planning a single-day conference or a multi-day festival stage, the right display technology makes a measurable difference to audience engagement.

https://fireflyav.co.uk

Fireflyav’s rental inventory includes the Absen LED M2.9 Pro video wall panel, a high-performance rental cabinet suited to indoor stages and corporate conferences. The team provides end-to-end technical support covering rigging, calibration, and on-site operation. For a full overview of the display and AV technology available for your next event, the AV equipment guide covers everything from LED video walls to signal processing. You can also submit your project details directly to discuss your specific requirements with the Fireflyav team.

FAQ

What pixel pitch should I use for a live event?

Pixel pitch depends on viewing distance: use P1.9–P2.9 for indoor conferences, P3–P4 for indoor stages, and P4–P6 for outdoor events where audiences are further from the screen.

How bright does an LED screen need to be outdoors?

Outdoor LED screens require 5,500–7,000 nits to remain visible in direct sunlight. Indoor screens perform well at 800–2,000 nits without causing eye strain or glare.

What refresh rate do LED screens need for live event video?

Screens need a minimum of 3,840Hz to prevent strobing or rolling lines when captured on camera, which is critical for broadcast and social media content.

How quickly can a faulty LED panel be replaced during a live event?

Quick-lock modular panels can be isolated and swapped in under 5 minutes from the front or back of the wall, allowing technicians to restore full display output without interrupting the event.

Should I rent or buy LED screens for my event?

Renting suits infrequent events because rental packages include specialist labour for rigging, calibration, and technical operation. Purchasing only makes financial sense when events run frequently enough to justify the ongoing maintenance and crew costs.

"


LED screen setup for live events: the complete guide

9/07/2026

Event planner reviewing AV event insurance documents

"

Event insurance AV is defined as a suite of specialist insurance policies that protect event organisers against financial losses and liabilities arising from audiovisual equipment and associated event risks. The term “AV event insurance” is not a single product. It is the industry shorthand for combining coverages such as General Liability, Inland Marine, and Event Cancellation Insurance into a package tailored to events where AV equipment plays a central role. Standard event liability policies typically start with a £1 million per-occurrence limit and a £2 million aggregate limit, satisfying the requirements of the vast majority of UK venues. Fireflyav works with event organisers across the UK who rely on this type of coverage to protect costly AV equipment and the events built around it.

What is event insurance AV and what does it actually cover?

Event insurance AV is best understood as a bundle of specialist policies, not a single one-size-fits-all product. Insurance experts confirm that it acts as a financial safety net against catastrophic mishaps, combining liability, property, cancellation, and liquor liability coverage tailored to the specific risks of each event. That distinction matters because planners who assume one policy covers everything often discover gaps at the worst possible moment.

The audiovisual dimension adds a layer of complexity that standard event insurance does not always address. Expensive mixing desks, LED screens, projection systems, and wireless microphone rigs represent significant capital. A single incident involving theft, transit damage, or a third-party injury caused by a poorly rigged speaker can generate losses that run into tens of thousands of pounds. Proper AV event insurance accounts for all of these scenarios.

AV technician adjusting mixing equipment in booth

What types of event insurance cover AV equipment and associated risks?

Professional event planners require up to eight distinct coverages, and four of these are directly relevant to AV-focused events. Understanding what each one does prevents dangerous gaps in protection.

  • General Liability (GL). GL covers third-party bodily injury and property damage at your event. If a guest trips over a cable run by your AV crew, GL pays the resulting claim. It is the foundational coverage that virtually every UK venue demands before granting access.

  • Inland Marine insurance. Despite its name, this coverage has nothing to do with water. Inland Marine specifically protects expensive AV, lighting, stage, and decorative equipment during transportation and onsite setup from theft, damage, or vandalism. It is the coverage most often overlooked by planners and the one most relevant to protecting high-value AV gear.

  • Event Cancellation Insurance. General Liability does not cover your own financial losses if an event is cancelled or postponed. Event Cancellation Insurance is purchased per event and reimburses lost deposits, vendor fees, and client refunds when a covered reason forces cancellation. For events with large AV production budgets, this protection is critical.

  • Liquor Liability. If alcohol is served, Liquor Liability must be added as a separate policy. Standard GL excludes alcohol-related claims entirely. Many UK venues make this mandatory regardless of whether the organiser or a licensed caterer serves the drinks.

These four coverages complement each other and are frequently bundled into annual packages for professional planners. A planner running multiple corporate conferences per year, for example, benefits from an annual GL policy combined with per-event cancellation coverage and a standing Inland Marine policy covering their AV inventory throughout the year.

How much does AV event insurance cost?

The cost of event insurance varies considerably depending on the scale, duration, and complexity of the event. The table below gives a practical overview of typical premium ranges.

Coverage type Typical cost range What drives the price
General Liability (per day) £60–£190 equivalent Attendee numbers, venue type, liquor provision
Event Cancellation Insurance 1–3% of insured event budget Budget size, covered perils, event complexity
Inland Marine (annual) Included in annual packages or quoted separately Value of AV inventory, transit frequency
Annual package (small planner) £1,200–£3,600 equivalent Number of events, coverage breadth, add-ons

Infographic showing AV event insurance cost ranges by coverage type

One-day event liability insurance costs typically range from £60 to £190 for events up to 500 attendees, with cancellation insurance adding approximately 1–3% of the event budget on top. That means a £50,000 AV production budget could carry a cancellation premium of £500–£1,500 alone.

Several factors push premiums higher. Outdoor venues carry greater weather and ground-condition risk. Complex AV setups with rigging, large screens, or live broadcast equipment increase the probability of equipment damage and third-party injury. Alcohol service adds Liquor Liability costs. Events running over multiple days accumulate more exposure than a single afternoon conference.

Pro Tip: Request itemised quotes for each coverage type rather than accepting a bundled price without breakdown. Knowing the individual cost of Inland Marine versus GL helps you assess whether the AV equipment value justifies the premium and where to adjust limits.

What are the insurance requirements for AV events in the UK?

UK venues impose specific insurance requirements, and failing to meet them can result in a booking being cancelled on the day. Most venues require liability insurance with a minimum of £1 million per-occurrence and £2 million aggregate limits, along with an additional insured clause naming the venue on the policy. These are non-negotiable at the majority of professional event spaces.

The practical steps for meeting these requirements follow a clear sequence.

  1. Confirm venue requirements in writing. Request the venue’s insurance specification document before purchasing any policy. Requirements vary, and some venues demand higher limits for large-scale AV productions.

  2. Purchase insurance 30–60 days before the event. Certificates of Insurance should be prepared 30–60 days prior to the event to allow time for review and any amendments. Leaving this to the final week creates unnecessary risk.

  3. Verify vendor insurance. Vendors and entertainers must provide their own Certificates of Insurance. Event planners who skip this step risk bearing liability for accidents caused by hired AV crews or equipment suppliers.

  4. Check for coverage gaps. A common and costly mistake is assuming the venue’s own policy covers the organiser or their vendors. It does not. The venue policy protects the venue, not you.

  5. Match coverage to event specifics. An outdoor festival with a complex corporate AV setup requires different limits and add-ons than an indoor conference. Outdoor events need weather-related cancellation clauses; events with rigging need higher GL limits.

  6. Work with a broker experienced in event AV. A generalist insurance broker may not recognise the specific risks of AV production. Brokers who specialise in events understand Inland Marine, rigging liability, and the value of broadcast-grade equipment.

Pro Tip: Combine your annual GL policy with a per-event cancellation policy and a standing Inland Marine policy. This structure gives year-round protection for your AV inventory without paying for separate property coverage each time you run an event.

What risks does AV event insurance cover and what does it exclude?

AV event insurance covers a defined set of risks, and understanding the boundaries prevents expensive surprises.

What is typically covered:

  • Theft, damage, and vandalism of AV equipment during transit, setup, and the live event itself
  • Third-party bodily injury claims arising from AV equipment or its installation
  • Property damage caused to a venue by AV rigging, cabling, or equipment failure
  • Financial losses from event cancellation due to covered reasons such as extreme weather, venue closure, or key supplier failure
  • Vendor failure that directly impacts AV arrangements, where the policy wording includes this as a covered peril

What is typically excluded:

  • Wear and tear or gradual deterioration of AV equipment
  • Damage caused by failure to maintain equipment properly
  • Certain natural disasters, depending on specific policy wording
  • Losses arising from events cancelled for reasons not listed as covered perils
  • Cyber incidents affecting AV control systems, unless Cyber Insurance is added separately

Reading the policy exclusions is as important as reading the coverage. A planner who insures a £30,000 LED wall under a policy that excludes transit damage has no protection the moment that screen leaves the warehouse. Always confirm that Inland Marine coverage extends from the point of loading to the point of return, not just during the live event hours.

Deductibles also affect the real-world value of a policy. A low premium with a high deductible may leave you absorbing the first £2,000–£5,000 of any claim. For high-value AV equipment, a lower deductible is worth the additional premium.

Key takeaways

Event insurance AV requires a combination of General Liability, Inland Marine, Event Cancellation, and Liquor Liability policies to protect both AV equipment and associated event liabilities fully.

Point Details
AV insurance is a bundle No single policy covers all AV event risks; combine GL, Inland Marine, and cancellation coverage.
Inland Marine is non-negotiable It is the only coverage that protects AV equipment during transit, setup, and the live event.
Buy insurance 30–60 days early This allows time for Certificate of Insurance issuance and venue review before the event date.
Verify vendor certificates Always obtain Certificates of Insurance from AV suppliers to avoid bearing their liability.
Read exclusions carefully Wear and tear, transit gaps, and uncovered cancellation reasons are the most common claim pitfalls.

Why planners underestimate AV insurance risk

The most common mistake I see event planners make is treating General Liability as a complete solution. GL is the foundation, not the building. It covers what happens to other people. It does not cover what happens to your equipment, your budget, or your client’s deposit when something goes wrong.

Inland Marine coverage is the one that genuinely changes outcomes for AV-heavy events. I have spoken with planners who discovered, after a theft, that their GL policy offered nothing because the stolen gear belonged to them, not a third party. The equipment was gone, the event was cancelled, and there was no recovery. That is an avoidable situation.

The other habit worth building is treating vendor insurance verification as a standard checklist item, not an afterthought. If an AV supplier’s crew damages a venue ceiling during rigging and that supplier carries no insurance, the liability lands on the organiser. Asking for a Certificate of Insurance before any vendor sets foot on site is the simplest risk management step available.

Early engagement with a specialist broker also pays dividends. A broker who understands the value of a Sennheiser wireless system or a broadcast-grade switcher will write a policy that reflects actual replacement costs, not generic electronics values. Generic policies routinely undervalue AV inventory, which means underinsurance at the point of claim.

— Michael

How Fireflyav supports your AV event planning

Fireflyav supplies professional AV equipment and technical support for corporate conferences, live events, broadcast productions, and eSports across the UK. Working with a professional AV provider reduces the operational risks that drive insurance claims in the first place: equipment that is properly specified, correctly installed, and maintained to a professional standard is far less likely to generate a liability incident or a cancellation.

https://fireflyav.co.uk

Fireflyav’s team understands the equipment values that underpin AV event insurance decisions. Whether you are planning a single conference or a full production calendar, getting the AV specification right from the start informs the coverage you need. Use the Fireflyav product form to outline your AV requirements and speak directly with the team about your next event.

FAQ

What is event insurance AV in simple terms?

Event insurance AV is a combination of insurance policies that protect event organisers against financial losses and liabilities related to audiovisual equipment and event operations. It typically includes General Liability, Inland Marine, and Event Cancellation Insurance.

Does General Liability cover AV equipment damage?

General Liability covers third-party injury and property damage but does not cover damage to or theft of your own AV equipment. Inland Marine insurance is required to protect owned or hired AV gear during transit and at the event.

How much does event insurance cost for a UK event?

One-day liability coverage typically costs the equivalent of £60–£190 for events up to 500 attendees, with Event Cancellation Insurance adding approximately 1–3% of the insured event budget on top.

When should I buy event insurance for an AV production?

Purchase event insurance 30–60 days before the event date. This allows sufficient time to issue Certificates of Insurance and satisfy venue requirements before the event.

Do I need to check my AV supplier’s insurance?

Yes. Vendors must carry their own insurance, and planners should obtain Certificates of Insurance from all AV suppliers before the event. Failure to do so risks the organiser bearing liability for supplier-caused accidents or damage.

"


What is event insurance AV? A UK planner’s guide

11/07/2026

Audio engineer working on mixing desk controls

"

An audio mixing desk is an electronic device that combines multiple audio signals into controlled master outputs, giving you precise command over volume, tone, and routing. Also called a mixing console or soundboard, it sits at the centre of every professional recording studio, live concert, and broadcast facility. Consoles range from simple 6-channel setups to professional systems handling up to 384 input channels. That range tells you everything about how universal this tool is, from a hobbyist home studio to a West End theatre production. Understanding what a mixing desk does is the first real step into audio engineering.

What is an audio mixing desk and what does it do?

A mixing desk is the central hub through which every audio signal passes before reaching speakers or a recording device. Microphones, instruments, playback sources, and effects units all feed into the desk. The engineer then shapes each signal individually before combining them into a final mix. Without a mixing console, controlling multiple audio sources simultaneously would be impossible. The desk is what separates a chaotic wall of sound from a polished, balanced output.

The core function is signal routing and level control. Every input channel receives a signal, processes it through a series of controls, and sends it to one or more outputs. Those outputs might feed a PA system, a recording interface, a broadcast encoder, or a set of stage monitors. Understanding audio signal flow is the foundation skill for anyone learning to use a mixing desk effectively. Once you grasp how a signal travels through the desk, every other concept falls into place.

Close-up of mixing desk channel strip controls

How does a mixing desk channel strip work?

Mixers are modular by design. A large desk typically duplicates 48 to 96 identical channel strips side by side. Understanding one strip means you understand the entire console, regardless of its size. That insight removes most of the intimidation factor when you first sit in front of a large-format desk.

The signal path through a channel strip follows a fixed order:

  1. Input and gain (trim): The signal enters here. The gain control sets the input level before any processing occurs.
  2. EQ (equalisation): Boosts or cuts specific frequency ranges, such as adding warmth to a vocal or reducing muddiness in a guitar.
  3. Dynamics processors: Compressors and gates shape the dynamic range of the signal.
  4. Auxiliary sends: Route a copy of the signal to effects units or monitor speakers, independent of the main mix.
  5. Pan control: Positions the signal in the stereo field, left to right.
  6. Fader: Sets the final level of the channel in the main mix. Faders default at unity gain, marked as 0 dB.

Proper gain staging avoids background noise and distortion. Setting the gain correctly at the input stage means every processor downstream receives a clean, strong signal to work with. Skipping this step is the most common beginner mistake, and it cannot be fixed later in the chain.

Auxiliary sends operate as either pre-fader or post-fader. Pre-fader sends are independent of the channel fader, making them ideal for monitor mixes on stage. Post-fader sends track the fader position, making them the correct choice for effects like reverb. Confusing the two causes monitor mix chaos or unintended changes to reverb levels during a performance.

Pro Tip: Set your gain so the signal peaks around 0 VU or below -18 dBFS on a digital desk. Use the channel solo or PFL button to check the level in isolation before bringing the fader up.

Infographic comparing analogue and digital mixing desks

What are the different types of audio mixing desk?

Mixing desks fall into three broad categories: analogue, digital, and software-based. Each suits different working environments and skill levels.

Type Strengths Limitations Best suited for
Analogue Immediate tactile control, no menu navigation, warm signal path Fixed channel count, no recall, larger physical footprint Live events, beginners learning signal flow
Digital Recall of settings, built-in effects, flexible routing, compact Menu navigation required, software literacy needed Touring engineers, broadcast, corporate events
Software (DAW-based) Low cost, unlimited tracks, deep editing Requires audio interface, no physical faders without controller Home studios, post-production

Analogue desks give you a physical control for every function. That directness makes them excellent for learning. You can trace the signal path by following the knobs and faders with your hands. The Yamaha MGP16X, for example, is a popular analogue mixer that combines physical controls with onboard effects, making it a practical starting point for live and studio work.

Digital consoles present distinct learning challenges, particularly menu navigation, sometimes called “menu diving.” Core signal flow principles remain unchanged between analogue and digital desks, but digital units require software navigation skills alongside traditional audio knowledge. The Allen and Heath Avantis is a strong example of a professional digital console that offers deep routing flexibility alongside a touchscreen interface, widely used in corporate conferences and live events.

Software mixers inside digital audio workstations (DAWs) remove the hardware entirely. They offer unlimited track counts and non-destructive editing, but they require an external audio interface to connect microphones and instruments. Without a physical controller, mixing on a screen alone is slower and less intuitive than working on hardware.

Pro Tip: If you are learning on a digital desk, spend your first sessions mapping the signal flow on paper before touching the screen. Knowing where the signal goes mentally makes menu navigation far less confusing.

How to use a mixing desk effectively

Effective mixing starts before the performance or recording session begins. The setup and soundcheck phase determines the quality of everything that follows.

  • Set gain first, always. Bring each channel up individually, ask the performer to play or speak at their loudest, and adjust the trim until the signal is strong but not clipping. Gain staging failure leads to noise or distortion that compromises all subsequent processing, including EQ and compression.
  • Use EQ to solve problems, not to add colour. Cut before you boost. If a vocal sounds muddy, reduce the low-mid frequencies around 300–500 Hz rather than boosting the highs. Boosting frequencies you do not need adds noise and phase issues.
  • Check your aux sends before the show. Confirm whether each send is pre-fader or post-fader and verify that monitor mixes reflect what performers actually need to hear. A guitarist who cannot hear themselves will perform poorly regardless of how good the front-of-house mix sounds.
  • Use PFL to troubleshoot. PFL (Pre-Fade Listen) lets you listen to an individual channel through headphones without affecting the main output. Use it to check for hum, distortion, or phase issues on any channel before the audience hears it.
  • Mix by ear, not by eye. Meters are a guide, not the final word. Trust what you hear through the speakers or headphones. A mix that looks balanced on the meters but sounds wrong is wrong.
  • Mute unused channels. Open microphone channels that are not in use pick up stage noise and bleed. Muting them keeps the mix clean and reduces the risk of feedback.

Soundcheck discipline is the single biggest factor in live mixing success. Good microphone placement and PA tuning matter more than the complexity of the desk. An expensive console cannot compensate for a poorly positioned microphone or an untreated room.

The same principles apply in a recording studio, though the pace is slower. You have time to revisit gain settings, try different EQ curves, and compare takes. Live mixing demands faster decisions, but the underlying technique is identical.

Pro Tip: Walk the room during soundcheck. What sounds balanced at the mixing position may sound bass-heavy near the back wall or thin near the stage. Adjust the desk to serve the whole room, not just your listening position.

How to choose the right mixing desk for your needs

Choosing a mixing desk requires matching the desk’s capabilities to your specific working environment. A desk that suits a recording studio may be impractical for a touring live engineer, and vice versa.

  • Channel count: Count your inputs realistically. A band with drums, bass, two guitars, keys, and three vocals needs at least 12 channels, and ideally more for effects returns and playback sources. Always buy more channels than you think you need.
  • Analogue or digital: Analogue suits beginners and smaller live setups where simplicity and reliability matter. Digital suits engineers who need scene recall, built-in processing, and flexible routing across multiple events. For conference and corporate work, digital desks with scene recall save significant setup time between sessions.
  • Portability: A large-format analogue desk is impractical for a mobile engineer. Compact digital desks with stage boxes allow the mixing position to be placed anywhere in the venue while keeping the inputs close to the stage.
  • Integration with other equipment: Check that the desk connects cleanly to your conference microphone system, recording interface, or broadcast encoder. Incompatible gain structures or connector types create problems that no amount of EQ will fix.
  • Budget and future-proofing: Entry-level analogue desks offer excellent value for learning. Mid-range digital desks add recall and built-in effects. High-end professional consoles add redundancy, advanced routing, and larger channel counts. Buy the desk that meets your current needs with room to grow, rather than the cheapest option you will outgrow in six months.

For event planners and sound engineers working across corporate and cultural venues, understanding AV equipment for events helps clarify how a mixing desk fits into a wider technical setup.

Key takeaways

An audio mixing desk is the control centre of any professional audio setup, and mastering its signal flow is the foundation of every other mixing skill.

Point Details
Core function A mixing desk combines and controls multiple audio signals into balanced outputs for live or recorded sound.
Signal flow order Every channel strip follows the same path: gain, EQ, dynamics, aux sends, pan, and fader.
Gain staging is critical Set input levels correctly first; poor gain staging creates noise and distortion that no processor can fix.
Analogue vs digital Analogue suits beginners and simple setups; digital suits engineers who need recall and flexible routing.
Soundcheck over gear Microphone placement and room acoustics determine mixing success more than the desk’s specification.

Why the mixing desk clicked for me later than I expected

The first time I sat behind a 32-channel analogue desk, I did what most beginners do. I looked at it as 32 separate problems. It took an experienced engineer about 30 seconds to correct that thinking. He pointed at one channel strip and said, “Learn that one. The rest are copies.” That single reframe changed everything.

The second lesson took longer to absorb: gain staging is not a preliminary step. It is the mix. Every engineer I have watched who consistently produces clean, powerful sound sets gain with the same care they give to EQ or compression. The ones who rush it spend the rest of the session chasing problems they created at the input stage.

The hardest habit to break is mixing by eye. Meters are useful, but they do not tell you whether a vocal sits correctly in the mix or whether the kick drum is masking the bass guitar. Your ears do. The discipline of closing your eyes during a soundcheck and listening without looking at the desk is something I still practise deliberately. It forces honest decisions.

The transition from analogue to digital is genuinely challenging, and not for the reasons most people expect. The signal flow is identical. The challenge is that digital desks hide controls behind menus, which slows your reaction time in a live situation. The solution is repetition. Learn the menu structure of your specific desk until navigation is automatic. Then you can focus on the sound again.

— Michael

Fireflyav’s mixing desk solutions for engineers and event teams

Fireflyav supplies analogue and digital mixing consoles for corporate conferences, live events, broadcast productions, and cultural venues across the UK.

https://fireflyav.co.uk

Whether you are specifying a desk for a touring production or a fixed installation in a conference centre, Fireflyav’s technical team can advise on the right console for your channel count, routing requirements, and budget. The range includes professional-grade options from established manufacturers, supported by hands-on technical expertise. For a full overview of how mixing desks fit into a complete AV setup, the AV equipment guide for event planners is a practical starting point. To discuss your specific project requirements, submit your project details and a member of the team will respond with tailored recommendations.

FAQ

What is an audio mixing desk used for?

An audio mixing desk combines multiple audio signals, such as microphones and instruments, into controlled outputs for live sound, recording, or broadcasting. It gives the engineer precise control over volume, tone, and routing for every input source.

How many channels does a mixing desk need?

Channel requirements depend on the number of inputs in your setup. Consoles range from 6 to 384 channels, so count your microphones, instruments, and returns, then choose a desk with at least a few spare channels for flexibility.

What is the difference between analogue and digital mixing desks?

Analogue desks offer direct physical controls for every function, making them straightforward to learn. Digital desks require menu navigation but offer scene recall, built-in effects, and flexible routing that analogue units cannot match.

What does gain staging mean on a mixing desk?

Gain staging means setting the input level on each channel so the signal is strong and clean before it reaches any processing. Setting trim controls correctly prevents noise and distortion from affecting EQ, compression, and all downstream processing.

What is a PFL button on a mixing desk?

PFL stands for Pre-Fade Listen. Using PFL lets you listen to an individual channel through headphones without changing the main mix output, making it the standard method for checking and troubleshooting individual channels during a performance or session.

"


What is an audio mixing desk: a beginner’s guide

8/07/2026

Virtual event producer managing LED studio setup

"

A virtual event studio is a purpose-built production environment that combines LED walls, real-time rendering engines, and broadcast-grade audiovisual technology to deliver professional online events without traditional post-production. The term sits alongside “virtual production studio” in industry usage, and both refer to the same core concept. Where a conventional event space relies on physical sets and green screen compositing, a virtual event studio produces the final image live on set. For event planners and corporate communication professionals, this distinction changes everything about how you plan, budget, and execute online events.

What is a virtual event studio made of?

A virtual event studio is defined by its LED walls and real-time digital environments, which display backgrounds live during filming rather than adding them in post-production. This single characteristic separates virtual studios from every other production method. The background your audience sees is the background your presenter sees, in the room, in real time.

The core components of a virtual event studio include:

  • LED volume walls. Large curved or flat LED panels display photorealistic digital environments. They replace physical sets and green screens entirely.
  • Real-time rendering engines. Software such as Unreal Engine generates and updates digital backgrounds at broadcast frame rates, responding to camera movement without lag.
  • Camera tracking systems. Sensors attached to cameras feed positional data to the rendering engine, so the virtual background shifts in perspective as the camera moves. The result looks physically correct.
  • Broadcast lighting rigs. Lighting is designed to match the colour temperature and directionality of the digital environment displayed on the LED wall, so presenters appear naturally lit by their surroundings.
  • Audio systems. Broadcast-grade microphones, mixing desks such as the Allen & Heath Avantis, and acoustic treatment keep dialogue clean regardless of the visual complexity around the speaker.
  • Studio control software. Platforms such as Pixotope integrate real-time rendering, camera tracking, and LED control into a single workflow, enabling live compositing without a green screen in sight.

Pro Tip: Scope your digital environments before production day. Defining backdrops, colour palettes, and lighting conditions in pre-production prevents costly baked-in errors that are extremely difficult to correct during a live stream.

How does a virtual studio differ from green screen?

Event planner reviewing virtual studio production details

The difference between a virtual LED studio and a green screen setup is not cosmetic. It is structural, and it affects every stage of your production.

Feature Green screen setup Virtual LED studio
Background visible on set No Yes, in real time
Post-production editing required Extensive Minimal
Lighting match to background Manual, approximate Automatic, live
Presenter eyeline accuracy Difficult to achieve Natural and correct
On-set approval of final image Not possible Immediate

Green screen requires your presenter to perform in front of a flat, uniformly lit surface with no visual reference for the world they are supposedly standing in. Directors cannot approve the final image until editing is complete. Mistakes in lighting or framing are discovered late, when they are expensive to fix.

A virtual LED studio removes that uncertainty. Actors and presenters interact naturally with the environment because the environment is physically present on the LED wall in front of them. Eyelines are correct. Lighting from the wall wraps around the presenter’s face and clothing in a way that no post-production colour grade can fully replicate. The director, the client, and the presenter all see the same final image at the same moment.

Infographic outlining steps to set up virtual event studio

Post-production requirements decrease dramatically because backgrounds and lighting are captured live. For corporate event planners working to tight turnaround schedules, this is not a minor convenience. It is a fundamental change to how quickly finished content reaches your audience.

What are the benefits of a virtual event studio for planners?

Virtual event studios offer event planners and corporate communicators a set of advantages that traditional production methods cannot match. The most significant is the live feedback loop.

All participants, including producers, directors, and speakers, view the final output in real time. This shared visibility means creative decisions happen in the room, not in an edit suite days later. A corporate communications director can approve a branded environment before a single frame is recorded for broadcast.

The practical benefits extend well beyond creative approval:

  • Higher production value at lower cost. Physical sets require construction, transport, and storage. A virtual studio replaces all of that with a digital asset that can be updated for each event.
  • Reduced post-production time. Because the final image is captured live, your team spends less time in editing and more time on content strategy.
  • Hybrid event capability. Hybrid event studios combine live venue elements with virtual production technology, including broadcast-grade production and interactive features such as Q&A boards and live chat integration. Your in-room audience and your remote audience receive the same quality experience.
  • Global reach without travel. Presenters in different locations can appear within the same virtual environment simultaneously, removing the logistical cost of flying speakers to a single venue.
  • Brand consistency. Digital environments are built to specification. Every event uses the exact same branded backdrop, with no variation caused by physical set construction or venue lighting conditions.

For corporate events that rely on AV to communicate authority and professionalism, a virtual studio raises the production floor significantly.

How to set up a virtual event studio for your next event

Setting up a virtual event studio requires structured pre-production. The technology performs best when every decision about the environment is made before the cameras roll.

  1. Define your environment in pre-production. Decide on the digital backdrop, colour palette, and lighting conditions before booking studio time. Early environment scoping is the single most important factor in avoiding expensive errors during a live event.
  2. Audit your hardware requirements. Confirm that your LED wall resolution, camera tracking system, and rendering hardware meet the demands of your broadcast format. For live switcher functionality, a device such as the Blackmagic Design ATEM Mini PRO handles multi-source switching without adding post-production complexity.
  3. Choose your streaming platform early. Platform choice affects encoding settings, latency, and interactive feature availability. Supporting multiple platforms ensures global reach and client confidence, particularly for large-scale corporate events.
  4. Build a real-time feedback loop into your rehearsal. Run a full technical rehearsal with all stakeholders watching the live output. Identify lighting mismatches, camera tracking drift, and audio issues before the event day.
  5. Integrate interactive tools. Q&A boards, live polling, and chat integration connect your remote audience to the event. A well-designed live streaming platform blueprint accounts for these features at the architecture stage, not as an afterthought.
  6. Plan your post-event content. Because virtual studios produce broadcast-quality footage in camera, the recorded output is ready for repurposing with minimal editing. Build this into your content calendar from the start.

Pro Tip: Assign a dedicated technical director whose sole responsibility is monitoring the LED wall output and rendering engine during the live event. Directors focused on talent and timing rarely catch rendering artefacts before they reach the audience.

Understanding how LED video walls differ from projectors also helps planners make informed decisions when specifying studio hardware, particularly for venues where ambient light is difficult to control.

Key takeaways

A virtual event studio produces broadcast-quality results live on set by combining LED walls, real-time rendering, and camera tracking, removing the need for extensive post-production.

Point Details
Core definition A virtual event studio uses LED walls and real-time rendering to display digital environments live during production.
Green screen advantage Virtual LED studios capture final visuals in camera, cutting post-production time and cost significantly.
Collaboration benefit All stakeholders view the final output in real time, enabling immediate creative decisions on set.
Hybrid event potential Virtual studios support hybrid formats by combining live venue elements with digital tools and global streaming.
Pre-production priority Scoping digital environments and lighting before production day is the most effective way to prevent costly errors.

Why I think planners underestimate virtual studios

Most event planners I speak with assume virtual studios are a broadcast industry tool, relevant to film and television but not to corporate events. That assumption costs them money and quality in equal measure.

The real-time collaboration model that virtual production enables is genuinely different from anything a green screen workflow offers. When a communications director can stand in the studio and approve the branded environment before a single presenter walks on set, the number of revision cycles drops sharply. That time saving alone often justifies the technology investment.

What I find most underappreciated is the hybrid potential. A well-configured virtual studio does not force you to choose between a physical event and an online one. It produces both simultaneously, at broadcast quality, with the same crew. For organisations running annual conferences or product launches, that capability changes the economics of event production entirely.

My practical advice: treat the digital environment as you would a physical set design. Commission it early, review it with your director and your client, and lock it before you book studio time. The planners who struggle with virtual production are almost always the ones who treat the backdrop as a technical detail rather than a creative decision.

— Michael

How Fireflyav supports your virtual event studio production

Fireflyav works with event planners and corporate communications teams across the UK to supply the equipment and technical expertise that virtual event production demands.

https://fireflyav.co.uk

From broadcast-grade AV equipment to on-site technical support for live and hybrid events, Fireflyav covers the full production chain. The team brings experience across corporate conferences, eSports broadcasts, and cultural events, which means your virtual studio setup is handled by engineers who understand both the technology and the pressure of a live event. Start your next virtual event project by submitting a project enquiry and a member of the Fireflyav team will advise on the right equipment and support package for your brief.

FAQ

What is a virtual event studio?

A virtual event studio is a production space that uses LED walls and real-time rendering software to display digital environments live on set, replacing physical sets and green screens for online event production.

How does a virtual studio improve event production quality?

Virtual studios capture the final image in camera, so lighting, backgrounds, and presenter eyelines are all correct without post-production editing. This produces broadcast-quality results faster and at lower cost than green screen methods.

What equipment does a virtual event studio need?

The core equipment includes LED volume walls, a real-time rendering engine such as Unreal Engine, camera tracking hardware, broadcast lighting, and studio control software such as Pixotope for integrated live compositing.

What is the difference between virtual and physical events?

Physical events require venue logistics, set construction, and travel. Virtual event studios remove those constraints by delivering immersive, broadcast-quality environments digitally, while hybrid formats combine both for simultaneous in-room and online audiences.

Can a virtual studio support hybrid events?

Hybrid event studios combine live venue elements with virtual production technology, including interactive features such as Q&A boards and live chat, giving in-room and remote audiences an equally high-quality experience.

"


What is a virtual event studio? A planner’s guide

8/07/2026

Technicians assembling modular conference stage in Leeds venue

"

Conference staging hire in Leeds is the process of renting professional staging platforms, audio visual equipment, and technical support to create polished, engaging conference environments. The industry term is “event production hire,” and understanding both terms helps you communicate clearly with suppliers. Getting this right matters: the wrong stage configuration or underpowered AV rig can undermine even the most carefully planned programme. Leeds has a strong conference market, and working with a local specialist like Fireflyav gives you access to venue-specific knowledge that generalist national suppliers simply cannot match.

1. Conference staging hire Leeds: modular stage platforms

Modular staging is the foundation of any professional conference setup. These platforms arrive in interlocking deck sections, typically 1m x 1m or 2m x 1m, and stack to your required height. The key advantage is flexibility: you can configure a wide thrust stage for a panel of six, or a compact raised platform for a single keynote speaker.

Stage height matters more than most organisers realise. A 600mm rise puts a standing speaker at eye level with a seated audience of 200. Drop below 400mm and delegates at the back lose sightlines entirely. Fireflyav supplies modular decks with adjustable leg sets to match these requirements precisely.

Speaker preparing on moderately raised conference stage platform

2. Integrated AV setup: microphones and mixing consoles

A quality conference AV setup includes microphones, projectors, and screens sized to the audience and format. That combination is non-negotiable for clear communication across a room of any size. A digital mixing console such as the Allen & Heath Avantis gives your audio engineer real-time control over every channel, from lapel mics to podium condensers.

The conference mic system you choose shapes how delegates experience every speaker. Delegate units with built-in speakers and a chairman unit allow structured Q&A without the chaos of passing a handheld around the room. Fireflyav stocks both wired and wireless delegate mic systems to suit different room layouts.

Pro Tip: Book your mixing console and microphone package together. Mismatched impedance between a budget mic and a professional console introduces noise that no amount of post-event editing can fix.

3. High-brightness projection and large screens

Large screens positioned for full audience visibility are critical for effective conference staging. This is not a preference; it is a technical requirement. A delegate seated 15 metres from the stage needs a minimum screen width of 3 metres to read standard presentation text comfortably.

Projector brightness is measured in lumens. A room with controlled ambient light needs at least 5,000 lumens for a 3-metre screen. Rooms with windows or high ceilings require 10,000 lumens or more. Fireflyav’s twin screen stage sets pair matched projectors with rear-projection screens built into the stage fascia, removing the need for a separate projection throw.

4. Stage lighting for conferences

Stage lighting does two jobs at a conference: it makes speakers visible on camera, and it signals to the audience where to focus attention. Wash lights positioned at 45 degrees eliminate unflattering shadows on speakers’ faces. A stage light package that includes front wash, side fill, and a gobo for the back wall gives you a complete, professional look.

LED fixtures are now the standard for conference work because they run cool and draw less power. This matters in older Leeds venues where total power draw is often limited by the building’s supply capacity. Fireflyav’s lighting rigs are spec’d to work within typical venue power budgets.

5. Local supplier advantages in Leeds

Local AV specialists in Leeds understand venue constraints such as loading bays, ceiling heights, and power limitations in heritage buildings. That knowledge prevents costly surprises on the day of your event. A national supplier dispatching a crew from outside the region will not know that a particular Leeds venue has a goods lift with a 500kg limit, or that the power supply in a Victorian mill conversion tops out at 32 amps per phase.

Conference Leeds recommends using impartial venue-finding services to match your required stage footprint and AV rig to the right venue. Pairing that venue search with a local AV partner who already knows those spaces shortens your planning timeline significantly. Fireflyav works regularly across Leeds venues and carries that site knowledge into every brief.

6. Professional installation versus dry hire

Dry hire of staging is often a false economy because unassisted equipment rental increases the risk of setup problems and event disruption. The hire cost looks lower on paper, but the risk sits entirely with you. If a stage deck is assembled incorrectly or a projector is misconfigured, there is no engineer on hand to fix it.

Professional AV support throughout an event covers planning, testing, and management from installation through to the final session. That end-to-end cover is what separates a smooth conference from one where the first 20 minutes are spent troubleshooting a signal chain. Fireflyav provides full crew support as standard on conference packages.

Pro Tip: Always ask your supplier whether their quote includes a pre-event site visit. A supplier who visits the venue before the event day will spot access and power issues that no amount of phone calls can reveal.

7. Hybrid event staging

Hybrid conference staging requires camera systems, audio routing to remote participants, and video conferencing platform integration. The technical complexity of a hybrid event is roughly double that of an in-room-only conference. You need a dedicated streaming encoder, a reliable internet uplink, and a camera operator who understands conference pacing.

The stage layout for a hybrid event also differs. Remote delegates need to see the speaker clearly, so camera positions must be planned into the stage design from the start. A confidence monitor facing the speaker, showing the remote audience feed, helps presenters engage with both rooms simultaneously. Fireflyav integrates streaming hardware and camera rigs into its conference staging packages.

8. Tiered and covered staging options

Tiered staging creates a stepped platform so that multiple speakers or panellists are visible at different heights. This works well for award ceremonies, panel debates, and graduation-style events where hierarchy or visibility across a wide stage matters. Covered staging, with a roof or fascia structure, adds a broadcast-quality finish and provides a surface for branding.

Leeds venues vary widely in ceiling height. A covered stage structure in a room with a 4-metre ceiling needs careful planning to avoid clashing with venue lighting rigs or sprinkler systems. Fireflyav surveys ceiling heights and structural anchor points before specifying any overhead structure.

9. Delegate seating and conference furniture

Delegate seating hire is often overlooked until late in the planning process. Seat count, row spacing, and aisle width all affect sightlines to the stage. Theatre-style seating maximises capacity but reduces comfort for sessions longer than 90 minutes. Cabaret-style seating suits workshops and interactive sessions but cuts capacity by roughly a third.

A Perspex conference lectern at the front of the stage gives speakers a professional focal point without blocking the audience’s view of the screen behind. Fireflyav supplies lecterns, delegate tables, and chairs as part of a complete conference furniture package.

10. Flexible hire durations and cost planning

Event AV hire services provide flexible hire durations including short-term and long-term options tailored to event schedules. That flexibility matters when your conference runs across multiple days or requires an early-access build day before delegates arrive. Budget planning should account for delivery, build, the event itself, and de-rig as separate line items.

The cost difference between a basic staging package and a full production package is significant, but so is the difference in outcome. A well-lit, clearly amplified stage with matched screens retains delegate attention. A poorly configured setup loses it within the first session. Fireflyav offers tiered packages so you can match the specification to your budget without compromising the core technical requirements.

How to select the best staging and AV hire for your Leeds conference

Choosing the right staging hire starts with the venue, not the equipment catalogue. Work through these criteria before you contact any supplier:

  • Venue dimensions: Measure the room’s usable floor area, ceiling height, and the distance from the stage to the back row. These three numbers determine your stage size, screen size, and projector specification.
  • Loading and power access: Confirm the venue’s goods access route, lift capacity, and available power supply. Leeds venues such as the Leeds Marriott Hotel have upgraded AV infrastructure, but many heritage buildings have strict power limits.
  • Event format: A single-speaker keynote needs a different setup from a six-person panel or a hybrid event with 300 remote delegates.
  • AV technical needs: List every AV requirement: microphone count, screen positions, streaming requirements, and recording needs. Share this list with your supplier before they quote.
  • Installation support: Confirm whether your quote includes crew for build, operation, and de-rig. Never assume this is included.
  • Scalability: Choose a supplier whose equipment range can scale up if your delegate count grows. Fireflyav’s modular staging and AV services are designed to adapt as event requirements change.

Pro Tip: Book your staging and AV hire at least eight weeks before the event. Popular Leeds venues fill quickly, and the best local AV crews are often committed months in advance.

Staging and AV features by conference size

The right equipment set depends on the scale of your event. This table maps typical feature requirements to conference size categories.

Feature category Small (up to 50 delegates) Medium (50–200 delegates) Large (200+ delegates) Hybrid (any size)
Stage platform Single deck, 4m x 2m Modular, 6m x 3m Full production stage, 10m+ Camera-integrated stage
Screens Single 2m screen Twin 2.5m screens Triple or LED wall Twin screens plus remote feed
Microphones 2 handheld or lapel 4–6 delegate units Full delegate mic system Delegate units plus streaming mix
Mixing console Compact digital Mid-range digital Allen & Heath Avantis class Full digital with streaming output
Lighting Basic front wash Front wash plus side fill Full rig with gobo and colour Full rig plus camera-optimised wash
On-site support 1 technician 2 technicians Full crew Full crew plus streaming operator

Situational recommendations for Leeds event organisers

Every conference has a different set of pressures. These recommendations address the most common scenarios Leeds organisers face.

  • Heritage venue bookings: Use a local AV supplier who has worked in the building before. Local specialists understand venue-specific constraints that affect staging and system installation, making professional installation the lower-risk choice every time.
  • Tight budgets: Prioritise microphone quality and screen size over staging height. Delegates forgive a modest platform but not a speaker they cannot hear or a slide they cannot read.
  • Hybrid events: Plan the streaming infrastructure before you finalise the stage layout. Camera positions, encoder placement, and internet uplink location all affect where the stage can go.
  • Short lead times: Contact your AV supplier before you confirm the venue. Knowing what equipment is available on your date prevents you from committing to a venue the supplier cannot service.
  • Multi-day conferences: Book a dedicated build day. Rushing a complex staging setup into a two-hour window before delegates arrive is the single most common cause of avoidable technical problems.
  • Venue finder services: Use Conference Leeds venue search to identify spaces that match your staging footprint and AV requirements before signing a venue contract.

Key takeaways

Professional conference staging hire in Leeds requires local expertise, matched equipment, and full crew support to deliver a reliable, engaging event.

Point Details
Local expertise reduces risk Local AV suppliers know Leeds venue constraints, preventing costly setup problems on the day.
Dry hire costs more in practice Unassisted equipment rental shifts all technical risk to the organiser, increasing the chance of disruption.
Screen size drives delegate engagement A minimum 3-metre screen width is needed for audiences seated 15 metres from the stage.
Hybrid events need dedicated planning Camera positions, streaming encoders, and audio routing must be designed into the stage layout from the start.
Book early for best results Securing your AV crew and staging at least eight weeks out protects against availability gaps in a busy Leeds market.

What I have learned from years of conference staging in Leeds

The biggest mistake I see event organisers make is treating staging and AV as a line item to cut rather than a foundation to protect. A delegate who cannot hear the speaker or read the slides will not remember the content. They will remember the frustration.

Leeds is a genuinely varied conference city. You have modern purpose-built venues with full AV infrastructure, and you have beautiful Victorian mills and civic buildings where the power supply is a puzzle and the loading bay is a car park around the back. The difference between a smooth event and a stressful one often comes down to whether your AV partner has been in that building before.

My honest advice: do not separate the venue search from the AV conversation. The moment you have a shortlist of venues, call your staging supplier and ask whether they have worked there. If they have not, ask whether they will do a site visit before quoting. A supplier who skips the site visit is quoting blind, and you will pay for that gap in knowledge on the event day.

Integrated packages, where staging, lighting, sound, and crew come from a single supplier, also remove the blame-shifting that happens when something goes wrong across multiple contractors. One point of contact, one brief, one crew. That simplicity is worth paying for.

— Michael

Fireflyav’s conference staging and AV hire for Leeds events

Fireflyav specialises in conference staging and AV hire for corporate events across Leeds, supplying everything from modular stage platforms to full production rigs with on-site technical crew.

https://fireflyav.co.uk

The conference mic systems Fireflyav stocks cover everything from compact two-channel setups for small boardroom events to full delegate mic arrays for large-scale conferences. The twin screen conference stage sets integrate projection, staging, and fascia branding into a single, professionally finished package. Every hire includes delivery, professional installation, and on-site technical support. To discuss your event requirements and get a tailored quote, visit the Fireflyav product enquiry form and share your brief directly with the team.

FAQ

What is included in a conference staging hire package?

A standard conference staging hire package includes modular stage platforms, a mixing console, microphones, screens or projectors, and stage lighting. Professional suppliers like Fireflyav also include delivery, installation, and on-site technical crew.

How far in advance should I book conference staging hire in Leeds?

Book at least eight weeks before your event date. Popular Leeds venues and experienced local AV crews are often committed well in advance, particularly during the autumn and spring conference seasons.

Is dry hire of staging equipment a good option for conferences?

Dry hire increases technical risk because there is no professional crew to install or operate the equipment. Unassisted equipment rental is widely considered a false economy for conferences where technical failure directly affects the delegate experience.

What AV equipment does a hybrid conference need?

Hybrid conferences require camera systems for speaker coverage, a streaming encoder, audio routing to remote participants, and integration with a video conferencing platform. These elements must be designed into the stage layout from the start.

How do I match staging to my Leeds venue?

Measure the room’s floor area, ceiling height, and throw distance from stage to back row. Then confirm the venue’s power supply and loading access before specifying any equipment. Conference Leeds offers an impartial venue search tool to help match your staging requirements to the right space.

"


Conference staging hire Leeds: top 10 essentials

11/07/2026

AV technician configuring equipment at London event

"

Audio visual technology is the single most important factor separating a forgettable London event from one that attendees talk about for months. The term “AV” covers everything from microphones and mixing desks to LED walls, streaming encoders, and automated lighting rigs. Understanding why London venues need AV goes well beyond ticking a technical checklist. The 2026 AV Trends Review published by Olympia Events and Aztec Event Services confirms that the industry has shifted decisively from treating AV as equipment to treating it as an experience enabler. For event planners and venue managers in London, that shift changes every decision from budget allocation to supplier selection.

Why London venues need AV: engagement and storytelling

AV technology is the primary tool for turning a room into a story. Without it, even the most architecturally impressive London venue is just a box with chairs. The move to immersive, content-led experiences means that audiences now arrive expecting to be drawn into a narrative, not simply presented with information.

LED screens and transparent displays give event designers the ability to layer visuals across a space, creating depth that flat projection cannot match. A product launch at a Southbank venue, for example, can use scenic LED panels behind a speaker to place them inside a branded world rather than in front of a corporate backdrop. That distinction matters because it changes how the audience feels about the brand, not just how they see it.

Event designer checking LED screen installation

Personalised and accessible AV interactions have become core expectations, not optional extras. Multilingual captions, own-device experiences, and anonymous audience interaction tools increase participation across diverse attendee groups. A conference at ExCeL London serving an international audience, for instance, requires real-time captioning and language switching as standard. Venues that cannot support these features lose bookings to those that can.

Key benefits of AV for audience engagement include:

  • Immersive visual storytelling through LED walls, projection mapping, and scenic layering
  • Inclusive participation via multilingual captions and anonymous polling tools
  • Branded atmosphere control using dynamic lighting and content-driven backdrops
  • Real-time interaction through audience response systems and own-device platforms

Pro Tip: Brief your AV supplier on the event narrative before discussing equipment. A supplier who understands the story you are telling will specify kit that serves the content, not just the room.

Is AV a revenue driver or just a cost centre?

AV systems are silent staff members that work continuously to increase guest engagement and spending. That framing shifts the entire conversation for venue managers who treat AV as an overhead to be minimised.

Well-designed AV adapts to venue flow throughout an event. During a quiet period between conference sessions, interactive screens can display timely food and beverage promotions. Mood-setting music and visuals shift the energy of a room, encouraging guests to stay longer rather than drift to the lobby. Timely promotions on interactive screens and atmosphere management through AV directly influence secondary spend, which is where many London venues make their margin.

Infographic showing audiovisual benefits for venue revenue

Automated AV controls also reduce manual workload for venue staff. A single operator using a control system like a digital mixing console can manage audio across multiple rooms simultaneously, cutting the labour cost of running parallel events. That operational efficiency compounds the financial case for investing in professional AV infrastructure.

The revenue-driving strategies available to London venues through AV include:

  • Interactive screen promotions timed to slow periods in the event programme
  • Atmosphere management through dynamic lighting and curated audio to influence dwell time
  • Automated room control reducing the number of staff needed to run multi-room events
  • Upsell opportunities through digital signage displaying premium packages or add-ons
  • Hybrid event income by streaming content to remote delegates who pay a separate ticket price

Treating AV as a revenue-driving asset rather than a cost line transforms how venue managers justify AV budgets to ownership and finance teams. The conversation moves from “how much does this cost?” to “how much does this generate?”

What are the technical and logistical challenges of AV in London venues?

London venues present AV challenges that do not exist in purpose-built conference centres. Historic and heritage buildings, which make up a significant portion of London’s most sought-after event spaces, carry restrictions on rigging, cabling routes, and power distribution. A Grade II listed building in Mayfair may prohibit drilling, limit the weight hung from its ceiling, and restrict the cable runs available to an AV team.

In-house AV systems are often generic and fall short for complex events requiring redundancy, streaming, and architectural flexibility. A venue’s default projector and lapel microphone setup may work for a small board meeting. It will not work for a 500-person hybrid conference with simultaneous translation and live streaming to three time zones.

Venue AV teams managing multiple spaces may lack the focus that high-demand conferences require. When a technical issue arises mid-session, a stretched in-house technician covering three rooms cannot give your event the attention it needs. Audiences notice unresolved issues before anyone backstage does.

London’s logistics compound the technical picture. Narrow streets, loading bay restrictions, and congestion charge zones affect delivery schedules for AV equipment. A production truck arriving late because of a Soho street closure can delay an entire event build.

The steps that prevent these problems are:

  1. Commission a site visit before finalising the AV specification, checking power capacity, rigging points, and cable routes in person.
  2. Confirm delivery access including loading bay dimensions, permitted hours, and any road restrictions around the venue.
  3. Agree technical ownership in writing, clarifying which elements the venue covers and which the external AV supplier owns.
  4. Build redundancy into the specification so that a single equipment failure does not stop the event.
  5. Schedule a technical rehearsal on-site the day before, not the morning of, the event.

Early collaboration among venues, AV suppliers, and organisers is the single most effective way to prevent costly last-minute failures. A site visit costs a few hours. A failed live stream in front of 400 delegates costs far more.

Pro Tip: Ask your AV supplier for a power distribution plan before the event. Knowing exactly which circuits carry which loads prevent tripped breakers during a keynote.

How are London venues evolving into production studios?

London venues now function like mini-production studios, with clients expecting cinematic lighting, live streaming, and content capture as standard. This is not a niche demand from broadcast clients. It is the baseline expectation of corporate event buyers in 2026.

The “screen tourism” effect, driven by London’s cultural status as a filming location and creative hub, has raised the visual bar for events. Attendees who spend their leisure time consuming high-production content on streaming platforms arrive at events with calibrated expectations. A flat, poorly lit stage with a single projector reads as amateur against that reference point.

Professional AV systems designed around event content rather than venue rooms provide the redundancy and quality that hybrid and streamed events require. Equipment such as the Blackmagic Design ATEM Mini PRO gives event teams the ability to switch between camera feeds, graphics, and remote presenters in real time, matching broadcast-level production values at event scale.

Capability What clients expect Why it matters
Live streaming Multi-camera, broadcast-quality output Remote delegates expect the same experience as in-room attendees
Cinematic lighting Colour-accurate, programmable rigs Supports content capture and creates atmosphere simultaneously
Content capture Multi-angle recording for post-event use Extends the value of the event beyond the day itself
Hybrid integration Seamless switching between in-room and remote Increases delegate reach without increasing venue capacity
Stage design LED scenic elements and transparent displays Elevates brand perception and visual storytelling

Independent AV teams clarify technical ownership and improve real-time decision-making during events. When a camera feed drops or a remote presenter freezes, a dedicated technician with clear responsibility resolves it in seconds. A shared in-house team resolves it when they can.

The Horaizn AI Summit is one example of an event format that demands this level of production integration, combining live audience interaction, streamed content, and AI-driven experiences within a single event environment.

Key takeaways

AV technology is not optional for London venues. It is the infrastructure that determines whether an event succeeds or fails on every level from audience engagement to revenue generation.

Point Details
AV drives revenue Well-designed AV increases guest dwell time, secondary spend, and hybrid ticket income.
Engagement requires experience design LED walls, captioning, and audience interaction tools are now baseline client expectations.
In-house AV has limits Generic venue systems rarely meet the redundancy and streaming demands of complex events.
London logistics need early planning Site visits, power checks, and delivery confirmation prevent costly last-minute failures.
Venues are becoming production studios Clients expect cinematic lighting, live streaming, and content capture as standard in 2026.

What I have learned from watching AV transform London events

The most common mistake I see venue managers make is treating AV as the last line item to confirm, not the first. By the time the AV supplier arrives, the room layout is fixed, the power allocation is committed, and the rigging points are already spoken for. The AV team then spends half their build time solving problems that a 30-minute conversation three weeks earlier would have prevented entirely.

The shift from AV as equipment to AV as experience enabler is real, and it has happened faster than most venues have adapted. I have watched events at genuinely impressive London spaces fall flat because the AV was functional rather than considered. A working microphone and a bright projector are not AV production. They are the floor, not the ceiling.

The venues that are winning the best corporate and cultural events in London right now are the ones that have invested in relationships with professional AV suppliers before they need them. They know their power capacity. They know their rigging limits. They have a preferred supplier who understands the building. That preparation is what allows them to say yes to complex briefs that other venues have to turn away.

My recommendation is straightforward. Bring your AV supplier into the planning conversation at the same time as the caterer, not after the floor plan is signed off. The events that look effortless are the ones where the AV team had time to make them that way.

— Michael

Fireflyav: professional AV for London venues and events

Fireflyav specialises in supplying AV equipment and technical support for corporate conferences, cultural events, broadcast productions, and live events across the UK. Whether you are planning a multi-room conference, a hybrid summit, or a large-scale live event, Fireflyav provides the equipment and expertise to match your brief.

https://fireflyav.co.uk

From conference microphone systems to vision mixers and cinematic lighting rigs, Fireflyav’s catalogue covers the full production chain. The team works with event planners and venue managers to specify kit that fits the content, the room, and the budget. Explore the full range of AV services and equipment or submit your project details through the Fireflyav product enquiry form to get a tailored recommendation for your next event.

FAQ

Why is AV technology essential for London venues?

AV technology is essential because it determines the quality of audience engagement, the viability of hybrid and streamed events, and the overall atmosphere of any event. Without professional AV, even well-designed venues cannot meet the production expectations of corporate and cultural clients in 2026.

What are the limits of in-house AV at London venues?

In-house AV systems are typically generic and lack the redundancy, streaming capability, and architectural flexibility that complex events require. Venue AV teams managing multiple spaces also cannot provide the dedicated technical focus that high-demand conferences need.

How does AV technology increase venue revenue?

AV systems increase revenue by encouraging guests to stay longer, supporting timely promotional content on interactive screens, enabling hybrid ticket sales through live streaming, and reducing staff costs through automated room controls.

What should event planners check before an AV build in London?

Event planners should confirm power capacity, rigging point weight limits, cable routing options, loading bay access, and delivery schedules before finalising any AV specification. A site visit with the AV supplier is the most reliable way to identify restrictions early.

What AV capabilities do London clients expect as standard in 2026?

Clients now expect multi-camera live streaming, programmable cinematic lighting, content capture for post-event use, and hybrid integration that gives remote delegates a comparable experience to in-room attendees.

"


Why London venues need AV: the 2026 guide

9/07/2026

Technician adjusting professional studio broadcast camera

"

Broadcast AV equipment is defined as the integrated hardware and software used to capture, process, mix, and distribute professional audio and video content across live and recorded productions. The core categories include cameras, video switchers, audio consoles, broadcast monitors, and transmission gear, each governed by standards such as SMPTE 2110 and ATSC 3.0. Signal integrity and timing synchronisation are the two non-negotiable principles that run through every category. Software-defined and hybrid tools are now reshaping what a broadcast chain looks like, but the underlying equipment roles remain constant.

1. What are the main broadcast AV equipment types?

Broadcast AV equipment types fall into five functional categories: acquisition (cameras), switching and mixing (video switchers), audio (consoles and microphones), monitoring (displays and scopes), and distribution (transmission and signal routing). Each category contains both traditional hardware and newer software-defined alternatives. Understanding where each category sits in the signal chain is the fastest way to make confident purchasing or hire decisions.

Hands operating video switcher and vision mixer controls

2. Studio cameras and broadcast camera types

Studio cameras are the primary acquisition tool for fixed broadcast environments. They connect to a camera control unit (CCU) via triax or fibre cable, which carries power, video, and talkback on a single run. The Blackmagic Studio Camera 4K is a well-established example of a studio camera that delivers 4K SDI output with genlock support at a fraction of traditional broadcast camera costs.

PTZ (pan-tilt-zoom) and robotic cameras are the fastest-growing camera type in corporate and broadcast studios. They remove the need for a camera operator on each position, which reduces crew costs significantly. PTZ cameras now support NDI and SMPTE 2110 IP outputs, making them compatible with modern IP-based production workflows.

ENG (electronic news gathering) and EFP (electronic field production) cameras are shoulder-mounted units built for location work. They carry their own batteries, record internally, and output SDI for live feeds. HDR capability, typically HLG or PQ, is now standard on broadcast-grade ENG cameras.

  • Studio cameras: Fixed position, CCU-controlled, triax or fibre connection
  • PTZ/robotic cameras: Operator-free, IP-native, ideal for corporate and multi-camera studios
  • ENG/EFP cameras: Location-ready, SDI output, internal recording, HDR support
  • IP cameras (NDI/SMPTE 2110): Network-distributed, software-controlled, growing adoption in hybrid facilities

Pro Tip: Genlock capability is non-negotiable for multi-camera live production. Without it, frame-accurate switching is impossible and you will see visible glitches on cuts.

3. Video switchers and vision mixers

A video switcher, also called a vision mixer, is the device that selects and transitions between multiple video sources in real time. Hardware switchers offer the lowest latency and the highest reliability for live broadcast. The Blackmagic Design ATEM Mini PRO handles up to four HDMI inputs with built-in streaming, making it a practical entry point for smaller productions.

Hardware switchers at the mid-tier, such as the Roland V-40HD Multiformat Vision Mixer, support multiple formats simultaneously and include built-in scalers. This matters when you are mixing sources with different resolutions or frame rates in a single production. The Blackmagic Smart Videohub Cleanswitch 12x12 extends routing capability for larger facilities managing multiple SDI feeds.

Software switchers and GPU-accelerated compositing engines are now a genuine alternative for many productions. GPU-accelerated software engines manage compositing, mixing, and graphics in unified interfaces, reducing physical footprint and power requirements. Modern broadcast software platforms achieve sub-250ms latency for live production, enabling interactive multi-source remote workflows without heavy hardware.

The most significant emerging trend is the separation of processing from control. Future broadcast control separates server-side processing from web-based control surfaces, enabling remote operation of multi-camera productions from anywhere. This is already in use for remote sports coverage and distributed corporate events.

Pro Tip: Always confirm your switcher supports genlock or SPG input. Timing synchronisation prevents frame drops and jitter when cutting between cameras. Genlock and SPG are the most commonly overlooked specifications at the point of purchase.

4. Broadcast audio consoles and microphone systems

Digital mixing consoles are the standard for broadcast audio. They offer recall, automation, and digital routing that analogue desks cannot match. The Allen & Heath Avantis Digital Mixing Console supports Dante audio networking and delivers the channel count and processing depth required for complex broadcast productions.

Modern audio mixing consoles support Dante audio networking, embedded metadata, and comply with EBU R128 loudness standards for broadcast. EBU R128 compliance is not optional for broadcast delivery. Loudness non-compliance results in content being rejected by broadcasters or automatically corrected in ways that damage audio quality.

Microphone selection depends entirely on the production format:

  • Wireless lavalier microphones: Preferred for presenters and talent. Systems such as the Sennheiser EW-D EM Receiver offer digital transmission with low latency and strong RF management.
  • Handheld wireless microphones: Standard for interviews and vox pops. The Sennheiser G4 Receiver remains a reliable choice for live broadcast environments.
  • Conference and panel microphone systems: The conference mic system format suits multi-speaker corporate broadcasts and panel discussions.
  • Shotgun microphones: Used on booms for drama and documentary production, connected via XLR to the console or audio interface.

Audio embedding and de-embedding is a critical but often overlooked skill. Broadcast signals carry audio embedded within the SDI stream. Dedicated embedders and de-embedders allow audio to be extracted, processed separately, and re-inserted without breaking the signal chain.

5. Broadcast monitors and display equipment

Broadcast monitors differ from consumer displays in one fundamental way: they are calibrated for accurate colour reproduction and carry zero processing delay. A consumer television applies image enhancement that adds latency and distorts colour. A broadcast monitor shows the signal as it is, which is what operators need for quality control.

The Blackmagic Video Assist 7 Inch 12G HDR Monitor combines a calibrated display with recording capability, making it useful both as a field monitor and as a confidence monitor in studio environments. SDI connectivity is the standard for broadcast monitors, though HDMI inputs are common on monitors designed for hybrid production.

Monitor type Primary use Key specification
SDI broadcast monitor Studio quality control Colour accuracy, zero processing delay
Multiviewer display Multi-source confidence monitoring Simultaneous display of multiple feeds
Waveform/vectorscope Signal measurement Luma and chroma analysis
Field monitor Location production Lightweight, battery-powered, HDR support

Multiviewers display multiple sources on a single screen, which is standard practice in broadcast galleries. Waveform monitors and vectorscopes measure luma and chroma levels, providing objective signal data that the human eye cannot reliably judge under varying ambient light conditions.

6. Transmission and signal distribution equipment

Transmission equipment carries the finished broadcast signal from the production facility to the audience. The choice between traditional RF transmission and IP delivery defines the entire infrastructure approach. Entry-level streaming-first broadcast setups cost between £8,000 and £25,000, while traditional studio and transmitter setups exceed £50,000 to £200,000. The cost gap reflects the difference in infrastructure complexity.

Traditional terrestrial transmission uses RF modulators, antennas, and transmitters operating under Ofcom licence in the UK. These systems deliver zero-dependency-on-internet reliability but require significant capital investment and ongoing compliance management. ATSC 3.0 and DVB-T2 are the current digital terrestrial standards for broadcast-grade transmission.

IP-based distribution via SMPTE 2110 is the direction the industry is moving. Transitioning to IP workflows depends on rigorous network management, managed switches, PTP (Precision Time Protocol) configuration, and ample bandwidth. The network infrastructure is as important as the devices connected to it. Many facilities underestimate this and encounter sync failures that are difficult to diagnose without specialist knowledge.

Production mobile units integrate cameras, production control, audio, transmission, and communication equipment, supporting multi-camera live events outside traditional studios. OB (outside broadcast) vehicles represent the most complete expression of broadcast AV equipment types working as a unified system.

Key takeaways

Broadcast AV equipment types are most effectively selected by matching each category to its role in the signal chain, from acquisition through to distribution.

Point Details
Camera selection by workflow Match camera type to environment: studio, PTZ for fixed multi-camera, ENG for location work.
Switcher reliability vs. flexibility Use hardware switchers for mission-critical live output; software switchers suit iterative and remote productions.
Audio compliance is mandatory EBU R128 loudness compliance and Dante networking are standard requirements for broadcast audio delivery.
Monitor accuracy over consumer displays Broadcast monitors provide calibrated colour and zero processing delay, which consumer screens cannot match.
IP infrastructure is the hidden cost SMPTE 2110 workflows require managed switches, PTP, and bandwidth planning before any device is connected.

Hardware vs. software: what experience actually teaches you

The industry conversation about hardware versus software has been running for a decade, and the answer is still the same: it depends on what you cannot afford to get wrong. Hardware switchers do not crash mid-broadcast. Software engines give you capabilities that would cost ten times as much in dedicated hardware. Both statements are true, and neither cancels the other out.

What I have seen repeatedly is professionals making the mistake of going software-first because the cost looks attractive, then discovering that their network infrastructure is not ready for it. Hardware-centric systems are necessary for zero-tolerance, multi-source live broadcasts requiring high reliability, whereas software-defined tools suit flexible, iterative production and remote collaboration. That is not a preference. That is the operational reality.

For professionals starting out or working at mid-tier production level, the practical advice is to build your signal chain around one reliable hardware switcher and layer software tools on top for graphics, streaming, and remote sources. The Vmix 4K Media Server is a good example of a software platform that integrates cleanly alongside hardware without replacing it entirely.

The future is clearly moving towards remote and cloud production. Web-based control surfaces separated from processing units are already in professional use. But the fundamentals, genlock, signal integrity, loudness compliance, and proper cabling, do not change regardless of whether your switcher is a hardware unit or a GPU running in a data centre.

— Michael

Fireflyav’s broadcast AV equipment for professional productions

Fireflyav supplies broadcast production gear across every category covered in this guide, from studio cameras and vision mixers to digital mixing consoles and professional microphone systems.

https://fireflyav.co.uk

Whether you are specifying a full broadcast studio, an OB setup, or AV equipment for live streaming, Fireflyav’s team provides equipment and technical support matched to your production requirements. The Allen & Heath Avantis Digital Mixing Console and Blackmagic Design ATEM Mini PRO are among the broadcast-grade options available to hire or purchase. For a full equipment specification and expert consultation, complete the product enquiry form and a specialist will respond with a tailored recommendation.

FAQ

What are the core broadcast AV equipment types?

The core categories are cameras, video switchers, audio consoles, broadcast monitors, and transmission equipment. Each category has a defined role in the signal chain from acquisition to distribution.

What is the difference between SDI and HDMI in broadcast?

SDI is the professional standard for broadcast signal paths, carrying video over long cable runs with no copy protection limitations. HDMI is used in consumer and hybrid production environments but is avoided in primary broadcast signal paths.

Do I need a hardware switcher or will software work?

Hardware-centric systems are the right choice for zero-tolerance live broadcasts. Software switchers suit remote collaboration and productions where flexibility matters more than absolute reliability.

What does SMPTE 2110 mean for broadcast equipment?

SMPTE 2110 is the standard for transporting video, audio, and data over IP networks. Adopting it requires managed network switches, PTP configuration, and careful bandwidth planning alongside the broadcast devices themselves.

How much does a broadcast setup cost?

Entry-level streaming-first setups cost between £8,000 and £25,000. Traditional studio and transmitter infrastructure exceeds £50,000 to £200,000 depending on compliance requirements and signal distribution scope.

"


Broadcast AV equipment types: the 2026 professional guide

11/07/2026

Technician setting up AV equipment at corporate event

"

Audio-visual technology is the backbone of every successful corporate event, determining whether your message lands clearly or gets lost in a sea of technical failure. AV, the industry term for integrated audio, video, and lighting systems, covers everything from microphone arrays and digital mixing consoles to projection rigs and live streaming encoders. The reason why corporate events use AV so consistently comes down to three things: clear communication, professional brand presentation, and audience engagement. Get any one of those wrong, and the event suffers. Get all three right, and attendees leave with a strong impression of your organisation.

Infographic showing AV system roles in corporate events

Why do corporate events use AV systems?

AV technology in corporate events is not a luxury add-on. It is the infrastructure that makes communication possible at scale. A speaker addressing 300 delegates in a conference hall cannot rely on unaided voice projection. A product launch streamed to remote offices needs broadcast-quality video. A board meeting with participants across three time zones requires synchronised audio and video that feels natural, not laboured.

Event planner managing AV technology with tablet

Professional AV services prevent audio feedback, video resolution mismatches, and lighting issues that undermine speaker visibility and attendee experience. Each of those failures is avoidable with the right equipment and technical support. The difference between a polished event and a chaotic one often comes down to whether a qualified AV team was involved from the planning stage.

Poor AV signals disorganisation and damages brand credibility in the eyes of attendees. That is a direct business consequence, not a minor inconvenience. When a keynote speaker’s microphone cuts out or a presentation slide appears blurry on screen, the audience stops focusing on the content and starts questioning the competence of the organiser.

What roles do AV systems play in enhancing corporate event engagement?

AV systems do far more than amplify sound and project images. They shape the entire attendee experience, from the moment someone walks into a venue to the final Q&A session.

Audio clarity across every zone

Clear audio is the single most critical element of any corporate event. Poor audio quality is the top reason attendee disengagement occurs during corporate conferences. That finding matters because disengaged attendees do not absorb your message, do not act on your calls to action, and do not leave with a positive impression of your brand.

Effective microphone placement and speaker coverage are critical to avoiding audio dead zones and feedback during events. A professional AV setup uses distributed speaker arrays, directional microphones, and digital signal processing to deliver consistent audio across every seat in the room. A conference mic system designed for corporate use handles multiple simultaneous speakers without feedback or drop-out, which is particularly important in panel discussions and roundtable formats.

Visuals and lighting that direct attention

Lighting is not simply about making a room look attractive. It directs audience attention, reinforces brand colours, and ensures that speakers appear clearly on camera. A presenter standing in front of a poorly lit backdrop looks unprofessional on screen, regardless of how strong their content is. Intelligent lighting rigs allow event planners to shift focus between a main stage, a secondary presenter, and a screen display without manual intervention.

Video quality follows the same logic. A twin screen conference stage set gives large audiences clear sightlines to presentation content from any angle in the room. High-resolution displays paired with a capable vision mixer mean that slides, live feeds, and pre-recorded content all appear at consistent quality.

Interactive features that raise participation

Modern AV technology supports live polling, audience Q&A platforms, and real-time captioning. These tools transform a passive audience into an active one. When attendees can submit questions digitally, vote on topics, or see their responses reflected on screen, their sense of involvement increases significantly. That involvement translates directly into better knowledge retention and stronger post-event sentiment.

Modern AV systems enable hybrid communication, connecting remote and in-person attendees for collaboration that feels natural rather than forced. Hybrid events are now a standard expectation, not an exception. AV technology for business meetings must account for both the room and the remote audience simultaneously.

Pro Tip: Brief your AV team on the event’s interactive elements at least two weeks in advance. Live polling and Q&A platforms require integration testing with your display and audio systems before the event day.

What risks arise from inadequate AV setups at corporate events?

The risks of poor AV are concrete and measurable. They fall into four categories.

  1. Audio failure. Feedback loops, dead zones, and microphone drop-out are the most common complaints at corporate events. They interrupt the flow of presentations and force speakers to pause or repeat themselves, which erodes audience confidence.

  2. Video and lighting problems. Mismatched video resolution between a presenter’s laptop and the venue’s display system produces blurry or letterboxed slides. Poor stage lighting makes speakers look washed out or shadowed on camera, which is particularly damaging for events that are recorded or streamed.

  3. Streaming failures. A hybrid event that loses its stream mid-session leaves remote attendees with nothing. That audience segment often includes senior stakeholders, international partners, or paying delegates. A streaming failure is not a minor technical glitch. It is a broken commitment to those attendees.

  4. Lack of on-site technical support. Equipment fails. The question is whether a qualified technician is present to resolve the issue in seconds or whether the event grinds to a halt while someone searches for a solution. Poor audio and video signals degrade or negate advanced AI collaboration features, which means even the most sophisticated software tools become useless without solid underlying hardware.

The reputational cost of a failed event is difficult to quantify, but the pattern is consistent. Attendees remember technical failures long after they forget the content of the presentations.

How do modern AV technologies transform corporate events?

AV technology has advanced considerably in the past two years. The most significant shift is the integration of artificial intelligence directly into AV hardware.

Agentic AI in conference room hardware

AI embedded at the hardware layer in conference room AV systems can proactively frame cameras and manage audio zones, unlike older reactive AI systems that responded only after a problem occurred. This is a meaningful distinction. Proactive framing means the camera follows the active speaker automatically, without a camera operator. Proactive audio management means the system suppresses background noise and adjusts gain before the audience notices a problem.

Advanced AI features in AV require endpoint hardware with significantly higher compute power to operate autonomously within meetings. That requirement has a practical implication for event planners: AI-enhanced AV is not a software upgrade you apply to ageing equipment. It requires investment in capable hardware from the outset.

Wireless systems and room analytics

Wireless presentation gateways, room scheduling panels, and usage analytics help optimise conference room utilisation and attendee experience. Wireless systems remove the cable clutter that slows down room turnarounds between sessions. Usage analytics tell event planners which rooms were at capacity, which sessions ran over time, and where attendees congregated. That data informs better planning for future events.

AV hardware integration with IT infrastructure is crucial for future-proofing corporate event spaces and enabling smooth hybrid collaboration. An AV system that cannot communicate with your organisation’s video conferencing platform, network, or room booking software creates friction at every event. Choosing AV solutions that integrate cleanly with existing IT systems is not a technical detail. It is a planning priority.

Pro Tip: When evaluating AV equipment for a permanent conference space, ask the supplier for a compatibility matrix showing which platforms the hardware integrates with natively. This prevents costly surprises during installation.

How do you select the right AV solutions and partners?

Choosing AV supplier for corporate events requires a structured approach. The wrong choice costs more than money. It costs credibility.

  • Assess your event scale and venue acoustics. A 50-person boardroom requires a very different AV specification than a 500-seat auditorium. Venue acoustics, ceiling height, and room shape all affect microphone placement and speaker coverage decisions.
  • Confirm hybrid capability. If any portion of your audience attends remotely, your AV setup must include a reliable streaming solution, a vision mixer for switching between feeds, and a dedicated internet connection for broadcast. A multiformat vision mixer handles multiple video inputs simultaneously, which is standard practice for hybrid events.
  • Evaluate equipment quality and supplier expertise. Entry-level equipment may appear cost-effective but frequently underperforms under the sustained load of a full-day conference. Ask suppliers about their equipment specifications, maintenance schedules, and contingency plans for hardware failure.
  • Require on-site technical support. A supplier who delivers equipment and leaves is not a partner. A qualified technician present throughout the event resolves issues before they become visible to the audience.
  • Plan for integration with your IT stack. Your AV system should connect cleanly with your video conferencing platform, presentation software, and any audience interaction tools you plan to use. Virtual tours support hybrid event planning by giving remote attendees a spatial sense of the venue, which improves their engagement with the live content.

A digital mixing console such as the Allen & Heath Avantis gives your audio engineer precise control over every input channel, which is particularly valuable when managing multiple microphones, playback sources, and hearing loop feeds simultaneously.

Key takeaways

Professional AV technology is the single most controllable factor in whether a corporate event communicates clearly, engages its audience, and reflects well on the organising brand.

Point Details
Audio quality drives engagement Poor audio is the top cause of attendee disengagement; invest in distributed speaker coverage and professional microphones.
AV reflects brand credibility A poor AV setup signals disorganisation and damages the organiser’s reputation with attendees.
AI AV requires capable hardware Agentic AI features in modern AV systems only function correctly when the underlying hardware has sufficient compute power.
Hybrid events need dedicated AV Remote attendees require a separate streaming solution, vision mixer, and dedicated connection to receive a consistent experience.
Supplier expertise matters as much as equipment On-site technical support and integration knowledge separate a reliable AV partner from a simple equipment hire.

The part most planners get wrong

The most common mistake I see corporate event planners make is treating AV as a line item to reduce rather than an investment to protect. A planner will spend months refining the agenda, negotiating catering contracts, and designing branded collateral, then cut the AV budget at the last moment because it feels like an invisible cost. The audience never sees the AV rig. They only notice when it fails.

The second mistake is hiring on price rather than expertise. A supplier who quotes low often does so because they are using older equipment, providing fewer technicians, or skipping the pre-event site survey. That site survey is where microphone placement, speaker coverage, and cable routing get resolved before the event day. Skip it, and you are solving those problems in front of your audience.

The third mistake is underestimating hybrid complexity. Planners who have run successful in-person events sometimes assume that adding a camera and a streaming link is sufficient for hybrid delivery. It is not. Hybrid events require a dedicated AV operator managing the remote feed, a separate audio mix for the stream, and a contingency plan for connection failure. The Blackmagic Design ATEM Mini Pro is a capable entry point for hybrid switching, but it still requires a competent operator to use it effectively.

Experienced AV partners bring something that no equipment catalogue can provide: the knowledge of what goes wrong and how to prevent it. That knowledge is worth more than the cost difference between a professional supplier and a budget alternative.

— Michael

Fireflyav’s AV equipment and support for corporate events

Fireflyav supplies professional AV equipment and technical support to corporate event planners across the UK, covering conferences, product launches, and hybrid events of every scale.

https://fireflyav.co.uk

The Fireflyav equipment range includes conference mic systems built for multi-speaker formats, professional digital mixing consoles for precise audio control, and vision mixers for clean hybrid video switching. Every piece of equipment is maintained to broadcast standard and supported by experienced technicians who attend events on-site. Fireflyav’s team works with planners from the initial site survey through to post-event debrief, ensuring that the AV specification matches the event’s scope and the venue’s acoustic properties. To discuss your next event, visit the Fireflyav services page or complete the product enquiry form.

FAQ

What is AV technology in corporate events?

AV technology refers to the integrated audio, video, and lighting systems used to deliver clear communication and professional presentation at corporate events. It includes microphones, mixing consoles, displays, lighting rigs, and streaming equipment.

Why does poor AV damage a corporate event?

Poor audio and video quality causes attendee disengagement and signals disorganisation to the audience. The reputational damage to the organising brand can outlast the event itself.

How does AV support hybrid corporate events?

Modern AV systems connect remote and in-person attendees through synchronised audio, video streaming, and interactive tools. A dedicated vision mixer and streaming encoder are the minimum requirement for a reliable hybrid setup.

What should I look for when choosing an AV supplier?

Prioritise suppliers who conduct a pre-event site survey, provide on-site technical support throughout the event, and can demonstrate compatibility between their equipment and your existing IT and video conferencing platforms.

How does AI improve AV in corporate events?

AI embedded directly in AV hardware can automatically frame cameras on active speakers and manage audio zones without manual intervention. This requires capable endpoint hardware rather than a software upgrade to existing equipment.

"


Why corporate events use AV: a planner’s guide

3/07/2026

AV technician adjusting LED video wall setup

"

Audience engagement AV techniques for events are methods that use audio-visual technology to turn passive attendees into active participants. Live polling, real-time Q&A, and immersive projection systems are the core tools in this discipline, which the industry formally calls interactive event AV. Engagement participation has risen from 20% to over 80% when planners deploy live interaction tools consistently. That shift is not incremental. It represents a fundamental change in what audiences expect from a corporate or cultural event. Fireflyav supplies the equipment and technical support that makes this level of participation achievable, from conference microphone systems to digital mixing consoles and LED video walls.

What AV tools and technologies enable effective audience engagement?

The right hardware is the foundation of every successful event audience interaction strategy. Without it, even the best facilitator cannot sustain participation across a room of 200 delegates.

Core AV hardware for live events

LED video walls, digital mixing consoles, wireless microphone systems, and projection systems form the backbone of any engagement-focused AV setup. Each piece serves a distinct function. An LED video wall displays live poll results and social media feeds at a scale the entire room can read instantly. A digital mixing console gives the AV team precise control over every audio source, keeping presenter voices clear and Q&A contributions audible. Wireless microphone systems, including handheld, lapel, and throwable cube formats, remove the physical barrier between the stage and the audience.

AV tool Engagement role
LED video wall Displays live poll results and social feeds in real time
Digital mixing console Manages multiple audio sources for clear presenter and audience audio
Wireless microphone system Enables audience members to speak and be heard without leaving their seat
Live polling platform Collects and visualises audience responses during the session
Social media wall Aggregates attendee posts and reactions on a shared display
Vision mixer Switches between camera feeds for hybrid and multi-camera events

AV operator managing LED video wall at event

Software and real-time interaction tools

Live polling platforms, moderated Q&A tools, and social media walls are the software layer that converts hardware capability into measurable participation. Mobile integration is the critical link: attendees submit responses on their own devices, and the platform pushes results to the main screen. Poll responses must appear on stage screens within 2 seconds to maintain the impression of live interaction. Any delay longer than that breaks the energy in the room. Planners should test latency under realistic network load before the event opens, not during the opening session.

Infographic comparing AV hardware and software techniques

Pro Tip: Run a full network stress test with the expected number of simultaneous device connections at least 24 hours before the event. Wi-Fi congestion is the most common cause of latency failures in live polling.

How do you design an AV workflow that maximises audience participation?

A well-designed AV workflow is the difference between a session that feels alive and one that feels like a broadcast. Techniques for audience participation only work when the technical setup supports them reliably.

Step-by-step AV workflow for event planners

  1. Define interaction moments. Map every point in the programme where you want audience input: opening polls, mid-session Q&A, gamified quizzes, and closing feedback. Assign a specific AV action to each moment.
  2. Brief your presenters. Presenter comfort and authenticity have a greater impact on audience attention than production polish alone. Walk each speaker through the polling interface and the microphone handoff process before the day.
  3. Test all systems end-to-end. Run a full rehearsal with live polling active, microphones open, and the vision mixer switching between feeds. Confirm latency is under 2 seconds on every interaction tool.
  4. Assign dedicated AV roles. One operator manages audio, one manages vision, and one monitors the polling platform. Splitting responsibilities prevents a single point of failure during live interaction moments.
  5. Integrate remote participants into the main workflow. For hybrid events, route remote video feeds directly into the vision mixer so remote attendees appear on the main stage screen alongside in-room speakers.
  6. Prepare contingency plans. Have a backup polling method (show-of-hands with a roving mic) ready if the digital platform fails. Brief the host on how to manage the transition without breaking the session’s momentum.
  7. Debrief and capture data. Export poll results and Q&A logs immediately after the event. This data informs the next event’s programme design and demonstrates ROI to stakeholders.

Hybrid event AV integration

Hybrid events present the most complex audience engagement challenge. The risk is that remote attendees become spectators rather than participants. Effective hybrid AV places remote video feeds directly inside the main stage switcher, not on a separate monitor at the side of the room. That single change signals to the in-room audience that remote participants are equal contributors. Tightly integrating remote attendee feeds with on-stage AV systems creates a unified experience and measurably improves engagement for both groups. Planners should also assign a dedicated remote audience moderator who feeds questions from the online chat into the main Q&A queue.

Pro Tip: Use a web presenter device to encode and stream the main stage feed at broadcast quality. This gives remote attendees the same visual experience as those in the room, which directly supports their sense of inclusion.

Which AV techniques are transforming audience engagement in 2026?

AV has shifted from amplifying content to shaping how attendees perceive and interact with events. The most significant 2026 developments give attendees direct control over what they see and hear, which increases retention far beyond what passive immersive displays achieve.

Interactive 3D projection mapping

Interactive 3D projection with motion tracking uses computer vision to let attendees influence the visuals displayed on stage surfaces. Attendees move, gesture, or vote, and the projection responds in real time. This prevents the visual fatigue that static projection mapping produces over a long session. The technique works particularly well at product launches and cultural events where the visual narrative is part of the brand story.

Physical interactive microphones

Throwable cube microphones and similar low-tech AV tools lower the barrier to participation more effectively than digital-only platforms. Passing a physical object across a room creates a social moment. It signals permission to speak in a way that raising a hand or tapping a phone screen does not. These tools work alongside digital polling rather than replacing it, and they are particularly effective at breaking the fourth wall in smaller conference settings.

Data-driven content personalisation

AV systems in 2026 can adjust session content in real time based on live audience data. If poll results show that 70% of attendees want more detail on a specific topic, the presenter can branch to that content immediately, with the AV team switching to the relevant slide deck or video asset on cue. This approach treats the event programme as a living document rather than a fixed script. Planners who build branching content structures into their AV workflows report stronger end-of-session satisfaction scores.

For planners looking at event guest engagement best practices, the consistent finding is that attendee agency, the sense that their input changes what happens next, is the single strongest driver of positive event experience.

Technique Primary benefit Best event type
Interactive 3D projection mapping Prevents visual fatigue; increases retention Product launches, cultural events
Throwable cube microphones Lowers participation barrier; creates social moments Conferences, workshops
Live data-driven content branching Aligns session content with real audience interest Corporate conferences, training events
Social media walls Amplifies attendee voice; builds community Awards, festivals, brand events

What common AV engagement challenges should planners avoid?

Even well-resourced events fail on engagement when a small number of technical and human factors are overlooked. Knowing the failure modes in advance is the most reliable form of risk management.

  • Latency over 2 seconds. Poll visualisation latency above 2 seconds kills the energy that live interaction creates. The audience stops feeling like co-creators and starts feeling like they are filling in a form. Test under load and have a network engineer on site.
  • Presenter discomfort. A presenter who is visibly uncomfortable with the AV setup loses the audience before the first poll launches. High-end AV must prioritise presenter comfort over production polish for optimal engagement. Brief presenters thoroughly and keep the interface as simple as possible.
  • Hybrid audience segregation. Placing remote attendee feeds on a side monitor rather than the main screen signals that they are secondary. Route all participant video through the main vision mixer to avoid this.
  • Over-reliance on a single interaction format. Using only live polling for 90 minutes produces diminishing returns. Alternate between polling, open Q&A, gamified quizzes, and physical microphone moments to sustain variety.
  • No contingency plan. Digital platforms fail. A roving wireless microphone and a show-of-hands protocol costs nothing to prepare and saves the session when technology lets you down.

The most common mistake I see at corporate events is treating AV engagement tools as a feature to switch on rather than a workflow to rehearse. Every interaction moment needs a technical owner, a timing cue, and a fallback. Without those three things, the technology creates friction instead of removing it.

Pro Tip: Assign one team member specifically to monitor audience energy throughout the event. Their only job is to flag when attention is dropping so the AV team can trigger the next interaction moment before the room loses momentum.

Key takeaways

Effective AV-driven audience engagement requires the right hardware, a rehearsed workflow, and presenter preparation working together as a single system.

Point Details
Latency is a hard limit Poll responses must appear on screen within 2 seconds to sustain live interaction energy.
Presenter comfort drives engagement Brief every speaker on the AV setup before the event; authenticity outperforms production polish.
Hybrid needs equal treatment Route remote video feeds through the main vision mixer to prevent audience segregation.
Vary interaction formats Alternate polling, Q&A, physical microphones, and gamified moments to maintain participation across a full session.
Attendee agency increases retention Techniques that let attendees influence content, such as data-driven branching and interactive projection, produce stronger recall than passive displays.

The shift I keep seeing event planners miss

The conversation about AV technology for engagement has changed significantly over the past few years. When I started working in this industry, the brief was almost always about amplification: make the presenter louder, make the slides bigger, make the video cleaner. That was the job.

The brief now is fundamentally different. Planners are asking how to make the audience feel like they are inside the event rather than watching it. That is a much harder problem to solve, and it requires a different way of thinking about the AV setup. The technology is not the centrepiece. The attendee’s experience of agency is the centrepiece, and the technology exists to deliver that feeling reliably.

What I find planners consistently underestimate is the human side of this equation. The best LED wall in the room does nothing for engagement if the presenter is visibly uncomfortable with the polling interface. I have watched technically flawless setups produce flat sessions because nobody spent 20 minutes walking the speaker through the interaction workflow. Conversely, I have seen modest AV setups produce extraordinary participation because the presenter was relaxed, the interaction moments were well-timed, and the audience felt genuinely heard.

The interactive AV techniques that generate the strongest retention are the ones where attendees believe their input changed something. That belief is created by good timing, low latency, and a presenter who responds authentically to what the audience says. The AV team’s job is to make all three of those things possible simultaneously.

— Michael

Fireflyav’s AV solutions for event engagement

Fireflyav supplies the equipment and technical support that event planners need to deliver genuine audience participation at corporate and cultural events.

https://fireflyav.co.uk

From conference microphone systems that give every attendee a clear voice, to the Roland V-40HD vision mixer for managing hybrid and multi-camera workflows, Fireflyav’s catalogue covers every layer of an engagement-focused AV setup. The team also supports live polling integration and real-time visualisation workflows, ensuring your interaction moments land with the impact they deserve. Planners can browse the full range of equipment and services at fireflyav.co.uk/services or submit a project brief directly through the product enquiry form to get a tailored recommendation for your next event.

FAQ

What are the most effective AV techniques for audience engagement at events?

Live polling with real-time visualisation, moderated Q&A, and interactive projection mapping are the most effective techniques. Poll responses must appear on screen within 2 seconds to maintain energy and the sense of live interaction.

How does AV technology improve hybrid event engagement?

Routing remote attendee video feeds directly into the main stage vision mixer places remote participants on equal footing with those in the room. This prevents the “second-class citizen” effect that occurs when remote feeds appear only on a side monitor.

Why does presenter comfort matter for AV-driven engagement?

Audiences engage more with presenters who are relaxed and authentic than with those who appear uncomfortable with the technology around them. Briefing speakers on the AV workflow before the event is one of the highest-return preparation steps a planner can take.

What is the latency threshold for live polling at events?

The industry benchmark is under 2 seconds from response submission to on-screen visualisation. Latency above this threshold breaks the perception of real-time interaction and reduces audience participation rates.

How can photo booths support event engagement strategies?

Physical interactive elements like photo booths create social moments that complement digital AV tools. They give attendees a tangible, shareable experience that extends engagement beyond the main session.

"


Audience engagement AV techniques for events: 2026 guide

AV technician preparing conference projector

"

AV equipment for corporate conferences is the specialised technology that ensures every presentation is seen and heard with professional clarity. Audio-visual (AV) equipment covers the full range of hardware used to deliver, amplify, and display content at live events. Poor AV is the fastest way to lose an audience. A microphone that cuts out, a projector too dim to read, or a video feed that freezes will undermine even the strongest speaker. Getting the right kit in place before the day is the single most important decision a corporate event planner makes.

1. What are the top AV equipment essentials for corporate conferences?

The ten categories below form the backbone of any professional audio-visual setup for corporate events. Each one addresses a specific failure point that, left unmanaged, will damage the quality of your conference.

1. Projectors and screens

Planner inspecting projector and screen setup

Projectors remain the workhorse of conference presentation technology. Standard meeting rooms require 3,000–4,000 lumens, while large venues demand 5,000–20,000 lumens for a clear, readable image. Brightness is non-negotiable when ambient light cannot be fully controlled. Fireflyav’s Panasonic PT-RZ970 10K projector is built precisely for high-ambient-light conference halls where a standard projector would wash out.

2. Projection screens

Screen size directly affects how many attendees can read your content. A screen should be at least 3 metres wide for 100 attendees, with multiple screens advisable for very large audiences. The DaLite FastFold Delux range, available through Fireflyav, covers medium to large venues with a quick-deploy frame system that saves significant setup time.

3. Microphone systems

Microphone choice shapes how natural and authoritative a speaker sounds. Lapel microphones free presenters to move around the stage. Handheld microphones suit Q&A sessions. Boundary microphones sit flat on tables and pick up panel discussions without visible hardware. Fireflyav’s conference mic system integrates multiple microphone types into a single managed setup.

4. PA systems and speakers

Distributed speaker arrays deliver even sound coverage across a room. A single front-of-house speaker cluster creates dead zones at the sides and rear. Line array systems or ceiling-mounted distributed speakers solve this problem in larger venues. Even coverage means every attendee hears the same quality of audio regardless of where they sit.

5. Digital mixing consoles

A mixing console gives the AV technician real-time control over every audio source in the room. The Allen & Heath Avantis digital mixing console handles complex multi-speaker conferences with precise channel routing and onboard processing. Digital consoles also store scene presets, which means transitions between speakers happen in seconds rather than minutes.

6. DSP processors

Digital signal processing (DSP) filters background noise and prioritises voice clarity, which is vital for professional conference audio. A DSP unit sits between the microphone inputs and the speaker outputs, applying equalisation, compression, and feedback suppression automatically. Without DSP, even a good microphone system will produce feedback squeals and muddy dialogue.

7. Video cameras and recording devices

Recording a conference creates a content asset that extends the event’s value well beyond the day itself. PTZ (pan-tilt-zoom) cameras with AI-powered speaker tracking produce broadcast-style video without a dedicated camera operator. That removes a significant cost and complexity barrier for planners who need professional footage on a fixed budget.

8. Wireless presentation systems

Wireless systems such as ClickShare and Barco allow screen sharing without cables, reducing setup time and the risk of a presenter arriving with the wrong adapter. Any delegate can share their screen from their own device in seconds. This matters most in panel sessions where multiple speakers need to present in quick succession.

9. AV control systems

Modern touch-panel control systems manage volume, source switching, and lighting from a single interface. That simplicity reduces the chance of a technician error during a live session. One-touch scene presets mean the room transitions from a presentation layout to a panel discussion layout without anyone hunting through menus.

10. Cabling and adapters

HDMI, USB-C, and DisplayPort are the three connectors most commonly needed at corporate events. Carrying adapters for all three prevents the most common and most embarrassing technical failure. A well-labelled cable kit, tested before the event, is worth more than any single piece of expensive hardware.

Pro Tip: Label every cable at both ends before the event. When something goes wrong during a live session, a labelled cable kit cuts fault-finding time from minutes to seconds.

2. How to choose the right projector and screen setup

Projector and screen selection depends on three variables: room size, ambient light level, and attendee count. Getting any one of these wrong produces an image that is either too dim, too small, or impossible to read from the back row.

Brightness by venue size

Venue size Attendee count Recommended lumens
Small meeting room Up to 20 2,000–3,000
Medium conference room 20–100 3,000–5,000
Large conference hall 100–500 5,000–10,000
Auditorium or arena 500+ 10,000–20,000

Lumen figures assume controlled ambient light. Add 30–50% to these figures if the venue has large windows or cannot be fully darkened.

Viewing distance and screen size

The furthest viewer should be no more than 8x the screen height away. The closest viewer should sit at least 2x the screen height from the display. These two rules define the minimum screen size for any given room. A 2-metre-high screen works for a room up to 16 metres deep. A room 24 metres deep needs a 3-metre-high screen at minimum.

Screen types

Fixed-frame screens give the sharpest image because the surface stays perfectly flat. Motorised screens suit venues where the screen needs to retract between sessions. Tripod screens are portable and work well for smaller breakout rooms. Rear-projection screens hide the projector behind the screen, which eliminates shadows cast by presenters walking in front of the beam.

LED displays versus projectors

LED displays outperform projectors in brightly lit rooms because they produce their own light rather than reflecting it. They are heavier and more expensive to transport, but they require no throw distance calculation and no ambient light management. For a boardroom or a permanent installation, an LED display is the better long-term choice. For a temporary conference setup in a large hall, a high-lumen projector with a quality screen remains the most practical option.

Pro Tip: Always test your projector in the actual venue at the same time of day as your event. Morning light through east-facing windows will wash out an image that looked perfect during an evening rehearsal.

3. What audio equipment ensures clear sound at corporate conferences?

Audio quality is the element attendees notice most when it fails. A slightly dim screen is tolerable. A speaker who cannot be heard clearly is not.

The microphone type should match the speaker’s role. Lapel microphones suit keynote speakers who move around the stage. Handheld microphones work for Q&A sessions where the microphone passes between audience members. Boundary microphones placed on a conference table pick up panel discussions without visible hardware cluttering the set.

Distributed speakers and foldback monitors maintain even sound coverage and help speakers hear themselves clearly. Foldback monitors are the wedge-shaped speakers placed at the front of the stage facing the presenter. Without them, a speaker in a large room hears their own voice echoing back from the rear wall, which disrupts their timing and confidence.

DSP processing is the difference between a conference that sounds professional and one that sounds like a public address system in a car park. DSP applies automatic feedback suppression, which prevents the high-pitched squeal that occurs when a microphone gets too close to a speaker. It also applies compression, which keeps quiet voices audible and loud voices from distorting.

Pro Tip: Run a full sound check with a person standing at the furthest point in the room. What sounds balanced at the mixing desk often sounds thin or boomy at the back. Adjust from the audience’s position, not the technician’s.

4. Which video and connectivity technologies improve hybrid conferences?

Hybrid conferences, where some attendees join remotely, require a higher standard of video and connectivity than purely in-person events. The remote audience has no ambient experience to compensate for a poor feed.

  1. AI-powered PTZ cameras track the active speaker automatically, producing a broadcast-quality shot without a camera operator. Voice-activated switching creates a dynamic multi-camera feel that keeps remote attendees engaged rather than watching a static wide shot.
  2. Certified conferencing platforms such as Microsoft Teams Rooms and Zoom Rooms rely on certified PTZ cameras and touch-panel control hardware for reliable, tested performance. Using uncertified equipment with these platforms introduces compatibility risks that are difficult to diagnose under pressure.
  3. Wireless presentation systems remove the cable problem entirely. Testing the venue’s wireless infrastructure in advance is the single most effective way to prevent connectivity failures on the day.
  4. Video switchers such as the Blackmagic Design ATEM Mini PRO allow a single operator to cut between camera feeds, presentation slides, and remote video calls in real time. This gives a hybrid conference a polished, produced feel.
  5. Adapters and cabling cover the gap between a presenter’s device and the conference system. Carrying HDMI, USB-C, and DisplayPort adapters prevents the most common last-minute failure.

5. What lighting and ancillary AV equipment enhance conference professionalism?

Lighting is the most underestimated element in a conference AV setup. Poor lighting makes video footage unusable and makes presenters look tired or washed out on screen.

  • Stage wash lighting provides even illumination across the presenter’s face and body, which is critical for video recording and live streaming.
  • Digital signage displays session titles, sponsor branding, and wayfinding information on screens around the venue. Meeting room digital signage integrates with AV systems to update automatically as the programme changes.
  • Lecterns with integrated AV controls give presenters direct access to slide advancement, confidence monitors, and microphone muting without relying on a technician. Fireflyav’s Perspex conference lectern combines a clean visual profile with practical AV integration points.
  • Acoustic wall panels reduce echo and reverberation in hard-surfaced rooms. Acoustic treatments such as wall panels and suspended ceilings improve sound clarity and reduce listener fatigue over a full conference day.
  • Twin-screen stage sets give large conferences a professional broadcast aesthetic. Fireflyav’s twin-screen conference stage set provides a complete framed stage solution that works for audiences of several hundred.

Key takeaways

The most effective AV setup for a corporate conference combines high-lumen projection, DSP-processed audio, AI-powered cameras, and a single integrated control system tested thoroughly before the event begins.

Point Details
Match lumens to venue size Use 3,000–5,000 lumens for medium rooms; 10,000+ for large halls with ambient light.
Choose microphones by speaker role Lapel for keynotes, handheld for Q&A, boundary for panel tables.
Use DSP for every audio setup DSP removes feedback and compression issues that damage audio quality live.
Test wireless connectivity in advance Venue wireless infrastructure must be verified before the event, not during it.
Plan lighting alongside AV Stage wash lighting is non-negotiable for any conference with video recording or streaming.

What I have learned from years of conference AV planning

The mistake I see most often is treating AV as a last-minute logistics task rather than a design decision. Planners spend months on venue choice, catering, and speaker line-ups, then book AV equipment two weeks before the event. That timeline leaves no room to discover that the venue ceiling is too low for the projector throw distance, or that the room’s HVAC system creates a constant background noise that a standard microphone setup cannot filter out.

The second mistake is underestimating the value of a dedicated AV technician on the day. A well-specified equipment list means nothing if no one in the room knows how to operate it under pressure. The technician is not a cost to minimise. They are the person who keeps the event running when something unexpected happens, and something unexpected always happens.

Budget conversations are where I push back hardest. Planners often ask whether they can cut costs by renting lower-specification equipment. My answer is always the same: cut costs on catering before you cut costs on audio. An attendee who cannot hear the speaker will leave with a negative impression of the entire event, regardless of how good the content was.

The shift towards hybrid events has raised the baseline standard for what “good” AV looks like. A conference that looked professional in 2019 may look amateurish to a remote attendee joining via a video call today. AI-powered cameras, certified platform hardware, and proper streaming infrastructure are no longer optional extras. They are the expected standard for any event that includes a remote audience.

— Michael

How Fireflyav supports your next corporate conference

Planning a corporate conference means making dozens of AV decisions under time pressure. Fireflyav specialises in supplying equipment and technical support for exactly this environment, from conference mic systems and digital mixing consoles to full stage sets and hybrid streaming rigs.

https://fireflyav.co.uk

Every project is different. Fireflyav’s team works with event planners to match equipment to venue, audience size, and programme requirements rather than offering a one-size-fits-all package. Whether you need a single boardroom setup or a multi-room conference with live streaming, submit your project details and the Fireflyav team will respond with a tailored equipment list and support plan. You can also review the full range of AV services available to understand what is included before you commit.

FAQ

What lumens does a conference projector need?

Standard meeting rooms need 3,000–4,000 lumens; large venues require 5,000–20,000 lumens depending on ambient light levels.

What microphone type is best for a keynote speaker?

A lapel (clip-on) microphone is best for keynote speakers because it stays fixed to the presenter and leaves both hands free for movement and gesture.

How does DSP improve conference audio?

DSP filters background noise and applies automatic feedback suppression, which keeps voice clarity consistent across all microphone inputs throughout the event.

Do I need a separate camera operator for a hybrid conference?

AI-powered PTZ cameras with speaker-tracking remove the need for a dedicated camera operator by switching automatically between speakers, producing a broadcast-style result.

How far in advance should I test AV equipment at the venue?

Test all equipment at least one full day before the event. Wireless connectivity, projector throw distances, and acoustic conditions all vary by venue and cannot be reliably assessed on the morning of the conference.

"


AV equipment for corporate conferences: the essential guide

close up of Absen LED Panels

" How do LED video walls differ from traditional projectors?

Date added: 3/07/2026

How do LED video walls differ from traditional projectors?

LED video walls are now the preferred display standard for mid-to-large live events, replacing projectors in most professional settings. The reasons are practical, not just aesthetic.

Projectors require a clear throw path between the lens and the screen. They struggle in venues with ambient light, and image quality degrades as room brightness increases. LED walls emit their own light, so they remain vivid even in fully lit conference halls or outdoor environments.

Projector — washed out
LED wall — full brightness in daylight
FeatureProjectorLED Video Wall
BrightnessLimited by ambient lightPerforms in full daylight
InstallationNeeds throw distanceModular, fits any space
Image qualityCan wash outConsistent, high contrast
CostLower upfrontHigher upfront, lower running cost
MaintenanceLamp replacement neededLong LED lifespan

What is pixel pitch and why does it matter?

Pixel pitch defines the distance between LED pixels, measured in millimetres. A smaller number means pixels are closer together, which produces a sharper image at close range. A larger number is acceptable when the audience is further away.

For a conference room where delegates sit 3–5 metres from the screen, a P2 or P3 pixel pitch is appropriate. For a large arena where the nearest viewer is 10 metres away, a P6 or P8 panel delivers the same perceived quality at a significantly lower cost. Choosing the wrong pixel pitch is one of the most common and expensive mistakes in AV planning.

Pro Tip: Always calculate your minimum viewing distance before specifying an LED wall. Divide the pixel pitch (in mm) by 0.3 to get the minimum recommended viewing distance in metres.
"


How do LED video walls differ from traditional projectors?

Image of firefly tech working on an allen& Heath desk

"

What is audio visual equipment explained simply?

AVL systems consist of three core disciplines: audio, video, and lighting. Each discipline contains its own specialist hardware, and together they create the complete sensory experience your audience receives. A corporate conference, an eSports tournament, and a product launch all rely on the same fundamental categories, even if the specific gear differs significantly.

AV equipment is not a single product. It is an integrated system where every component must work with every other component. A powerful speaker array means nothing without a properly configured audio mixer feeding it clean signal. A high-resolution LED wall loses its impact if the lighting rig washes it out. The system is only as strong as its weakest link.

Hands connecting cables on AV mixer console

What are the main types of audio visual equipment?

Infographic comparing main types of AV equipment

A complete AV setup includes audio hardware, visual displays, lighting rigs, and control devices. Each category serves a distinct function, and understanding them separately helps you make smarter decisions when planning your event.

Audio equipment

  • Microphones: Capture speech and sound at the source. Wireless handheld, lapel (lavalier), and headset microphones are the most common choices for presentations and live events.
  • PA speaker systems: Distribute sound evenly across the venue. Line arrays are standard for large rooms; point-source speakers suit smaller spaces.
  • Audio mixers: Control levels, EQ, and routing for every audio source. A skilled operator at the mixing desk is as important as the hardware itself.
  • Amplifiers: Power the speakers. Most modern active speaker systems have amplifiers built in, which simplifies setup.

Visual equipment

  • Projectors: Project images onto a screen or flat surface. Cost-effective for smaller venues with controlled lighting.
  • LED video walls: Modular display panels that tile together to form large, bright screens. The preferred choice for mid-to-large events.
  • Flat panel displays: Samsung 60" and 65" 4K LED TVs, for example, work well for breakout rooms, reception areas, and smaller presentation spaces.

Lighting equipment

Stage lighting shapes how your audience perceives the space. Spotlights focus attention on speakers. Wash lights set the colour and mood of the room. Intelligent fixtures, such as moving heads, add dynamic visual effects for live performances and eSports events.

Control and connectivity

Video switchers, mixers, and controllers are the devices that tie everything together. The Blackmagic Design ATEM Mini PRO and the Roland V-40HD are two widely used vision mixers for live event production and streaming. Cables, signal converters, and distribution amplifiers complete the connectivity chain.

Pro Tip: Label every cable at both ends before your event. It takes ten minutes and saves hours of troubleshooting during a live show.

"


What is Audio Visual Equipment?

Event planner adjusting audio visual equipment setup

"

Audio visual equipment is the collection of devices and systems that combine sound and visuals to deliver clear, engaging communication at events and presentations. Known in the industry as AV or AVL (audio, video, and lighting), these systems are the technical backbone of every corporate conference, live event, and broadcast production. Understanding audio visual gear before you plan your event saves money, prevents failure on the day, and ensures your audience actually receives your message. This guide covers the core types of AV equipment, how modern technologies compare, and how to choose the right tools for your specific needs.

"


Audio visual equipment explained for event planners

""


How to Create a Virtual Event – 2024 Guide

4/03/2024

Image of Vision items

"In recent years, the landscape of events has undergone a significant transformation, with the rise of virtual and hybrid events taking centre stage. As more organisations adapt to the digital era, understanding the nuances between these two event formats becomes crucial. Can virtual and hybrid events bring the same level of engagement and value to live events?"


Hybrid VS Virtual Events – What is The Difference?

Image of an exhibition car show for B12

""


Aston Martin Launch 2023

10/06/2023

Photo of the British Open Squash 2023 Birmingham

""


The British Open 2023

10/04/2023

Lady in a wheel chair at the Leeds city council show

""


Inclusive by Design: Making Live Events More Accessible

2/04/2023

Leeds sports award show 2023 - image of the screen

""


Leeds Sports Awards 2023: 20th Anniversary

12/03/2023

Horizon Leeds Streaming Studio with a lady being streamed

""


Hybrid and Virtual Events – Why Choose Airmeet?

4/02/2023

banners that say share your story and bbc bitesize, with 4 directors chairs that all say BBC on them

""


BBC Share Your Story Tour

4/02/2023

Large image of Esports event with 4 different screens

""


The Commonwealth Esports Championships 2022

4/01/2023

Fire fly blog post cover image

""


What Microphone do I need?

4/12/2022

stage with presenter and blue lights at the leeds sports awards 2022

""


Leeds Sports Awards 2022

audience looking at screen which shows the aesthetica short film festival

""


Aesthetica Film Festival

1/11/2022

Image of a squash court with bright lights of red and blue

""


Chauvet Lights British Open Squash Tournament

5/05/2022